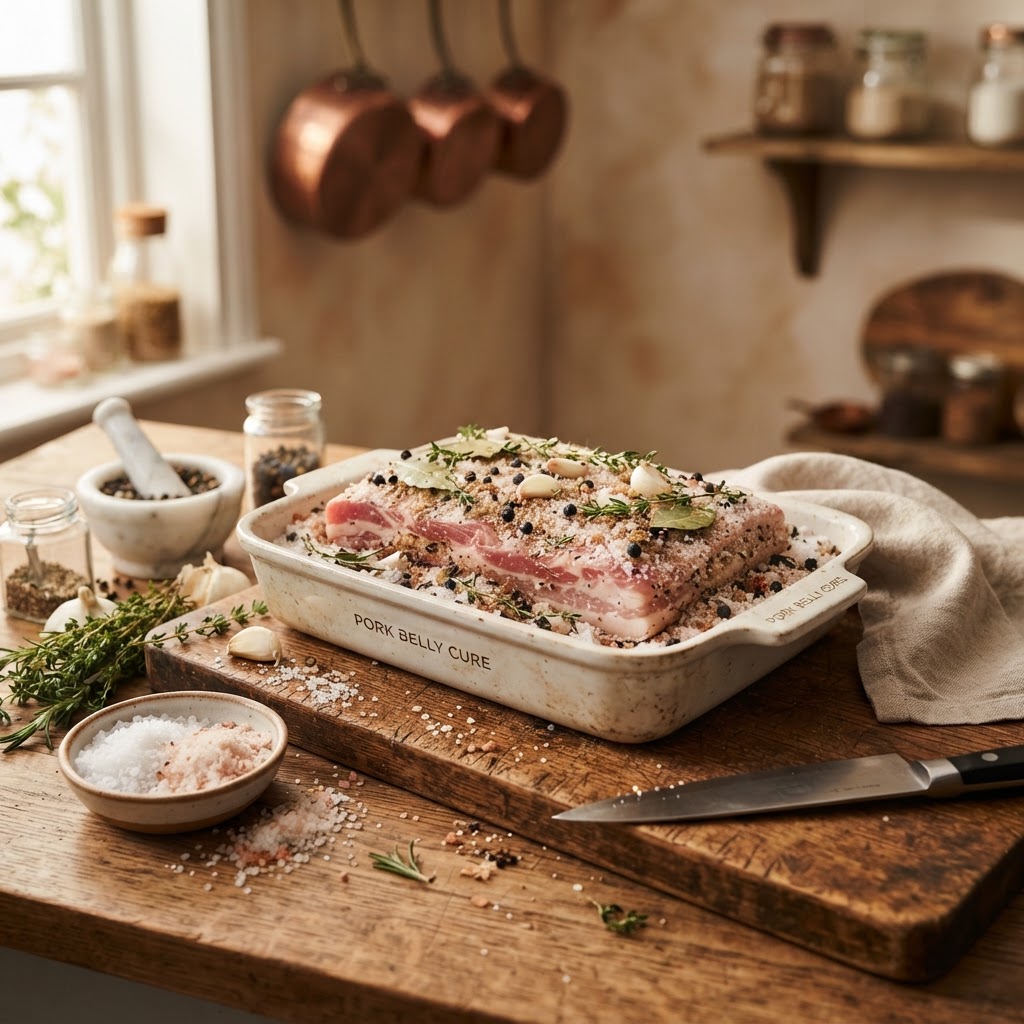
The Home Cook’s Guide to Salt Curing: Mastering Osmosis and Dehydration for Preserving Proteins and Enhancing Flavor
The art of salt curing is perhaps the oldest culinary technology in human history, acting as the bridge between necessity and indulgence. Long before the convenience of the modern refrigerator, our ancestors relied on the transformative power of salt to stabilize proteins and stave off spoilage, effectively allowing for long-term survival in unpredictable environments. Today, we look at salt curing not merely as a method of preservation, but as a sophisticated technique that elevates simple ingredients into complex, umami-rich delicacies that define the landscape of fine dining. By removing moisture and altering the molecular structure of meat, fish, and even certain vegetables, you are essentially rewriting the culinary DNA of your product to achieve textures and depths of flavor that fresh ingredients simply cannot possess on their own.
When you begin your journey into the world of curing, you are stepping into a realm governed by the strict, immutable laws of chemistry. Specifically, you are working with the twin phenomena of osmosis and dehydration, processes that move water out of the cells of the protein while simultaneously allowing salt and aromatic compounds to penetrate deep into the fibers. While it might seem intimidating to leave a raw piece of meat in a container for days or even weeks, the science is incredibly forgiving once you master the foundational ratios. This guide is designed to strip away the myths surrounding charcuterie and salt-cured proteins, providing you with a reliable roadmap to create everything from silky gravlax to firm, savory guanciale in your very own kitchen.
At "Blame The Chef," we believe that the kitchen is a laboratory where the most profound discoveries happen during the quietest moments of development. You do not need a commercial curing chamber or expensive imported equipment to achieve professional results; all you need is patience, high-quality ingredients, and a rigorous adherence to the safety protocols outlined in this guide. As we navigate the nuances of curing salts, environmental conditions, and the delicate balance of seasonings, you will begin to see your role as a home cook shift from someone who merely prepares food to someone who directs the aging and maturation of exquisite proteins. Let us peel back the layers of tradition and science to discover how salt can become your most versatile ingredient.
The Chemistry of Osmosis: How Salt Transforms Protein
At its core, salt curing is the deliberate manipulation of water activity. When you coat a piece of raw meat in a heavy layer of salt, you are creating a concentration gradient that the cells of the protein are physically compelled to equalize. Because the salt concentration is higher on the exterior, moisture is drawn out from the protein’s interior to the surface. As this moisture is pulled away, the environment becomes increasingly hostile to harmful bacteria, which require high levels of water activity to proliferate. This effectively stabilizes the protein, creating a safe environment where enzymes can work their magic to break down complex proteins into flavorful peptides and amino acids.
Beyond the movement of water, the salt acts as a catalyst for the migration of aromatics. Whether you are using traditional juniper berries, bay leaves, or cracked black pepper, these flavor compounds are held in suspension and pulled into the muscle fiber alongside the salt ions. This is why cured meats possess a depth of flavor that is fundamentally different from a simple rub or marinade. The process is slow and methodical, ensuring that every bite is seasoned from the inside out, rather than just coated on the surface. Understanding this migration is the first step toward mastering your own proprietary cure blends.
It is vital to acknowledge the role of dehydration in this equation. As the water content drops, the texture of the meat changes significantly; it moves from the supple, rubbery state of raw protein to a firm, dense, and velvety consistency that can be sliced paper-thin. This concentration of mass means that the final product is much more nutrient-dense and intense in flavor. As a home cook, you must learn to monitor this weight loss, as it is the primary indicator of when your project has successfully reached the ideal point of maturation.
Understanding the Equilibrium Cure
The most reliable method for the home cook is the equilibrium cure. Unlike the old-fashioned "salt box" method—which involves burying meat in salt for a set time and hoping for the best—the equilibrium method uses precise math to ensure consistency. You weigh your protein and add a specific percentage of salt relative to that weight. This prevents the product from becoming overly salty because once the salt is absorbed, the movement stops at a predictable level.
Step 1:* Weigh your protein in grams.
Step 2:* Calculate your salt ratio (typically 2.5% to 3.5% of the total protein weight).
Step 3:* Apply the salt, along with any sugar or curing agents (like Prague Powder #2), in a vacuum bag or a sealed non-reactive container.
Step 4:* Refrigerate until the salt has fully penetrated, which usually takes one day per inch of thickness.
"Salt is the great equalizer of the culinary world; it draws out the hidden soul of the meat while holding the chaos of spoilage at bay, turning a fleeting resource into a timeless treasure."
The Critical Role of Curing Salts: Safety and Nitrites
There is often a great deal of confusion regarding the use of curing salts, specifically sodium nitrite and sodium nitrate. Many home cooks are wary of these additives, yet they are the backbone of safety in the world of charcuterie. These compounds—known commercially as Prague Powder #1 and Prague Powder #2—are designed to inhibit the growth of Clostridium botulinum, the bacteria responsible for botulism. Without these agents, cured meats—especially those aged at room temperature—pose a significant risk to health.
Prague Powder #1 (containing 6.25% sodium nitrite) is primarily used for products that will be cooked or smoked, such as bacon or ham. Prague Powder #2 (containing sodium nitrite and sodium nitrate) is essential for long-term air-dried products. The nitrate in #2 acts as a reservoir, slowly breaking down into nitrite over weeks or months, providing long-term protection during the drying process. As long as you follow the manufacturer's usage instructions—usually about 2.5 grams per kilogram of meat—these salts are safe and standard practice in charcuterie production.
Never attempt to "eyeball" your curing salts. Use a digital precision scale that measures to the tenth of a gram. Because these agents are so potent, even a slight miscalculation can result in an over-cured, metallic-tasting product or, in worse scenarios, an ineffective cure. Treat these additives with the same respect you would a powerful kitchen tool; they are not optional ingredients if you plan on aging your proteins outside of the refrigerator for an extended duration.
Identifying Your Curing Needs
Environment: Managing Humidity and Temperature
If you are moving beyond simple refrigerated cures, you must concern yourself with the environmental conditions of your "curing chamber." Whether that is a dedicated refrigerator outfitted with a humidity controller or a cool, dark basement, the climate must be strictly controlled. For most dry-cured meats, you are looking for an ambient temperature between 50°F and 55°F (10°C to 13°C) and a relative humidity between 65% and 75%. These conditions allow the meat to lose moisture slowly and evenly without the exterior hardening into a "case-hardened" shell.
Case hardening is the most common failure in home curing. This occurs when the surface of the meat dries too quickly—usually due to low humidity—forming a tough, dry layer that prevents the interior moisture from escaping. Once this happens, the interior of the meat stays wet, which can eventually lead to spoilage or rot. If you notice your meat starting to feel like a drum, increase the humidity in your chamber immediately, perhaps by placing a bowl of water with a damp cloth near the meat.
Investing in a digital hygrometer is non-negotiable. Place it inside your curing space and check it daily. If you are using a standard refrigerator, remember that they are designed to remove moisture (which is why your vegetables shrivel up). You will need to add a small humidifier or keep the meat in a slightly porous container to maintain the necessary 70% humidity. Keeping a log of your humidity and temperature fluctuations will help you refine your process for future batches.
Essential Gear for the Home Charcutier
The Art of Aromatization: Crafting Your Signature Cure
Once you have mastered the ratios of salt and curing agents, the real fun begins: the flavor profile. The "cure" is a blank canvas, and you are the artist. Consider the regional influences of the world—the heavy use of fennel and chili in Italian salumi, the black pepper and garlic dominance of American bacon, or the delicate sweetness and dill found in Scandinavian gravlax. You are not just preserving meat; you are creating a narrative of flavor.
When creating a dry rub, start with a base of high-quality kosher salt or coarse sea salt. Avoid table salt, as the anti-caking agents and iodine can impart a harsh, chemical bitterness that distracts from the pure flavor of the protein. From there, think about textures. Coarsely cracked black peppercorns, crushed coriander seeds, and toasted juniper berries provide a crunchy, aromatic exterior. Fresh herbs like rosemary or thyme are beautiful, but be aware that they can mold if they remain moist on the surface of the meat. It is often safer to toast your spices in a dry pan for a few minutes before applying to the meat; this kills off surface bacteria and releases the essential oils.
Remember that aromatics take time to permeate. If you are curing a thick cut like a pork shoulder (coppa) or a loin (lonzino), the spices will migrate throughout the protein over the course of weeks. Do not be afraid to be bold with your spices, as the curing process slightly dulls the intensity of high notes like citrus zest or dried chili flakes. Over time, these flavors will mellow and marry, creating a cohesive, nuanced finished product that tastes like the sum of its parts rather than individual spices.
"Flavor in charcuterie is a slow burn. What starts as a sharp, pungent spice rub on the exterior of a raw pork shoulder mellows through the months of aging, blooming into a complex, savory, and intoxicating perfume that permeates every slice."
Seasonal Flavor Pairings
Autumn:* Sage, bay leaf, nutmeg, and juniper.
Winter:* Black pepper, toasted garlic, and dried orange zest.
Spring:* Fennel pollen, fresh thyme, and crushed coriander.
Summer:* Cracked white pepper, chili flakes, and a hint of brown sugar.
Troubleshooting Common Curing Issues
Even the most experienced chefs encounter hurdles during the curing process. The most common concern for beginners is the appearance of mold. It is important to distinguish between "good" mold and "bad" mold. A fine, white, powdery mold is a sign that your environment is healthy and that you are achieving the right fermentation. This white bloom actually helps protect the meat from rogue bacteria. If you see it, leave it be. However, if you see fuzzy, dark green, black, or bright orange spots, you have a contamination issue.
If you encounter problematic mold, do not panic. Wipe the surface down with a clean cloth soaked in a mixture of white vinegar and water. The vinegar’s acidity will kill the unwanted mold while leaving the white, beneficial cultures intact. If the mold persists or if the meat develops an "off" or putrid smell, it is safer to discard the batch. While it is rare if you have used proper curing salts and kept your environment within the correct parameters, your sense of smell is your ultimate safety judge. If it smells wrong, it is wrong.
Another issue is the "slimy" surface. This often happens if the meat was not properly dried after being pulled from the initial salt cure, or if the humidity in the chamber is consistently too high. Always pat your meat completely dry with clean paper towels before hanging it. If it still feels sticky or slimy, a quick wipe with a splash of high-proof alcohol (like bourbon or vodka) can help sanitize the surface and draw out excess moisture. Proper air circulation is also key; ensure there is at least an inch of space between pieces of hanging meat and that your chamber has a small fan to keep the air moving gently.
The Inspection Checklist
Texture:* Should be firm to the touch, not squishy or soft in the center.
Weight:* Check for a 30% to 35% weight loss from the initial pre-cure weight.
Visual:* Look for uniform color; avoid any sudden dark patches that look like rot.
Scent:* The meat should smell like its seasonings—salty, peppery, sweet, or garlicky—never sulfurous or metallic.
Scaling Up: From Simple Cures to Complex Salumi
Once you feel comfortable curing a whole muscle, you might be tempted to try your hand at salumi, which involves grinding, seasoning, and stuffing meat into casings. This introduces a whole new variable: fermentation. By adding a starter culture—a specific strain of beneficial bacteria—to your ground meat mixture, you initiate a fermentation process that lowers the pH of the meat. This acidity not only aids in food safety but also creates that signature tangy, sharp flavor characteristic of great salami.
This step requires a higher level of dedication and equipment, such as a meat grinder, a stuffer, and perhaps a dedicated fermentation cabinet. But do not let that deter you. Many home cooks start by making "forced" or "cured" sausages that don't require fermentation, such as fresh kielbasa or breakfast sausage, before moving on to the complexities of dry-cured salami. The principles remain the same: precision in measurement, cleanliness in the workspace, and constant vigilance regarding temperature and humidity.
Remember that you are working with live biological processes. The bacteria that provide the tang are also the ones that keep the bad stuff out. By creating the correct environment, you are essentially "farming" flavor. You will learn to identify the moment the fermentation is complete by checking the pH—professional charcutiers use a simple probe—but you will also learn to recognize the smell of the fermentation (a distinct, pleasant sourness) versus the smell of spoilage. This is the mark of a true practitioner: the move from following recipes to following the intuition developed through experience.
A Roadmap for Advancement
Final Thoughts
The journey into salt curing is perhaps the most rewarding path a home cook can take. It forces you to slow down and observe the passage of time in a way that modern cooking rarely demands. You learn to listen to your environment, to value the precision of a scale, and to appreciate the profound chemical changes that turn a raw, humble piece of protein into a centerpiece worthy of any dinner party. The patience required is not a burden; it is part of the recipe.
Remember that every failure is simply data. If a batch of pancetta ends up too salty or a loin of lonzino dries too quickly, you have learned a vital lesson about your specific curing environment. Take notes, adjust your ratios, and try again. The beauty of charcuterie is that it is repeatable, improvable, and deeply personal. You will eventually develop a "house style" that reflects your palate—whether you prefer a heavy, smoky finish, a delicate, floral aroma, or a intense, punchy spice rub.
As you master these techniques, you become part of a tradition that spans millennia, connecting you to the artisans of the past while allowing you to innovate for the future. Do not be afraid to experiment, but always lead with safety. Keep your tools clean, your salts measured, and your environment stable. When you finally slice into your first successful, home-cured project, you will understand why we blame the chef for the success of such an incredible transformation. It wasn't magic, and it wasn't a secret; it was science, time, and a little bit of salt. Now, go forth and start your first cure—your pantry is waiting to be filled with the fruits of your labor.
Patience is your best tool:* Never rush the curing or drying process.
Trust the math:* Keep your scale calibrated and your measurements exact.
Stay organized:* Label your projects with the date and the intended "finish weight."
Celebrate the process:* Every step is a part of the craft, from the initial rub to the final slice.
The world of charcuterie is wide and deep, but you now have the foundational knowledge to navigate it with confidence. Whether you are curing a single salmon fillet for a weekend brunch or aging a coppa for a year, the principles of osmosis, dehydration, and environmental control remain your constant guides. Keep your curiosity sharp and your kitchen clean, and you will soon find that the best cured meats you have ever tasted are the ones you made yourself. Happy curing, and remember: at "Blame The Chef," we believe every great meal begins with the courage to try something difficult, and every great chef is born from the persistence to master it.


Get the Next Recipe
Weekly recipes, techniques, and gear picks — straight to your inbox.
