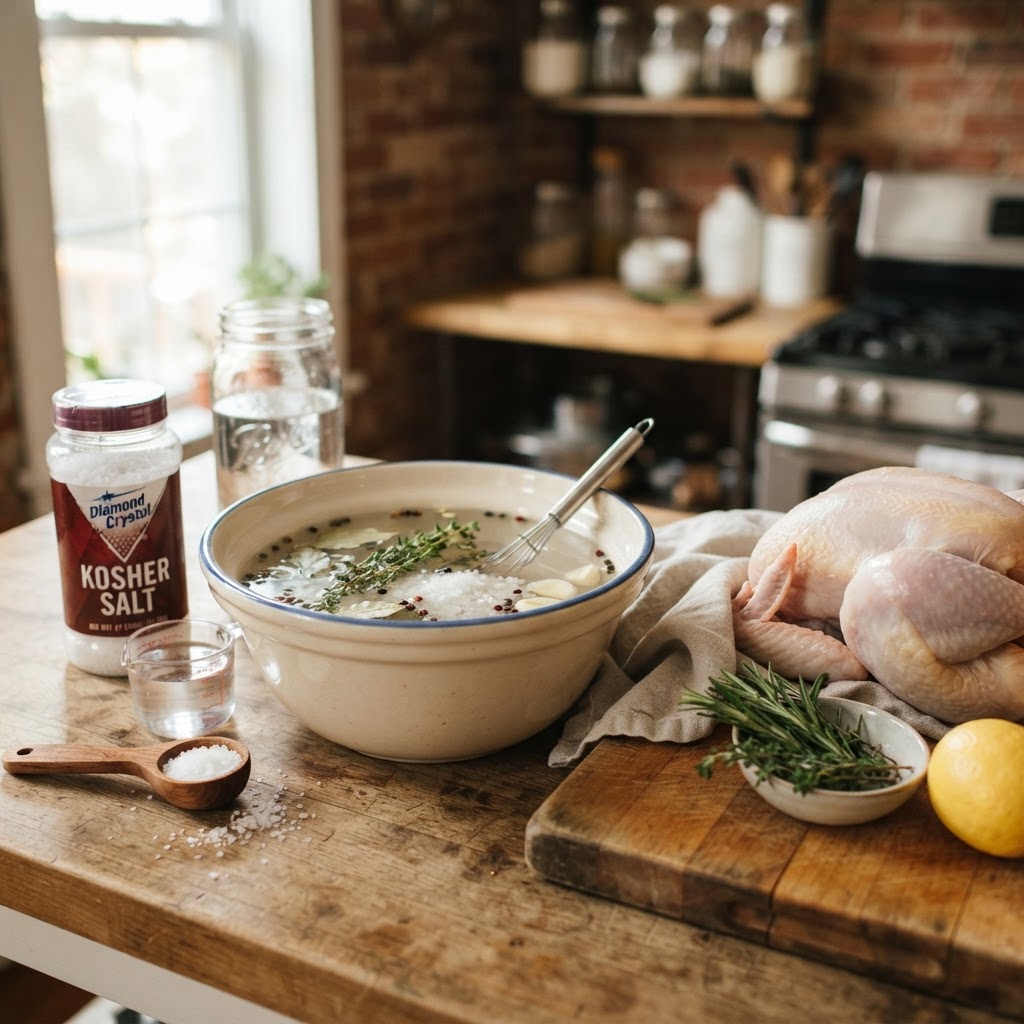
The Home Cook’s Guide to Salt Water Brines: Mastering Ratios for Perfectly Succulent Proteins
There is a persistent myth in the culinary world that achieving restaurant-quality protein—specifically that elusive, perfectly succulent texture—requires a secret culinary school technique or an expensive piece of kitchen gadgetry. In reality, the most transformative tool in your kitchen is one you likely already have sitting in your pantry: a simple container of salt. Mastering the brine is the great equalizer for home cooks, turning an otherwise dry, lackluster chicken breast or a tough pork chop into a juicy, flavor-forward centerpiece that practically melts on the tongue. By understanding how salt interacts with the cellular structure of meat, you unlock the ability to compensate for overcooking and uneven heat, ensuring that your dinner guests are always impressed by your consistency.
At "Blame The Chef," we believe that cooking should be an act of confidence rather than a guessing game. When you learn to control the moisture levels within your proteins, you stop worrying about the clock and start focusing on the actual experience of flavor development. Brining is not merely about seasoning; it is a fundamental culinary science that manipulates proteins at a molecular level to hold onto liquid through the rigors of high-heat cooking. Once you have internalized the basic ratio of salt to water, you can branch out into aromatics, spices, and even fruit juices to customize your dishes in ways that a plain pan-sear simply cannot match. It is time to demystify this process and turn your home kitchen into a laboratory of succulent, perfectly executed meals.
We will move beyond the myths that brining makes everything taste like a saltwater taffy shop or that it is too time-consuming for a busy weeknight. This guide serves as your comprehensive manual for the equilibrium brine and the concentration brine, two distinct methods that serve different needs in your culinary arsenal. Whether you are prepping a holiday turkey that weighs twenty pounds or just looking to elevate a quick Tuesday night pork tenderloin, the information ahead will provide you with the exact ratios, timing, and professional insights required to excel. Put away the intimidation factor, pick up your favorite whisk, and get ready to change your approach to proteins forever.
The Science of the Soak: How Brining Works
To understand why a brine works, we must first understand the structural composition of muscle fiber. Meat is largely composed of water, proteins, and fat. When you apply high heat to a protein, the muscle fibers contract and tighten, effectively squeezing out the moisture—a process known as denaturation. If you have ever felt like your chicken breast turned into a dense, dry sponge, it is because those fibers tightened too much, losing the liquid that keeps the meat succulent. Brining counteracts this by introducing a saline solution that penetrates the meat, which helps the proteins maintain a more relaxed structure even as they undergo the thermal stress of your oven or skillet.
Osmosis and Diffusion in the Kitchen
The primary mechanism at play is osmosis, the movement of a solvent through a semipermeable membrane. When you submerge meat in a saltwater solution, the salt ions migrate into the muscle tissue, while the water follows the path of the salt. This increased intracellular salt content actually alters the charge of the muscle proteins, causing them to physically unravel or "unfold." These unraveled proteins gain the ability to trap and bind to water molecules, acting like a sponge that stays saturated throughout the cooking process. Even if you accidentally pull your roast a few degrees past your intended target, the brine provides a safety net that keeps the protein from drying out completely.
Salt Concentration and Timing
The secret to success lies in the concentration of your brine. A common beginner mistake is using too much salt, which can leave the meat tasting overly processed or "cured" rather than succulent. We generally recommend a 5% salt concentration for most quick brines. This ensures that the flavor profile remains balanced while the functional benefits of moisture retention are fully realized. It is essential to remember that timing is equally important; a small cut of meat may only need an hour, while a large bird might require overnight refrigeration. Keeping the meat at a consistent, safe temperature below 40°F (4°C) during this process is non-negotiable for food safety.
The goal of a brine is not to season the meat to death, but to create a reservoir of moisture that protects the integrity of the muscle fiber against the inevitable onslaught of high heat.
Calculating Your Ratios: The Golden Rules
The mathematical side of brining is where most home cooks stumble, but it is actually quite simple if you follow the "Rule of Five." For a standard brine, you are aiming for a solution that is approximately 5% salt by weight. While many old-school recipes call for "a cup of salt per gallon of water," this is notoriously imprecise because table salt, kosher salt, and sea salt have wildly different densities. A cup of fine table salt is much denser than a cup of flaky Diamond Crystal Kosher salt, which can result in a brine that is far too salty or completely ineffective. Moving to weight-based measurements will instantly improve your consistency.
The Gram-Based Method
If you have a digital kitchen scale—and if you are reading this blog, I highly recommend you get one—the math is incredibly straightforward. To create a 5% brine, you need 50 grams of salt for every 1,000 grams (1 liter) of water. For a smaller batch, simply use 5 grams of salt for every 100 grams of water. This precise ratio guarantees that your brine will be identical every single time, regardless of which brand or grain of salt you pick up at the grocery store. If you do not have a scale, try to stick to Kosher salt, as its larger flakes are more forgiving, but recognize that weight will always be the superior metric.
Temperature and Solubility
Always dissolve your salt in a small portion of hot water before adding the rest of the liquid as ice or cold water. Salt does not dissolve well in ice-cold liquid, and you do not want to put your protein into a warm brine, as this encourages bacterial growth. By creating a saturated concentrate with hot water and then cooling it down rapidly with ice, you reach the target temperature of below 40°F (4°) safely and efficiently. This two-step process ensures you are ready to brine in minutes rather than waiting for an hour for a gallon of water to reach room temperature.
Types of Brining: Wet vs. Dry
While we have focused heavily on the wet brine—the traditional dunk in a saltwater bath—it is important to distinguish this from the dry brine. A dry brine is essentially a high-quality dry rub applied to the surface of the meat several hours or even days in advance. Instead of adding water, the dry brine relies on the moisture naturally present in the meat. The salt draws the juices out, dissolves into a concentrated liquid, and is then reabsorbed into the meat via osmosis. This method is excellent for cuts like steak or whole chickens where you want a crispy, perfectly seared skin.
When to Choose Wet
A wet brine is superior for lean proteins that lack fat content, such as chicken breasts, pork chops, or lean white fish. These cuts benefit from the added mass of the water and the chemical interaction that prevents the muscle fibers from seizing. If you are preparing a Thanksgiving turkey, the wet brine is the industry standard because the large surface area and thick muscle mass of the bird need the extra hydration that a soak provides. It acts as an insurance policy against the long duration required for roasting such a massive piece of protein.
When to Choose Dry
Choose the dry brine when your priority is the texture of the exterior. Because a wet-brined piece of meat is inherently damp, it can be difficult to get a hard, golden-brown Maillard reaction on the skin or surface. A dry brine removes moisture from the surface while retaining it inside, allowing the exterior to crisp up almost instantly when it hits the hot pan. For a ribeye steak or a roasted duck, the dry brine is the professional choice. It is cleaner, requires no massive containers in your fridge, and results in a more intense, concentrated flavor profile that is not diluted by the absorption of extra water.
Dry brining is the secret behind that crackling, golden-brown chicken skin you see in professional kitchens; it wicks away surface moisture while forcing the interior to hold onto every drop of juice.
Essential Aromatics and Flavor Boosters
Once you have mastered the 5% salt ratio, you are ready to start playing with the flavor profile of your brines. A brine is essentially a liquid delivery system for aromatic compounds. Because salt opens the protein structures, the accompanying flavors in your brine are absorbed much more deeply than they would be with a surface-level rub. Consider the brine a blank canvas. You can incorporate whole spices, citrus peels, fresh herbs, and sweeteners to elevate the final product.
The Role of Sugar and Acid
Many brines include a sugar component, such as brown sugar, maple syrup, or honey. Sugar serves a dual purpose: it balances the harshness of the salt and aids in the caramelization process during cooking. When you sear or roast your protein, these sugars hit the heat and create a deep, mahogany color that is impossible to achieve with salt alone. However, be careful with acidic ingredients like lemon juice or vinegar. While they provide flavor, they can actually "cook" the outside of the protein if left for too long, leading to a mushy or chalky texture. Use acids sparingly and only in shorter brining windows.
Building Your Aromatic Profile
Think of your brine aromatics in layers. Start with the aromatics that provide a base, such as peppercorns, bay leaves, and smashed garlic cloves. These are the "heavy hitters" that stand up to long soaks. If you want brighter, lighter notes, add citrus zests, fresh rosemary, or ginger in the last few hours of brining.
For Poultry:* Try adding star anise, cinnamon sticks, and orange peel for a warm, fragrant result.
For Pork:* Apple cider, sage, and whole cloves create a classic, homey flavor.
For Fish:* A subtle brine with lemon slices, fennel seeds, and a hint of white wine adds elegance without overpowering the delicate protein.
Safety First: The Professional's Cold-Chain Protocol
Culinary safety is not just a suggestion; it is a fundamental pillar of being a competent cook. Because a brine involves keeping meat in a liquid state for an extended period, you must be hyper-vigilant about temperature control. Bacteria thrive in the "danger zone," which is between 40°F and 140°F (4°C and 60°C). When your meat is sitting in a brine, it is vulnerable. If your refrigerator is not cold enough, you are essentially creating an incubator for foodborne illness.
The Ice-Water Necessity
Never, under any circumstances, start a brine with warm or room-temperature liquid if the meat will be sitting in it for more than an hour. Always chill your brine until it is below 40°F before adding the meat. If you are in a rush, use half the required water amount to dissolve the salt and aromatics, then top off the brine with an equal amount of ice. This chills the liquid instantly and keeps the environment safe for your protein. If you are brining a large item like a turkey, ensure that it is completely submerged; exposed meat is an invitation for bacteria to flourish.
Container Selection Matters
Use non-reactive containers only. Glass, food-grade plastic, or stainless steel are acceptable. Avoid aluminum or copper, as the salt in the brine will react with these metals, potentially leaching a metallic taste into your food and ruining the surface of your cookware. If you are struggling to find a large enough container for a whole bird, a clean food-grade 5-gallon bucket or a heavy-duty brining bag (which can be sealed to remove air) is your best friend. Always keep the brine container in the lowest, coldest part of your refrigerator, away from ready-to-eat foods to prevent cross-contamination.
Troubleshooting Common Brining Mistakes
Even the best chefs occasionally face issues when adapting to new techniques. If you find your protein is coming out "bouncy" or weirdly rubbery, you have likely left it in the brine for too long. This is called over-brining. While the salt acts as a moisture binder, too much exposure causes the muscle to break down into a mushy consistency. Always follow the guidelines: 1 to 2 hours for thin pork chops or chicken breasts, 4 to 8 hours for bone-in chicken pieces, and 12 to 24 hours for a whole turkey. If you are short on time, a shorter brine is always better than an over-brined catastrophe.
The Saltiness Problem
If you find that your food is consistently too salty, your ratios are the first place to look. Remember that the salt you are using is likely denser than you think. If you use table salt, you must use less volume than if you use kosher salt. Another pro tip: rinse and pat dry. After removing your protein from the brine, rinse it thoroughly under cold, running water to remove the excess salt clinging to the exterior. Then, use paper towels to get the meat as dry as possible before cooking. This ensures that the exterior salts don't create a crust that is too intense and aids in achieving that perfect, crispy sear.
The "Salty-Sweat" Phenomenon
Sometimes, when you pull a piece of meat from a brine, it might look slightly translucent or "cured." This is a natural reaction to the salt, but it can be off-putting if you are expecting raw-looking meat. Do not panic; this is exactly what you want. The protein has been effectively modified. Once you apply heat, this appearance disappears, leaving behind a juicy interior. If you notice a strange smell or the liquid has turned cloudy or murky before the recommended time is up, discard the entire batch immediately. It is always better to lose a dinner than to risk a foodborne illness.
The Final Step: The Rest
Even the most perfectly brined piece of meat can be ruined if you skip the resting period. After you take your protein out of the oven, grill, or pan, you must allow it to rest for at least 10 to 15 minutes—longer for larger roasts. During the cooking process, the muscle fibers have tightened and the internal juices have been forced toward the center. If you cut into the meat immediately, all that beautiful moisture you worked so hard to retain will flood out onto your cutting board. Resting allows the fibers to relax and the juices to redistribute evenly throughout the meat.
The Carry-Over Cooking Factor
Remember that your meat will continue to cook for a few minutes after you remove it from the heat. This is known as carry-over cooking. If you want your chicken to reach 165°F (74°C), take it out of the oven when it hits 160°F (71°C) and let the residual heat finish the job during the rest. This prevents the "dry-out" that happens at the very end of the cooking cycle. By combining the benefits of a brine with a precise rest, you ensure that every bite is as juicy as the first, regardless of the cut of meat.
A well-rested protein is a succulent protein; never rush the transition from heat to plate, as those final ten minutes are where the chemistry truly settles into perfection.
Final Thoughts
Mastering the brine is not about memorizing complex recipes; it is about embracing the basic principles of salt concentration, time management, and temperature control. By taking the time to understand the "why" behind the "how," you transition from a cook who follows recipes to a chef who understands the ingredients. You now have the tools to handle almost any protein with the confidence that you are maximizing its potential for moisture and flavor.
Start small. Try a simple 5% brine on your next batch of pork chops or chicken breasts. Observe how the texture changes, note the difference in how the meat browns, and pay attention to how much more forgiving the protein is when you are at the stove. Once you have seen the difference for yourself, you will never go back to un-brined meat again.
Remember, "Blame The Chef" is here to provide the foundation, but your kitchen is the lab. Do not be afraid to experiment with the aromatics or tweak your resting times based on your specific equipment. Cooking is an ongoing education, and the best way to learn is by doing. Keep your salt measurement accurate, keep your environment cold, and keep your standards high. When you serve that first perfectly succulent meal, you will realize that the secret wasn't a fancy ingredient—it was simply the science of salt. Now, go forth, fire up those burners, and let your brining journey begin. Your dinner guests—and your palate—will thank you for it.
The beauty of this technique lies in its versatility. Once you feel comfortable with the standard poultry or pork applications, consider applying these ratios to more unconventional proteins. Have you ever tried a quick brine on firm white fish like halibut or cod? The result is a flakey, moist texture that turns an otherwise easy-to-overcook fish into a star. How about brining a venison roast to soften its gamey intensity? The possibilities are endless when you understand the mechanics of the brine.
Finally, never underestimate the power of documentation. Keep a small notebook in your kitchen where you track your brine concentrations and your results. Over time, you will develop a shorthand for what works best for your personal taste. Maybe you prefer a slightly higher salt content, or perhaps you find that a shorter soak with more intense aromatics suits your palate better. This guide is your starting point, but your experiences will make you a master. Welcome to the club of succulent protein enthusiasts—may your pans always be hot and your meat always be juicy. Happy cooking, and remember: if it turns out perfectly, take all the credit; if it doesn't, well, you know exactly who to blame.


Get the Next Recipe
Weekly recipes, techniques, and gear picks — straight to your inbox.
