The Home Cook’s Guide to "Sear-and-Simmer" Braising: Mastering Liquid-to-Protein Ratios for Fall-Apart, Flavor-Packed One-Pot Meals
There is a specific kind of magic that occurs when a kitchen fills with the scent of slowly rendering fat, toasted aromatics, and the deepening complexity of a wine-dark braising liquid. For many home cooks, the idea of braising feels reserved for professional kitchens or Sunday afternoons that stretch into eternity. However, the art of the braise is actually the most forgiving and rewarding technique in your culinary arsenal. By mastering the fundamental "sear-and-simmer" method, you move away from following rigid, step-by-step recipes and toward an intuitive understanding of how heat, time, and moisture transform humble ingredients into luxury meals.
At its core, braising is a two-stage cooking process that bridges the gap between high-heat browning and low-heat moist cooking. It is designed specifically for tougher cuts of meat—the ones loaded with connective tissue and collagen—that would turn into leather if subjected to a quick sear or a rapid roast. When we sear, we create flavor; when we simmer, we dissolve structure. Understanding this binary is the key to unlocking the "fall-apart" texture that defines a world-class pot roast, coq au vin, or short rib ragu. You are not just cooking dinner; you are managing a controlled chemical reaction that requires little more than patience and a heavy-bottomed pot.
In this guide, we are going to dismantle the intimidation factor surrounding braising and focus on the mechanics of the liquid-to-protein ratio. Too often, home cooks drown their proteins in excess stock, effectively boiling their ingredients into a flavorless, grey submission. By controlling the depth of your liquid, managing your vessel’s heat retention, and respecting the Maillard reaction, you will elevate your one-pot meals from "homestyle" to "restaurant-quality." Let’s put on our aprons, grab a Dutch oven, and start the process of turning tough fibers into tender, succulent masterpieces.
The Chemistry of the Sear: Why Your Prep Matters
The process begins long before the liquid ever hits the pan. The Maillard reaction—that complex chemical response between amino acids and reducing sugars—is the primary source of depth in any braised dish. If you skip the sear or do it poorly, you lose the foundational flavor that the simmering liquid will eventually draw out. You must ensure your protein is bone-dry before it touches the oil; moisture is the enemy of the crust. When water sits on the surface of the meat, it turns into steam, preventing the surface temperature from reaching the 300°F threshold required for proper browning.
Choosing Your Fat and Heat
Temperature control during the searing phase is non-negotiable. You want a high smoke-point fat, such as grapeseed oil, avocado oil, or clarified butter, to ensure you can reach a hard, dark-brown crust without burning the pan. Your heat should be set to medium-high; if the pan is too cool, the meat will grey rather than bronze. If it is too hot, the exterior will turn acrid and burnt before the rendered fat can contribute to the pan’s fond. Aim for a deep, chestnut-colored crust on every side of your protein, even the edges if possible.
The Importance of the Fond
As you sear your meat, you will notice a dark, sticky residue accumulating at the bottom of your pot. This is the fond, and it is arguably the most valuable ingredient in your kitchen. Never wash the pan between searing and simmering. This fond represents concentrated protein and caramelized sugars that, when deglazed, provide the backbone for your braising liquid. Treat the fond with respect; it is the difference between a thin, watery sauce and one that coats the back of a spoon with pure, savory intensity.
"A braise is only as good as the crust you build at the beginning. If you don't take the time to develop that dark, mahogany-colored fond, you are essentially poaching your meat in flavored water rather than braising it to perfection."
Decoding the Liquid-to-Protein Ratio
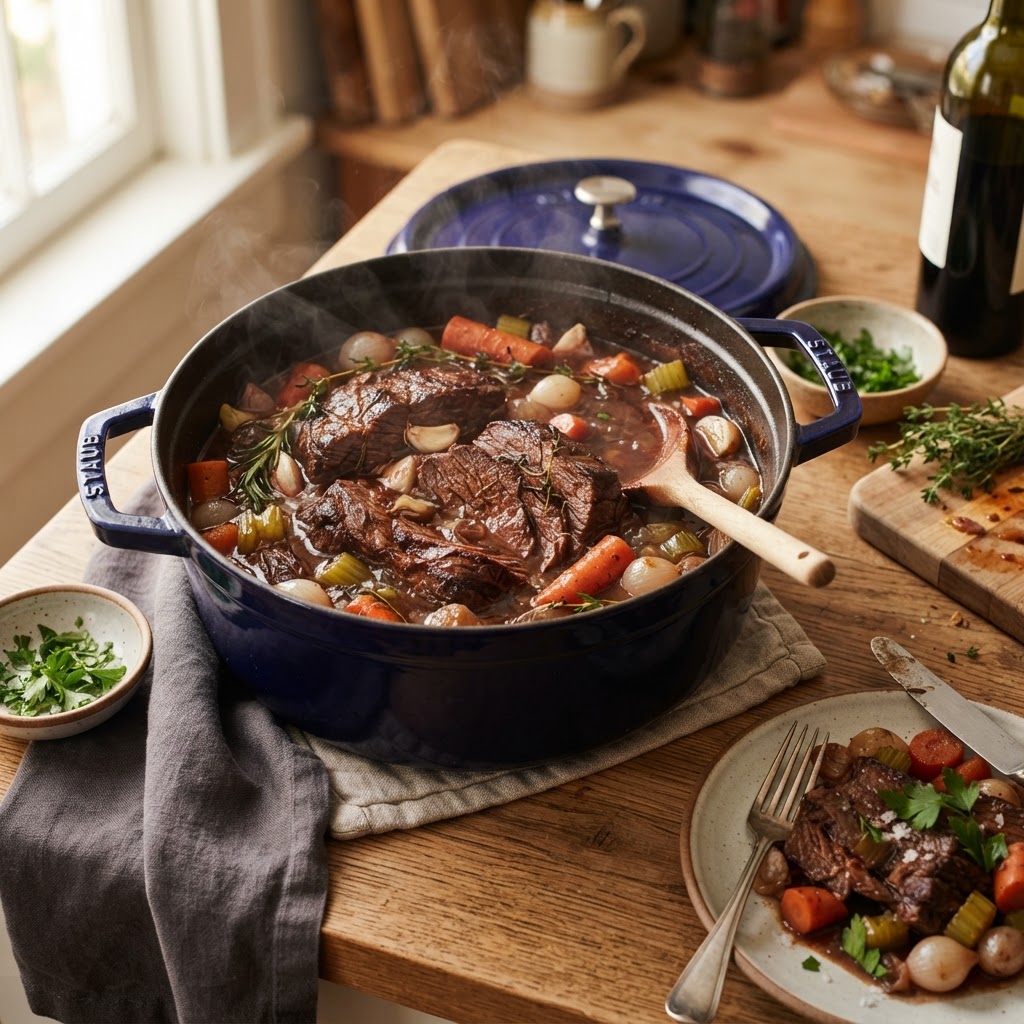
The most common mistake home cooks make is using too much liquid. When you submerge a piece of meat entirely, you are boiling, not braising. The goal of a braise is to utilize the steam generated within the pot to cook the upper portion of the protein while the lower portion braises in the liquid. A perfect braise usually involves enough liquid to cover only one-third to one-half of the protein. The protruding part of the meat undergoes a gentle, humid-heat treatment that yields a superior texture compared to the submerged portion.
Managing Liquid Reduction
As the liquid simmers, it will evaporate, and the proteins within the meat will release their own juices. By keeping the level lower, you ensure that the flavors in your braising liquid—whether it be red wine, stock, or beer—concentrate as the dish cooks. If you start with too much liquid, you end up with a diluted final product that requires aggressive reduction at the end, which can often overcook the meat in the process. Start low; you can always add more liquid, but you cannot remove it once the fibers have softened.
Building Your Braising Liquid
Your liquid should be a reflection of the protein’s profile. For red meats like beef short ribs or lamb shanks, a combination of dry red wine and beef bone broth is traditional, providing tannins that cut through the richness of the fat. For white meats like chicken thighs or pork shoulder, a dry white wine or even a hard cider can provide a necessary acidity. Always taste your liquid before adding the meat; it should be slightly over-seasoned, as the salt will eventually disperse into the large volume of protein.
The Art of the Low and Slow Simmer
Once the protein is seared and the aromatics have been softened in the rendered fat, it is time to transition to the simmer. The key to success here is consistent, low-intensity heat. Your target internal temperature for the liquid should be just below a boil, ideally around 190°F to 200°F. If you allow the pot to reach a rolling boil, the rapid agitation will toughen the proteins, causing them to seize and become stringy rather than tender.
The Role of the Dutch Oven
A heavy-bottomed, enameled cast-iron Dutch oven is the gold standard for braising. Its mass allows it to hold a steady, ambient temperature, and its tight-fitting lid keeps the moisture trapped inside. If you do not have a heavy lid, a piece of parchment paper pressed directly onto the surface of the liquid, topped with aluminum foil, will create the necessary seal. This "cartouche" method prevents the top of the meat from drying out and keeps the aromatic oils from escaping through the lid’s gaps.
The Oven vs. The Stovetop
While you can braise on the stovetop, the oven provides more uniform heat. By placing your pot in a 300°F to 325°F oven, you surround the vessel with heat, ensuring that the cooking is even from all sides. Stovetop braising creates a hot spot at the base of the pot, which can lead to scorching if you aren't careful about stirring or rotating the meat. The oven is a set-it-and-forget-it environment that guarantees the tender result we are looking for.
"Patience is not just a virtue in the kitchen; it is an ingredient. The transition from collagen to gelatin is a biological process that simply cannot be rushed. If you pull the pot too early, you have wasted your time."
Mastering the Texture: Collagen and Gelatin
The reason we choose tough cuts for braising is the presence of connective tissue, specifically collagen. When heated in a moist, moderate environment, collagen breaks down into gelatin. This is what gives a well-made braise that luxurious, sticky, mouth-coating sensation. Without the gelatin, your meat would be dry and fibrous; with it, the meat becomes succulent and easy to pull apart with a fork.
Knowing When It Is Done
The biggest temptation for a home cook is to prod, poke, and check the meat every ten minutes. Resist this urge. Every time you lift the lid, you lose valuable steam and drop the internal temperature of the pot. Rely on the "fork-tender" test: when the meat offers no resistance to a fork and begins to flake or pull away from the bone with almost zero pressure, it is ready. This usually takes anywhere from two to four hours, depending on the thickness of the protein.
The Rest is Crucial
Even after the braise is finished, the meat is not ready to be served. Let the pot sit, lid on, for at least 20 to 30 minutes after removing it from the heat. This allows the internal juices to redistribute throughout the meat, ensuring that every bite is as moist as the first. This resting period also allows you to skim off any excess fat that has risen to the surface, which makes for a cleaner, more elegant final sauce.
Aromatics and Flavor Profiles
No braise is complete without a foundation of aromatics. The classic French mirepoix—onions, carrots, and celery—is the standard for a reason. However, you can adapt your aromatics based on the cuisine you are aiming for. For a Mediterranean-inspired braise, consider fennel, leeks, and tomatoes. For an Asian-inspired short rib, lean into ginger, garlic, star anise, and scallions. The secret is to sauté these aromatics in the residual fat after removing your seared meat, ensuring they soften and release their essential oils before the liquid is added.
The Role of Herbs and Spices
Hard herbs like thyme, rosemary, and bay leaves are ideal for long-simmering dishes because they hold up under the heat and slowly release their resins. Soft herbs like parsley, cilantro, or basil should only be added at the very end, just before serving, to maintain their vibrancy and color. If you are using dried spices, toast them briefly in the pot with your aromatics; this "blooming" technique releases fat-soluble flavors that wouldn't otherwise emerge in a watery environment.
Balancing the Sauce
Once your meat is removed and your liquid is strained, you have the opportunity to balance the flavors. Does it need more acidity? A splash of sherry vinegar or lemon juice can cut through the heavy, rich fat. Does it need a touch of sweetness? A teaspoon of tomato paste or a drizzle of honey can bridge the gap between the savory salt and the deep umami of the meat. Taste your sauce repeatedly as you reduce it; the flavor will intensify exponentially as the liquid volume decreases.
Troubleshooting Common Braising Pitfalls
Even for seasoned home cooks, braising can occasionally go awry. If your meat ends up tough despite a long cooking time, it usually means the heat was too high, causing the proteins to tighten and lock out the moisture. Alternatively, you may have pulled the meat too early. If you find your meat is dry, it means it was overcooked past the point of collagen breakdown—the gelatin rendered out entirely, leaving behind nothing but lean muscle fiber.
What if the Sauce is Too Thin?
If your sauce is still thin after reducing it, you can use a beurre manié—a mixture of equal parts softened butter and flour—to thicken it. Whisk small amounts into the simmering liquid, and the starch will hydrate, giving the sauce a glossy, thick consistency. Avoid adding cornstarch if possible, as it can give the sauce a slightly chalky texture and a dull appearance; flour-based thickeners provide a more velvety, traditional mouthfeel.
Dealing with Saltiness
If you realize your braise is too salty, do not try to fix it by adding water. Adding water will dilute the flavor without solving the salinity issue. Instead, add a small amount of heavy cream or a touch of sweetness (like brown sugar or caramelized onions) to mask the salt. If the braise is truly over-salted, you can stir in a raw potato cut into large chunks during the final 30 minutes of cooking; the potato will absorb some of the excess salt, and you can discard it before serving.
"A braise is a conversation between the fat, the heat, and the protein. If you listen to your pot and respect the time it needs, it will always reward you with something far greater than the sum of its parts."
Elevating the Presentation
Serving a braise is about embracing its rustic, comforting nature. Because the dish is "one-pot," the presentation should focus on the quality of the meat and the richness of the sauce. A beautiful braise should be served on a warmed platter, with the meat carefully placed in the center and the reduced sauce spooned generously over the top. The vibrant colors of fresh herbs—like a scatter of chopped chives or gremolata—will contrast against the dark, glossy surface of the meat.
Serving Suggestions
Don't neglect the side dishes. A braise requires a "sponge" to soak up all that incredible sauce. Creamy mashed potatoes, crusty sourdough bread, or buttered egg noodles are the classic partners for a reason; they provide the neutral base that allows the complex, concentrated flavors of your braised protein to shine. If you want a bit of brightness, serve a crisp, bitter green salad with a sharp vinaigrette alongside the meal to cleanse the palate.
The Leftover Factor
There is no such thing as a "sad" leftover when it comes to braised meat. In fact, most braises taste better the next day, as the flavors have had more time to meld and the gelatin in the sauce has had a chance to set. If you are reheating a braise, do so gently on the stovetop. Adding a tablespoon of water or broth will help revive the sauce. You can also shred the leftover meat and use it for tacos, sliders, or an elevated pasta ragu, proving that a single braise can be the foundation for multiple meals throughout the week.
Final Thoughts
Braising is the ultimate lesson in culinary humility and reward. It requires you to set aside the fast-paced, high-heat mentality of modern cooking and embrace the slow, deliberate rhythm of the kitchen. By focusing on the fundamentals—a hard, golden sear; a restrained, flavor-packed braising liquid; and the steady, patient application of low heat—you can produce meals that are consistently tender, deeply flavorful, and undeniably impressive.
Remember that every kitchen is different. Your stove’s "low" is not the same as your neighbor’s, and every Dutch oven has a different heat retention capacity. Use this guide as a framework, but trust your own senses. Watch the liquid levels, smell the browning aromatics, and listen for the gentle, bubbling whisper of the simmer. Over time, you will stop looking at recipes and start looking at the ingredients themselves, understanding exactly what they need to reach their full potential.
Ultimately, "Blame The Chef" is about taking ownership of your food, and there is no better way to do that than by mastering a braise. It is a technique that turns tough, inexpensive cuts of meat into a centerpiece that commands attention. Whether you are cooking for a crowded table on a cold winter evening or prepping a meal for the week ahead, the sear-and-simmer method will never let you down. Embrace the patience, enjoy the process, and above all, enjoy the incredible, fall-apart flavors that await you at the end of the journey. You have all the tools you need—now, go make something truly remarkable.


Get the Next Recipe
Weekly recipes, techniques, and gear picks — straight to your inbox.
