The Home Cook’s Guide to Slurry Ratios: Mastering Suspension and Stability for Perfect Pan Sauces and Glazes
There is a moment in the culinary life of every home cook where a beautiful, seared protein sits resting on a cutting board, leaving behind a treasure trove of flavor in the pan. You stare at those browned bits—the fond—and realize that with just a bit of liquid and the right thickening agent, you could elevate this simple meal into a restaurant-quality experience. Many cooks shy away from the pan sauce, fearing the dreaded graininess of a broken emulsion or the gluey, gelatinous texture of a sauce that has been over-thickened with flour or cornstarch. The secret to bridging the gap between a watery pan juice and a glossy, luxurious glaze lies in the science of the slurry. It is a humble, deceptively simple mixture, yet it serves as the foundational architecture for the majority of professional-grade pan sauces and glazes.
Understanding the mechanics of a slurry is about more than just ratios; it is about respecting the thermodynamics of starches. When you whisk a starch into a cold liquid and introduce it to a simmering environment, you are triggering gelatinization. As the starch granules heat up, they absorb the surrounding liquid, swell, and eventually burst, releasing amylose and amylopectin molecules that create a network of viscosity. The difficulty for the home cook often arises when the heat is too aggressive, or the ratio of starch to liquid is improperly calculated, leading to a sauce that tastes like raw paste or looks like wallpaper adhesive. By mastering the specific ratios and incorporation techniques that we will explore in this guide, you will gain the confidence to manipulate the body, sheen, and cling of every sauce you create.
This journey into the chemistry of thickening is designed to strip away the intimidation factor often associated with high-end culinary techniques. We are not aiming for chemistry class complexity; we are aiming for consistency, flavor, and the ability to reclaim the potential of your cookware. Whether you are working with a delicate velouté, a sticky Asian-inspired glaze, or a robust red wine reduction, the slurry remains your most reliable tool. Throughout this post, we will dissect the different types of starches, the specific temperatures required for activation, and the professional chef shortcuts that turn a standard pan deglaze into a velvety masterpiece. Let us stop blaming the chef for these culinary mishaps and start taking ownership of our technique, one perfectly thickened sauce at a time.
The Chemistry of Starch: Choosing Your Weapon
Before we get to the ratios, we must first understand the differences between the starches you likely have in your pantry. Not all starches are created equal, and choosing the right one for your specific dish is the first step toward achieving the perfect mouthfeel. Cornstarch is perhaps the most ubiquitous choice, known for its ability to create a very high-gloss, translucent finish. It is highly effective, but it does have a tendency to "weep" or break down if it is reheated too many times or if it is subjected to prolonged boiling. When you use cornstarch, you are looking for that classic "takeout style" glaze that coats a protein in a vibrant, mirror-like layer.
Cornstarch vs. Arrowroot and Tapioca
Arrowroot starch is a fantastic alternative for those who find cornstarch to be too opaque or who are concerned about the "starchy" aftertaste that can sometimes linger if it isn't cooked out properly. It performs exceptionally well in acidic environments, such as sauces featuring citrus or wine, where cornstarch might begin to lose its thickening power. Tapioca starch, on the other hand, provides a much more elastic, stringy consistency. It is rarely the first choice for a standard pan sauce but is unparalleled when you are looking to add a specific type of viscosity to fruit-based glazes or stir-fry sauces where a slightly more "chewy" cling is desired.
The Role of Potato Starch
Potato starch is the secret weapon of many professional kitchens, specifically for those who demand a very neutral flavor profile. Unlike cornstarch, which can have a faint, distinct aroma when raw, potato starch is virtually odorless and flavorless. It reaches its peak thickening capacity at a lower temperature than its counterparts, which makes it ideal for delicate sauces that you don’t want to boil excessively. If you are preparing a quick pan sauce for a white fish or a delicate vegetable sauté, potato starch is your best bet for achieving stability without compromising the integrity of the base ingredients.
"A great sauce is not about the thickness of the liquid, but the quality of the emulsion and the transparency of the suspension; never let the starch hide the beauty of your reduction."
Mastering the Ratio: The Golden Rule
The most common mistake home cooks make is adding a slurry directly to a pot without measuring, which almost always results in a sauce that is either too thin to coat a spoon or thick enough to hold up a fork. The golden rule for a standard 1:1 slurry ratio is essentially one part starch to one part cold liquid. However, professional chefs often adjust this based on the specific volume of the liquid they are thickening. A good starting point is one tablespoon of starch to one tablespoon of cold water, mixed into a completely smooth paste before it touches the heat.
Calculating for Volume
For every cup of liquid you intend to thicken, start with one tablespoon of your chosen starch combined with one tablespoon of cold liquid. This will give you a nappé consistency—meaning it coats the back of a spoon cleanly without running off immediately. If you are looking for a lighter, more sauce-like viscosity, you can decrease the ratio to two teaspoons of starch per cup of liquid. Conversely, if you are working on a glaze that needs to stick to a seared piece of meat, you might increase the ratio to 1.5 tablespoons of starch per cup of liquid.
The Importance of the Cold Liquid
Always, and I mean always, use cold liquid to hydrate your starch. If you attempt to whisk starch into hot liquid, it will clump instantly, creating little pockets of raw, powdery paste that are nearly impossible to whisk out. The cold liquid allows the starch granules to become evenly suspended before they are exposed to the heat, ensuring a silky finish. You can use water, but for a more robust flavor, consider using a cold chicken or beef stock, or even a splash of the wine you are using for your reduction. This ensures that you aren't diluting the overall flavor profile of your final pan sauce.
Incorporation Techniques: The Art of the Drizzle
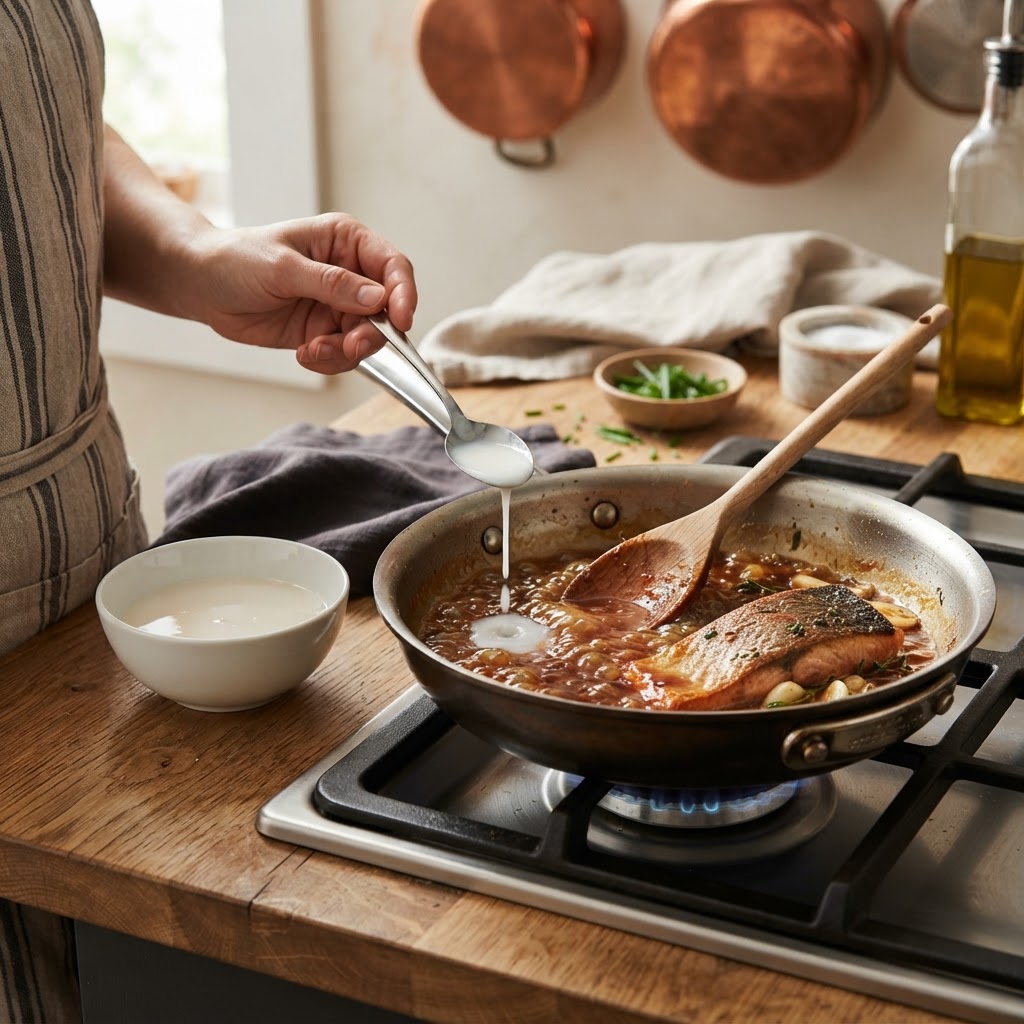
Once your slurry is mixed and your pan is at a gentle simmer, the method of incorporation is just enough to determine whether you end up with a glossy glaze or a lumpy mess. Never dump the entire slurry into the pan at once. Instead, pour it in a slow, steady stream while whisking the sauce constantly. This allows you to monitor the viscosity in real-time. Often, you will find that you don't need the entire amount of slurry you prepared, and stopping at the right moment is essential to maintaining the desired texture.
Temperature Management
After you have incorporated your slurry, you must bring the sauce back to a simmer, but avoid an aggressive, rolling boil for too long. Starches have a specific "cooking point" where the thickening is maximized. Once that point is reached, the sauce will look glossy and clear. If you continue to boil it rapidly for several minutes after it has thickened, the starch molecules can break down, causing the sauce to "thin out" again. This is a common point of confusion for home cooks who think the sauce isn't thickening because it looks thin, so they keep boiling it—eventually ruining the consistency entirely.
The Finishing Flourish
To take your pan sauce to the next level, always finish with a knob of cold, unsalted butter—a technique known as monter au beurre. After you have added your slurry, thickened the sauce to your liking, and removed the pan from the heat, drop in a tablespoon of cold butter. Whisk it in vigorously. This adds a beautiful sheen, rounds out the sharp edges of any acidity, and provides a rich, velvety mouthfeel that a starch-only sauce simply cannot achieve. This is the difference between a sauce that tastes like "thickened water" and one that tastes like a professional restaurant creation.
Troubleshooting Common Sauce Failures
Even experienced chefs face the occasional sauce emergency. If your sauce looks cloudy, it might be due to using too much starch or failing to reach the proper temperature to fully hydrate the granules. If your sauce is too thin, do not add raw starch directly to the pan. Pull the pan off the heat, pour a small amount of the thin sauce into a small bowl, whisk in a bit more starch to create a new slurry, and then slowly add that back into the main pan.
The Case of the Gummy Sauce
If your sauce feels "gummy" or stringy, you have likely over-thickened it or used the wrong type of starch (like tapioca) for a savory application. To fix this, thin the sauce out with a little bit of warm stock or water. If you have created a sauce that is far too thick to save, consider turning it into a base for a different dish, such as adding it to a soup or a vegetable stew where the extra body will be an asset rather than a drawback.
Graininess and Lumps
Lumps are almost always the result of adding the starch to liquid that was too hot or adding it too quickly without whisking. If you notice lumps immediately, you can attempt to pass the sauce through a chinois or a very fine-mesh sieve. This will catch the un-hydrated starch pellets and leave you with a smooth sauce. However, if the sauce has already been cooked for several minutes, the lumps may have already hardened, and your best option is to start fresh. Patience is your greatest asset here; whisking is not just about combining ingredients; it is about emulsification.
"The perfect sauce is a delicate balance of science and intuition; understand the starch, watch the sheen, and never rush the incorporation."
Developing Flavor Profiles: Beyond the Thickener
Now that you have the mechanics of the slurry down, it is time to focus on what goes into the pan. A slurry is only as good as the liquid it is thickening. Start your pan sauce by deglazing the pan with a high-quality wine, vinegar, or citrus juice. Scraping the fond—those delicious, caramelized brown bits—off the bottom of the pan is non-negotiable. This is where the depth, color, and complexity of your sauce originate. If you are starting with a dry pan, you are missing out on the foundational flavor that defines a pan sauce.
Building Complexity
Don't be afraid to incorporate aromatics during the reduction phase. Finely minced shallots, garlic, or fresh herbs like thyme and rosemary can be added to the pan while you are reducing your liquid. Once the liquid has reduced by at least half, strain the solids out if you prefer a perfectly smooth sauce, or leave them in for a rustic presentation. By the time your slurry is ready to be added, these aromatics will have infused the liquid with a profound depth that will shine through the thickened base.
Balancing Act
Every sauce needs a balance of salt, acid, and fat. Taste your reduction before adding the slurry. If it tastes "flat," it likely needs a pinch of salt or a squeeze of fresh lemon juice. If it is too acidic, a tiny touch of sugar or honey can bridge the gap. Remember that the starch can sometimes mute flavors, so feel free to season your reduction slightly more aggressively than you would if you were just serving it as a broth. The starch acts as a flavor carrier, and it will hold onto those aromatics, coating your palate and extending the finish of the flavor.
Advanced Techniques: The Glaze Strategy
When you are moving from a standard pan sauce to a glaze, the requirements change slightly. A glaze is meant to be thicker, stickier, and more concentrated in flavor. This is where you might use a higher ratio of starch or perhaps a combination of starches. For a classic teriyaki or a balsamic glaze, you are looking for a consistency that allows the liquid to cling to the protein, leaving a glistening, dark layer rather than pooling at the bottom of the plate.
The Reduction-First Method
To achieve a superior glaze, always reduce your liquid to a syrupy consistency before adding the slurry. By concentrating the sugars and flavors first, you ensure that the starch is only doing the work of thickening, not the work of boiling away excess water. This method produces a more intense, vibrant flavor profile. If you add the slurry too early, you end up with a large volume of sauce that lacks the concentrated, punchy profile of a true glaze.
Cling Factor
If you are struggling to get a glaze to stick to your food, consider adding a small amount of a fat-soluble ingredient like a dash of soy sauce, a bit of honey, or a drop of sesame oil. These ingredients help the starch network adhere to the surface of the meat or vegetables. The texture should feel slightly "tacky" once it cools for a few seconds. If it's too liquid, reduce it further; if it's too thick, add a drop of water. This constant adjustment, performed over low heat, is the hallmark of a cook who understands the architecture of a glaze.
Final Thoughts
Mastering the slurry is a rite of passage for any cook who wants to elevate their food from "sustenance" to "culinary expression." It is a technique that bridges the gap between the chaotic heat of the stovetop and the composed elegance of the dinner plate. By understanding the science of how different starches interact with temperature, volume, and acidity, you move away from following recipes blindly and into the realm of cooking with confidence. You no longer have to fear the thin, watery pan juice or the gummy, over-thickened disaster. You now possess the knowledge to troubleshoot, adjust, and finish your dishes with the precision of a professional.
Always remember that the best sauces are a team effort between the quality of your pan's fond, the intensity of your reduction, and the stability of your slurry. Keep your whisk close, your cold liquid measured, and your eyes on the texture of the sauce as it glazes your spoon. Start small, experiment with different starches to see how they affect the transparency and mouthfeel of your creations, and most importantly, never be afraid to taste as you go. Your palate is your final judge, and the more you practice these ratios, the more intuitive the process will become.
The next time you find yourself staring at a pan full of browned bits, take a breath, pour in that wine, reduce it, and reach for your slurry. You have the skills to transform that pan into the highlight of your meal. Cooking is an iterative process, and every failed sauce is simply a lesson that brings you closer to the perfect one. So, blame the chef if you must, but with this guide in your apron pocket, you will find that you have very little to blame once the final plate is set on the table. Happy cooking, and may your sauces always be perfectly glossy and full of depth.
Get the Next Recipe
Weekly recipes, techniques, and gear picks — straight to your inbox.
