The Home Cook’s Guide to Starches: Choosing the Right Thickeners for Soups, Sauces, and Stews
Welcome to the kitchen, where the alchemy of heat and ingredients transforms simple liquids into culinary masterpieces. Every home cook has faced that moment of panic when a beautiful, aromatic sauce refuses to coat the back of a spoon, remaining stubbornly thin and watery. It is in these moments that we often blame ourselves, thinking we failed to reduce the liquid enough or that our stock was too weak. In reality, the difference between a sad, runny liquid and a luxurious, glossy sauce is an understanding of starches and how they interact with moisture and temperature. Once you master the science of thickening, you gain the confidence to troubleshoot any pot on your stove, moving from following recipes to truly understanding how flavors and textures are built.
Many beginners fear the complexity of French techniques, assuming that a proper emulsion or reduction requires years of culinary school training. However, the world of thickeners—from the humble flour-based roux to the delicate clarity of arrowroot—is surprisingly approachable once you learn the "why" behind the "how." Starches are complex carbohydrates that swell and gelatinize when exposed to heat and water, creating a matrix that traps liquid and builds body. Whether you are aiming for the deep, toasted flavor of a gumbo base or the silky, translucent finish of a stir-fry sauce, selecting the right thickening agent is the difference between an amateur effort and a professional-grade dish. Today, we are going to pull back the curtain on the pantry staples that hold our favorite meals together.
Throughout this guide, we will explore the nuances of various thickening agents, their heat tolerances, and the specific culinary applications where they shine. We will look at how to avoid the dreaded "floury" aftertaste, how to prevent lumping, and why certain starches turn cloudy while others remain crystal clear. This is not just about making things thick; it is about texture, mouthfeel, and the aesthetic presentation of your finished plate. Put on your apron, grab your whisk, and prepare to elevate your home cooking by turning those thin, lackluster broths into the velvety, professional sauces you’ve always dreamed of creating in your own kitchen.
The Foundation: Understanding the Roux
The roux is the bedrock of French cuisine and a technique that every serious home cook should have in their repertoire. At its simplest, a roux is an equal mix of fat and flour by weight, cooked together to remove the raw taste of the wheat. This mixture serves as a stabilizing agent that allows you to thicken stocks into velvety sauces, such as a classic Béchamel or Velouté. When you combine the starch in the flour with the fat, you are essentially coating the starch granules so that they do not clump together when added to a hot liquid. This is the secret to achieving a smooth, lump-free consistency every single time you cook.
The Stages of Roux
The color of your roux will drastically change the flavor profile of your finished dish. A white roux is cooked just long enough to remove the raw flour smell, usually about 1 to 2 minutes over medium-low heat. This is perfect for light, milky sauces. A blond roux is cooked until it turns a light golden color and develops a faint, nutty aroma, which takes about 3 to 5 minutes. Finally, a brown roux or dark roux is cooked significantly longer, often for 20 to 45 minutes, until it reaches a deep, mahogany color. Note that as a roux gets darker, its thickening power actually decreases, meaning you will need more of it to reach the same viscosity as a lighter roux.
A roux is not merely a thickening agent; it is a flavor builder. The longer you cook your flour and fat together, the more depth you add to your dish, moving from light, neutral notes to the deep, roasted complexity required for hearty stews and gumbos.
Techniques for Success
To ensure a smooth transition, always follow the "opposite temperature" rule when incorporating your roux into a liquid. If your roux is hot, add cold stock; if your roux is cold, whisk it into a hot liquid. This temperature contrast prevents the starch from gelatinizing instantly upon contact, which is the primary cause of lumps. Use a balloon whisk and constant motion to ensure the liquid and roux are fully incorporated. Once the liquid comes to a simmer, the starch will begin to expand. Be patient; the true thickness of a sauce thickened with flour usually won't be apparent until the liquid has simmered for at least 5 to 10 minutes to ensure the starch is fully hydrated and the "floury" taste has been cooked out.
Starch Slurries: The Home Cook’s Secret Weapon
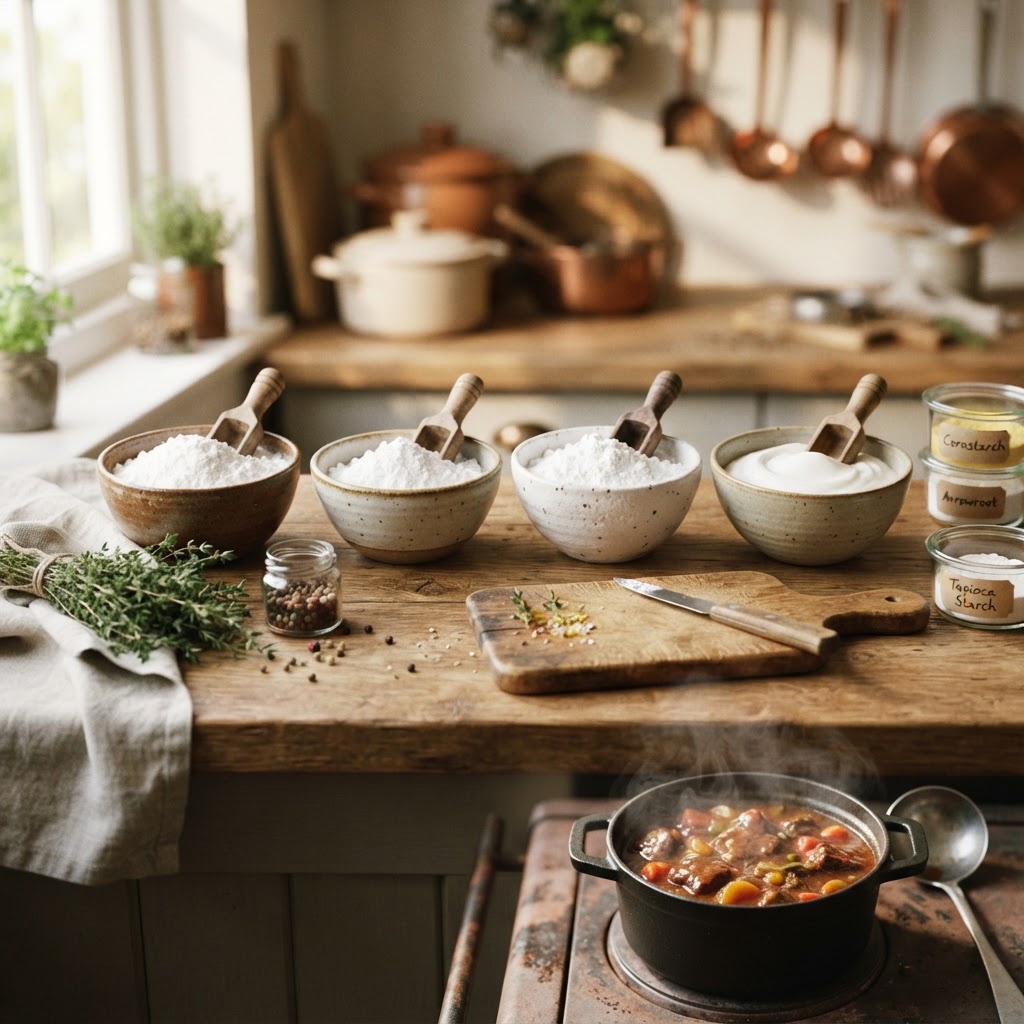
While the roux is powerful, there are times when you need an instant fix or a lighter finish. This is where the starch slurry comes into play. A slurry is simply a mixture of a powdered starch—most commonly cornstarch, arrowroot, or potato starch—and a cold liquid, usually water, stock, or wine. Unlike a roux, which is added at the beginning of a cooking process, a slurry is almost always added at the very end to finish a sauce, soup, or stir-fry. It provides a glossy, high-shine appearance that is impossible to achieve with a traditional flour roux.
Choosing Your Starch
Each of these starches behaves differently under heat. Cornstarch is the most common, providing a high-viscosity, opaque, and somewhat "gummy" thickness that is excellent for Chinese stir-fries and sweet fruit pie fillings. Potato starch offers a similar thickening power but can break down if boiled for too long. Arrowroot, on the other hand, is the gold standard for delicate sauces. It remains almost completely clear when cooked and has a very neutral flavor. Unlike cornstarch, which can turn "chalky" if reheated, arrowroot holds its texture beautifully, making it ideal for elegant pan sauces that might need to be prepared ahead of time.
Mastering the Incorporation
The golden rule of the slurry is never to dump the dry powder directly into the pot. You will inevitably end up with gelatinous, uncooked clumps that are nearly impossible to remove. Instead, mix your starch with an equal part of cold liquid in a small bowl or jar until it forms a smooth, milky paste. Slowly drizzle this mixture into your bubbling liquid while whisking constantly. You do not need to add the entire amount at once. Add a small portion, wait about 30 seconds for the starch to reactivate and thicken, then assess the consistency. Remember, the sauce will always thicken slightly more as it cools on the plate, so don't over-thicken it while it is at a rolling boil.
Reduction: The Art of Concentration
Sometimes, the best thickener isn't an additive at all; it’s the process of reduction. By simmering a liquid over heat, you allow the water content to evaporate, effectively concentrating the natural gelatin, proteins, and sugars already present in your ingredients. This is the most "pure" way to thicken a sauce, as it intensifies flavor rather than diluting it with starch. While it requires more time and patience, the result is a sauce with a depth of flavor and a natural, sticky mouthfeel that simply cannot be replicated by adding flour or cornstarch.
The Physics of Evaporation
For an effective reduction, surface area is your best friend. Do not use a deep, narrow pot if you are trying to thicken a sauce. Instead, opt for a wide, shallow pan or a sauté pan. The greater the surface area, the faster the evaporation of moisture. Keep the heat at a steady simmer—a rolling boil can cause the sauce to emulsify with unwanted fats or turn bitter, while a gentle simmer allows for steady, controlled reduction. It is essential to skim any impurities or excess fat that rise to the surface during the reduction process to ensure the final product is clear and smooth.
Knowing When to Stop
The "nappe" test is the professional standard for determining if a sauce has reached the right consistency. Dip a metal spoon into your sauce, then remove it and run your finger through the coating on the back of the spoon. If the sauce leaves a clean trail and the liquid doesn't run back into the space, you have achieved the nappe consistency. This is the perfect thickness for coating meats or vegetables. If the liquid runs back immediately, it needs more time on the heat. Keep in mind that as you reduce a liquid, the salt content also becomes concentrated. Always hold off on final seasoning until after your reduction is complete to avoid an overly salty sauce.
Reduction is the ultimate test of a chef’s patience. By slowly coaxing the water out of a stock or wine reduction, you are not just thickening the liquid—you are building a bridge between the ingredients, resulting in a sauce that coats the palate with pure, concentrated essence.
Emulsions: The Hidden Thickener
Emulsions are a special category of thickening where two liquids that don't normally mix—such as fat and water—are forced into a stable, creamy state. Think of a classic Beurre Blanc or a Hollandaise. While these aren't "thickened" in the traditional sense of adding flour or starch, they achieve a rich, luxurious viscosity through the suspension of tiny fat droplets within a liquid base. This process requires a bit of technique, but the results are arguably the most sophisticated sauces you can serve at home.
The Power of Emulsifiers
In a Beurre Blanc, the emulsifier is the lecithin found in butter and the reduction of acidic components like vinegar or wine. To achieve a stable emulsion, you must whisk cold, cubed butter into your hot liquid reduction slowly, piece by piece. If you add the butter too quickly or if the heat is too high, the emulsion will break, separating the fat from the liquid. If this happens, don't panic! Whisk in a tablespoon of cold water or cream to bring the emulsion back together. This process creates a sauce that is velvety, opaque, and incredibly rich.
Tips for Stable Sauces
Temperature control is the absolute key when working with emulsions. If your base liquid is too hot, it will melt the butter before it can emulsify, causing it to pool on top. If the pan is too cold, the butter won't melt enough to incorporate. Aim for the "sweet spot"—a warm pan where you can comfortably whisk in the butter while the mixture stays at a temperature that just barely keeps the sauce in a liquid, glossy state. Always remember that once an emulsion is made, it is highly sensitive to heat; do not boil a finished emulsified sauce, or it will surely break.
Purées and Vegetables: The Healthy Alternative
For those looking for a healthier or gluten-free way to thicken soups and stews, look no further than the ingredients already in your pot. Starchy vegetables like potatoes, parsnips, white beans, and squash can act as natural thickening agents when blended. By puréeing a portion of your soup and returning it to the pot, you create a rustic, hearty texture without the need for additional butter or flour. This technique is particularly effective for autumnal soups like butternut squash or hearty vegetable medleys.
The Immersion Blender Technique
The immersion blender (or stick blender) is an essential tool for this process. It allows you to thicken a soup directly in the pot without the safety hazard and cleanup of transferring boiling liquid to a standard countertop blender. Simply remove a third to a half of the soup into a separate bowl, blend it until perfectly smooth, and stir it back into the remaining chunky portion. This method creates a "base" for the soup that carries the flavor, while the remaining whole vegetables provide texture and visual interest.
Starchy Vegetables to Use
Not all vegetables work equally well as thickeners. The best candidates have a high starch content:
Managing Common Thickening Mistakes
Even experienced cooks encounter issues when working with starches. Understanding how to troubleshoot these problems can save a dish that seems headed for the drain. Perhaps the most frequent issue is "weeping" or "syneresis," where a thickened sauce releases liquid after sitting, or the starch breaks down due to over-cooking. This often happens if a sauce is frozen or if it contains too much acid, which can attack the starch molecules and weaken the matrix.
Why Your Sauce Broke
If your sauce turned thin after thickening, you might have introduced an acidic ingredient (like lemon juice or vinegar) too early, or perhaps you added a "thinning" agent like excessive wine. Another common culprit is over-boiling. When cornstarch is boiled for too long, the starch chains can actually snap, causing the sauce to lose its thickness. If you find your sauce has thinned, simply make a new slurry with 1 part starch to 2 parts cold liquid and whisk it in during the final minutes of cooking. This "booster" usually rights the ship immediately.
Lumpy Gravy Solutions
If you find yourself staring at a lumpy gravy, don't throw it out. First, try passing the sauce through a fine-mesh sieve or a chinois. This is the professional way to ensure a perfectly smooth finish. If you don't have a sieve, you can use an immersion blender to break up the clumps. If you haven't added the liquid yet and your roux has lumps, keep the heat low and whisk vigorously with a small amount of liquid until the lumps dissolve before adding the rest of your stock. It is always easier to manage the consistency when your liquid volume is small.
Final Thoughts
The journey toward becoming a master of sauces and soups is not about memorizing complex chemical formulas; it is about observing the behavior of ingredients and developing a feel for the kitchen. When you understand the difference between a white roux and a dark one, or when to choose arrowroot over cornstarch, you stop being a slave to the recipe. Instead, you become a creator who can adapt to whatever is in the pantry. Whether you are aiming for the deep, complex flavors of a long-simmered beef stew or the delicate, translucent shimmer of an Asian-inspired glaze, the principles remain the same: patience, proper temperature management, and the right starch for the job.
As you continue your culinary adventures, don't be afraid to experiment. Take a small portion of your soup and test out a bit of cornstarch versus a bit of flour. See how the texture changes, how it coats the spoon, and how it feels on the palate. By treating these techniques as tools in your creative kit, you will find that the "blame" for a failed meal rarely falls on the chef's shoulders when you have the knowledge to fix it. Keep your heat steady, keep your whisk handy, and never stop pushing the boundaries of what your home kitchen can produce.
The beauty of a perfectly thickened sauce is that it brings everything together—the flavors, the textures, and the heart of the meal—into a cohesive experience. It is the invisible backbone of a great dish. By mastering these basics, you are not just thickening liquids; you are building the foundation for every meal you will serve for years to come. Now, head back to that stove with confidence, and let your sauces reach the level of excellence they deserve. Happy cooking!


Get the Next Recipe
Weekly recipes, techniques, and gear picks — straight to your inbox.
