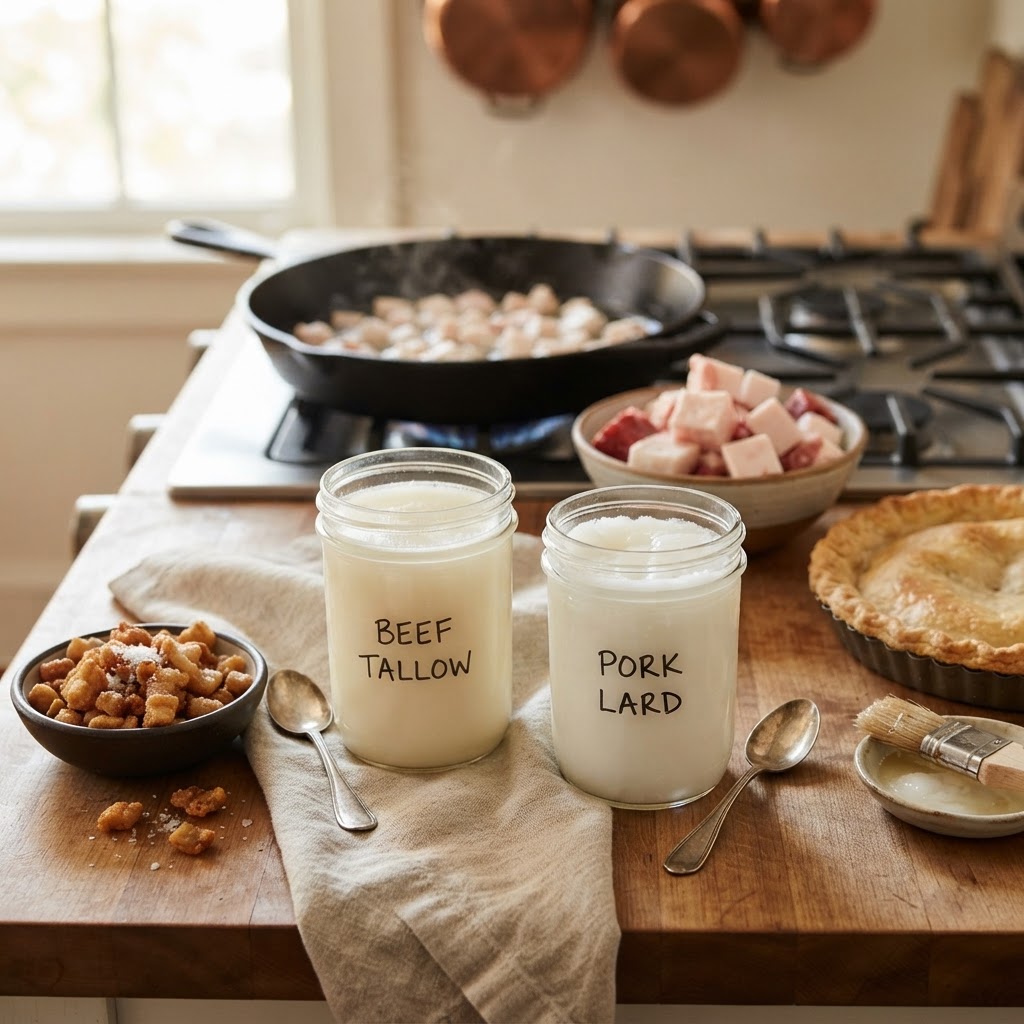
The Home Cook’s Guide to Tallow and Lard: Mastering Animal Fat Rendering for Superior Searing, Frying, and Baking
In the vast, sterile aisles of the modern supermarket, we have been conditioned to reach for plastic bottles filled with highly processed, translucent oils. We are told these are the pinnacle of heart health, the secret to light cooking, and the only path forward for the modern kitchen. Yet, if you step into the back-of-house operations of the world’s most acclaimed bistros and steakhouses, you will find a different reality simmering in the copper pots. Professional chefs have long understood a fundamental truth that has been largely erased from the home cook’s repertoire: animal fats are the soul of flavor. When you replace neutral, industrial oils with rendered tallow or lard, you aren't just changing an ingredient; you are fundamentally upgrading the structural integrity and taste profile of every dish you create.
The process of rendering fat is perhaps the most ancestral and satisfying culinary skill a home cook can master. It connects you to the history of the kitchen, back to a time when no part of the animal was discarded and every scrap of suet was treated as liquid gold. By taking raw, unrefined fat and gently clarifying it into a stable, shelf-ready cooking medium, you regain control over the quality of your fats. You move away from chemically solvent-extracted oils and into a realm of culinary craftsmanship that prioritizes smoke point, nutrient density, and unparalleled depth of flavor. It is time to reclaim this craft, cast off the fear of traditional fats, and learn why your grandmother’s cooking always tasted "better" than yours.
As we dive into this guide, it is important to understand that not all fats are created equal. Whether you are aiming for the supreme crust on a ribeye, the flaky perfection of a pie crust, or the golden-brown crisp of a potato fried in pure beef tallow, the preparation matters immensely. We will walk through the science of moisture removal, the importance of low-temperature rendering, and the sensory cues that tell you your fat is perfectly clarified. Prepare to transform your pantry, eliminate the need for inferior store-bought cooking oils, and finally understand why, when a dish fails, the answer is usually simple: you should have blamed the chef for not using enough high-quality fat.
Understanding the Difference: Tallow vs. Lard
To master the art of rendering, we must first distinguish between the two titans of animal fat: tallow and lard. Tallow is the rendered fat of ruminant animals, most commonly cattle. It is dense, shelf-stable, and prized for its incredibly high smoke point, often exceeding 400°F (204°C). Because of its solid, stable structure at room temperature, it is the undisputed king of high-heat searing and deep frying. When you bite into a french fry that has been cooked in beef tallow, the difference is immediate; the exterior is shattering-crisp, while the interior remains fluffy and seasoned with the savory, nutty undertones of the beef itself.
Lard, conversely, comes from pigs. It is softer and more malleable than tallow, possessing a lower melting point that makes it the darling of the pastry world. If you want a crust that is truly flaky, you must use leaf lard, which is the fat sourced from around the pig’s kidneys. This fat is neutral in taste and incredibly clean, preventing that "porky" flavor from bleeding into your delicate fruit pies or biscuits. While regular "back fat" lard is excellent for savory cooking and roasting vegetables, leaf lard is the gold standard for baking.
"The difference between a good home cook and a great one is often the medium in which they choose to cook their proteins. If you are still searing your steaks in vegetable oil, you are starving your palate of the richness that only properly rendered animal fat can provide."
Selecting the Right Raw Material
When you head to your local butcher, ask specifically for "suet" if you are looking to render beef tallow. Suet is the hard, white, visceral fat found around the kidneys and loins of the cow. It should be firm, cold to the touch, and relatively free of bloody connective tissue. If the suet looks grey or smells "off," avoid it; fresh suet should be nearly odorless. For lard, look for "fatback" for savory roasting or "leaf fat" for your baking projects. The quality of the raw fat is directly proportional to the quality of the finished product, so sourcing from pasture-raised, grass-fed animals is always the superior choice.
Why Quality Matters
Commercial fats are often bleached, deodorized, and hydrogenated to increase shelf life. When you render your own at home, you are creating a "whole food" ingredient. You retain the fat-soluble vitamins—specifically A, D, E, and K—that are destroyed during industrial processing. Furthermore, when you render at home, you avoid the additives like BHA or BHT that are commonly found in store-bought lard to prevent spoilage. By rendering yourself, you are ensuring the cleanest, most nutrient-dense cooking medium possible, tailored exactly to your kitchen’s needs.
The Equipment Essentials for Rendering
You do not need an industrial kitchen to master the art of fat rendering, but you do need the right tools to ensure safety and quality. The most important tool in your arsenal is a heavy-bottomed pot. A Dutch oven is perfect for this, as its thick walls provide even heat distribution and prevent the fat from scorching on the bottom. Scorched fat will take on a bitter, acrid taste that is impossible to remove, effectively ruining your hard work. You want consistent, gentle heat, so avoid thin-gauge aluminum pans at all costs.
Beyond the pot, you will need a fine-mesh sieve or, preferably, several layers of cheesecloth. Filtration is the secret to shelf stability. Any leftover bits of meat or connective tissue, known as cracklings or "scracklins," will eventually spoil if left in the rendered fat. If your fat remains cloudy or has tiny particles floating in it, it will turn rancid much faster. We are aiming for a liquid that, once cooled, looks like alabaster or polished gold, depending on the diet of the animal.
Precision Control
While your eye is your best tool, a digital thermometer is non-negotiable for the beginner. You want to maintain the temperature between 225°F and 250°F (107°C - 121°C). If the temperature exceeds 300°F (149°C), you are no longer rendering; you are frying the fat, which can lead to unwanted odors and a darker, less neutral color. A slow, low-and-slow approach allows the moisture within the fat cells to evaporate without burning the rendered liquid.
Safety Considerations
Rendering fat involves hot liquid that can easily cause severe burns. Always ensure your workspace is clear, keep children and pets away from the stove, and have a dry kitchen towel nearby for spills. Never leave a pot of rendering fat unattended. If you are doing a large batch, consider using a slow cooker, which provides a safe, set-it-and-forget-it environment that prevents the temperature from ever spiking into the danger zone.
Step-by-Step Rendering Technique
"Rendering is an act of patience. If you rush the heat, you compromise the clarity and the shelf life of the fat. Take the extra hour, lower the flame, and watch the process transform solid suet into a shimmering, pure elixir."
The Art of the Crackling
Do not throw away the leftover bits of meat and connective tissue! These are the cracklings. Season them generously with kosher salt and black pepper while they are still hot, and you have the ultimate chef's snack. Some cultures even use them as a garnish for salads or fold them into bread dough, adding a savory crunch that store-bought bread simply cannot replicate.
Achieving Perfect Clarity
If you find your rendered fat is still a bit cloudy after the first pour, you can re-melt it and pass it through a fresh, clean layer of cheesecloth once more. Another pro-tip is to incorporate a small amount of salt at the beginning of the process; the salt helps draw out the impurities from the fat tissues, acting as a natural clarifying agent that leaves you with a cleaner, more vibrant product.
Mastering High-Heat Searing with Tallow
The most frequent complaint I hear from home cooks is that they cannot achieve that deep, mahogany crust on a steak like they see at high-end steakhouses. The secret is almost always the fat. Vegetable oils, even those marketed as "high heat," have a tendency to break down and release off-flavors when exposed to the extreme temperatures required for a proper Maillard reaction. Beef tallow, however, thrives in this environment. Because it is chemically related to the steak itself, it creates a flavor bridge that enhances the meat’s natural earthiness rather than masking it.
When you sear with tallow, you are essentially "basting" the meat in its own essence. Start by getting your cast-iron skillet ripping hot. Add a tablespoon of tallow, allow it to melt and shimmer—do not wait for it to smoke—and then lay your steak in the pan. The fat will immediately hiss, creating a bubble of heat that penetrates the surface of the meat instantly. This leads to a more uniform crust that locks in the juices, ensuring that the middle of your steak stays perfectly medium-rare while the exterior achieves a restaurant-quality char.
The Basting Technique
Once you have seared both sides of the steak, lower the heat slightly and drop in a knob of fresh tallow along with some crushed garlic and rosemary. As the tallow melts, spoon the hot, aromatic liquid over the steak repeatedly. This is known as arroser in French culinary terms. The beef tallow absorbs the aromatics and transfers that flavor directly into the crust of the meat, resulting in a depth of flavor that is simply impossible to achieve with a neutral oil like canola.
Searing Beyond Beef
Tallow is not just for steaks. Try searing your portobello mushrooms or thick slices of eggplant in tallow. The fat will infuse into the spongy cells of the vegetables, adding a savory richness that makes them taste almost like meat. It is a fantastic way to elevate vegetarian dishes and provide the mouthfeel that is often lacking in meat-free meals.
The Baker’s Secret: Lard for Perfect Pastry
If you have ever been frustrated by a pie crust that turns out tough, chewy, or soggy, you are likely using the wrong fat. Lard is a superior shortening agent because it has a larger crystal structure than butter. When you cut lard into your flour, it creates distinct pockets of fat that melt slowly in the oven, creating layers of steam that push the flour apart. This is the physical mechanism that creates the "flake" in a pie crust. Butter, while delicious, is 15-20% water, which can lead to gluten formation and a tougher dough if you aren't careful.
When using lard in baking, it is crucial that the fat is cold. Keep it in the refrigerator until the very second you need to incorporate it into your flour mixture. Use a pastry blender or your fingertips to work the lard into the flour until you have small, pea-sized chunks. Do not overwork the dough; if you mix it until it is perfectly smooth, you will destroy those delicate layers of fat, and your crust will lose its signature snap and flakiness.
Balancing Flavor and Texture
Many professional pastry chefs use a 50/50 blend of butter and lard. The lard provides the structural integrity and the ultimate flake, while the butter provides the richness and the classic flavor profile that diners expect. When you make a crust with this combination, you get the best of both worlds: a crust that shatters perfectly under the fork but carries the golden color and buttery aroma of a traditional French patisserie.
Beyond the Pie
Lard is also a secret weapon for biscuits, scones, and even savory crackers. Because lard is essentially flavor-neutral, it doesn't fight with your ingredients. If you are making a batch of rosemary-sea salt crackers, using lard ensures that the flavor of the herbs remains the star of the show. It creates a texture that is impossibly crisp and light, a stark departure from the dense, heavy versions often found in supermarket aisles.
Deep Frying: The Golden Standard
When we talk about fried food, we are really talking about the transfer of heat through fat. The goal of deep frying is to cook the food so quickly that the moisture inside turns to steam, preventing the fat from soaking into the product. This requires a fat that is stable at high temperatures and doesn't impart a chemical or processed taste. Beef tallow is the absolute gold standard for deep frying. Because it is highly saturated, it is less prone to oxidation during the frying process, meaning you can reuse it more times than vegetable oil.
When frying in tallow, you will notice that the food does not feel "greasy" in the same way it does when fried in seed oils. The tallow forms a thin, crisp barrier that seals the exterior of the chicken or potato. When the food cools slightly, the fat that remains on the surface solidifies into a clean, non-translucent film that has a pleasant texture, whereas vegetable oil remains a sticky, oily residue that coats the roof of your mouth.
Temperature Management
To fry properly, you need to maintain your fat at 350°F to 375°F (177°C - 190°C). Use a heavy-duty thermometer to track the temperature. If you add too much food at once, the temperature will drop, leading to soggy, oil-logged food. Fry in small batches, and always allow the temperature to return to the target range between rounds. This level of discipline is what separates a backyard fry-up from a professional-grade dish.
Rejuvenating Your Frying Fat
You can use your tallow for multiple frying sessions, provided you follow the right storage protocol. After you finish frying, let the fat cool to a safe temperature, strain it through a fine-mesh sieve to remove all crumbs, and store it in a cool, dark place. The presence of food particles is what causes the fat to go rancid, so thorough straining is the single most important step for maintaining a clean, reusable frying medium.
"True flavor resides in the fats we use. Once you start cooking with rendered animal fats, you will find that store-bought oils taste like nothing more than a pale, synthetic shadow of what cooking is meant to be."
The "Fry" Test
If you want to know if your fat is still good to use, smell it. If it smells clean and neutral, you are good to go. If it smells like the food you previously fried or, worse, like stale chemicals, it is time to discard it or use it for non-edible purposes like candle making or outdoor bird feeders. Tallow is a precious resource, but it is not immortal; treat it with the respect it deserves and it will return the favor in your cooking.
Final Thoughts
The journey into rendering your own tallow and lard is about more than just having a better ingredient in your cupboard; it is about reclaiming the independence of the home cook. We live in an era where convenience is often prioritized over quality, yet the most flavorful food in history was built on the foundation of traditional ingredients and time-honored techniques. By mastering the art of rendering, you are cutting out the middleman and creating a pantry staple that is healthier, tastier, and more versatile than anything you can buy in a bottle.
Start small. Buy a pound of suet from a local rancher, clear an afternoon, and focus on the process. Observe how the fat changes from opaque white to liquid gold. Feel the texture of the finished product. Most importantly, taste the difference in your very first meal—whether it is a perfectly seared steak, a batch of impossibly flaky biscuits, or the crispest potatoes you have ever made. You will quickly realize that the secret to culinary mastery isn't some complex French technique or an expensive piece of kitchen gadgetry; it is simply knowing how to handle your fats.
As you integrate these traditional ingredients into your daily routine, you will find your own culinary voice evolving. You will start to see the potential in ingredients that others ignore, and you will understand why the best kitchens in the world refuse to compromise on the quality of their fats. The next time you find yourself unhappy with the results of a dish, don't reach for a different spice or a new pan. Look at your fat. If it’s not up to standard, well, you know who to blame. Keep rendering, keep cooking, and enjoy the profound difference that traditional fats bring to your table. The craft of the home cook is alive and well, and it starts right here with the simple, satisfying act of mastering your own tallow and lard.




Get the Next Recipe
Weekly recipes, techniques, and gear picks — straight to your inbox.
