The Home Cook’s Guide to Tempering Chocolate: How to Achieve a Professional Snap and Gloss at Home
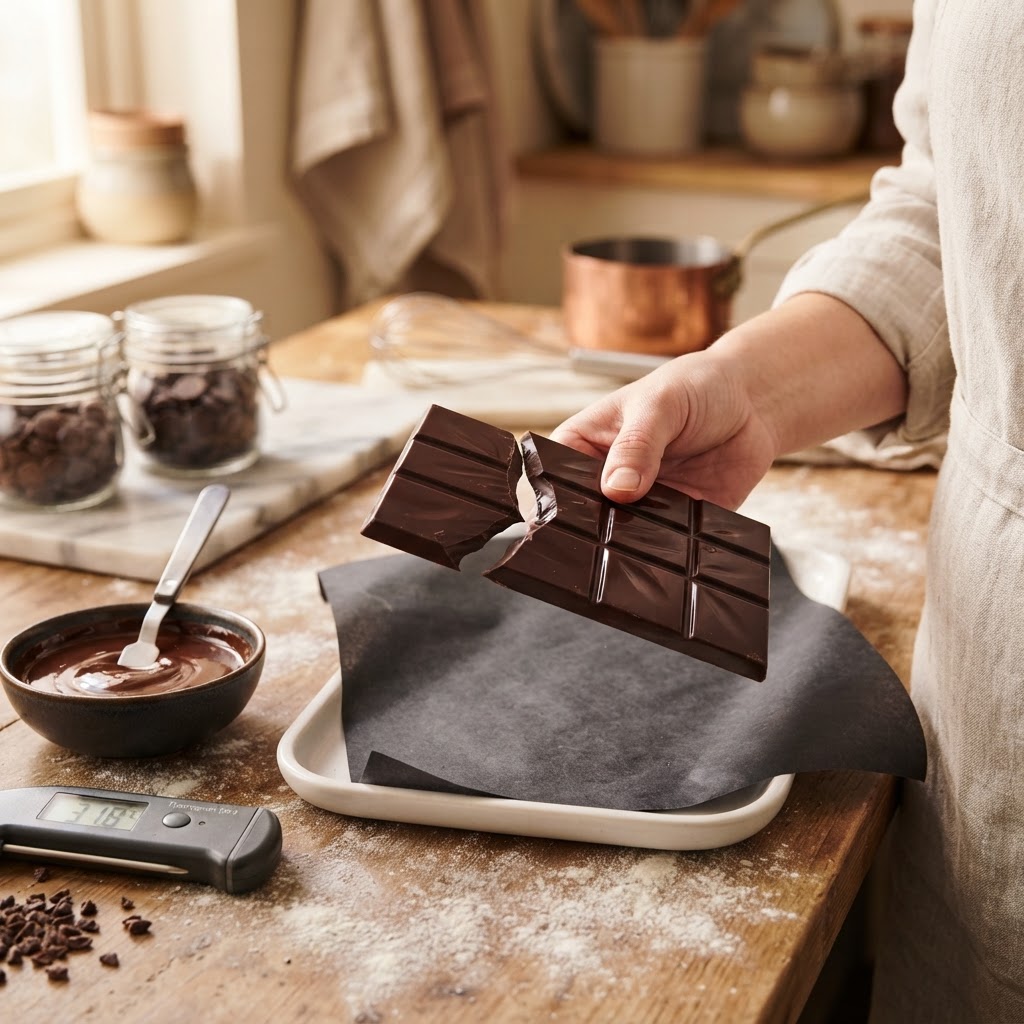
There is a profound, almost mystical transformation that occurs when you melt a dull, matte block of chocolate and coax it back into a shimmering, crisp confection. For many home cooks, the mere mention of tempering chocolate feels like an invitation to disaster—a high-stakes game of patience and thermodynamics that often ends in gray, bloomed streaks and frustrated tears. But here at Blame The Chef, we believe that every kitchen can be a professional atelier if you have the right guidance and a little bit of nerve. Tempering is not a dark art; it is simply the science of encouraging cocoa butter to form stable, uniform crystals, which is the secret behind that satisfying, audible "snap" every chocolatier craves.
Understanding the internal structure of chocolate is the key to mastering this process, regardless of whether you are working with dark, milk, or white varieties. When chocolate is in its raw, "out of the bag" state, its cocoa butter crystals are arranged in a stable, organized configuration that gives the chocolate its characteristic gloss and snap. As soon as you apply heat, you dismantle that structure, turning the chocolate into a chaotic, molten mess. The goal of tempering is to guide that liquid state back into a stable crystalline formation as it cools. By controlling the temperature fluctuations with precision, you lock those crystals into place, ensuring your finished truffles, bars, and dipped strawberries look and feel like they just came off a boutique display shelf.
Throughout this guide, we will strip away the intimidation factor and focus on the practical, tactile realities of the kitchen. You do not need expensive enrobing machines or marble slabs that span your entire countertop to achieve professional results. All you truly need is a reliable digital thermometer, a heat-resistant bowl, a sturdy rubber spatula, and a willingness to monitor your progress with meticulous care. Whether you are aiming to create intricate molded chocolates or simply want to finish a dessert with an elegant chocolate garnish, the following steps will provide you with the framework to succeed. Put on your apron, clear your workspace of any stray water droplets, and let us dive into the wonderful world of crystalline stabilization.
The Chemistry of Cocoa Butter Crystals
To truly understand why tempering is necessary, one must look at the invisible world inside the chocolate. Cocoa butter is polymorphic, meaning it can crystallize into six different forms, labeled I through VI. These forms behave differently based on how the chocolate is cooled, and only one of them, the Form V beta crystal, provides the qualities we desire: the snap, the gloss, and the resistance to melting at room temperature. If you allow chocolate to cool naturally without tempering, it will likely form a mix of these crystal types, leading to a dull finish and a soft texture that melts on your fingers far too quickly.
Why Tempering Matters
The process of tempering is essentially a "weeding out" exercise. By melting the chocolate, you destroy all existing crystal structures, effectively resetting the chocolate to a blank slate. As you bring the temperature down, you are creating an environment where Form V crystals can thrive while suppressing the less desirable, unstable crystals. If you are successful, the result is a product that contracts slightly as it cools, making it easy to remove from molds, and one that remains stable and shiny for weeks or even months.
The Impact of Temperature
Temperature is the ultimate arbiter in this scientific process. You will find that dark, milk, and white chocolates have slightly different working ranges, largely due to the varying amounts of milk solids and sugar content. Dark chocolate, with its higher cocoa butter concentration, is generally the most forgiving and easiest to temper. Milk and white chocolates contain more sugar and dairy, which interfere with crystal formation, requiring more precision and a slightly lower working temperature. Always keep a digital infrared or probe thermometer handy; relying on touch alone is a gamble that rarely pays off for the home cook.
"Tempering is not about the equipment you own, but the attention you pay to the thermometer. When the temperature fluctuates, the crystals follow suit, so keep your eyes on the needle and your hand steady."
Essential Tools and Preparation
Before you even open a bag of chocolate, your environment must be perfectly prepared. Chocolate is notoriously sensitive to its surroundings, and even the smallest amount of moisture can spell disaster. Water and chocolate are mortal enemies; even a single drop can cause the chocolate to seize, turning your smooth, glossy liquid into a thick, grainy paste that is impossible to salvage for tempering. Ensure all your bowls, spatulas, and workstations are completely dry. If you have been washing dishes, give everything an extra wipe-down with a lint-free cloth or paper towel before you begin.
Choosing Your Chocolate
Not all chocolate is created equal, and for tempering, the quality of your base product is paramount. Look for high-quality couverture chocolate, which has a higher percentage of cocoa butter (usually 32% to 39%) compared to standard supermarket chocolate chips. Chips are often manufactured with stabilizers that prevent them from melting down properly, making them a nightmare for tempering. Invest in professional-grade bars or callets from reputable brands; it will save you significant frustration and ensure that your final product has the best possible flavor and texture.
Maintaining Your Workspace
Work in a cool, dry room—ideally around 65°F to 68°F. If your kitchen is too hot, the chocolate will take too long to set, which gives unstable crystals more time to form and ruins the temper. If the room is too humid, condensation can form on the surface of your molds or chocolates, leading to bloom or sticky surfaces. Clear off your counters, organize your tools, and make sure you have everything you need within arm's reach before the heat goes on. Being prepared allows you to focus entirely on the bowl in front of you.
* Digital thermometer (the most critical tool)
* Stainless steel or glass heat-resistant mixing bowl
Saucepan for a bain-marie* (water bath)
* High-quality silicone spatula
* Small offset spatula for testing
* Parchment paper or acetate sheets for testing samples
The Method: Seeding (The Home Cook’s Gold Standard)
The seeding method is the most reliable technique for the home cook because it requires the least amount of specialized equipment and offers the most control. The core concept is simple: you melt a portion of your chocolate to a specific temperature, then add "seed" chocolate (solid, tempered chocolate) to drop the temperature. These seed pieces act as a template, encouraging the melted chocolate to form the same stable crystals as the solid pieces. It is a foolproof way to initiate the tempering process without needing to temper massive batches at once.
The Step-by-Step Seeding Process
Testing for Temper
Before you begin pouring your chocolate into molds or using it for dipping, you must ensure it is truly in temper. Take your offset spatula, dip it into the chocolate, and set it aside for about 3 to 5 minutes at room temperature. If the chocolate sets quickly and develops a uniform, glossy sheen without streaks, you are ready to go. If it remains dull, streaky, or tacky after five minutes, you need to continue working the chocolate or adjust the temperature slightly. Do not skip this test—it is your insurance policy against a ruined batch.
Troubleshooting Common Tempering Failures
Even the most seasoned chefs occasionally run into trouble. If you find yourself staring at a bowl of chocolate that just refuses to behave, do not panic. Most issues in tempering are easily corrected if you catch them early. The most common problem is blooming, which appears as a white, dusty-looking layer on the surface of your chocolate. This happens when the cocoa butter separates from the solids due to temperature fluctuations, but it is purely cosmetic—the chocolate is still safe to eat, though it lacks the visual appeal of a perfectly tempered batch.
When Your Chocolate Seizes
If you accidentally get water in your chocolate, it will seize immediately, turning into a grainy, stiff clump. There is no going back once this happens; the sugar crystals have grabbed the moisture and clumped together. Don't throw it away, though! You can use this "seized" chocolate to make a ganache by adding hot cream or milk until it smooths out. It can no longer be used for tempering, but it is perfectly fine for fillings, truffles, or sauces.
When the Chocolate is "Out of Temper"
If your test sample looks streaky or dull, the chocolate is likely "out of temper." This often means it was either not cooled enough to initiate crystal growth or it was cooled too quickly, causing unstable crystals to dominate. If the chocolate is still liquid, you can try adding a few more small pieces of high-quality tempered chocolate and stirring vigorously to "re-seed" the mixture. If it has already started to harden, you will need to gently re-melt the entire batch and restart the process from the beginning.
"A bowl of stubborn chocolate is not a failure; it is a lesson in patience. If the crystals aren't cooperating, simply restart the cycle. The cocoa butter will forgive you if you are willing to try again."
Grainy texture:* Usually indicates the chocolate was overheated or got too cold.
Dull finish:* Often caused by ambient temperature being too high or insufficient stirring during the cooling phase.
Dark streaks:* A sign of improper crystal formation or uneven mixing.
Advanced Techniques: Beyond the Basics
Once you have mastered the basic seeding method, you can start experimenting with more advanced techniques, such as tabliering. This is the classic European method that involves pouring two-thirds of the melted chocolate onto a clean, cool marble slab and working it back and forth with a bench scraper. The marble cools the chocolate rapidly, encouraging crystal growth, after which you scrape it back into the bowl with the remaining third of warm, melted chocolate. It is a dramatic, highly effective method, but it requires a bit of space and a lot of confidence.
Enrobing and Dipping
Once your chocolate is perfectly tempered, you can dive into the world of enrobing. Whether you are covering truffles, dried fruits, or nuts, the goal is a thin, uniform coating. Use a dipping fork, submerge the item completely, and tap the fork gently against the side of the bowl to knock off the excess. This prevents a "foot" (a pool of chocolate) from forming at the base of your confection. Place the dipped item onto parchment paper or a silicone mat and allow it to set undisturbed in a cool, dry area.
Incorporating Flavors and Colors
If you want to add flavors, be very careful. Oil-based flavorings are generally safe, but avoid anything water-based, as it will cause the chocolate to seize. If you are using colored cocoa butter, it must be melted and tempered separately before being painted into your molds. Creating multi-colored, professional-looking molded chocolates requires layering tempered colored cocoa butter into a mold, letting it set, and then filling it with your tempered base chocolate. The result is a stunning, high-contrast finish that looks like it cost five dollars per piece.
Maintaining Your Temper
The battle isn't over once you have tempered your chocolate; you must maintain it. Chocolate that is left to sit for a long period of time will eventually lose its temper. You will notice it getting thicker and duller as you work. To keep it in the "sweet spot" for as long as possible, keep your bowl sitting in a warm spot, or occasionally use a hair dryer or a heat gun to gently warm the bowl from the outside. Stir it frequently—movement keeps the crystals suspended and prevents them from clumping together.
The Role of Stirring
Stirring is perhaps the most underrated aspect of tempering. By keeping the chocolate in constant motion, you are physically forcing the cocoa butter crystals to distribute throughout the mass. If you stop stirring, the crystals will settle or form large, unorganized clusters, which is exactly the opposite of what you want. A good rule of thumb is to never stop moving the spatula, even when you are just waiting for a test piece to set on the counter.
Storing Your Masterpieces
Once your chocolates are finished and have set, store them in an airtight container in a cool, dry place. Do not store them in the refrigerator unless absolutely necessary, as the condensation that forms when you take them out can ruin the shine and cause blooming. If you live in a particularly humid or hot climate, the fridge is a necessary evil—if you must use it, place the chocolates in an airtight container and let them reach room temperature slowly before opening the lid to minimize condensation.
The Art of the Finish
The final step in your journey is the presentation. Even if your chocolate is tempered perfectly, the way you finish your pieces determines the final "wow" factor. For bars, use high-quality polycarbonate molds, which give a mirror-like finish that you simply cannot get with silicone. For truffles, consider dusting them with high-quality cocoa powder, finely chopped nuts, or even a tiny pinch of sea salt. The contrast between the snap of the shell and the ganache inside is what separates an amateur dessert from a professional one.
Understanding Couverture
Always check the label of your chocolate. You want couverture, which means it contains at least 32% cocoa butter. This is the "gold standard" for tempering because the high fat content makes the chocolate fluid and easy to work with. If you are using chocolate meant for baking or eating (like standard semi-sweet bars), you might find it too thick for coating or dipping. You can add a very small amount of high-quality cocoa butter (or even a neutral oil, in a pinch, though cocoa butter is superior) to thin the chocolate out, but be careful not to overdo it, or it will affect the set of your final product.
The Chef’s Secret: Patience
Ultimately, the most important tool in your arsenal is your own sense of patience. Tempering cannot be rushed. If you try to force the chocolate to cool by putting it in the freezer or by adding too much ice to your water bath, you will create a mess of unstable crystals. Respect the temperature ranges, follow the cooling curve, and remember that the chocolate is a living, breathing component of your recipe. If you approach it with care and respect, the chocolate will reward you with a professional-grade product that will impress even the most skeptical critics.
Final Thoughts
Mastering the art of tempering chocolate is a rite of passage for every home cook who aspires to elevate their dessert game. It is a process that demands precision, but it is also one that rewards the curious mind. By learning to control the cocoa butter crystals, you move from being someone who merely melts chocolate to someone who understands the very fabric of the ingredient. You gain the power to create professional-grade ganaches, glossy molded bars, and crisp, delicate garnishes that bring a sense of wonder to any dessert plate.
At Blame The Chef, we firmly believe that the kitchen should be a space for experimentation and growth. Do not be discouraged if your first attempt results in a bowl of dull, soft chocolate—it has happened to every chef who has ever worked in a pastry kitchen. The secret is to learn from the texture, monitor the temperature, and try again. Each attempt brings you closer to that perfect, audible snap that tells the world you have mastered your craft.
As you move forward, keep your tools clean, your thermometer calibrated, and your passion for learning high. Whether you are making chocolates for a holiday gift, a special event, or just because you deserve a treat that tastes like it came from the finest pâtisserie, remember that the most important ingredient in any recipe is the care you put into the process. Take your time, enjoy the transformation, and never forget that there is no culinary challenge you cannot conquer with a little bit of science and a lot of heart. Happy tempering!
The journey of the chocolatier is a long one, filled with trials, errors, and moments of pure, sweet success. You have now been equipped with the foundation you need to handle dark, milk, and white chocolates with the grace of a professional. Keep experimenting with different origins of cacao, as each one will have a slightly different working profile and flavor intensity. Some are fruity, some are earthy, and some are intensely floral. By tempering them properly, you are honoring the craftsmanship that went into producing that cacao, allowing those complex notes to shine through in a clean, crisp, and beautifully finished package.
Continue to refine your process. Perhaps you will move on to enrobing complex, multi-layered bonbons or crafting delicate sugar-free options. The skills you have learned here—the seed method, the importance of constant agitation, and the critical nature of temperature control—are the building blocks for every advanced technique you might choose to pursue. The home kitchen is not a place for compromise, and with these techniques, you are well on your way to setting a new standard for your personal culinary endeavors.
Lastly, remember to share your creations. Chocolate is a social food, meant to be tasted, experienced, and enjoyed in the company of others. When you present someone with a perfectly tempered truffle, you are not just giving them a piece of candy; you are giving them the result of your discipline and your study. It is a gesture of kindness and skill that never goes unnoticed. Keep your tempering bowl out, keep your spatulas ready, and keep pushing the boundaries of what you thought was possible in your home kitchen. You are now part of a long tradition of people who refuse to blame the ingredients when they can simply master the process instead.
As you pack away your bowls and wipe down your counters for the last time today, take a moment to look at your finished work. Look for the sheen on the surface of your chocolate; hold a piece to your ear and listen for that crisp, sharp snap. If you hear it, you have done the work. You have tamed the crystals and turned liquid cocoa butter into a polished, stable masterpiece. That sound is the sound of success, and it is a reward well-earned after the work you have put in. Tomorrow is another day, and another opportunity to refine your technique, but for today, you can rest easy knowing you have conquered the temper.
Continue to challenge yourself with new recipes, perhaps combining your tempered chocolate with ganache, praline, or sea salt caramel. The possibilities are truly endless once you have unlocked the technique. Do not be afraid to fail, for in the world of chocolate, every "failed" batch is just a base for a rich, delicious sauce or a decadent filling. Keep the joy in the kitchen, keep the temperature in check, and most importantly, enjoy the delicious fruits of your labor. The world of chocolate is wide, deep, and incredibly satisfying, and you have officially taken your first, firm steps into its heart.
If you find yourself stuck, refer back to the basics: the temperature of your water bath, the quality of your couverture, and the consistency of your movement. These three pillars will see you through any obstacle. There is no magic, only methodology. There is no luck, only preparation. Your kitchen is now an extension of your creative potential, and that is a truly beautiful thing. So, go forth and create something wonderful, something that snaps, something that shines, and something that tells a story of patience and precision. The next batch is already waiting for your touch.
To round out your professional approach, consider keeping a culinary journal. Note the type of chocolate you used, the starting temperature, the working temperature you settled on, and the ambient temperature of your kitchen on that day. Over time, you will build a database of what works best for your specific environment and your specific preferences. This data-driven approach is what separates the casual cook from the true culinary artist. You will find that you start to get a "feel" for the chocolate, a sixth sense developed through repetition and documentation. That intuition will eventually allow you to temper without even needing to glance at the thermometer every five seconds, though we always recommend keeping it close by just in case!
There is a serene, meditative quality to tempering chocolate. The sound of the spatula against the bowl, the shifting colors of the cooling mass, the way the surface begins to dull and then suddenly snap back into a lustrous, brilliant shine—it is a sensory experience that grounds you in the moment. In a world that is always rushing, taking an hour or two to focus entirely on the microscopic alignment of cocoa butter crystals can be a welcome relief. It is a practice in mindfulness, and the outcome is something that brings joy to everyone who tastes it.
Finally, do not underestimate the power of your own enthusiasm. Cooking is contagious. When you share your tempered chocolates with friends and family, tell them about the process. Explain the crystals, show them the snap, and share the tips you have learned here. By demystifying the process for them, you might just inspire someone else to pick up a spatula and try their hand at it as well. That is how culinary traditions are passed down and how the art of the chocolatier stays vibrant and alive in every generation. Keep tempering, keep sharing, and keep blaming the chef only when you have had far too much delicious chocolate to handle.
Remember that the goal is progress, not perfection. If a piece of chocolate has a tiny air bubble or if your dip isn't quite perfectly symmetrical, don't sweat it. The flavor remains, and that is the most important part of any culinary endeavor. Your guests will be far more impressed by the fact that you made these yourself than they will be concerned with a minor aesthetic flaw. Embrace the handmade nature of your work; it is the fingerprint of the maker that makes every bite unique. You are the architect of these flavors, the engineer of this texture, and the master of your kitchen.
We hope this guide serves as a well-worn companion in your kitchen for years to come. Whenever you feel the urge to create something truly elegant, return to these pages, review the temperature charts, and dive back into the bowl. The science is constant, the method is proven, and your success is waiting. Go forth and create, experiment, and enjoy every single snap. Your chocolate journey is just beginning, and we are thrilled to have been a part of your path to becoming a true master of the melt. Happy tempering, and may every batch you make be as brilliant as the last.

Get the Next Recipe
Weekly recipes, techniques, and gear picks — straight to your inbox.
