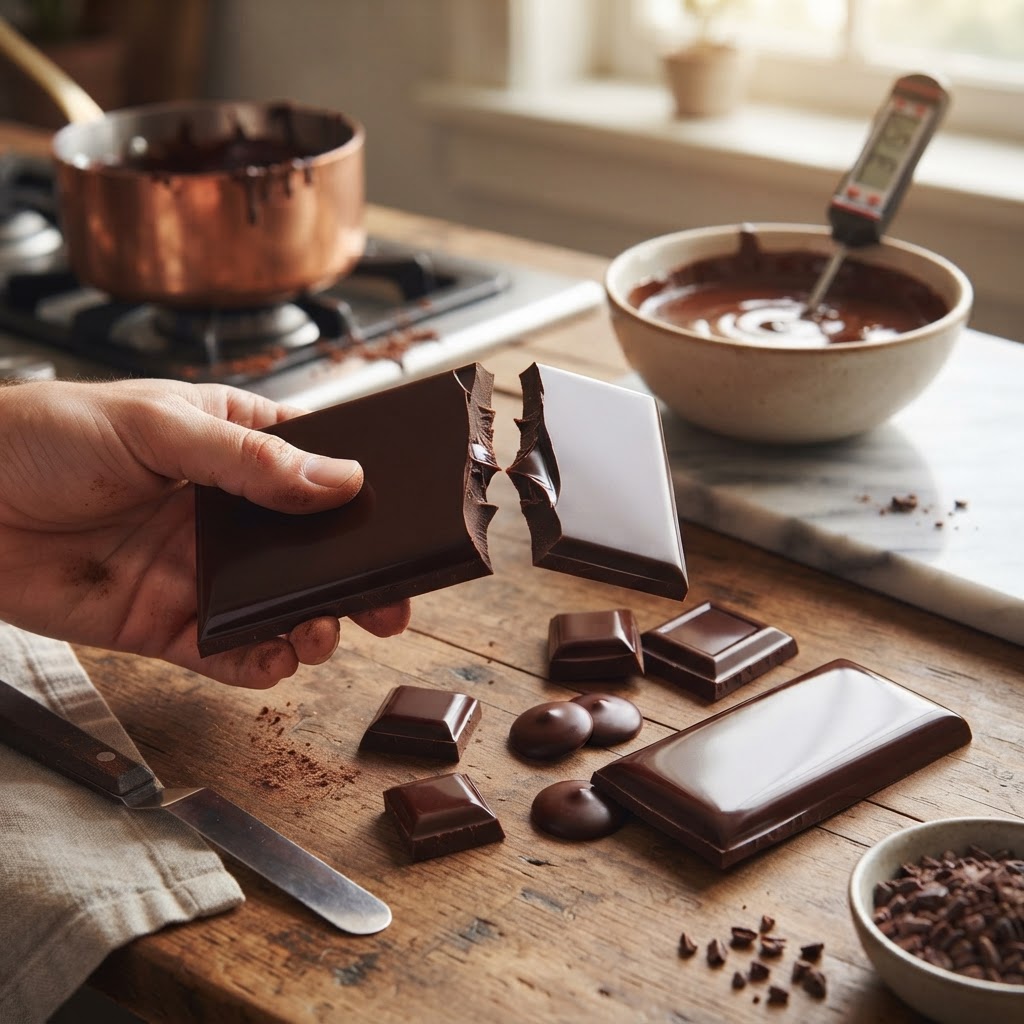
The Home Cook’s Guide to Tempering Chocolate: Mastering Crystal Stabilization for a Professional, Snap-Perfect Finish
There is a particular kind of heartbreak that every home baker knows all too well: you spend hours meticulously crafting a ganache, piping elegant shells, or dipping strawberries in high-quality cocoa, only to find the results turning dull, streaky, or stubbornly soft at room temperature. For years, I told myself that professional chocolatiers possessed some sort of mystical, alchemical secret that couldn't possibly be replicated in a standard home kitchen. I blamed the weather, the humidity, and occasionally the quality of the chocolate itself for those disastrous, bloom-covered batches that lacked that elusive, satisfying snap. The truth, however, is far less magical and much more scientific; the secret isn't in the brand of chocolate you buy, but in the precise manipulation of temperature, a process known as tempering.
When we talk about tempering, we are essentially acting as conductors for the cocoa butter inside your chocolate. Cocoa butter is a polymorph, meaning it can crystallize into several different forms depending on how it cools. Most of these forms are unstable, resulting in a soft, grainy, or chalky mess that melts the moment it touches your skin. By learning how to guide these crystals into the stable Form V state, you are ensuring that your chocolate sets with a glossy finish, a clean break, and the structural integrity required for professional-grade confectionery. It is a lesson in patience, thermal precision, and the quiet beauty of food science, and once you master it, your kitchen will never be the same.
Before you even reach for your double boiler, it is important to accept that tempering is as much about observation as it is about following instructions. You will need to abandon your instincts to just "melt and go," and instead embrace the slow, methodical process of heating, cooling, and re-warming. This guide is designed to move you past the frustration of "seized" chocolate and into the world of professional finishing. Whether you are aiming for perfectly smooth truffle shells, intricate chocolate garnishes, or simply trying to get a decent bar of couverture to cooperate, we are going to break down the chemistry so you can stop blaming the equipment and start taking control of your cocoa.
The Chemistry of Cocoa Butter Crystals
At the heart of every piece of high-quality chocolate lies the complex structure of cocoa butter. Cocoa butter is a fat that can solidify in six different crystal forms, labeled I through VI. Only one of these—Form V—is what we want for our final product. Form V crystals provide that signature high-gloss finish and the sharp "snap" that indicates the chocolate has been tempered correctly. Forms I through IV result in chocolate that is mushy, grainy, or prone to "fat bloom," that unsightly greyish-white film that appears when unstable fats migrate to the surface.
To achieve that crystalline perfection, we must put the chocolate through a specific thermal cycle. This cycle is intended to melt all existing crystals, then encourage the formation of stable crystals while discouraging the formation of unstable ones. If you skip this, you are simply allowing the cocoa butter to solidify at random, which almost always results in a dull, unappealing product. Tempering is not an optional "extra" step; it is the fundamental process of creating chocolate as it was meant to be experienced.
The Role of Thermal Agitation
Professional chocolatiers often refer to this process as "seeding" or "tabling." Regardless of the method, the goal is consistent: moving the chocolate through a precise temperature curve. You start by melting the chocolate completely to destroy any bad crystal structures. You then cool it, and finally, gently reheat it to reach the ideal working state. This agitation, through constant stirring or scraping, helps the stable Form V crystals multiply throughout the mass of the chocolate.
"Tempering is the bridge between a simple melted confection and a professional-grade dessert. It is the moment where science and art meet, turning raw ingredients into a structural masterpiece that feels as good as it tastes."
Choosing Your Chocolate and Preparation
Not all chocolate is created equal when it comes to tempering. If you are grabbing a standard bag of semi-sweet chocolate chips from the baking aisle, you are likely starting at a disadvantage. Many mass-produced chocolate chips contain added stabilizers and lower ratios of cocoa butter, which are designed to keep the chips from melting in the oven, not to melt smoothly for tempering. For the best results, you must invest in high-quality couverture chocolate.
Couverture is defined by its high percentage of cocoa butter—typically 32% or higher. This extra fat is essential because it provides the smooth flow and glossy finish we associate with high-end bonbons. Look for chocolate in the form of pistoles or callets; these small, uniform discs melt much more evenly than large, hand-chopped chunks of a solid bar. If you must use a bar, chop it as finely and evenly as possible, as uneven sizes will lead to hot spots and scorched chocolate during the melting phase.
Humidity and Temperature Control
The environment of your kitchen plays a massive role in your success. Chocolate is notoriously sensitive to moisture; even a single drop of water can cause the entire batch to seize, turning it into a stiff, clumpy paste that cannot be salvaged. Ensure all your bowls, spatulas, and work surfaces are bone-dry. Additionally, try to work in a room that is between 65°F and 68°F. If your kitchen is too hot, the chocolate will take forever to set; if it is too cold, it may set too quickly before you have a chance to finish your work.
The Seeding Method: A Reliable Technique for Home Cooks
For most home kitchens, the seeding method is the most reliable and least messy technique. It involves melting about two-thirds of your chocolate, and then introducing the remaining one-third as "seeds" to lower the temperature and provide a template for the stable crystals to form. This method is far more forgiving than the professional "tabling" method, which requires dumping molten chocolate onto a marble slab and scraping it back and forth until it reaches the desired temperature.
To begin the seeding method, place two-thirds of your chocolate in a heat-proof glass or stainless steel bowl set over a pot of simmering (not boiling) water. Ensure the bottom of the bowl is not touching the water, as direct steam heat can easily scorch the chocolate. Stir the chocolate gently with a silicone spatula, using a digital thermometer to track the temperature closely. For dark chocolate, you want to bring the mass to about 115°F to 120°F (46°C to 49°C). For milk and white chocolate, keep the heat lower, around 110°F (43°C), as their higher sugar and milk content makes them more prone to burning.
Once the chocolate has reached the target temperature, remove the bowl from the heat. Now, stir in your remaining unmelted "seed" chocolate. This serves two purposes: it cools the molten chocolate rapidly and introduces the perfect crystal structure from the pre-tempered seed chocolate. Continue stirring constantly. This agitation is crucial. You want the temperature of the entire batch to drop to the working range—typically between 88°F and 90°F (31°C to 32°C) for dark chocolate, and 84°F and 86°F (29°C to 30°C) for milk and white chocolate.
Mastering the Temperature Curves
Every type of chocolate demands a slightly different thermal path. Dark chocolate, with its high cocoa mass, is the most robust, while milk and white chocolate—which contain higher levels of milk proteins and sugars—are significantly more delicate. Understanding these temperature "sweet spots" is what separates the home cook from the professional. Keep a notebook handy to record the ambient room temperature, the type of chocolate you used, and the final result of your tempered batch.
Key Working Temperatures (Fahrenheit)
Dark Chocolate:* Melt to 118°F, cool to 82°F, reheat to 89°F.
Milk Chocolate:* Melt to 113°F, cool to 80°F, reheat to 86°F.
White Chocolate:* Melt to 110°F, cool to 79°F, reheat to 84°F.
Once you hit that final reheat temperature, your chocolate is technically in temper. To test it, dip a clean palette knife or a piece of parchment paper into the chocolate and set it aside for three to five minutes. If the chocolate is correctly tempered, it will set quickly and cleanly with a uniform, glossy sheen. If it remains streaky, dull, or soft, you need to go back and work the chocolate more or re-evaluate your cooling phase. Do not panic—tempering is a process that can be repeated if you get it wrong the first time.
"The difference between a amateur chocolate creation and a professional one is entirely found in the temper. It is the difference between a dull, waxy texture and a crisp, clean snap that releases a burst of flavor across the palate."
Troubleshooting Common Tempering Disasters
Even the most experienced pastry chefs run into issues with tempering. The most common culprit is usually a temperature spike. If your chocolate accidentally rises above the "melt" temperature, you risk burning the cocoa butter, which causes a grainy, burnt flavor that cannot be fixed. If this happens, it is best to set that batch aside for use in brownies or cookies where tempering is irrelevant, and start fresh with a new batch of chocolate.
Another common issue is streaking. If your chocolate shows white, marbled streaks after it sets, it means the chocolate was not properly agitated or the temperature was not uniform throughout the bowl. As you work, your chocolate will naturally lose heat and eventually fall out of temper. This is why professional chocolatiers use heat lamps or intermittent, very short bursts of heat to maintain the temperature throughout the dipping process. Keep your thermometer nearby at all times; checking the temperature every few minutes will save you from accidental blooming.
Dealing with Seizure
If you accidentally introduce water into your chocolate, it will "seize" instantly. This happens because the sugar and cocoa particles inside the chocolate grab onto the water droplets and form a thick, pasty, unworkable mass. Unfortunately, there is no way to "fix" seized chocolate to make it smooth again for dipping. Instead, you can add a significant amount of hot cream to turn the seized chocolate into a rich, decadent ganache. It is a brilliant way to save your ingredients and turn a technical failure into a delicious pantry staple.
Essential Tools for the Professional Home Kitchen
You do not need a fancy marble slab or a professional-grade tempering machine to achieve results that rival a chocolatier's shop. However, you do need the right set of basic tools. A high-quality digital instant-read thermometer is your single most important piece of equipment. Without it, you are merely guessing, and in chocolate work, guessing is the path to failure. Look for a model that updates quickly, as even a few seconds of delay can lead to the chocolate overshooting its target temperature.
A heavy-bottomed stainless steel bowl is preferable to plastic or thin glass, as it holds heat more consistently, which helps stabilize the temperature during the cooling phase. Silicone spatulas are essential for scraping down the sides of the bowl to ensure no untempered chocolate is left behind. Finally, having a marble pastry board or a simple stone countertop can be a huge help when you are working with larger batches, as the cold surface helps pull the heat out of the chocolate during the cooling phase.
Organizing Your Workspace
Before you melt a single piece of chocolate, make sure you have your dipping tools, parchment-lined trays, and molds ready to go. Tempering is a time-sensitive task. Once your chocolate is in the perfect window, you don't want to be scrambling for tools. Organize your station in a "production line" style—melt station, dip station, and set station. Keeping your workspace clean and cool is essential to preventing the chocolate from falling out of temper while you are in the middle of production.
Why Quality Ingredients Matter
We often blame our tools or our techniques when a recipe fails, but sometimes the answer is much simpler: the quality of the chocolate. When you purchase high-end chocolate, you are paying for a higher percentage of pure cocoa butter and, often, a more rigorous refinement process known as conching. Conching is the process of crushing and mixing the cocoa solids to create a silky-smooth texture. Lower-quality chocolates are often grainy from the start, and no amount of perfect tempering will make a grainy, low-fat chocolate suddenly turn into a smooth, professional-grade finish.
Look for brands that are transparent about their cocoa butter content. Avoid "candy melts" or "confectionery coatings"—these products usually replace cocoa butter with hydrogenated vegetable oils. While they are very easy to work with and never need to be tempered, they lack the complex flavor profile and the luxurious "melt-in-your-mouth" sensation that real chocolate provides. If you want the experience of true chocolate, you must use real, butter-based cocoa products, and that means taking the time to learn the temper.
The Importance of Storage
Once your beautiful chocolates are finished, how you store them is just as important as how you made them. Keep them in a cool, dry, and dark place—never in the refrigerator. The high humidity of a fridge will almost certainly cause the chocolate to bloom, as the moisture reacts with the sugar and fat. If you must store them for longer periods, use an airtight container and place it in the coolest part of your home, but avoid the fridge at all costs.
Final Thoughts
Mastering the art of tempering chocolate is a journey that requires both precision and patience. You will likely fail a few times, and that is perfectly okay. Every chef, from the most lauded pastry artist in Paris to the amateur home baker, has spent hours cleaning hardened, dull chocolate off of their counters after a failed batch. The "Blame The Chef" philosophy isn't about being perfect; it’s about understanding the mechanics of your ingredients so that you can correct your path the next time around.
When you finally pull that piece of chocolate from the mold and hear that sharp, clear snap, you will realize that all the careful temperature monitoring and constant stirring were worth the effort. There is an immense sense of pride that comes with creating a professional-grade finish in your own kitchen. It shifts your perspective on desserts from a quick, sweet treat into a deliberate act of culinary creation.
Keep practicing, keep your thermometer close, and remember that chocolate is a living ingredient that responds to your touch and your temperature control. Once you get the hang of it, you will stop blaming the ingredients or the humidity and start enjoying the incredible, glossy, snap-perfect results that come with true mastery. Your kitchen is now a laboratory of fine sweets, and you are officially the lead scientist in charge. Enjoy the process, enjoy the science, and most importantly, enjoy every single bite of your perfectly tempered creations.

Get the Next Recipe
Weekly recipes, techniques, and gear picks — straight to your inbox.
