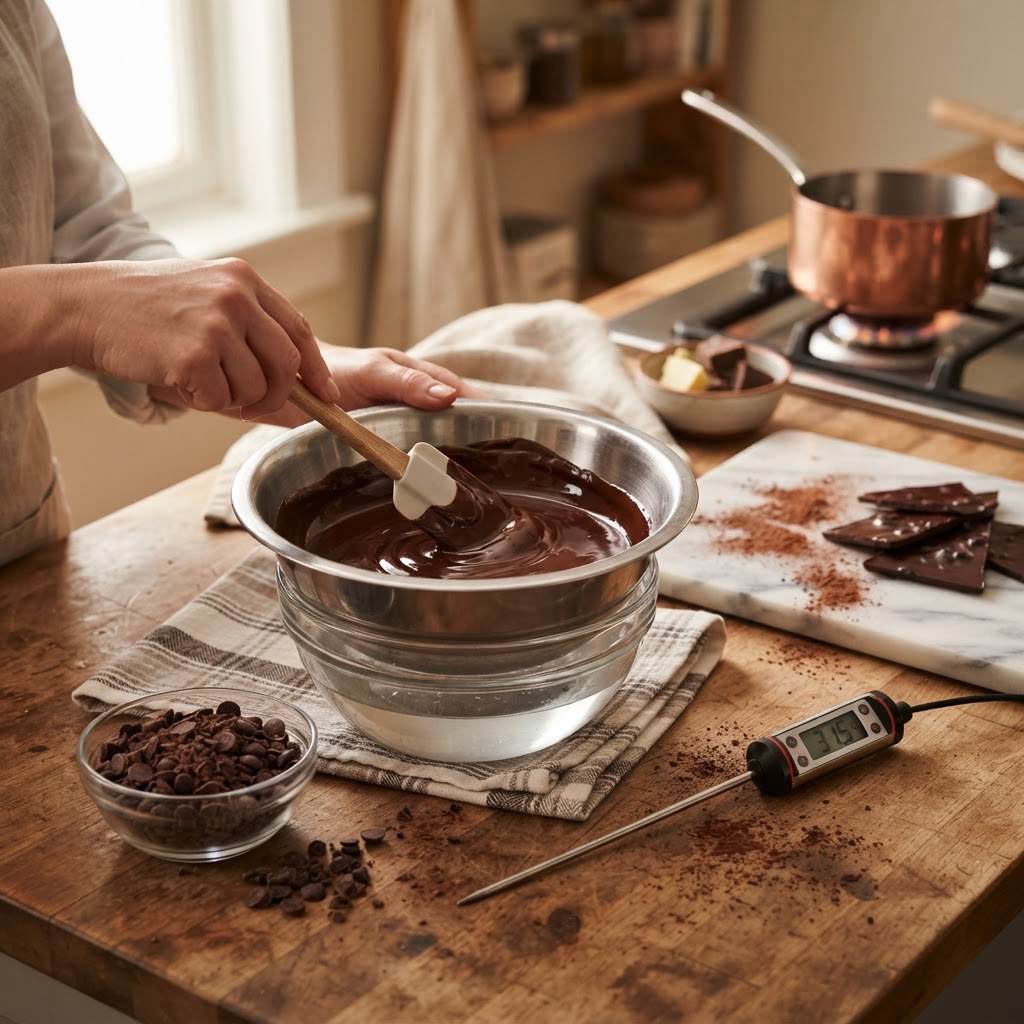
The Home Cook’s Guide to Tempering Chocolate: Mastering Heat Curves and Seed-Melting Techniques for Professional Gloss and Snap
There is perhaps no greater hurdle in the home kitchen than the enigmatic world of chocolate tempering. It is the bridge between a gritty, melted candy bar and the shimmering, professional-grade bonbons you see displayed in high-end pâtisseries. Many home cooks approach this task with trepidation, convinced that tempering requires a degree in food science or thousands of dollars in specialized equipment. In reality, tempering is a precise application of thermodynamics—a dance of heat and time that forces cocoa butter into its most stable form. Once you understand the behavior of these fats, you move from being a victim of "seized" chocolate to a master of its structure.
At its core, tempering is the process of manipulating the cocoa butter crystals within chocolate so that they solidify in a stable, crystalline arrangement known as Form V. If you simply melt chocolate and let it cool, it will develop dull, streaky, and soft patches, often blooming with a chalky white residue as the cocoa butter separates. When you temper correctly, you are essentially "seeding" the melted chocolate with pre-crystallized, stable fat molecules that encourage the rest of the batch to follow suit. This results in the prized snap, the glossy finish that reflects light like a mirror, and the contraction that allows the chocolate to release cleanly from a mold.
Welcome to "Blame The Chef," where we believe that every culinary challenge is simply a recipe waiting to be understood. Throughout this guide, we will strip away the mystery surrounding the tempering process, moving past the intimidating jargon and focusing on the tactile cues that indicate success. Whether you are aiming to create delicate ganache centers, chocolate-dipped truffles, or intricate molded bars, the skills outlined here will serve as your blueprint. Keep your thermometer nearby, stay patient, and remember that even professional chocolatiers occasionally have to re-melt a batch that didn’t take the first time. Let us begin our deep dive into the art of the perfect temper.
The Chemistry of Cocoa Butter Crystals
To understand tempering, you must first appreciate the fickle nature of the cocoa bean. Cocoa butter is polymorphic, meaning it can solidify into six different crystalline structures, each with a different melting point and stability. These forms are numbered I through VI, ranging from highly unstable, soft, and low-melting forms to the rock-hard, high-melting Form VI that can take months to develop. Our goal is exclusively Form V. It is the only crystal structure that provides the glossy shine and the sharp, clean snap we desire.
Understanding Form V
Form V crystals are the "Goldilocks" of the chocolate world. They are stable enough to remain solid at room temperature but possess a melting point just below human body temperature, which is exactly why high-quality chocolate melts so luxuriously on your tongue. When you melt chocolate entirely, you destroy all existing crystal structures, essentially resetting the chocolate to a liquid state. The process of tempering is the deliberate cooling and manipulation required to rebuild those Form V crystals while preventing the formation of the unstable, lower-melting-point crystals that cause dullness and soft textures.
The Role of Temperature
Temperature is the language of the chocolatier. If you work too cold, the chocolate thickens and becomes impossible to pour; work too hot, and you melt away the very crystals you spent so much effort creating. Professional standards dictate precise temperature curves that must be strictly followed. You will need a reliable digital probe thermometer or an infrared gun to track your progress. In this guide, we rely on the seeding method, which is the most reliable technique for home kitchens because it relies on the physical addition of pre-tempered chocolate to act as a template for the melt.
"Tempering is not an act of force; it is an act of persuasion. You are inviting the cocoa butter to reorganize itself into a structure that is both beautiful and structurally sound. If you rush the physics, the chocolate will inevitably resist your efforts."
Preparation and Equipment Selection
Before you even touch your chocolate, you need to ensure your workstation is prepared. Chocolate is notoriously sensitive to its environment. Even a single drop of water, condensation, or high humidity can cause the chocolate to seize, turning your smooth, liquid gold into a grainy, unusable paste. Ensure your bowls, spatulas, and molds are completely dry. If you are using a double boiler, make sure the water in the bottom pot is not touching the bottom of the bowl holding the chocolate to avoid scorching.
Choosing Your Chocolate
Not all chocolate is created equal for tempering. For the best results, use couverture chocolate, which has a higher percentage of cocoa butter compared to standard baking or eating chocolate found in grocery stores. The added fat content is essential for fluidity and achieving that professional sheen. Check your labels and aim for a cocoa butter content of at least 32% to 35%. If you are using high-quality chocolate chips, ensure they are high-quality brands rather than "candy melts," which often contain vegetable fats instead of cocoa butter and cannot be tempered in the traditional sense.
Essential Tools
Digital Thermometer:* A fast-responding probe thermometer is non-negotiable.
Offset Spatula:* Ideal for agitation and spreading chocolate on marble surfaces.
Double Boiler or Microwave:* Both work, but be cautious with microwaves, as they heat unevenly.
A Solid Marble or Granite Slab:* Optional, but useful for the "tabling" method if you decide to advance your skills.
High-quality Silicone Spatulas:* For scraping down the sides of the bowl to ensure even cooling.
The Seeding Method: A Step-by-Step Guide
The seeding method is the gold standard for home cooks because it is repeatable, requires minimal mess, and provides a clear visual and thermal roadmap. In this process, you melt the bulk of your chocolate to a high temperature to ensure all previous crystal memory is wiped clean, then you introduce "seed" chocolate—finely chopped, already-tempered chocolate—to lower the temperature and encourage the formation of stable Form V crystals.
Melting the Base
Begin by chopping about three-quarters of your chocolate into very small, uniform pieces. Place them in a heat-proof bowl. If using a double boiler, keep the heat low and steady. If using a microwave, heat in 15-second intervals, stirring thoroughly between each burst. Your target melting temperature is:
Adding the Seeds
Once your base is melted, remove it from the heat source and wipe the bottom of the bowl clean. Gradually add your finely chopped seed chocolate. Stir constantly. The goal is to melt the seed chocolate completely while the overall temperature of the mixture drops. The seeds act as a "blueprint" for the liquid chocolate, telling the molecules exactly how to arrange themselves. Keep stirring until the temperature hits the working range:
Dark Chocolate:* 88°F - 90°F (31°C - 32°C)
Milk Chocolate:* 86°F - 88°F (30°C - 31°C)
White Chocolate:* 84°F - 86°F (29°C - 30°C)
Testing the Temper
Before you begin dipping or molding, perform a "spot test." Dip the tip of a knife or a piece of parchment paper into the chocolate and set it aside for three to five minutes. If the chocolate is correctly tempered, it will set smoothly and streak-free within this timeframe. If it remains dull or tacky after five minutes, your chocolate is likely under-tempered. You may need to add a bit more seed chocolate or stir more vigorously to encourage further crystallization.
Troubleshooting Common Failures
Even the most seasoned chefs occasionally deal with temper loss. The most common culprit is temperature fluctuation. If your work area is too cold, the chocolate may set too quickly; if it is too warm, the crystals will melt back out of their stable state. If you find your chocolate thickening or turning dull mid-project, don't panic. You can usually rescue it by gently re-warming it and adding a few fresh shards of tempered chocolate to "re-seed" the batch.
When Chocolate Seizes
Seizing happens when moisture enters the chocolate. This could be steam from your double boiler, a wet spatula, or even a splash of liquid in your ganache. The sugar and cocoa particles clump together, turning the chocolate into a gritty, stiff mass. Once chocolate has seized, it cannot be "fixed" to return to a tempered state for molding, but you can save it by turning it into a ganache. Add warm cream or butter to the seized chocolate, stir until it creates a smooth emulsion, and use it as a truffle filling or frosting instead.
Streaking and Blooming
If you see white streaks or a dusty coating appearing on your finished chocolates after they have set, this is known as fat bloom. It is not a sign that the chocolate has gone bad, but rather that it was not tempered properly or was stored in an environment with fluctuating temperatures. Bloom is purely cosmetic, but it lacks the professional aesthetic. To prevent this, ensure your molds are perfectly clean before pouring and store your finished chocolates in a cool, dry place—never the refrigerator, as the humidity there is the enemy of a glossy finish.
"The secret to chocolate is not in the recipe, but in the patience. If you force the process, the chocolate will manifest every error. If you follow the temperature curves, the chocolate will reward you with a brilliance that can only be described as professional."
Mastering the Workflow: Professional Tips
Efficiency is the hallmark of a professional kitchen. When working with chocolate, time is a finite resource. Because the working temperature window is quite narrow, you should have all your molds, ingredients, and decorations ready before you begin the melting process. If you are decorating, ensure your transfers or nuts are at room temperature. Cold inclusions can cause the chocolate to cool too rapidly, resulting in uneven spots.
The Agitation Factor
Continuous stirring is essential. Even when you are not actively adding seed chocolate, move the mixture with your spatula. This ensures that the crystals are distributed evenly throughout the bowl and prevents the formation of "cold pockets" at the edges of the bowl, which can lead to clumps of over-crystallized chocolate. A steady, rhythmic stirring motion also helps remove air bubbles, which will translate to a smoother finish in your final product.
Working with Inclusions
If you are adding nuts, dried fruit, or puffed rice, mix them in gently once the chocolate is within its working temperature range. Remember that inclusions will absorb heat, so you must work slightly faster. If you are coating truffles, use a dipping fork to ensure excess chocolate drips off, leaving only a thin, even layer. A thick, uneven coating is often a sign of cold chocolate or a lack of proper technique, which can mask the flavor of the ganache center.
Advanced Techniques: Tabling and Mycryo
While the seeding method is the gold standard for home cooks, there are other professional techniques that allow for greater control. Tabling involves pouring two-thirds of your melted chocolate onto a cool marble slab and working it back and forth with spatulas until it reaches a specific, lower temperature. Then, you incorporate it back into the remaining third. It is a messy, labor-intensive process, but it is the fastest way to temper large quantities of chocolate without the risk of adding too many seeds.
The Mycryo Method
Another professional advancement is the use of Mycryo, which is essentially powdered, crystallized cocoa butter. Because this is pure, stable Form V cocoa butter, you can simply melt your chocolate to 115°F (46°C), allow it to cool to 95°F (35°C), and stir in 1% of the weight of the chocolate in Mycryo powder. This method is incredibly fast and produces consistent results, as you are bypassing the need to source pre-tempered chocolate for seeding. It is a fantastic option for home cooks who have found a reliable source for high-quality cocoa butter powder.
Equipment Maintenance
Finally, always clean your equipment immediately after use. Dried chocolate is much harder to remove than liquid, and a residue of untempered chocolate in your bowl can ruin your next batch. Use warm water and a good degreasing soap. If you use a marble slab, scrape it clean with a bench scraper while the chocolate is still slightly warm, then wipe it down with a dry cloth. Maintaining your tools ensures they are ready the next time you feel the urge to create something spectacular.
The Art of the Finish
The final step of any tempering project is the release. If your temper is correct, the chocolate will shrink slightly as it cools and crystallizes. This is why you can easily tap a chocolate mold against the counter and have the pieces drop right out. If the chocolates remain stuck, do not pull at them. Simply place the mold in the freezer for two to three minutes—the rapid contraction will usually force the chocolate to release. If it still sticks, your temper was likely slightly off.
Storage for Longevity
Once your chocolates are removed from the molds, handle them as little as possible. The oils from your skin can leave fingerprints or cause the chocolate to lose its shine. Store them in an airtight container lined with parchment paper. Keep them in a cool, dark room, ideally between 60°F and 68°F (15°C - 20°C). Avoid the refrigerator at all costs, as the moisture will lead to sugar bloom, which feels grainy on the tongue and looks white and dusty.
Troubleshooting Your Final Result
If you find that your chocolate is still not snapping, check the room temperature of your workspace. If you live in a very warm climate, the ambient temperature may prevent the chocolate from setting properly even if the temper is correct. In such cases, consider using a fan to circulate cool air, but avoid direct blasts of air, which can cause surface blemishes. Remember, each batch is a learning experience. Even master chocolatiers track their temperatures and results to refine their process, and you should too.
Final Thoughts
Mastering the temper of chocolate is a transformative experience for any home cook. It changes how you view the humble bar of chocolate, shifting your perspective from seeing it as a simple ingredient to seeing it as a complex material that demands respect and precision. You have now learned the importance of the temperature curve, the necessity of seeding, and the environmental factors that can make or break your success. Most importantly, you have learned that failure is not the end of the process; it is merely a signal that you need to re-evaluate the variables.
Do not be discouraged if your first attempts do not yield the glossy, sharp-snapping results you desire. Every professional was once a novice who ended up with a bowl of seized, grainy, or bloomed chocolate. The key is to keep a journal of your temperatures, the brand of chocolate you used, and the ambient conditions of your kitchen. By isolating these variables, you will quickly identify what works best for your specific setup. Soon, the sight of a perfect, mirror-like finish on your handmade truffles will become the norm rather than the exception.
Ultimately, "Blame The Chef" is about empowering you to take risks in the kitchen. Tempering is just one of many techniques that bridge the gap between "good enough" and "extraordinary." Once you have achieved that perfect temper, you unlock a world of creative possibilities—from molded figures and complex center-filled bonbons to elegant decorations for your cakes and desserts. So, find a quiet afternoon, calibrate your thermometer, and start melting. The world of professional-grade chocolate is now well within your reach, and I have no doubt that your next batch will be nothing short of magnificent. Happy cooking!

Get the Next Recipe
Weekly recipes, techniques, and gear picks — straight to your inbox.
