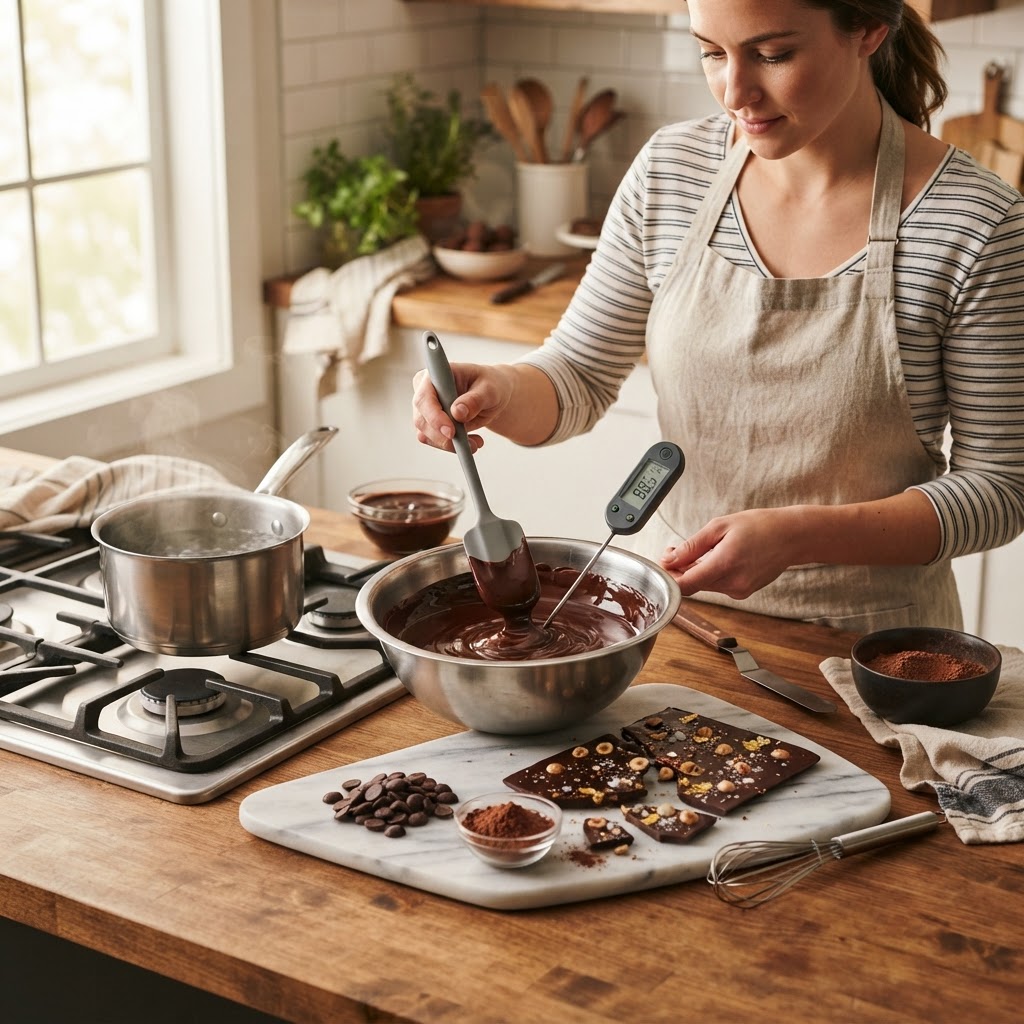
The Home Cook’s Guide to Tempering: Mastering Precise Heat Control for Glossy Chocolates and Stable Custards
There is a particular brand of magic that happens in a kitchen when a home cook stops guessing and starts measuring. Many of us have spent years hovering over a saucepan, frantically whisking away at a curdled custard or staring hopelessly at a bowl of grey, streaky chocolate that refuses to set. We often blame the recipe, the quality of the ingredients, or even the humidity in the room, but the truth usually lies in a fundamental misunderstanding of thermal manipulation. Tempering is not just a fancy culinary term reserved for elite pastry chefs working in temperature-controlled test kitchens; it is a vital skill that bridges the gap between amateur frustration and professional precision. When you finally grasp how heat dictates the crystalline structure of fat and protein, the kitchen shifts from a place of mystery to a place of mastery.
The process of tempering, whether you are dealing with the complex polymorphism of cocoa butter or the delicate coagulation of egg proteins, is fundamentally about patience and control. We are talking about the manipulation of molecules, forcing them to align in a specific, stable formation that results in that satisfying "snap" of a chocolate bar or the velvet smoothness of a crème anglaise. If you have ever been intimidated by the word "tempering," you are not alone, as the culinary world often treats it as a gatekept secret. However, once you strip away the pretension, you find that it is simply a game of degrees and timing. By applying consistent heat and cooling, you provide the structural foundation that your ingredients need to achieve their highest possible form.
In this guide, we are going to deconstruct the science behind heat control and walk through the tangible techniques that will change your cooking forever. We will examine the exact temperature thresholds for different types of chocolate, the nuanced dance of tempering eggs for custards, and the troubleshooting tips that will save your next dinner party. It is time to stop apologizing for your dishes and start blaming the chemistry—or better yet, start leveraging it to your advantage. Get your thermometers ready, clear your workspace, and prepare to elevate your home kitchen game to a standard you once thought was reserved for the professionals.
The Chemistry of Cocoa: Why Tempering Matters
At the heart of every great chocolate confection is the temper, a state where the cocoa butter molecules are arranged in a stable, uniform crystalline structure. If you simply melt chocolate and let it cool naturally, the cocoa butter will solidify into a chaotic, unstable mess of crystals, leading to a dull surface, a crumbly texture, and the dreaded white "bloom" that makes chocolate look old and unappetizing. Tempering forces these fats into a stable Form V crystal structure, which provides the glossy finish and the crisp snap that indicates high-quality work. Without this intervention, your chocolate will remain soft at room temperature and prone to melting the moment it touches your fingertips.
Understanding Crystal Polymorphism
Cocoa butter is a polymorphic substance, meaning it can solidify into several different crystalline forms, ranging from Form I to Form VI. Form I is unstable and melts almost immediately, while Form VI is the result of long-term storage and is often what we see when chocolate blooms. As a home cook, your goal is to manipulate the temperature to eliminate the lower-tier crystals and encourage the growth of Form V. This is achieved through a cycle of heating the chocolate to break down all existing crystals, cooling it to create "seed" crystals, and then gently warming it again to melt out any unstable, low-melting-point crystals that may have formed during the cooling phase.
The Thermal Roadmap
The specific temperature ranges vary slightly depending on whether you are working with dark, milk, or white chocolate, but the methodology remains identical. Dark chocolate must be heated to approximately 115°F to 120°F (46°C to 49°C) to fully melt the cocoa butter, cooled to about 80°F to 82°F (27°C to 28°C) to initiate crystallization, and then brought back to a working temperature of 88°F to 90°F (31°C to 32°C). Milk and white chocolates, due to their higher milk solids and lower cocoa butter content, require slightly lower working temperatures to prevent the sugar and milk proteins from seizing. Keeping a digital probe thermometer submerged or constantly checking the temperature of your bowl is the only way to ensure you are staying within these narrow windows.
"Tempering is not an act of force; it is an act of persuasion. You are gently convincing the cocoa butter molecules to line up in perfect, orderly rows, rather than forcing them into a state of chaotic flux."
Mastering the Seeding Method at Home
The seeding method is the most accessible technique for home cooks because it doesn't require a marble slab or a sophisticated tempering machine. This technique relies on adding stable, pre-tempered chocolate—your "seed"—to a bowl of melted chocolate. The introduced crystals act as a template for the surrounding liquid cocoa butter, effectively teaching the melted mass how to crystallize properly. It is a foolproof way to ensure you have a "template" of stable crystals available to kickstart the cooling process without needing to stir for hours on end.
Preparing Your Workspace
Before you begin, ensure your tools are bone-dry. Water is the mortal enemy of tempered chocolate; even a single drop can cause the chocolate to "seize," turning it from a fluid, glossy ganache into a gritty, clumpy paste that is impossible to salvage. Use a heavy-bottomed stainless steel bowl and a silicone spatula. Chop your high-quality couverture chocolate finely and evenly, as large chunks will take too long to melt and increase the risk of overheating parts of the bowl while other parts remain solid.
Step-by-Step Seeding
The Art of the Stable Custard
While chocolate relies on fat crystals, custards rely on the controlled coagulation of egg proteins. A perfectly stable custard, whether it is a rich Crème Anglaise or a classic pastry cream, should be thick, smooth, and entirely devoid of any "scrambled egg" texture. The challenge here is the narrow margin between the protein-setting point and the boiling point. When you heat eggs too quickly or beyond the threshold of 180°F (82°C), the proteins contract too tightly, squeezing out moisture and causing the emulsion to break, which is exactly why so many home cooks fear the custard.
The Importance of Tempering Eggs
"Tempering" in the context of custards refers to the gradual addition of hot liquid (such as milk or cream) to your egg yolks. If you add the hot liquid all at once, you will accidentally cook the yolks before you have a chance to whisk them into an emulsion, resulting in sweet scrambled eggs. Instead, pour a small stream of the hot dairy into your yolk-sugar mixture while whisking vigorously. This slow introduction raises the temperature of the yolks incrementally, "getting them used to" the heat, and ensuring they remain smooth and stable when they are finally returned to the main pot for thickening.
Temperature Thresholds for Success
140°F (60°C):* This is the beginning of the thickening phase where the yolk proteins start to unfold.
160°F–170°F (71°C–77°C):* The sweet spot for a silky custard. At this point, the mixture will coat the back of a spoon.
180°F+ (82°C+):* Danger zone. At this temperature, the proteins begin to seize and curdle.
Pro Tip:* Always strain your custard through a fine-mesh sieve immediately after cooking to ensure a perfectly smooth finish and to remove any tiny bits of cooked egg that may have formed.
"A custard is a living, breathing emulsion. If you treat the heat with respect and the whisk with vigor, the resulting texture will be as smooth as silk and twice as luxurious."
Troubleshooting Common Tempering Catastrophes
Every chef, regardless of their Michelin-star status, has faced a bowl of ruined chocolate or a curdled sauce. The key is knowing when to discard and when to recover. If your chocolate has seized due to moisture contamination, there is often no way to return it to a state suitable for tempering or dipping. However, you can repurpose that seized chocolate by adding a small amount of heavy cream or butter to create a ganache or a sauce. Never try to salvage seized chocolate by adding water; it will only make the situation exponentially worse by thickening the mess into a thick, unmanageable sludge.
Fixing Overheated Chocolate
If you accidentally let your chocolate exceed the melting temperature—say, it hits 130°F—the crystalline structure has been completely destroyed. Do not panic. Remove the bowl from the heat immediately, place it in an ice bath for ten seconds while stirring constantly, then remove it again. You have essentially "shocked" the chocolate, and you can now proceed to re-introduce seed chocolate to force the crystals back into alignment. It is a common mistake, but one that is easily corrected if you catch it before the sugar burns.
Handling "Grainy" Custard
If you see small lumps in your custard, it means you have pushed the temperature too far. While the damage is usually permanent for a delicate sauce, you can often disguise the texture by blitzing the mixture in a high-speed blender for 30 seconds. This won't technically "uncook" the eggs, but it will homogenize the mixture enough that the lumps disappear, creating a serviceable texture that is indistinguishable from a perfectly cooked version to the untrained palate. Always serve these rescued custards in a cold setting, as the chilling effect helps mask slight variations in texture.
Beyond the Basics: Advanced Tempering Applications
Once you have mastered the basics of tempering for simple applications like dipping strawberries or making a basic Crème Anglaise, you can branch out into more advanced confectionery. Enrobing is the process of coating centers like truffles or caramels in tempered chocolate. The key here is the thickness of the chocolate; if your chocolate is too cool, it will be thick and lead to a heavy, unpleasant coating. If it is too warm, it will be thin and won't set with that glossy, professional finish. Mastering the "flow" of the chocolate takes practice, but it is the ultimate indicator that you have achieved the perfect temper.
The Role of Humidity and Environment
Temperature control isn't just about the pan; it is about the environment. High humidity is the enemy of tempered chocolate. In humid conditions, water molecules from the air can adhere to the surface of the cooling chocolate, causing it to lose its gloss and develop a dull appearance. If you live in a humid climate, try to work in an air-conditioned room or during the early morning hours when the moisture content in the air is at its lowest. Keep your finished items in a dry, cool environment (roughly 65°F to 68°F) to prevent the "fat bloom" that can occur if the room temperature fluctuates.
Temperature Checks for Ganache
While ganache (a mixture of chocolate and cream) doesn't require tempering in the technical sense of aligning cocoa butter crystals for a snap, the temperature at which you emulsify the two ingredients determines the final stability and shine. Always ensure your cream is heated to a gentle simmer before pouring it over your chopped chocolate. Let the mixture sit for a full minute to allow the heat to penetrate the center of the chocolate solids before you begin to stir. Emulsify by starting in the center of the bowl with a spatula, moving in small circles until a shiny, stable "core" forms.
Precision Tools for the Modern Home Kitchen
You cannot achieve professional results with imprecise equipment. If you are still relying on "the touch test" or guessing by the color of the ingredients, you are operating with one hand tied behind your back. Invest in a high-quality digital infrared thermometer for checking surface temperatures of chocolate and a probe thermometer for internal temperatures of sauces and custards. These tools are the difference between guesswork and scientific accuracy. A digital scale is also non-negotiable; baking and confectionery are chemical formulas, and volume measurements are simply too inconsistent to be reliable.
Choosing the Right Ingredients
Tempering will only be as successful as the ingredients you start with. Not all chocolates are created equal. High-quality couverture chocolate contains a higher percentage of cocoa butter compared to the chips you find in the baking aisle of a grocery store. This extra fat is essential for tempering. Look for professional-grade brands that list the percentage of cocoa butter on the packaging. The higher the cocoa butter content, the easier it will be to achieve a perfect temper and the better the final mouthfeel will be.
Recommended Equipment List:
Digital Probe Thermometer:* Essential for internal temperatures of custards.
Infrared Laser Thermometer:* Perfect for monitoring the surface temperature of tempering chocolate.
Digital Kitchen Scale:* For precise ratios of cream to chocolate or eggs to milk.
Silicone Spatulas:* Heat-resistant and perfect for scraping every bit of emulsion from the side of the bowl.
Fine-Mesh Sieve:* The final safety net for ensuring a smooth, lump-free custard.
The Psychology of the Home Cook
The most important ingredient in any recipe, including those that require precise tempering, is your own confidence. When you approach a technique with fear, you are more likely to make mistakes—rushing the process, overheating, or failing to stir at the right moment. Understand that tempering is a process of repetition. Your first attempt might result in a slightly dull chocolate or a custard that needs an extra minute with the immersion blender, and that is perfectly okay. By focusing on the temperature readings rather than the anxiety of the outcome, you turn a chore into a scientific experiment.
Embracing the Learning Curve
Keep a kitchen notebook specifically for your tempering trials. Note the room temperature, the type of chocolate used, the exact temperatures you reached, and the final result. Over time, you will start to see patterns. You will learn, for example, that your specific kitchen warms up significantly in the afternoon, which might mean you need to cool your bowl in the refrigerator for a few minutes longer than a standard recipe suggests. This kind of observational data is what turns a home cook into a master of their craft.
Final Thoughts
Ultimately, tempering is about control, but it is also about liberation. Once you are no longer limited by the fear of melting chocolate or curdling custard, a whole world of culinary possibilities opens up to you. You can move from simple chocolate-dipped fruit to elaborate, glossy truffles; from basic vanilla pudding to rich, velvety crème brûlée. The techniques we have discussed are the foundation, but the application is entirely yours to explore. Use these temperature charts as your compass, but don't be afraid to experiment with flavors and textures as you grow more comfortable with the science.
The next time you find yourself staring at a bowl of ingredients and wondering why they aren't behaving the way the recipe promised, take a breath and reach for your thermometer. Identify the stage of the process you are in, verify your temperature against the thresholds provided, and make the necessary adjustments. You are not just cooking; you are performing chemistry. When you master these small, precise moments of thermal manipulation, you gain the ability to produce restaurant-quality results in your own kitchen. And should anything go wrong? Well, there is always a way to turn a technical error into a delicious, edible lesson. Keep practicing, keep measuring, and most importantly, enjoy the process of becoming a master in your own kitchen. There is no longer a need to blame the chef when you have the tools and the knowledge to control the heat, the structure, and the final, beautiful result. Remember that every master was once a beginner who refused to stop trying. Your journey toward the perfect temper has just begun, and the results will be as sweet as you desire. Happy tempering, and may your ganache always be shiny and your custards forever smooth.

Get the Next Recipe
Weekly recipes, techniques, and gear picks — straight to your inbox.
