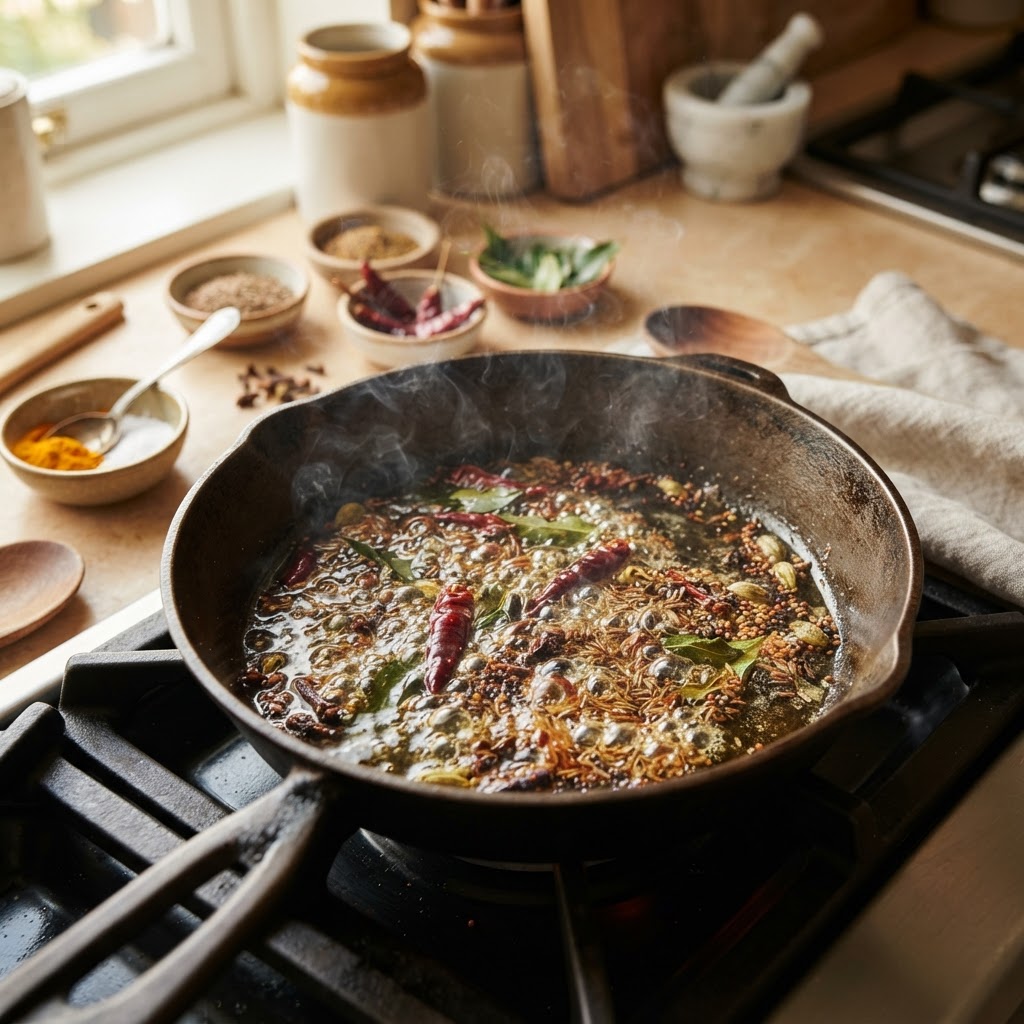
The Home Cook’s Guide to Tempering Spices: Mastering Bloom Times and Oil Temperatures for Maximum Aromatic Potency
The world of professional cooking is often shrouded in mystery, filled with complex techniques that seem reserved for those wearing white coats in high-end restaurant kitchens. Yet, the most profound secret to elevating home cooking doesn’t require a degree from a culinary institute or a drawer full of expensive gadgets. It lies in the humble, ancient practice of tempering spices, a technique often referred to as "blooming." When you learn to properly manipulate spices in hot fat, you are doing more than just adding flavor; you are performing a chemical alchemy that coaxes essential oils out of their botanical husks. This process transforms a flat, monotonous dish into a vibrant, aromatic masterpiece that dances on the palate.
Many home cooks view spices as mere dust or dried powders to be thrown into a pot toward the end of a recipe. This is a common mistake that leaves your food tasting muted and one-dimensional. In a professional kitchen, we treat spices with the same reverence we afford a pristine piece of wild-caught fish or a perfectly aged ribeye. The goal of tempering is to create a bridge between the fat-soluble flavor compounds and the dish, ensuring that the essence of cumin, coriander, mustard seed, or cardamom permeates every single bite. By understanding the interaction between heat and fat, you gain the ability to dial your seasonings up or down with precision, moving from subtle undertones to bold, aggressive flavor profiles.
Welcome to the kitchen, where we don’t just follow recipes—we understand the science behind them. Over the next few thousand words, we are going to demystify the art of the tadka, chhonk, or tempering, and give you the tools to master your spice rack once and for all. You will learn the exact oil temperatures that prevent burnt, bitter results and the precise timing required to pull those complex, lingering aromatics into your finished meal. It is time to stop blaming your lack of experience and start trusting your nose, your heat control, and the incredible potential sitting in those little glass jars in your pantry. Let’s turn the heat up and unlock the aromatics you never knew were waiting.
The Chemistry of Aromatics: Why Oil is Essential
At the molecular level, most of the flavor compounds found in dried spices are lipophilic, meaning they are fat-loving. If you toss your spices into a water-based broth or a dry stew, those precious essential oils remain trapped within the cellular structure of the spice itself. They never fully integrate with the rest of the meal because water and oil-based aromatic compounds do not bond effectively. By introducing your spices to fat—whether it be clarified butter (ghee), neutral vegetable oil, or pungent mustard oil—you are effectively extracting these compounds and distributing them throughout the dish.
Understanding Essential Oil Extraction
When you heat spices in fat, you are essentially creating a highly concentrated infusion. This process is analogous to steeping tea, but instead of water, the medium is lipid-based. The heat breaks down the cellulose structure of the spice, allowing the volatile oils to bleed into the fat. This fat then acts as a flavor carrier, coating your ingredients and your tongue, ensuring that the aroma of the spice reaches your olfactory system before the food even hits your palate. Remember, a huge portion of what we perceive as "taste" is actually smell, and tempering is the single best way to maximize that sensory input.
The Role of Lipid Mediums
The type of fat you choose significantly impacts the final result. While a neutral oil like grapeseed or sunflower oil allows the pure character of the spice to shine, using ghee or coconut oil introduces a secondary layer of richness that rounds out the sharper edges of spices like turmeric or chili. In some regional cuisines, like those found in North India or parts of West Africa, the fat itself is toasted alongside the spices, creating a savory depth that water-based cooking simply cannot replicate.
"Tempering is not just a cooking step; it is the fundamental orchestration of flavor. By releasing the oils in a controlled lipid environment, you create a depth of field that makes the difference between a dinner that is simply eaten and one that is remembered."
Mastering the Heat: Controlling the Bloom
Temperature control is the difference between a fragrant, nut-like finish and a charred, bitter catastrophe. Spices are remarkably sensitive, and the window between perfectly toasted and burnt is often a matter of seconds. Most home cooks operate their stovetops with a "set it and forget it" mentality, but when tempering, you must remain fully present. You are not just heating the pan; you are monitoring the visual and aromatic cues that signal when the volatile compounds have been released.
The Threshold of Perfection
For most whole spices, such as cumin seeds, coriander seeds, or black mustard seeds, you are looking for an oil temperature between 320°F and 350°F. At this range, the seeds will begin to sizzle, pop, or release a fragrant aroma within 10 to 30 seconds. If your oil is too cold, the spices will simply sit in a greasy puddle, absorbing fat without releasing flavor. If your oil is too hot—smoking, in other words—you risk scorching the exterior of the spice, which results in a harsh, acrid taste that will ruin the entire pot of food.
Visual Cues and Sensory Feedback
You don't need a laser thermometer to succeed here. Rely on your senses:
The Hierarchy of Spices: Order of Operations
Not all spices are created equal, and they certainly don't all react to heat in the same way. A woody cinnamon stick can handle several minutes of high heat, whereas the delicate powder of ground paprika will burn in a heartbeat. Understanding the order of operations is critical to building a complex flavor profile. We categorize spices into two camps: the "sturdy" whole spices and the "fragile" ground powders.
The Sturdy Pioneers
Always start with your whole seeds—mustard seeds, cumin, coriander, fennel, and whole cloves. These require the longest duration of heat to break down their husks. These are your "base notes." By blooming them first in the fat, you provide a stable foundation for the meal. Think of this as laying the bricks of your flavor house.
The Delicate Finishers
Ground spices, on the other hand, contain much more surface area and can burn almost instantly. These should be treated with extreme care. In many professional workflows, we add ground spices at the very end of the tempering process, often just seconds before adding a liquid like water, stock, or crushed tomatoes. The moisture from the liquid immediately halts the cooking process, preventing the ground spices from turning into bitter black carbon.
"The true test of a master is not in how much spice you add, but in how skillfully you expose those spices to the fire. A master knows that a few seconds too long can transform a fragrant bloom into a bitter sting."
Common Pitfalls and Troubleshooting
We have all been there: a recipe calls for a "quick fry" of spices, and suddenly the kitchen is filled with smoke and the smell of burnt toast. This is usually the result of rushing the process or failing to account for the carry-over heat of the pan. Let’s look at the most common errors and how to correct them so you never have to "blame the chef" for a ruined dinner.
Avoiding the Bitter Trap
If you accidentally burn your spices, there is very little you can do to save the oil. The bitter, burnt flavor molecules are now integrated into the fat. Do not try to salvage it. It is better to wipe out the pan and start over than to invest an hour into a dish that will ultimately taste like scorched dust. Remember, tempering happens quickly; if you feel like you are losing control, lift the pan off the burner to instantly drop the temperature.
Proper Ingredient Ratios
A common mistake is overcrowding the pan. When you add too many spices at once, the temperature of the oil drops significantly, leading to soggy, oily spices rather than crisp, aromatic ones. Aim for a ratio where the spices can float in the oil without being piled on top of each other. A good rule of thumb is to use enough oil to coat the bottom of the pan—usually 1 to 2 tablespoons for a standard batch of curry or stew.
Pro-Tips for Success:
Pre-heat your oil:* Always ensure the oil is shimmering before adding your spices.
Keep your spices measured:* Since the process is fast, have your spices pre-measured in a small bowl before you turn the stove on.
Use the "splash" method: If you are adding ginger or garlic, add them after the spices have bloomed, but before* you add your main vegetables or proteins.
Advanced Techniques: Infusing Complex Fats
Once you have mastered the basics of tempering in simple oils, you can begin to experiment with complex fats to elevate your dishes to a professional level. This is where you move from being a home cook to a culinary architect. By infusing fat with aromatic aromatics, you are creating a base that can be used in everything from rice pilafs to roasting vegetables.
Creating Compound Tempering Oils
You can create a "master oil" by gently heating spices like star anise, dried red chilis, and cardamom pods in a neutral oil over low heat for 10-15 minutes. This is not a high-heat "bloom" but a slow extraction. Once the oil has cooled, strain out the solids. You now have a shelf-stable oil that carries the essence of those spices, perfect for drizzling over finished dishes to give them that final, restaurant-quality polish.
The Power of Ghee
In many traditional Indian households, ghee (clarified butter) is the preferred medium for tempering. Because it has a higher smoke point than regular butter and contains milk solids that have been toasted during the clarification process, it provides a nutty, sweet undertone that amplifies the earthiness of spices like turmeric and cumin. If you want to impress guests, swap your standard vegetable oil for a high-quality ghee. The difference in the richness of the aromatics is noticeable from the first bite.
Essential Equipment for the Modern Temperer
You don't need a professional-grade kitchen, but having the right tools makes the process of tempering much more consistent. The most important tool is your pan. Because you are dealing with concentrated heat and small amounts of liquid, a heavy-bottomed pan is non-negotiable.
Choosing the Right Vessel
A small, heavy-bottomed stainless steel or copper saucier is ideal. These materials provide even heat distribution, which prevents hot spots that could scorch your spices. Avoid non-stick pans if possible; while convenient for eggs, they often struggle to maintain the precise high heat needed for a rapid bloom, and the coating can degrade under the intense, direct heat required for tempering.
The Importance of the "Tadka" Pan
In South Asian cuisine, there is a specialized tool known as a tadka pan or vaghar pot. It is a small, long-handled vessel designed specifically for tempering. If you find yourself cooking dishes with spices frequently, investing in a small, 4-inch stainless steel pan is a game changer. Its small surface area means you don't need to use excessive amounts of oil to ensure your spices are fully submerged.
"True mastery of the kitchen comes from the marriage of technique and tool. When you use the right pan and the right oil, you aren't just cooking; you are unlocking the latent potential within every seed and pod."
Final Thoughts
Mastering the art of tempering spices is a journey, not a destination. It requires patience, attention to detail, and a willingness to learn from your mistakes. There will be days when the aroma is intoxicating and the dish is perfectly balanced, and there will be days when a stray seed gets a little too dark. That is the reality of cooking. By embracing the process, you move away from blindly following recipes and toward understanding the foundational science of flavor.
Start small. The next time you make a simple dal, a soup, or even a basic roasted vegetable dish, take three minutes to temper a teaspoon of cumin and mustard seeds in a little oil. Notice how the scent changes as the seeds hit the fat. Notice how the flavor of the dish shifts from being "seasoned" to being "infused." Once you experience this, you will never go back to dumping raw, un-bloomed spices into your pot again.
Keep your heat in check, pay close attention to the visual cues, and always trust your nose. You have the ability to bring professional, high-end aromatics into your own home, night after night. Cooking is about communication—it’s about telling a story through flavor—and tempering is your most powerful tool in that narrative. Don’t be afraid to experiment, don’t be afraid to smell the process, and most importantly, enjoy the incredible transformation that happens when you bring fire, fat, and spice together.
***
To ensure you maintain a consistent quality in your culinary practice, keep a small notebook handy in your kitchen. Record the types of oil you use, the specific timings for different spices, and any notes on how the intensity of the flavor changes with different ratios. This culinary journal will become your most valuable resource over time. Whether you are tempering whole coriander seeds for a rustic beef stew or blooming delicate threads of saffron for a luxurious basmati rice, these notes will help you troubleshoot and replicate your successes.
Remember, the goal is not to reach perfection overnight, but to gain control over the variables. Every time you temper, you are training your brain to recognize the "perfect" state of an aromatic. Your sense of smell is an incredibly powerful tool that is often neglected in the modern kitchen. By slowing down and engaging with the tempering process, you are actively honing your palate. You are learning to distinguish between the bright, citrusy notes of toasted coriander and the deep, warm, musky notes of well-cooked cumin.
Furthermore, do not underestimate the power of incorporating fresh aromatics alongside your dry spices. Adding ginger, garlic, or fresh chilies to the tempered oil can add a layer of complexity that dry spices alone cannot achieve. The residual moisture in these fresh ingredients creates a beautiful contrast, providing a foundation for your sauces that feels multi-dimensional. By layering these ingredients—starting with the hardest spices and ending with the most delicate aromatics—you are building a "base" that will serve as the backbone for your entire dish.
Lastly, consider the quality of your ingredients. Spices are agricultural products, and their age, origin, and storage conditions drastically affect their aromatic potency. Try to buy your spices in smaller quantities and store them in airtight containers away from direct sunlight and heat. If you buy a massive bag of cumin that sits in your cabinet for two years, you are already fighting a losing battle. The best tempering technique in the world cannot revive stale, dusty spices. Invest in fresh, high-quality seeds, and your kitchen will reward you tenfold.
As you continue to refine these skills, think of your kitchen as a laboratory. The heat, the fat, and the spices are your variables. Each time you cook, you are testing a hypothesis: how much flavor can I extract from these ingredients today? By adopting this experimental mindset, you transform the daily chore of cooking into a source of ongoing discovery and joy. So, the next time you step up to the stove, keep these principles in mind. Respect the temperature, monitor the time, and prepare to elevate your home cooking to levels you previously thought were only possible in a restaurant. You’ve got this, and more importantly, you now have the knowledge to back it up. Happy tempering!
***
As we wrap up this guide, let’s quickly recap the fundamental workflow to keep you on the right track:
This process is simple, yet it holds the key to the most vibrant, aromatic food you will ever prepare. By mastering the bloom, you are gaining the ability to manipulate the very soul of your ingredients. You are no longer just putting food on the table; you are crafting experiences. Continue to practice, continue to smell, and above all, continue to enjoy the process. The path to better flavor begins in your pan, and it starts with a single, perfectly bloomed spice. Your kitchen is now an extension of your own culinary expertise, and with these techniques, there is no limit to what you can achieve. Keep cooking, keep exploring, and keep blaming the chef—because the chef is now you.


Get the Next Recipe
Weekly recipes, techniques, and gear picks — straight to your inbox.
