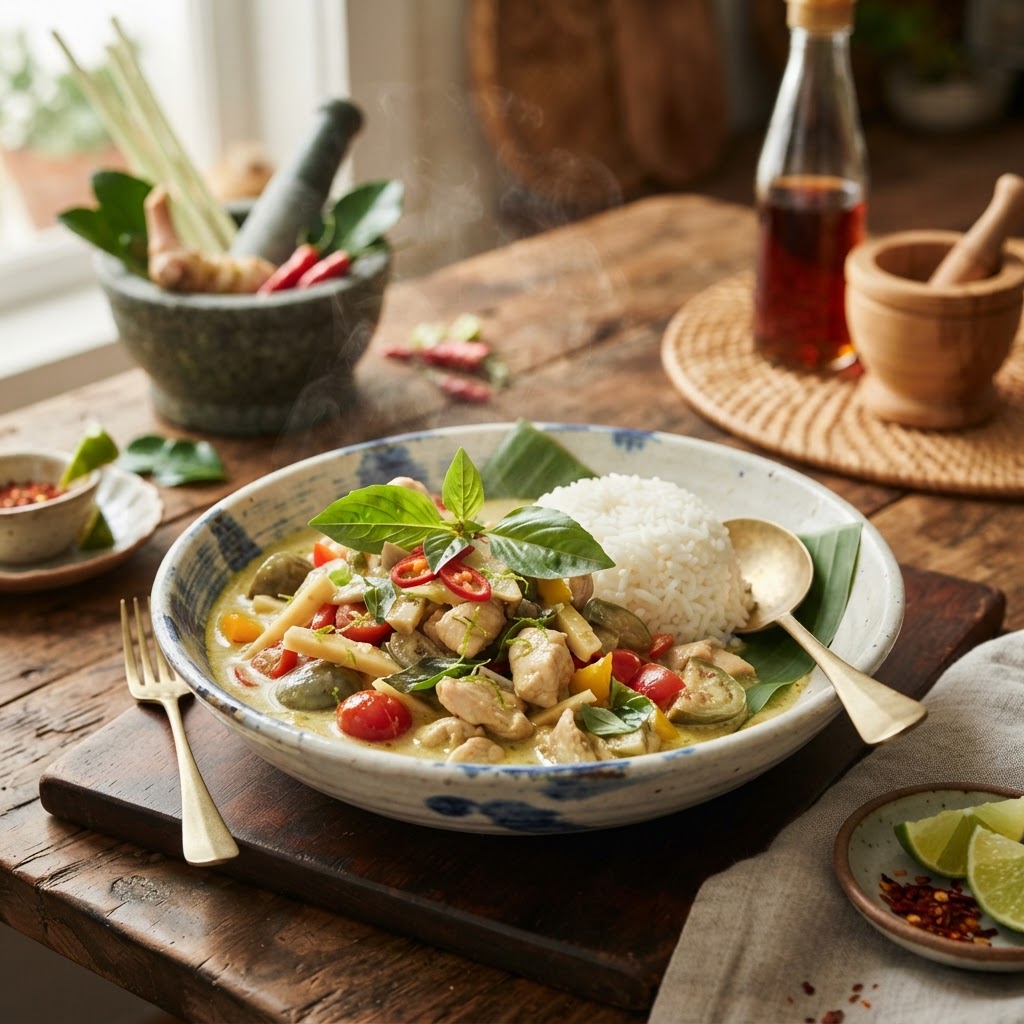
The Home Cook’s Guide to Thai Curries: Mastering the Balance of Aromatics, Heat, and Coconut Milk for Authentic Depth
There is a persistent myth in the Western culinary world that Thai curry is merely a soup seasoned with spice and heavy cream. In truth, authentic Thai curry is a symphonic masterpiece of balance, relying on the interplay between pungent aromatics, complex heat, and the velvety richness of coconut milk. Mastering these dishes in a home kitchen requires a shift in perspective, moving away from the idea of "adding ingredients" and toward the art of "building foundations." When you finally get that perfect ratio right, the result is a dish that dances on the tongue, hitting sweet, salty, spicy, and sour notes simultaneously. It is not just dinner; it is an exercise in mindfulness and an exploration of one of the most sophisticated flavor profiles in global cuisine.
For many home cooks, the intimidation factor lies in the curry paste—the beating heart of the entire dish. While store-bought pastes are convenient, they often lack the brightness of fresh, pounded aromatics like lemongrass, galangal, and kaffir lime leaf. My philosophy at Blame The Chef is that your kitchen should smell like an apothecary long before it smells like a restaurant. By learning to toast your dry spices and crush your wet aromatics into a paste, you unlock essential oils that are otherwise trapped and muted. This guide aims to demystify the process, stripping away the guesswork so you can approach your wok or heavy-bottomed pot with the confidence of a seasoned line cook.
We are going to dive deep into the chemistry of the "break," the specific temperatures required to coax flavor out of coconut cream, and the crucial finishing steps that transform a standard curry into a restaurant-quality meal. Whether you are aiming for the fiery, herbaceous punch of a Green Curry or the warm, earthy comfort of a Massaman, the principles remain remarkably consistent. Grab your mortar and pestle, clear your counter space, and let’s get to work. We are about to change the way you cook, one aromatically infused spoonful at a time, ensuring that the next time someone asks who made this incredible food, the answer is always a proud, well-earned "I did."
The Foundation: Understanding the Curry Paste
The difference between a lackluster curry and one that makes your eyes widen with delight is almost always the paste. In Thai cooking, the krueng gaeng (curry paste) is the essential architecture of the dish. It is a concentrated slurry of aromatics, roots, and chilies that must be pulverized into a uniform, vibrant mass. The traditional method uses a heavy granite mortar and pestle, which shears the fibers of the ingredients rather than chopping them, resulting in a more intense release of oils.
Why Pounding Matters
When you use a food processor, you are essentially pulverizing and overheating the ingredients, which can lead to a dull flavor. Using a mortar and pestle is not just a romantic nod to tradition; it is a chemical necessity. The friction of the pestle against the granite walls creates a fine paste where the oils of the galangal, lemongrass, and zest combine at a microscopic level.
"The true soul of a Thai curry does not reside in the coconut milk, but in the mortar where the spices are born. If you want depth, you must be willing to put in the physical work of the pound."
To achieve the best results at home, follow a specific order of operations: start with your hardest, most fibrous ingredients. Pound your sea salt, dried chilies, and galangal first. Once those are broken down, move on to the lemongrass and kaffir lime zest, and finish with the softer components like shallots and garlic. This ensures that every ounce of flavor is extracted and incorporated into the final paste.
The Art of the Break: Cooking the Paste
One of the most misunderstood techniques in Thai cooking is the process of "breaking" the coconut cream. Many home cooks make the mistake of dumping all their coconut milk into the pan and adding the curry paste immediately. This leads to a thin, watery sauce that lacks the vibrant, oily sheen that defines a professional-grade curry. You must start with the coconut cream or the thick, fatty top layer of a can of coconut milk.
Reaching the Oil Threshold
Heat a small amount of your coconut cream in a heavy-bottomed wok or skillet over medium-high heat. As the water content evaporates, the solids will begin to separate from the fat. This is the "break." You are looking for the moment when the coconut oil begins to pool and bubble around the edges of the white solids. Only when you see this oil glistening can you add your curry paste.
By frying the paste directly in this coconut fat, you are blooming the aromatics. This high-heat interaction draws out the fat-soluble flavor compounds from the chilies and herbs, effectively "frying" the raw edge off the garlic and shallots. You should cook the paste for 3 to 5 minutes until it is incredibly fragrant and slightly darkened. If you skip this step, your curry will taste raw and aggressive, lacking the mellow, integrated depth that marks an authentic preparation.
Balancing the Four Pillars: Sweet, Salty, Sour, Spicy
The genius of Thai cuisine lies in the Four Pillars of Flavor. A great curry should never be dominated by one of these elements; it should be a cohesive balance. You begin with the saltiness of fish sauce (nam pla), the sweetness of palm sugar, the sourness of tamarind or lime juice, and the heat of your chilies.
Adjusting on the Fly
Always remember that you can add more, but you can never take it away. Start with a conservative amount of fish sauce, as its salinity can intensify as the sauce reduces. When adjusting for sweetness, use palm sugar if possible, as it has a deeper, more caramel-like quality than refined white sugar. If your curry feels heavy, a squeeze of fresh lime juice at the very end of the cooking process can provide the necessary acidity to lift the flavors and brighten the entire profile.
"Cooking is the art of adjustment. Taste, reflect, and then balance. If the curry is too spicy, add a touch more sugar or coconut milk. If it is too bland, a tiny drop of fish sauce will awaken the entire dish like a lightning strike."
The key is to taste your curry at three stages: once the paste is fried, once the liquid is added, and finally, right before you remove it from the heat. Keep a small bowl of lime wedges and a bottle of high-quality fish sauce nearby during the final tasting. This ensures you can fine-tune the flavor profile to match your specific palate preferences before serving.
Selecting Proteins and Vegetables
The protein you choose determines the texture and final cooking time of the dish. Thai curries are incredibly versatile, but they are not one-size-fits-all when it comes to the cooking process. For chicken, I recommend using boneless, skinless thighs, as the higher fat content prevents the meat from drying out during the simmering process. If you are using beef, opt for a tougher cut like chuck, which benefits from the slow, gentle braising in the curry liquid.
Timing Your Add-ins
Vegetables should be added according to their density. Hard vegetables like carrots, potatoes, or bamboo shoots should be added early, often with the liquid, so they can tenderize as the curry simmers. Delicate vegetables such as Thai eggplant, spinach, or peppers should only be added in the final 3 to 5 minutes of cooking. This prevents them from becoming mushy and ensures they retain a vibrant color and a pleasant "snap."
The Secret Technique: Finishing with Aromatics
Many home cooks are surprised to learn that the most important part of a curry often happens after the stove is turned off. To achieve that signature aroma you encounter in a Thai restaurant, you need to introduce fresh, volatile aromatics right at the end. This includes torn kaffir lime leaves, Thai basil, and sometimes a garnish of fresh red chilies.
The Role of Basil
Do not cook the basil for too long. If you add it to a boiling pot for five minutes, the leaves will turn black, and the delicate anise notes will vanish. Instead, stir the fresh basil in the moment you turn off the heat. The residual heat of the curry is enough to wilt the leaves and release their oils without compromising their structural integrity or flavor. This technique creates a fresh, herbal contrast to the rich, creamy, and spicy base of the sauce.
Mastering Heat: Controlling the Scoville Level
If you are sensitive to heat, do not fear the curry. The beauty of making it at home is the ability to calibrate the Scoville level to your personal comfort zone. The heat in Thai curry primarily comes from the fresh or dried chilies used in the paste. If you want a milder experience, simply remove the seeds and membranes from the chilies before pounding them into your paste, or reduce the number of chilies used by half.
The Buffer Effect
Remember that coconut milk acts as a buffer. If you find that you have accidentally made your curry too hot, you can easily mitigate the intensity by stirring in a little more coconut milk or even a dollop of coconut cream. The fat molecules in the coconut milk bind to the capsaicin in the chilies, effectively neutralizing the burn on your tongue. This is why curries are so perfectly paired with steamed jasmine rice; the mild, neutral flavor of the rice provides a necessary palate cleanser between the spicy, complex bites of the curry.
Green Curry:* Typically the hottest, using plenty of fresh green chilies.
Red Curry:* A medium heat, using dried red chilies for a deep, smoky flavor.
Massaman Curry:* Very mild, relying on dry toasted spices like cardamom and cinnamon rather than chili heat.
Equipment Essentials for the Home Kitchen
You do not need a commercial kitchen to excel at Thai cooking, but having the right tools makes the process significantly more efficient and enjoyable. The most critical piece of equipment is a sturdy, heavy-bottomed wok or a high-quality enameled cast iron pot. These materials retain heat exceptionally well, which is essential for that initial "breaking" of the coconut cream.
Essential Gear List
Mortar and Pestle:* Invest in a medium-sized granite one. It will last a lifetime and is non-negotiable for authentic paste texture.
Wok or Deep Skillet:* You need high sides to manage the liquid volume and prevent splattering.
Microplane/Grater:* Essential for grating lime zest or ginger quickly and effectively.
Silicone Spatulas:* Crucial for scraping every last drop of your curry paste out of the mortar and into the pan.
By treating your kitchen like a laboratory for flavor, you move from simply "following a recipe" to "mastering a craft." Do not be afraid to taste, smell, and adjust. Cooking is a sensory experience, and your instincts are the most powerful tool you have.
Final Thoughts
Mastering the art of Thai curry is a journey, not a destination. It is about understanding how ingredients interact, how heat transforms fat, and how aromatics can transport you across the world. By taking the time to prepare your own pastes, choosing high-quality coconut milk, and respecting the delicate balance of the four flavor pillars, you elevate your home cooking to an entirely different level.
Never be discouraged if your first attempt is not perfect. Thai cooking is precise, but it is also forgiving. If the sauce is too thick, thin it with a splash of water or stock. If it lacks life, a final dash of lime juice is your best friend. The most important thing is to enjoy the process—the pounding of the aromatics, the rich scent of blooming spices, and the satisfaction of sitting down to a meal that is truly, deeply, and authentically yours. You have the tools, the technique, and the understanding; now, you just need to start the fire.
Deepening Your Knowledge: Advanced Nuances of Texture
As you become more comfortable with the basic techniques, you might start to look for ways to add professional-level complexity to your dishes. One such method involves the manipulation of textures within the curry itself. Beyond just the meat and vegetables, consider the interplay of "crunch" and "silk." Many traditional Thai kitchens finish their curries with a garnish that isn't just aesthetic. Fried shallots or crushed roasted peanuts can provide a necessary textural contrast to the soft, creamy sauce, making each bite more engaging.
Thickening Without Cornstarch
One of the most common mistakes I see in home kitchens is the use of cornstarch to thicken a curry sauce. In authentic Thai cuisine, thickness should come from the reduction of the coconut milk and the density of the curry paste itself. When you allow your curry to simmer slowly, the water evaporates, and the coconut fat emulsifies with the paste, creating a natural, velvety consistency. If you feel your curry is too thin, simply reduce the heat and let it simmer for an extra ten minutes while stirring occasionally. This creates a much more refined, luxurious mouthfeel than the gummy texture produced by cornstarch.
Ingredient Sourcing: Why Quality Dictates the Outcome
You can have the best technique in the world, but if your ingredients are subpar, the final dish will reflect that. Thai cooking relies heavily on fresh herbs. When shopping for kaffir lime leaves, look for bright, vibrant green leaves that have a strong, citrusy fragrance when bruised. If your lime leaves look brown or brittle, they have lost their essential oils and will add nothing to your curry.
The Coconut Milk Conundrum
Not all coconut milk is created equal. Most canned coconut milk found in standard grocery stores contains gums and thickeners like guar gum. While these aren't inherently "bad," they can prevent the coconut cream from properly separating, which makes the "breaking" technique much more difficult to achieve. Look for brands that contain only coconut extract and water, or, if you have access to an Asian grocer, seek out high-fat coconut creams specifically labeled for cooking. The higher the fat content, the better the final emulsion will be.
Cultural Context and Respect
It is helpful to remember that Thai curry is not a monolith; it is a regional reflection of geography and history. The curries of the south, influenced by coastal geography and proximity to Malaysia, often feature a heavier hand with turmeric and fresh coconut milk. The curries of the north are often thinner, more broth-like, and focus on local vegetables and wild-foraged herbs.
By understanding these regional differences, you can better appreciate why certain curries require specific techniques. For example, a Northern-style Gaeng Hang Lay (pork belly curry) relies on a long, slow braise with ginger and tamarind, whereas a Southern-style Gaeng Tai Pla (fish organ curry) is known for being ferociously spicy and intensely salty. As you explore these different styles, you will naturally develop a more nuanced understanding of how to balance ingredients to achieve the "authentic depth" we aim for at Blame The Chef.
The Role of Aromatics as Medicine
In traditional Thai culture, many of the ingredients used in curry paste—such as galangal, lemongrass, turmeric, and garlic—are considered medicinal. Galangal is often used to aid digestion, turmeric for its anti-inflammatory properties, and garlic for immune support. When you cook with these ingredients, you are not just preparing a meal; you are participating in a tradition that views food as a way to nourish the body. This holistic approach is why these dishes feel so satisfying. They are not just calorically dense; they are vibrant, healing, and deeply grounding.
Finalizing Your Technique: The "Rest" Period
Just as you would let a steak rest after grilling, letting your curry "rest" for a few minutes before serving can make a massive difference. When the curry comes off the high heat, the flavors are still volatile and the fats are very active. Allowing it to sit in the pot for two to three minutes while you prepare your rice or garnishes allows the sauce to settle, the oils to emulsify further, and the temperature to reach a level where the nuances of the aromatics become perceptible on the tongue.
Do not rush the transition from stove to table. That brief moment of stillness is where the dish truly comes together. Serve it in a bowl where the sauce can pool, and always serve alongside high-quality jasmine rice, which has been rinsed multiple times to remove excess starch. The fluffiness of the rice should be a perfect foil for the richness of the curry.
Beyond the Basics: Experimenting with Flavor
Once you have mastered the foundational curries, don't be afraid to branch out. Have you tried adding a hint of roasted coriander seeds to your Red Curry? Or perhaps a small amount of fermented shrimp paste (kapi) to your Green Curry for an extra layer of umami? These small, personal touches are what differentiate a recipe-follower from a chef.
Remember, the goal is always balance. If you decide to add a strong, funky element like shrimp paste, ensure you are offsetting it with a touch more sweetness or sourness to keep the dish harmonious. Every change you make is an opportunity to learn about how flavors interact. Keep a cooking journal, note your ratios, and don't be afraid to fail. A "bad" curry is just a data point for your next, much better, batch.
Troubleshooting Common Issues
If you find yourself in a bind while cooking, don't panic. Almost every common issue has a quick fix:
The curry is too oily:* You may have used a coconut milk with a very high fat content. Simply spoon off the excess oil from the top before serving.
The curry is too salty:* Add a bit more coconut milk or, if you have it, a small amount of unsalted vegetable stock. A pinch of palm sugar can also help mask excess saltiness.
The protein is overcooked:* Next time, try poaching the protein in the sauce for a shorter duration, or searing it separately and adding it to the sauce at the very end.
The color is muddy:* This usually happens if the paste wasn't fried correctly or if the vegetables were overcooked. Stick to the "adding vegetables at the end" rule and ensure your paste is properly bloomed.
With these techniques and troubleshooting steps in your back pocket, you are ready to approach your kitchen with a new level of authority. Thai curry is a rewarding, complex, and beautiful culinary challenge. Enjoy the process of learning, the thrill of the perfect balance, and, most importantly, the incredible food you are about to create. Happy cooking!

Get the Next Recipe
Weekly recipes, techniques, and gear picks — straight to your inbox.
