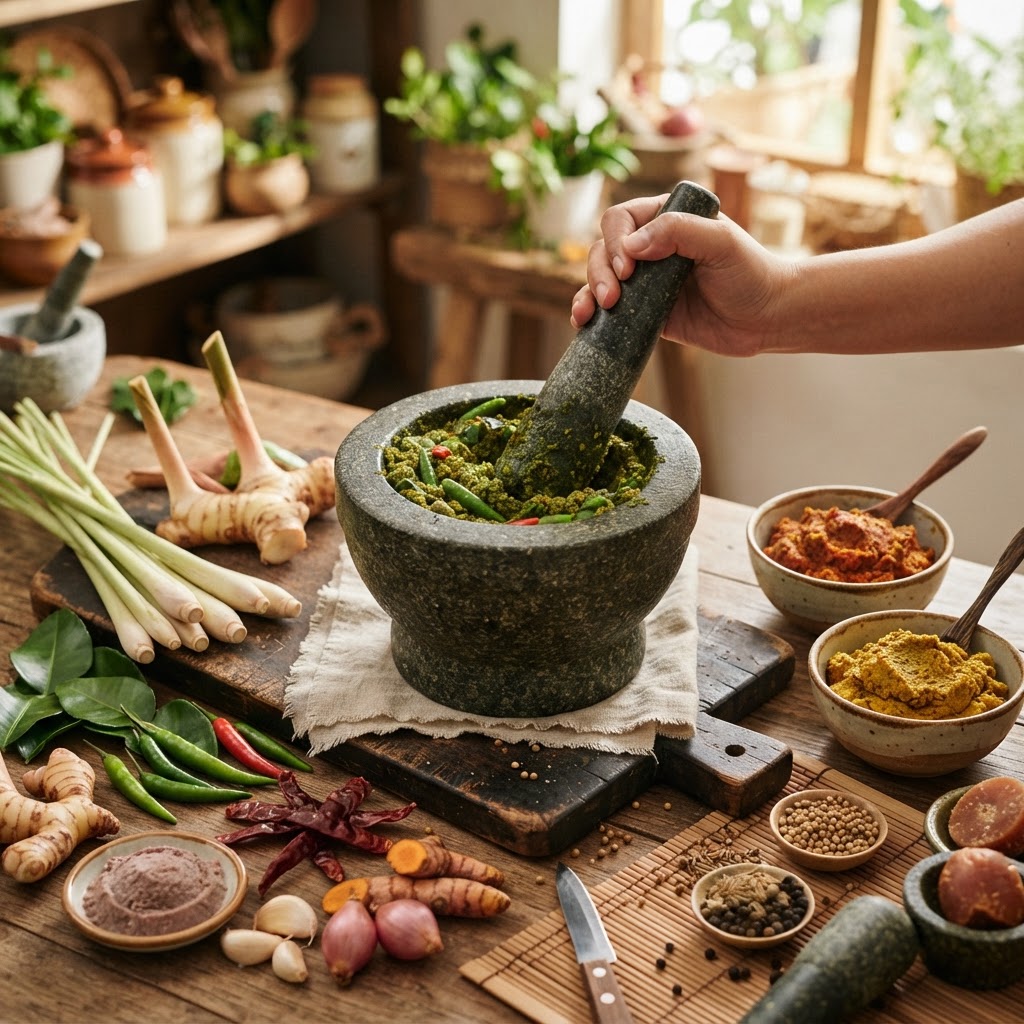
The Home Cook’s Guide to Thai Curry Pastes: Mastering Mortar and Pestle Techniques for Authentic Green, Red, and Yellow Bases
There is a singular, transformative moment in a home cook’s journey when they move beyond the convenient jar of store-bought curry paste and decide to start from scratch. Thai cuisine is defined by its aromatic complexity, a delicate balance of sweet, salty, spicy, and sour that feels almost magical until you understand the mechanics behind it. Many home cooks fear the curry paste, assuming it requires a lifetime of experience or obscure ingredients that can only be found in a hidden corner of a bustling Bangkok market. The truth, however, is that while it demands patience and precision, the process of hand-pounding your own curry paste is one of the most rewarding rituals in the kitchen. It is a sensory experience where the rhythm of the mortar and pestle becomes a meditation, allowing you to control the exact intensity of every flavor note in your dish.
When you look at the vibrant, oily, fragrant pastes produced by a traditional mortar and pestle, you begin to understand why authentic Thai curries have a depth that mass-produced versions simply cannot replicate. Machine-blended pastes often heat up the ingredients, causing the delicate essential oils of fresh herbs like lemongrass and galangal to oxidize and lose their brightness. By using the rhythmic, crushing motion of stone, you are gently macerating the fibrous ingredients, releasing their potent oils and aromatics into the fiber rather than just chopping them into tiny, lifeless bits. This technique creates a homogeneous paste with a texture that clings to protein and vegetables, ensuring every bite is as flavorful as the last. It is the secret weapon of the Thai kitchen, a humble set of tools that elevates a meal from simply "good" to truly transcendent.
In this guide, we will walk through the fundamentals of crafting Green, Red, and Yellow curry bases from the ground up. You will learn the importance of ingredient selection, the specific order in which to add your aromatics to ensure a perfect grind, and the science of how these pastes interact with heat and coconut milk. Whether you are aiming to impress your guests with a fiery, emerald-green curry or a soothing, turmeric-heavy yellow base, the technique remains the foundation of your success. We will strip away the mystery, provide you with professional ratios, and teach you how to adjust the heat to your personal tolerance. Put on your apron, clear your counter space, and prepare to embark on a culinary transformation that will make you the envy of your fellow home cooks.
The Foundation of Flavor: Understanding Aromatics
To master Thai curry, you must first respect the ingredients that provide its soul. A curry paste is effectively a concentrated distillation of the Thai culinary philosophy. Every element serves a specific purpose: the lemongrass provides the floral lift, the galangal offers a sharp, piney depth that ginger cannot replicate, and the shallots provide the essential base sweetness that binds the flavors together. When you are sourcing these ingredients, freshness is your absolute priority. Look for lemongrass stalks that are firm and pale at the base, and seek out fresh galangal that is knobby and hard, rather than the shriveled, woody bits often relegated to the back of a supermarket shelf.
Why the Mortar and Pestle Reigns Supreme
There is an ongoing debate regarding the use of food processors versus the traditional granite mortar and pestle. While a high-powered blender can certainly turn ingredients into a liquidized mess, it fails to achieve the structural integrity of a hand-pounded paste. The mortar and pestle works through maceration, a technique that breaks down cell walls to release the essential oils without over-heating the ingredients. When you pound fibrous ingredients like lemongrass, you are effectively forcing their volatile oils into the surrounding aromatics, creating a cohesive, velvety emulsion. If you use a blender, the high speed of the blades often creates heat, which causes the brightness of the citrus oils to fade, leaving you with a dull, muted final flavor.
The Importance of Ingredient Order
The order in which you add ingredients to your mortar is not merely a suggestion; it is a strategic requirement. You must start with the most fibrous, hardest ingredients—the lemongrass, galangal, and kaffir lime zest. These need the most force to break down. Once they have become a fine, pulpy paste, you move on to the aromatics like shallots, garlic, and fresh chilies. By introducing them later, you ensure they are incorporated into the fibrous base you have already built. If you add the soft ingredients first, they will simply slide around the bottom of the bowl, making it nearly impossible to pulverize the tough, woody fibers. Finally, you add the dry spices, such as coriander seeds or cumin, which act as a binder to pull the paste together.
The secret to a Thai curry that sings is not in the variety of ingredients alone, but in the release of their essential oils through the rhythmic, intentional force of the granite pestle. When the aroma hits you, that is the moment you know the foundation is ready.
The Green Curry Base: Mastering the Emerald Paste
Green curry, or Gaeng Keow Wan, is known for its sweet, vibrant profile and its characteristic sharp, lingering heat. The vibrant color comes from the abundance of fresh green chilies—usually the smaller, fiery bird’s eye chilies combined with larger, milder green chilies for color and volume. Achieving a vivid, deep green color is the mark of a master; it requires fresh herbs and a quick, efficient pounding process to prevent the paste from oxidizing and turning a muddy, brownish-green.
Selecting the Right Chilies
The heat of your green curry is dictated entirely by the ratio of Thai bird’s eye chilies to larger, green long chilies. If you want a milder heat but the same signature color, you can de-seed the chilies or use more of the larger, fleshy green peppers. Pro-tip: Keep your chilies in the refrigerator until the exact moment you are ready to pound them. The cold helps maintain their bright pigment. Always work in a well-ventilated area, and for the love of your eyes, do not touch your face after handling these peppers. The capsaicin will linger on your hands far longer than you expect.
The Essential Green Trio
Your green base must include three non-negotiables: fresh cilantro roots, kaffir lime zest, and shrimp paste. Cilantro roots are, unfortunately, often discarded by Western grocery stores, but you must find them with the stalks attached. The roots contain the most concentrated flavor, providing a deep, earthen base that leaves and stems simply cannot provide. The kaffir lime zest (or makrut lime) adds a signature floral citrus note that is the defining aroma of green curry. Finally, the shrimp paste, or kapi, acts as the "umami bomb" that ties the fresh, green herbs to the richness of the coconut milk.
The Red Curry Base: A Study in Depth and Intensity
While green curry is bright and floral, Red Curry (Gaeng Phed) is earthy, spicy, and profoundly savory. The foundation of this paste is the dried red chili. Unlike fresh chilies, dried chilies must be rehydrated before they are pounded. This process is crucial because it ensures that the paste reaches a consistent, pliable texture. When rehydrating, use hot water, but not boiling; you want the chilies to become tender, not cooked.
The Role of Dried Chilies
The character of your red curry depends on the variety of dried chilies you choose. For a classic, balanced heat, use dried Thai long chilies. If you prefer a deeper, more complex smoke, you can add a single ancho or guajillo pepper, though this moves slightly away from strict tradition. The key is to soak the chilies for at least 20 minutes, then drain them well. If they are too wet, your paste will become watery, which is the enemy of a good fry. After soaking, discard the stems and shake out the excess seeds if you want a more manageable heat level.
Balancing the Aromatics
Once your chilies are ready, follow the same "hard-to-soft" protocol established for the green paste. The red curry base benefits from a higher ratio of galangal and garlic. The pungency of the garlic is essential here to stand up to the robust heat of the dried chilies. Some chefs like to add a teaspoon of toasted, crushed coriander seeds and black peppercorns to provide a subtle, warm spice profile that lingers on the back of the palate. This is the base that makes the best duck curry or thick, succulent beef preparations.
A curry is only as good as the fry it receives at the start. Once your paste is made, you must 'fry' it in a small amount of thick coconut cream until the oil begins to separate from the solids. This process, known as 'cracking the cream,' is the bridge between a raw paste and a harmonious, finished curry.
The Yellow Curry Base: The Warm, Soothing Classic
Yellow curry (Gaeng Kari) is often considered the most approachable of the three, but its simplicity is deceptive. Its primary flavor profile is driven by turmeric, which gives it that brilliant, golden hue and earthy, slightly bitter undertone. Unlike the green and red versions, which rely heavily on fresh chilies, yellow curry is much milder, relying on the warmth of powdered spices rather than the sharp burn of raw chili heat.
The Turmeric Factor
When using fresh turmeric, handle it with care. It will stain your mortar, your wooden pestle, and your fingernails almost instantly. If you cannot find fresh turmeric root, high-quality organic turmeric powder is an acceptable substitute, but it will lack the bright, floral top-notes of the fresh root. If you use the powder, add it at the very end of the pounding process to ensure it is evenly distributed throughout the paste without having to be crushed further.
Spice Profiles and Ratios
The signature of a great yellow curry is the aromatic blend of warm spices. You should incorporate:
Toasted coriander seeds*
Toasted cumin seeds*
White peppercorns*
Cloves and cinnamon* (in small quantities)
These spices must be toasted in a dry pan over medium heat until they are fragrant—just a minute or two—before being pulverized into a fine dust in the mortar. Once they are a fine powder, add them to your base of aromatics (lemongrass, galangal, garlic, and shallots). This creates a paste that smells almost like an Indian curry, yet remains distinctly Thai due to the presence of the aromatics and the essential addition of shrimp paste or a heavy pinch of sea salt.
Techniques for Success: "Cracking the Cream"
Regardless of which paste you choose, the most important phase of the cooking process happens after the mortar is put away. You have created a beautiful, fresh base, but it is still raw. You must now cook the paste to release its volatile oils and create a cohesive foundation for your curry. This technique, called "cracking the cream," is non-negotiable for professional-level results.
The Physics of the Fry
Start by taking the thickest part of your coconut milk—the creamy, opaque layer at the top of a high-quality canned coconut milk—and adding it to a hot pan. As it heats, the water will evaporate, and the fat will separate. When the fat begins to bubble, add your curry paste. Fry the paste in this coconut oil, stirring constantly, until it becomes fragrant and begins to darken slightly. You will know it is ready when the oil begins to seep out from the edges of the paste and takes on the color of your curry base.
Incorporating the Liquids
Once the paste is fried and aromatic, add the remaining coconut milk and your protein. Never rush this stage. If you add the liquids too quickly, you risk "boiling" the paste rather than frying it, which leads to a "raw" taste that ruins the dish. The paste should become one with the fat, creating an emulsion that will provide the body for your sauce. Keep your heat at a medium-low; you want a gentle simmer, not a vigorous boil, to ensure the protein cooks evenly without toughening.
Troubleshooting Your Paste
Even the best chefs hit snags. If your paste is too fibrous, you likely didn't slice your lemongrass thin enough before starting. A chef's tip: use a microplane for the kaffir lime zest to ensure it disappears into the paste without leaving chewy bits. If your paste is too spicy, add a bit more palm sugar or a squeeze of lime juice at the end of the cooking process to balance the heat. The acid and sweetness will cut through the capsaicin and provide a more rounded flavor profile.
Texture and Storage
Your goal is a paste that is fine, smooth, and uniform. If it is too coarse, it won't emulsify properly with the coconut milk, leading to a gritty mouthfeel. If you are making a larger batch, you can store your curry paste in the refrigerator for up to one week in a sealed container, or freeze it in ice cube trays for up to three months. When freezing, cover the surface of the paste with a thin layer of vegetable oil to prevent oxidation and freezer burn. This means you are only one pan-fry away from a professional-quality meal on a busy weeknight.
The mortar and pestle is not just a tool; it is a bridge between the raw ingredients of the earth and the polished elegance of a finished plate. Embrace the work, and the flavors will reward your effort tenfold.
Final Thoughts
Mastering the art of Thai curry pastes is a transformative step for any home cook. It changes the way you view the kitchen, moving you from a consumer of convenience products to a creator of authentic, vibrant food. By understanding the chemical importance of the mortar and pestle, respecting the order of your ingredients, and embracing the technique of frying your paste, you are engaging in a tradition that spans centuries. Do not be discouraged if your first attempt isn't perfect; the beauty of this craft lies in the iteration. Taste your paste at every step. Notice how the salt interacts with the galangal, or how the lime zest brightens the earthiness of the turmeric.
As you gain confidence, start experimenting with the ratios. Perhaps you prefer a bit more heat in your green curry or a deeper, more savory punch in your yellow base. These adjustments are the hallmark of a cook who has truly mastered their craft. The "Blame The Chef" philosophy is built on the belief that anyone can achieve greatness if they are willing to put in the time and attention to detail. So, head to your local market, pick up the freshest ingredients you can find, and start pounding. Your kitchen is about to become the most aromatic room in your home, and your dinner table is about to become a place of true culinary wonder. Keep practicing, keep tasting, and most importantly, enjoy the process. The results, quite literally, will be in the bowl.

Get the Next Recipe
Weekly recipes, techniques, and gear picks — straight to your inbox.
