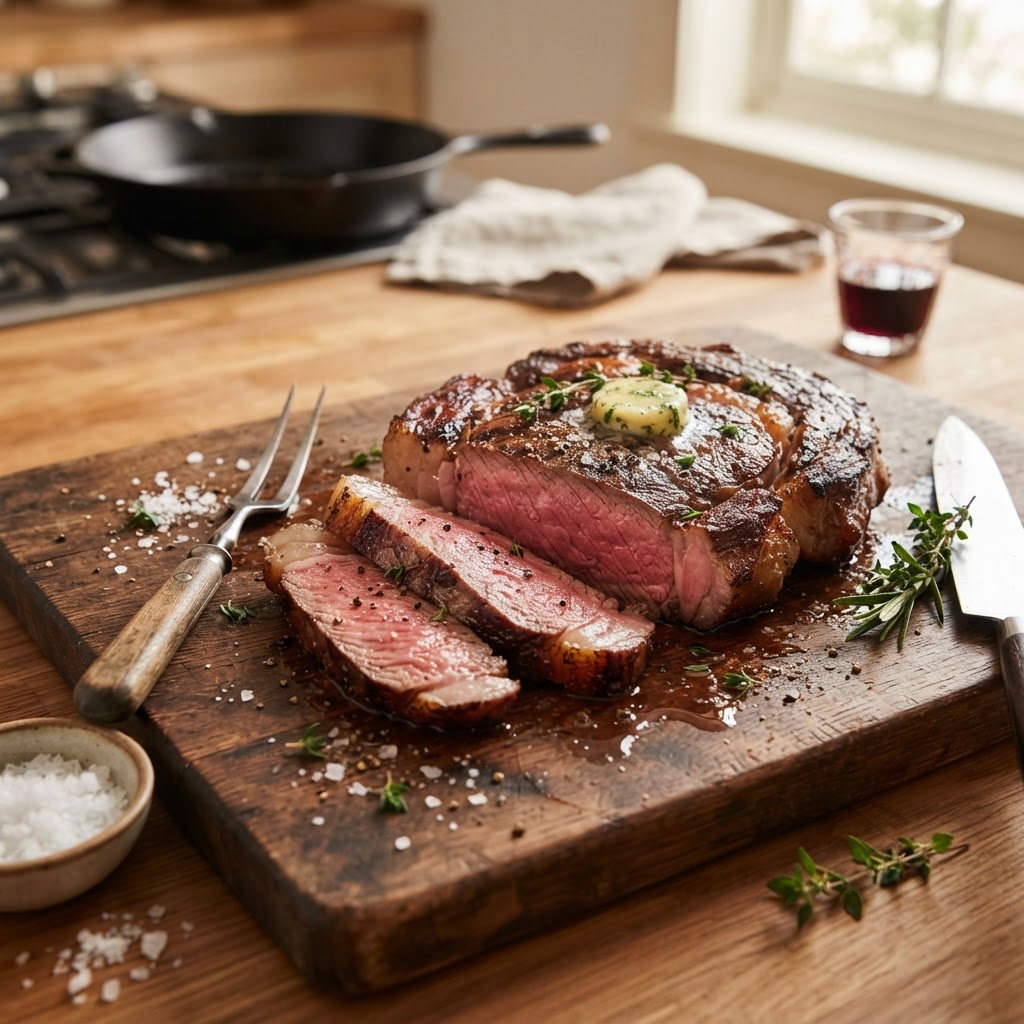
The Home Cook’s Guide to The "Reverse Sear": Mastering Internal Temperature for Perfectly Evenly Cooked Steaks and Roasts
There is a profound, almost primal satisfaction that comes from sitting down to a steak cooked to absolute, edge-to-edge perfection. We have all experienced the tragedy of the "bullseye" steak—that sad, gradient cross-section where a gray, overcooked outer band surrounds a tiny, lonely island of pink in the center. For decades, home cooks were told that the only way to achieve a steakhouse-quality sear was to blast meat over blistering heat, hoping the interior would somehow miraculously catch up to the exterior. This traditional high-heat method often resulted in uneven cooking, stressful timing, and a dinner that lacked the consistency we crave. Fortunately, the culinary world has moved past these hit-or-miss tactics, embracing a transformative technique that levels the playing field for every home kitchen.
The Reverse Sear method is, quite simply, the greatest advancement in home meat preparation of the modern era. By decoupling the process of cooking the interior of the meat from the process of browning the exterior, you gain total control over the final result. Instead of fighting against the physics of rapid heat transfer, you invite science to work in your favor by utilizing low, gentle heat to bring the protein to its ideal internal temperature before finishing it with a lightning-fast sear. This technique isn't just for ribeyes; it is a versatile tool for thick-cut pork chops, tenderloins, and even massive roasts, ensuring that every bite possesses the same texture and tenderness from the very first slice to the last.
Whether you are a novice cook terrified of ruining an expensive cut of Wagyu or a seasoned pro looking to refine your consistency, the reverse sear will fundamentally change how you view your stove and oven. You will no longer rely on touch tests, guesswork, or the dreaded "poke" method that has led so many well-intentioned dinners toward the bin. By focusing on temperature rather than time, you remove the anxiety from the kitchen, allowing you to enjoy the process of cooking rather than frantically monitoring a skillet. It is time to retire the old ways of thinking and embrace a methodical, rewarding approach that guarantees professional-grade results every single time you fire up the range.
Understanding the Physics of the Reverse Sear
The Problem with High Heat
When you throw a cold, thick steak directly into a blazing-hot pan, you are engaging in a race against thermodynamics. Because meat is a poor conductor of heat, the exterior will inevitably reach the Maillard reaction stage—the browning process that creates deep, savory flavors—long before the center has had a chance to thaw or reach a safe, palatable temperature. If you want a medium-rare steak, the outside becomes a charred, overcooked crust while the center remains raw. To combat this, cooks often try to compensate by turning the heat down, but then you lose that essential, high-crust sear that makes a steak truly special.
Why the Reverse Sear Works
The beauty of the reverse sear is that it works in reverse order of the traditional method. By placing your protein in a low-temperature environment—typically an oven or a smoker—you allow the thermal energy to permeate the meat slowly and evenly. This results in a uniform temperature profile throughout the entire cut. As the meat warms, the surface also dries out significantly, which is a hidden benefit. Surface moisture is the enemy of a good crust; by allowing the oven to dehydrate the exterior while the interior cooks, you ensure that the final sear will be faster, darker, and more flavorful.
"The secret to a perfect crust isn't just about heat intensity; it's about surface dryness and the patience to let the interior catch up to the exterior without the risk of overcooking."
Controlling the Environment
Temperature control is the cornerstone of this technique. While a standard oven works perfectly fine, those with convection capabilities or dedicated smokers will find even faster, more uniform results due to increased airflow. The objective is to bring the meat to within 10 to 15 degrees of your target final temperature before you ever touch the skillet. This "holding" phase is critical because it prevents carryover cooking from skyrocketing the temperature beyond your desired doneness during the searing phase.
Preparing Your Protein for Success
Selection and Thickness
Not all cuts are created equal. The reverse sear is specifically designed for thick-cut proteins—ideally at least 1.5 inches to 2 inches thick. If the steak is too thin, it will reach your target temperature before you have a chance to develop the crust, essentially turning the process into a regular pan-fry. Look for marbled steaks with good fat content, such as Ribeye, New York Strip, or Porterhouse. For roasts, the reverse sear is even more effective, as it eliminates the gradient found in traditional high-heat roasting where the outside is grey and the inside is raw.
The Importance of Seasoning
Because the cook time is extended during the low-temperature phase, you have a unique opportunity to prepare the surface of the meat. I recommend a generous application of Kosher salt at least 45 minutes before cooking, or even better, 24 hours in advance if you have the space in your refrigerator. This is known as a dry brine. During this time, the salt draws moisture out of the meat, dissolves, and is then reabsorbed into the muscle fibers, seasoning the meat deep inside while simultaneously drying the surface for a superior sear.
Temperature Management
When preparing for the cook, you must have a high-quality digital probe thermometer. You cannot do this by feel. Insert the probe into the thickest part of the meat, avoiding any large pockets of fat or bone, which can provide inaccurate readings. Set your oven to a low temperature, between 225°F and 250°F (105°C to 120°C). Anything hotter than 275°F defeats the purpose of the gentle heat gradient, and anything lower than 200°F may take too long to reach the danger zone, though for most home ovens, 225°F is the "sweet spot" for efficiency and quality.
The Low-and-Slow Phase: The Gentle Warm-Up
Setting the Stage
Once your protein is seasoned and your oven is preheated, place the meat on a wire rack set over a rimmed baking sheet. This allows air to circulate underneath the protein, preventing the bottom from becoming soggy or cooking differently than the top. Do not skip the wire rack; it is the difference between a steak that is evenly browned and one that has a flat, steamed bottom. If you are doing a large roast, consider tying it with butcher's twine to ensure it maintains a uniform shape, which promotes even heat penetration.
Monitoring the Progress
Depending on the thickness of your steak, this phase will take anywhere from 45 minutes to 90 minutes. Do not be tempted to open the oven door too frequently, as this drops the ambient temperature and extends the cooking time. Instead, monitor the internal temperature using your thermometer's remote display or by checking every 20 minutes once you get close to the estimated end time. The goal is to pull the meat out when it reaches the following "pull" temperatures:
Rare:* 110°F to 115°F
Medium-Rare:* 120°F to 125°F
Medium:* 130°F to 135°F
The Rest Factor
One of the most common mistakes in home cooking is skipping the rest. Even with the reverse sear, where the temperature gradient is minimal, the muscle fibers are still tense from the heat and the juices are agitated. Once you pull the meat from the oven, let it rest for 10 to 15 minutes. This allows the internal juices to redistribute throughout the meat. Unlike traditional cooking, where resting is used to cool the exterior to prevent overcooking, here we rest to stabilize the meat for the final searing step.
Achieving the Perfect Crust: The Final Sear
Choosing the Right Fat
While your steak is resting, get your skillet ready. A cast-iron skillet is the gold standard here, as it retains heat better than any other material. You want a high smoke point oil, such as avocado oil, grapeseed oil, or even refined coconut oil. Avoid butter at this stage, as the milk solids will burn almost instantly. We will add butter later for flavor, but for the sear itself, we need pure, high-heat fat to ensure the crust develops before the interior warms up too much.
The Technique of the Sear
Heat your skillet until the oil is shimmering and just beginning to smoke. Gently place your rested steak into the pan, ensuring it makes full contact with the surface. You only need to sear for about 60 to 90 seconds per side. Because the steak is already cooked internally, your goal is strictly surface-level browning. If you are using a thick-cut steak, don't forget to sear the edges using a pair of tongs to render the fat cap, which adds an incredible depth of flavor.
The Butter Baste (Arroser)
In the final 30 seconds of searing, drop a knob of unsalted butter, a few cloves of smashed garlic, and a sprig of fresh rosemary or thyme into the pan. As the butter melts and foams, tilt the pan slightly and use a large spoon to continuously baste the steak with the hot, aromatic fat. This adds a nutty, herbaceous complexity to the exterior that bridges the gap between the Maillard crust and the tender interior. It’s a professional technique that takes just a moment but elevates the final product significantly.
"The final sear is the crescendo of the process; it is not about cooking the meat, but about perfecting the canvas with flavor and texture."
Beyond Steaks: Applying the Technique to Roasts
The Versatility of the Reverse Sear
The reverse sear is not just a steakhouse trick; it is an incredibly reliable way to handle expensive, large-format proteins. Whether you are roasting a Prime Rib, a Beef Tenderloin, or even a Leg of Lamb, the methodology remains the same. With large roasts, you simply increase the time and keep the oven temperature low to ensure that the heat has time to travel to the center without overcooking the outer layers of the meat.
Timing for Large Roasts
For a massive roast, you might spend several hours in the oven. The benefit here is that you can serve a perfectly cooked medium-rare roast to a large table of guests without the anxiety of the center being raw or the edges being leather. Because the roast is large, you can increase the pull temperature by a few degrees—aim for 115°F for medium-rare—as the carryover heat in a large mass of meat will continue to climb more significantly than it does in a single steak.
Slicing and Presentation
Once your roast has been seared and rested, use a very sharp, long carving knife. Because the meat is uniformly cooked, you don't have to worry about finding the "perfect" center cut for your guests; every slice will be consistent. Serve with a reduction of the pan juices, some fresh herbs, and perhaps a dollop of horseradish cream or chimichurri to cut through the richness of the meat. The presentation of a reverse-seared roast, with its uniform pink interior and dark, crisp exterior, is always a showstopper.
Troubleshooting Common Issues
The "Grey Band" Returns
If you find that you still have a grey band around the outside, it is likely due to one of two things: your oven temperature was too high, or you seared for too long. Ensure your oven is calibrated correctly; many home ovens run 25 to 50 degrees hotter or cooler than the dial suggests. Using a separate, oven-safe thermometer is the best way to verify the ambient temperature. If you find the sear is taking longer than two minutes, your pan probably isn't hot enough, which allows too much heat to soak into the center.
Stuck Meat
If the meat is sticking to your cast iron, it is because it isn't ready to be flipped. The Maillard reaction creates a natural release; when the crust is fully developed, the meat will naturally detach from the pan. If you try to force it, you will tear the crust. Be patient. If you are worried about sticking, ensure you have used enough oil and that the pan is adequately preheated. Even a well-seasoned cast iron pan needs a thin layer of fat to create that barrier between the iron and the protein.
Smoke Control
Reverse searing can be a smoky affair. Because you are using high heat for the final sear, you must ensure your kitchen is properly ventilated. Turn your stove's exhaust fan on to the highest setting, open a window, or even set up a fan in the doorway. If you have an outdoor grill with a side burner or a charcoal setup, performing the final sear outdoors is the best way to keep your house smoke-free while still achieving that high-heat crust.
Advanced Tips for the Culinary Enthusiast
Utilizing Sous Vide in Tandem
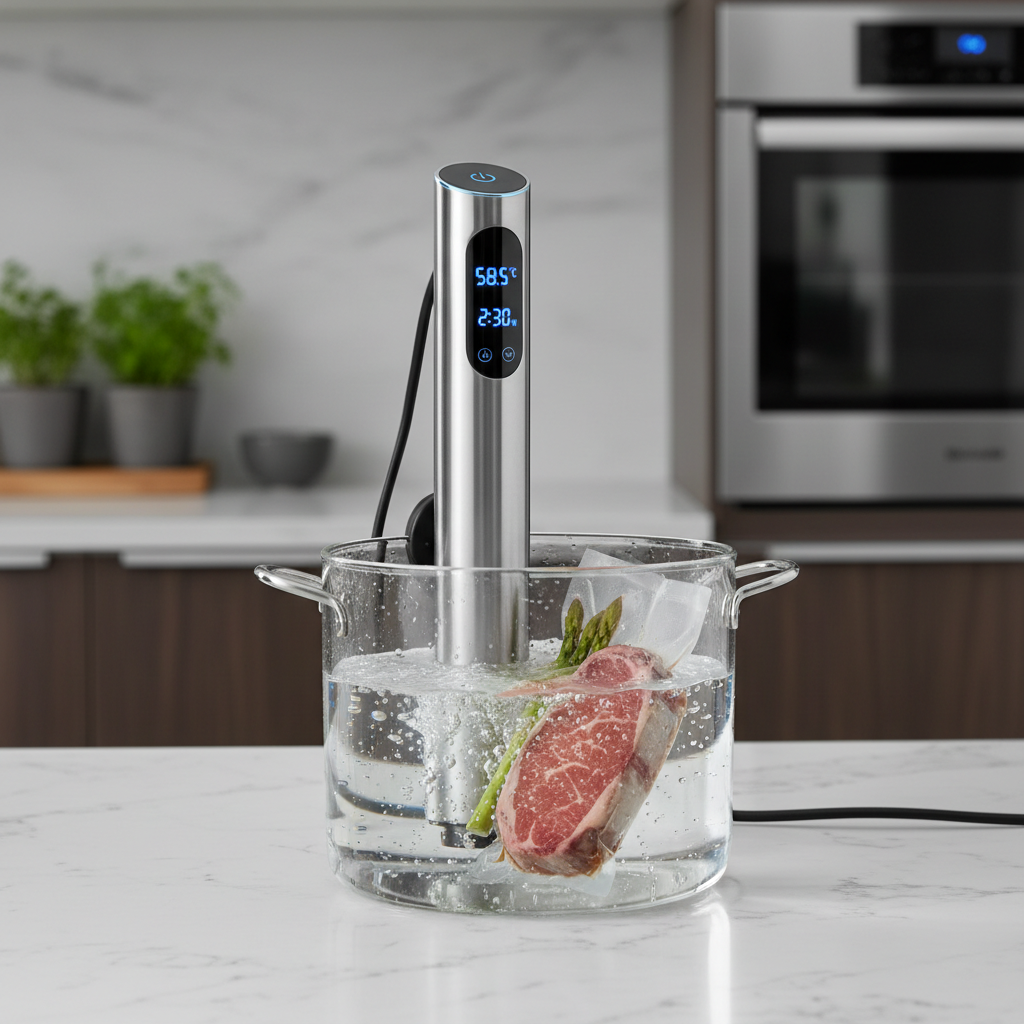
If you are already a fan of sous vide cooking, you can combine these methods. The sous vide approach is technically the ultimate "reverse sear" because it allows for precision temperature control down to the degree. You can cook your steak in a water bath to your target temp, chill it slightly, and then perform the final high-heat sear. While it adds a bit more equipment to the process, it offers the highest level of accuracy for those who love to experiment with technology in the kitchen.
Resting on a Cooling Rack
Many cooks make the mistake of resting the meat on a cutting board, where it sits in its own juices and softens the bottom crust. Always rest your meat on a wire cooling rack set over a tray. This allows air to flow around the meat during the rest, keeping the crust crisp and preventing the steak from "steaming" itself on the bottom. It is a small detail, but it is one that separates the amateur from the professional chef.
The Role of Aging
If you have access to dry-aged beef, the reverse sear is the perfect way to highlight its unique flavor profile. Dry-aging naturally dehydrates the meat, which helps you achieve an even better crust during the searing phase. The concentrated, nutty, and slightly funky flavors of a dry-aged steak are enhanced by the slow, gentle heating of the reverse sear. It is, quite simply, the best way to honor a premium cut of meat that you have invested time and money into acquiring.
Final Thoughts
The reverse sear is more than just a technique; it is a philosophy of respect for the ingredient. By moving away from the chaos of high-heat cooking and embracing a measured, slow, and precise approach, you take control of your results. You eliminate the guesswork, reduce the stress of dinner preparation, and consistently deliver restaurant-quality meals that will leave your guests impressed. The home kitchen should be a place of discovery and joy, and mastering this method provides you with the confidence to tackle everything from a simple Tuesday night dinner to an extravagant Sunday roast.
Take your time with the process. Listen to the sizzle in the pan, watch the color of the crust develop, and trust your digital thermometer above all else. Cooking is a skill that improves with every repetition, and once you have mastered the balance of low-temperature ambient heat and high-temperature searing, you will never look back. Your steaks will be juicier, your crusts will be deeper, and most importantly, your consistency will be unwavering. The next time you find yourself at the butcher counter, do not hesitate to buy that thick-cut piece of meat—you now have the tools to cook it perfectly, every single time.
Remember that the goal is progress, not perfection on the first try. Each time you use this method, you will learn the nuances of your oven, your pans, and your specific taste preferences. Adjust your salt, experiment with different oils, and find the seasoning profile that makes your kitchen smell like the finest steakhouse in the city. You are the architect of your own dinner, and with the reverse sear as your foundation, there is no limit to the culinary heights you can reach. Now, grab those tongs, heat that pan, and start your journey toward the perfectly cooked steak.
As you continue to explore these techniques, you will find that the reverse sear is adaptable to almost any protein. Whether it’s a thick-cut pork loin, a dense piece of swordfish, or a classic beef ribeye, the principle of slow internal warming followed by a rapid, high-heat finish remains the gold standard. Keep your kitchen tools sharp, keep your thermometer clean, and continue to prioritize the internal temperature over everything else. When you master the heat, you master the meal, and "Blame The Chef" will soon become a phrase synonymous with absolute culinary excellence. Go forth, cook with purpose, and enjoy the delicious results of your newfound expertise.



Get the Next Recipe
Weekly recipes, techniques, and gear picks — straight to your inbox.
