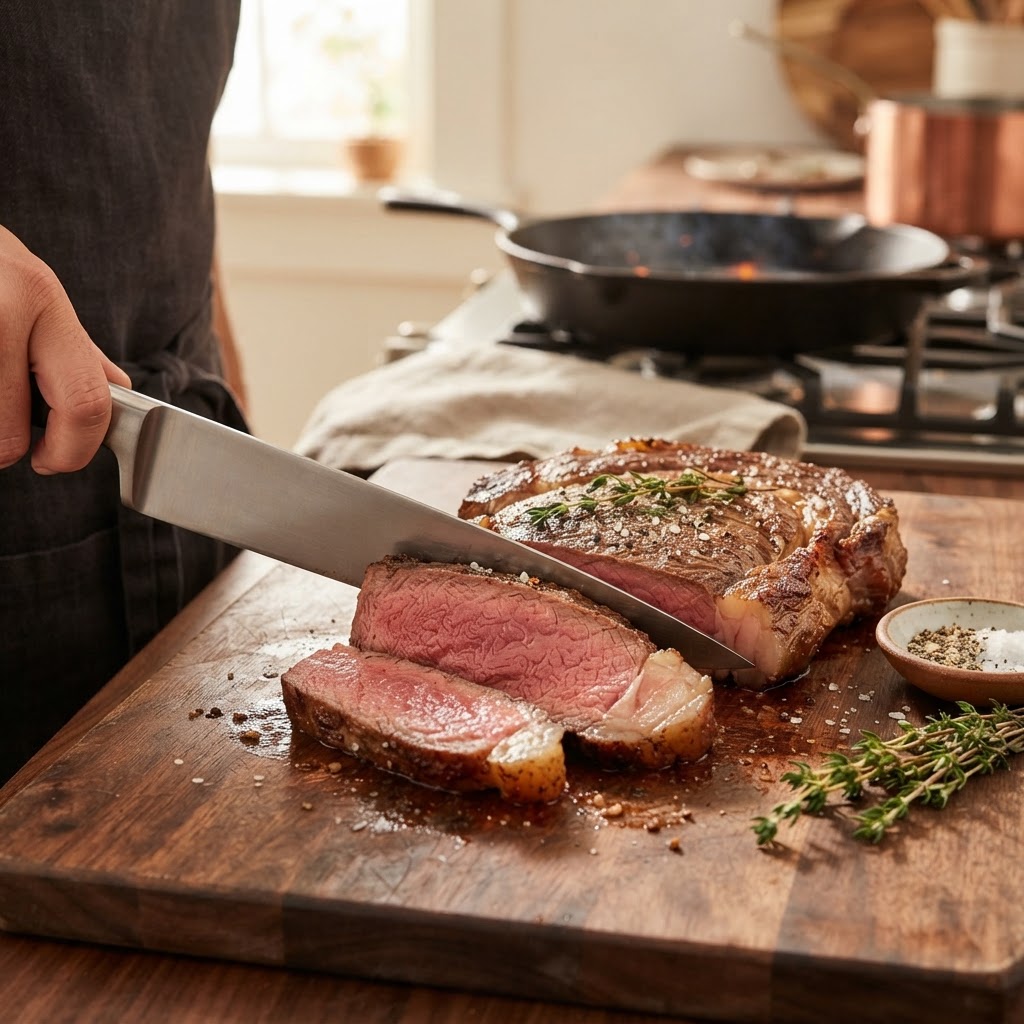
The Home Cook’s Guide to Thermal Conduction: Mastering Heat Transfer for Perfectly Even Cooking
The kitchen is often described as a laboratory, a place where art meets rigorous science, yet many home cooks view the application of heat as a mystical process governed by luck rather than physics. We rely on intuition, checking the color of a crust or the scent of browning aromatics, but beneath these sensory cues lies the fundamental principle of thermal conduction. To truly master your craft in the kitchen, you must understand how energy moves from your burner, through your cookware, and into your ingredients. When you treat the kitchen as an environment defined by heat transfer, you stop guessing and start executing with the precision of a professional.
Most amateur mistakes—burnt edges, raw centers, or rubbery proteins—are not the result of poor quality ingredients, but rather a misunderstanding of how heat behaves within a vessel. Whether you are searing a thick ribeye or tempering chocolate for a ganache, the way your pan interacts with the stove dictates the final molecular structure of the dish. By slowing down to observe the relationship between material density, surface area, and caloric intake, you gain control over the texture and flavor development that separates a decent meal from a truly memorable culinary experience. This guide is designed to shift your perspective from passive cooking to active thermal management.
Welcome to the inner sanctum of professional cooking, where we blame the chef only when they fail to respect the laws of thermodynamics. Mastering heat is not about having the most expensive equipment or the most complex recipes; it is about recognizing the limits of your tools and the requirements of your food. Throughout this exploration, we will dissect the variables that influence energy transfer and provide you with actionable techniques to ensure consistent results every single time you step up to the range. Prepare to refine your intuition and transform your relationship with your stove as we dive deep into the invisible forces that turn raw potential into culinary perfection.
The Foundation of Heat Transfer: Understanding Conduction
At its most basic level, thermal conduction is the transfer of heat between substances that are in direct contact with each other. In your kitchen, this occurs when the burner heats the pan, and the pan heats the food. The speed and efficiency of this transfer depend heavily on the thermal conductivity of the material you are using. Metals like copper and aluminum are highly conductive, meaning they move heat quickly and evenly across their surface, whereas cast iron is a poor conductor that retains heat well but takes significant time to distribute it.
Understanding this difference is crucial for choosing the right tool for the job. If you are searing a protein, you want a material that can hold onto a high amount of energy without a massive drop in temperature when the cold food hits the surface. This is why professional kitchens favor heavy-bottomed stainless steel or copper-clad pans. They act as a reservoir for heat, preventing the dreaded "steaming" effect that occurs when a thin pan loses its thermal charge immediately upon contact with a piece of meat.
The Role of Material Density
The density of your cookware material plays a pivotal role in the thermal gradient of your dish. A thick, heavy pan creates a more stable cooking environment because it creates a buffer against the fluctuations of your stovetop. When you drop a cold steak into a thin pan, the pan's temperature plummets, causing the proteins to stick and grey instead of undergoing the Maillard reaction. A dense, multi-ply pan, however, maintains its energy, allowing for that deep, mahogany-colored crust we all crave.
"The true secret to professional searing is not the heat of the fire, but the thermal mass of the pan. If the pan loses its energy the moment the protein touches the surface, you have already lost the battle for flavor."
Managing the Thermal Gradient
To achieve an even cook, you must understand the thermal gradient, which refers to the temperature drop between the exterior of the food and its core. In conduction, the outside is always hotter than the inside. By manipulating your heat source and the time spent cooking, you can flatten this gradient, leading to an edge-to-edge medium-rare steak or a perfectly golden-brown scalloped potato. This is why we often suggest lower, slower cooking methods for larger roasts; it gives the heat time to penetrate the center before the exterior becomes carbonized.
Convection and Radiation: The Hidden Partners of Conduction
While conduction is the primary driver of contact cooking, convection and radiation are essential supporting players that every home cook must master to achieve balance. Convection involves the movement of heat through a fluid, whether that fluid is air inside your oven or the bubbling liquid in a stockpot. When you braise a short rib, you are using the liquid to conduct heat evenly into the meat, while the natural circulation of that liquid—driven by convection currents—ensures that the temperature remains consistent throughout the vessel.
Radiation, on the other hand, is the transfer of energy through electromagnetic waves. This is what you feel when you stand near a broiler or an open flame. It is the intense, direct heat that blisters the skin of a bell pepper or caramelizes the sugars on top of a crème brûlée. Balancing these three forms of heat transfer—conduction, convection, and radiation—is the hallmark of a sophisticated chef who knows exactly how to utilize every inch of their kitchen environment.
The Science of Braising
Braising is the perfect marriage of conduction and convection. By searing the meat first, you use conduction to build the flavor through the Maillard reaction. Once you add liquid and cover the pot, you shift the process to convection, where the liquid carries heat gently and consistently into the fibers of the meat. This breakdown of collagen into gelatin is only possible through sustained, moderate heat transfer. Aim for a liquid temperature of roughly 190°F to 200°F—a gentle simmer—rather than a violent boil, which will toughen the protein before it has a chance to tenderize.
Optimizing Oven Dynamics
Many home cooks struggle with oven temperature accuracy, often finding that their cookies or cakes bake unevenly. This is usually due to poor convection flow. If your oven is overcrowded, you are physically blocking the air from circulating, which forces the food to rely entirely on the conduction of the baking sheet or the radiation from the heating elements. To improve this, space your items out to allow for airflow and rotate your pans halfway through the cooking process to compensate for the "hot spots" inherent in almost every residential oven.
Mastering the Maillard Reaction: Surface Chemistry
The Maillard reaction is the holy grail of cooking. It is a chemical reaction between amino acids and reducing sugars that occurs at temperatures above 300°F (150°C), resulting in the browning and the creation of hundreds of distinct flavor compounds. This is not mere burning; it is a complex transformation that creates the savory, nutty, and roasted notes we associate with high-quality food. Without proper control over thermal conduction, you will never achieve a consistent crust across the entire surface of your food.
To facilitate a perfect Maillard reaction, moisture is your greatest enemy. Water boils at 212°F, which acts as a thermal ceiling; if there is too much surface moisture on your steak or vegetable, the heat energy from your pan will be spent evaporating that water rather than browning the surface. This is why drying your ingredients with a paper towel before they hit the pan is the most important preparatory step in any recipe.
The Importance of Surface Area and Contact
For the Maillard reaction to occur efficiently, you need maximum contact between the ingredient and the pan. This is why overcrowding the pan is a cardinal sin. If you put too many mushrooms in a sauté pan at once, the liquid they release gets trapped, the temperature drops below the Maillard threshold, and you end up with soggy, grey vegetables. Always cook in batches if necessary, and ensure that every piece of food has its own space to breathe and sear.
Step 1:* Pat your protein dry with paper towels until no moisture remains on the surface.
Step 2: Preheat your pan for at least three to five minutes until a drop of water dances on the surface (the Leidenfrost effect*).
Step 3: Add your fat—an oil with a high smoke point* like avocado or grapeseed oil.
Step 4:* Place the food in the pan, ensuring it does not touch its neighbor.
Step 5:* Do not move the food. Let the crust develop naturally before attempting to flip.
"Patience is a thermal tool. If you try to flip your protein before it releases from the pan, you are not ready; the crust has not yet formed, and the flavor you desire is still stuck to the bottom of the vessel."
The Science of Fat: Choosing Your Conductive Medium
Fat is more than just a flavor carrier; it is a vital heat-transfer medium. In the culinary world, we distinguish between fats based on their smoke point and their flavor profile. When you sauté or fry, the oil fills the microscopic gaps between the food and the pan, creating a continuous bridge of heat. Without oil, the food would only touch the pan at the highest points of its surface, leading to uneven cooking and localized burning.
Choosing the right fat is an exercise in matching the temperature requirement of your dish to the chemical stability of the oil. For high-heat searing, you must use refined oils that can withstand temperatures of 400°F or higher without breaking down into acrid, bitter compounds. If you use butter for high-heat searing, the milk solids will burn almost instantly, ruining your crust and giving the meat a scorched, unpleasant taste.
Understanding Smoke Points
Avocado Oil:* 520°F – Best for high-heat searing and roasting.
Grapeseed Oil:* 420°F – A neutral, reliable workhorse for sautéing.
Extra Virgin Olive Oil:* 375°F – Best used for finishing, dressing, or lower-temperature sweating of aromatics.
Clarified Butter (Ghee):* 485°F – Offers the flavor of butter with the stability of a high-heat fat.
By utilizing the right fat at the right temperature, you can create a conductive coating that promotes uniform browning. When finishing a steak, many chefs use the "basting" technique, adding a knob of whole butter to the pan in the final minute of cooking. Because the butter contains water and milk solids, it lowers the overall heat of the pan, allowing you to gently cook the aromatics (like garlic and thyme) without burning them, while the foaming butter continues to transfer heat to the meat's surface.
Thermal Mass and Cooking Consistency
The concept of thermal mass is perhaps the most underrated aspect of home cooking. Thermal mass refers to an object's ability to store heat. A heavy cast-iron skillet has high thermal mass; it takes a long time to heat up, but once it is hot, it stays hot even when you add a cold ingredient. A lightweight aluminum pan has low thermal mass; it reacts quickly to changes in the burner setting, but it loses its heat instantly when the temperature of the contents changes.
If you are cooking a delicate fish fillet, a low-mass pan might be preferable because it allows you to lower the heat quickly to prevent overcooking. However, if you are searing a thick pork chop or a batch of root vegetables, you need high thermal mass to ensure the pan stays hot throughout the duration of the sear. Recognizing when to switch pans based on the thermal needs of your ingredients is the hallmark of a chef who understands the physics of their kitchen.
The Problem with Cold Ingredients
One of the most common mistakes is taking meat directly from the refrigerator and putting it into a pan. By the time the center of the meat reaches room temperature, the exterior is often overcooked and dry. Allowing your proteins to sit at room temperature for 20 to 30 minutes before cooking reduces the temperature differential, allowing the core to reach its target without sacrificing the quality of the surface crust. This simple adjustment improves heat transfer and final texture significantly.
Professional Tips for Heat Management
Mastering Carry-over Cooking: The After-Heat Phase
The process of heat transfer does not stop the moment you turn off the burner. Carry-over cooking is the phenomenon where the residual heat inside the food continues to raise its internal temperature as it rests. This is particularly relevant when cooking large proteins like roasts, whole chickens, or thick steaks. If you cook a steak to 135°F in the pan, it will likely reach 145°F or higher after it rests, moving it from a perfect medium-rare to a lackluster medium-well.
To account for this, professional chefs pull their proteins off the heat when they are 5 to 10 degrees lower than their final target temperature. This allows the heat to equilibrate from the hot exterior toward the cooler center without over-processing the muscle fibers. Resting the meat is not just about keeping the juices in; it is about respecting the physics of heat distribution within the protein.
The Physics of Resting
When you take a piece of meat off the heat, the surface is much hotter than the core. During the resting period, the thermal energy at the surface dissipates into the air, while the heat concentrated at the surface migrates inward to the cooler center. This ensures an even, succulent texture. If you slice into a steak immediately, you interrupt this migration, causing the concentrated juices at the center to flow out onto the board rather than reabsorbing into the muscle fibers.
"A resting steak is a finishing technique. The heat is still working for you; don't fight it by carving prematurely. Give the proteins time to relax and the heat time to settle."
Calculating the Rest
The duration of the rest depends on the size of the protein. A thin skirt steak might only need five minutes, while a large prime rib roast can benefit from thirty minutes or more. As a general rule, allow for a rest period of one minute for every 100 grams of meat. This ensures that the thermal equilibrium is reached, providing you with a result that is consistent from the first slice to the last.
The Art of Precision: Temperature Control and Monitoring
We live in an age of culinary empowerment, where tools like digital probe thermometers have become affordable and accessible. Relying on "poke tests" or clock-based timing is essentially gambling with your dinner. To master thermal conduction, you must be able to verify your results. A digital thermometer is your best friend because it removes the guesswork, allowing you to focus on the technique rather than worrying about whether the chicken is safe to eat.
However, do not become a slave to your equipment. Use your thermometer to calibrate your intuition. Over time, you will learn to recognize the sound of a pan at the right temperature, the smell of butter at its peak, and the tactile resistance of a cooked protein. These sensory inputs, when confirmed by the objective data of your thermometer, build the deep knowledge base required for professional-level execution in any home kitchen.
Implementing Probes in Daily Cooking
If you are roasting a whole bird, insert your probe into the thickest part of the breast, avoiding the bone, which conducts heat differently than the meat. Set your alarm for 155°F. Because the bird will continue to cook as it rests, that final 5-degree rise will bring it to the perfect, juicy 160°F. By removing the guesswork, you eliminate the fear that often leads to dry, overcooked poultry.
125°F (Rare):* Deep red center, cool to the touch.
135°F (Medium-Rare):* The culinary standard for high-quality beef.
145°F (Medium):* The point at which collagen begins to break down more significantly.
160°F+ (Well Done):* The threshold for safe poultry and ground meats.
Final Thoughts
Mastering thermal conduction is a journey of refinement, not a destination. As you become more attuned to how your pans, your stove, and your ingredients interact, you will find that your kitchen feels less like a place of chores and more like a space of creative control. You will stop blaming your equipment or your luck and start identifying the specific variables that lead to a successful meal. Remember that heat transfer is the invisible hand that shapes every dish you create; respect it, monitor it, and use it to your advantage.
Cooking is an act of translation. You are taking the energy of the universe, focusing it through a piece of steel or copper, and translating it into nourishment and pleasure. By understanding the physics of conduction, you are no longer just following a set of instructions; you are directing a chemical process. Keep experimenting with different materials, watch your temperatures closely, and never fear the learning curve. Every time you stand at your stove, you are practicing a craft that has been refined over thousands of years—and it is one that you can master with the right perspective.
Take these principles—the importance of moisture control, the necessity of thermal mass, the patience required for resting—and apply them to your next meal. You will be surprised at how much more consistent your results become. The difference between a home cook and a chef is not found in a secret spice blend or a fancy gadget; it is found in the fundamental respect for the science of the pan. Keep learning, keep testing, and continue to treat every meal as an opportunity to perfect your understanding of heat. Your kitchen is your laboratory, and you are the lead investigator. Happy cooking!

Get the Next Recipe
Weekly recipes, techniques, and gear picks — straight to your inbox.
