The Home Cook’s Guide to Thermal Conductivity: Mastering Material-Specific Heat Response for Precision Cooking
The journey to becoming a proficient home cook is often paved with burnt onions, undercooked proteins, and the lingering frustration of a meal that simply did not turn out the way you envisioned. Many of us operate under the assumption that the stove is the primary variable, convinced that if we just had that professional-grade range or the trendiest induction cooktop, our searing game would improve overnight. However, the secret to restaurant-quality consistency lies not in the BTUs of your burner, but in your intimate understanding of thermal conductivity. This fundamental property of physics dictates how quickly and efficiently heat moves from your energy source into your food, turning a cold pan into a searing surface or a gentle vessel for a delicate emulsion.
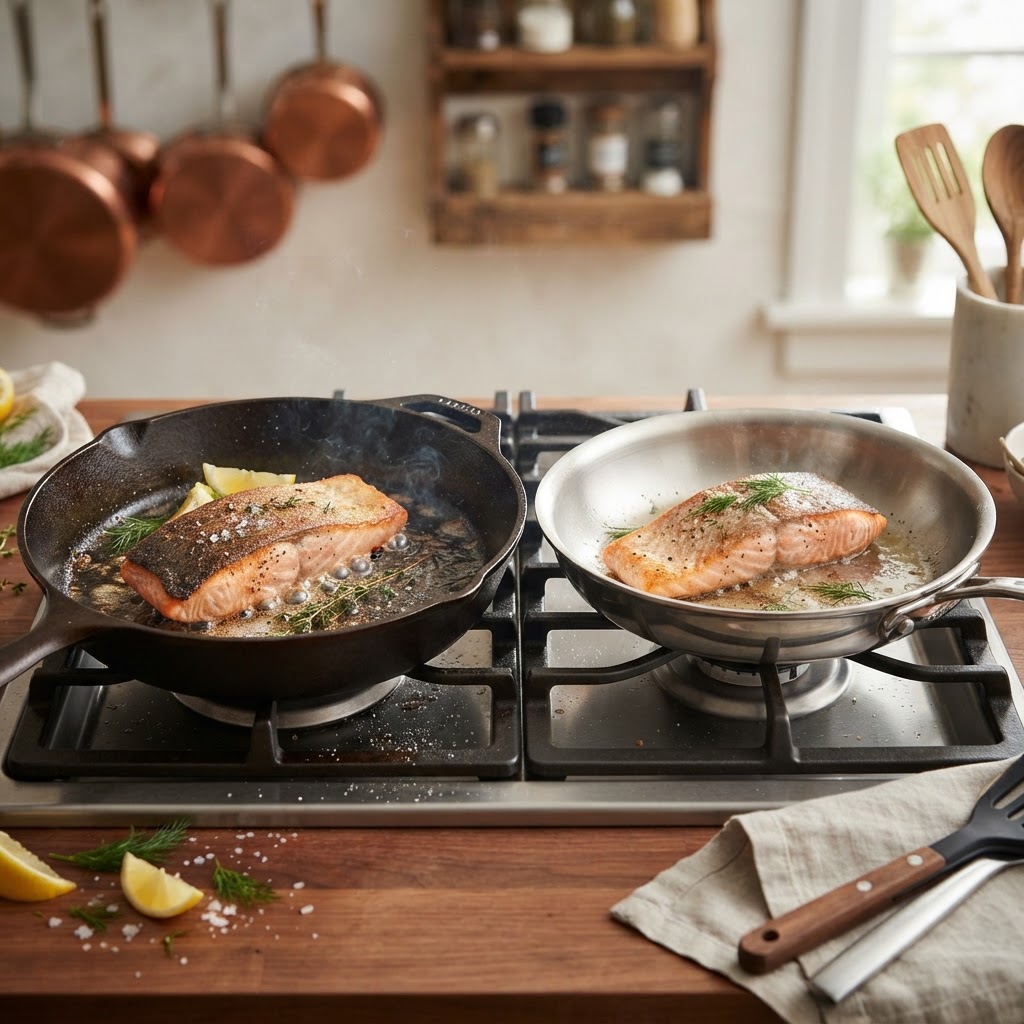
When we discuss kitchen hardware, we are really talking about energy management systems designed to contain, manipulate, and distribute heat. Whether you are working with a heavy-gauge cast iron skillet, a polished copper saucier, or a modern multi-clad stainless steel pan, each material possesses a unique signature in how it responds to temperature changes. Learning these nuances allows you to transition from following recipes blindly to predicting how your cookware will react before the heat is even turned on. Mastering these principles gives you the "chef’s intuition" that allows for perfect crusts, tender vegetables, and stable sauces without the constant anxiety of overcooking.
In this guide, we will strip away the marketing fluff surrounding high-end cookware and look at the hard science that dictates success in the kitchen. We will explore why your pan is the most important ingredient in your pantry and how to calibrate your heat levels to suit the specific material beneath your food. You will learn to identify the "hot spots" of your burners, understand the latent energy retention of your pans, and finally grasp why some recipes call for a heavy bottom while others demand the responsiveness of thin copper. Let us sharpen your technique by looking at the science of the stove, ensuring that next time something goes wrong, you can honestly look at your dinner guests and resist the urge to blame the chef.
The Physics of Heat Transfer in the Kitchen
At its core, cooking is merely the controlled application of thermal energy to biological material. This energy is transferred through three main modes: conduction, convection, and radiation. Conduction is the star of the show for the home cook, as it is the direct transfer of heat from a hot surface—like a pan—to the food sitting on it. The speed of this transfer depends entirely on the thermal conductivity of the material in contact with the food. Materials with high conductivity, such as copper or aluminum, move heat rapidly, allowing for nearly instantaneous response times when you adjust the flame.
Conversely, materials like stainless steel have relatively poor conductivity. While they are incredibly durable and non-reactive, they struggle to distribute heat evenly on their own. This is why we use multi-clad cookware, where an inner core of aluminum or copper is sandwiched between layers of stainless steel. By understanding this, you can better manage your flame. A pan with low conductivity requires more patience during preheating to ensure there are no cold zones that will lead to uneven searing or the dreaded "stick-and-tear" scenario.
Professional chefs do not just throw food into a pan; they calibrate the system. If you are using a thick-bottomed Dutch oven, you must account for the thermal mass of the vessel. The pan takes a long time to get hot, but once it is at temperature, it stores a tremendous amount of energy. This is a blessing for braising, where you want to maintain a constant, low temperature, but it can be a disaster if you are trying to quickly sauté delicate greens that might wilt into oblivion while the pan retains too much residual heat.
Understanding Thermal Lag
Thermal lag refers to the time it takes for your pan to respond to a change in the stove setting. If you turn your burner from high to medium, a thin steel pan will adjust almost instantly. A thick cast iron pan, however, will continue to pump high-intensity heat into your steak for several minutes. Recognizing this lag is essential for preventing burnt garlic or broken sauces, as it requires you to anticipate the temperature drop before you actually make the move at the dial.
"True precision in the kitchen isn't found in the sophistication of your equipment, but in the cook's ability to dance with the thermal limitations of their pans."
The Material Hierarchy: Copper, Aluminum, and Steel
Not all cookware is created equal, and the material composition of your pan dictates the rhythm of your cooking. Copper remains the gold standard for conductivity. It reacts to heat changes almost as quickly as the flame itself. Because copper is incredibly conductive, it eliminates the hot spots that plague lesser pans. This is why pros use copper for sugar work, delicate egg-based sauces, and anything that requires absolute temperature control. However, copper is reactive, meaning it can leave a metallic taste in acidic foods, which is why it is almost always lined with tin or stainless steel.
Aluminum is the workhorse of the professional world. It is highly conductive, lightweight, and significantly more affordable than copper. Anodized aluminum offers a harder surface that is less prone to warping and scratching. For the home cook, a heavy-gauge aluminum pan is a fantastic investment. It strikes the perfect balance between conductive efficiency and manageable weight, making it ideal for high-heat tasks like searing proteins or pan-roasting vegetables.
Stainless steel sits at the other end of the spectrum. While it is excellent for browning—the Maillard reaction—its conductivity is poor. On its own, a stainless steel pan will develop intense, concentrated hot spots directly above the burner, leaving the edges of the pan significantly cooler. This is why you must avoid cheap, single-ply stainless steel. Instead, invest in tri-ply or five-ply construction where a conductive metal core does the heavy lifting while the stainless steel provides a durable, non-reactive cooking surface.
The Role of Cast Iron
Cast iron is the outlier in the conductivity conversation. It has poor conductivity but incredible heat retention. It is the "thermal battery" of your kitchen. Once it is hot, it stays hot, making it perfect for crust-building on a steak. The key here is the preheat. You must give cast iron enough time to fully heat soak—at least 10 minutes—before adding your protein, or you will end up with a uneven sear.
Precision Searing: Leveraging Heat Capacity
The act of searing is a battle of thermal equilibrium. When you place a cold, moist piece of protein into a hot pan, the pan's temperature drops instantly. If your pan lacks sufficient heat capacity, the temperature will plummet below the threshold required for the Maillard reaction, resulting in a steamed, gray piece of meat rather than a beautifully caramelized crust. To master this, you need to understand the relationship between the heat capacity of your pan and the thermal shock of your ingredients.
For the best results, always pat your proteins bone-dry with paper towels. Moisture is the enemy of the sear; it absorbs energy as it turns into steam, cooling the pan and wasting your heat. When you add the fat, wait for it to shimmer, but not smoke. If you add your food and the temperature of the pan drops too much, you are essentially boiling your food in its own juices. Professional chefs often work in batches to avoid overcrowding the pan, as adding too much cold mass at once is the fastest way to kill your thermal momentum.
The Maillard Reaction Threshold
The Maillard reaction, the chemical reaction between amino acids and reducing sugars that gives browned food its distinctive flavor, generally begins around 285°F (140°C). However, the browning becomes rapid and effective between 300°F and 350°F (150°C–175°C). Use an infrared thermometer to ensure your surface temperature is in this sweet spot before dropping your ingredients.
"A pan that loses its heat the moment the food hits the surface is just a cold plate waiting to ruin your dinner. Manage the load, manage the crust."
Managing Moisture and Energy Output
In the culinary arts, moisture management is just as critical as temperature control. When you are sautéing vegetables, you are battling water content. If you crowd a pan with mushrooms or zucchini, the moisture released will pool, effectively turning the pan into a steamer. To achieve that desired golden-brown color, you must ensure that the surface area of your pan is large enough to allow that moisture to evaporate instantly upon release. This is the evaporative cooling effect in action, which can rapidly sap energy from your pan.
For vegetables that release a lot of liquid, such as onions or mushrooms, cook them in a large pan over medium-high heat. Do not stir them constantly. Give them time to make contact with the conductive surface of the pan. The silence of the pan is a good indicator; if the pan is hissing loudly, you have moisture release. If it is silent, you are likely burning the food or the pan is too cold. Wait for the audible "sizzle" to return after the moisture has evaporated before flipping or adding more ingredients.
Techniques for High-Moisture Sautéing
The Art of the Pan Sauce: Residual Heat Mastery
Once your protein is finished, you are left with the fond—the browned, delicious bits stuck to the bottom of your pan. These bits are concentrated flavor, and the best way to utilize them is through a pan sauce. This is where your understanding of residual heat becomes paramount. If your pan is scorching hot, adding cold liquids like wine or stock will lead to a violent, dangerous splatter.
Deglazing is a process of thermal shock. By adding a room-temperature liquid to a hot pan, you break the bonds between the fond and the metal surface. The transition from high heat (searing) to controlled liquid heat (simmering) is where many home cooks fail. You want to reduce your liquid quickly to concentrate the flavors, but you don't want to burn your aromatics. Keep your whisk ready. The goal is to emulsify the fat in the pan with your liquid, creating a velvety consistency known as monter au beurre.
The Emulsion Ratio
When finishing a sauce, cold butter is your best friend. Whisking in cold cubes of butter at the end of the cooking process—after removing the pan from the heat—creates a stable, glossy emulsion. The cold butter brings the temperature of the sauce down, preventing the emulsion from breaking and oiling out. This technique works perfectly with pan-fried chicken, steak, or even simple roasted vegetables.
Step 1:* Remove the protein from the pan.
Step 2:* Add your aromatics (shallots, garlic, herbs) and cook briefly in the remaining fat.
Step 3:* Deglaze with an acidic liquid (wine, vinegar, citrus juice).
Step 4:* Reduce the liquid by half to concentrate sugars and acids.
Step 5:* Whisk in cold butter off the heat for a rich, emulsified finish.
Advanced Maintenance and Heat-Mapping
To truly master your kitchen, you must become an expert on your specific equipment. Every burner has a "sweet spot," and every pan has a "heat map." Take a piece of dry white bread and place it across your pan on the burner. Turn the heat to medium and let it toast. Lift it after a minute or two and examine the browning pattern. This will show you exactly where your burner is delivering the most energy and where your pan is failing to distribute it.
If your pan shows a dark center and pale edges, you know you have a conductivity issue. You can compensate for this by manually moving the ingredients around during the cooking process or by using a heat diffuser—a heavy metal plate that sits between your burner and your pan to help spread the heat more evenly. Alternatively, you might decide it is time to upgrade to a better-constructed pan that handles heat distribution as a core feature of its design.
Don't ignore the importance of cleaning your gear. Burnt-on carbon deposits on the underside of your pans can act as insulators, interfering with heat transfer. Keeping your pans clean, inside and out, ensures that the thermal energy from your burner actually reaches your food instead of being blocked by layers of polymerized grease. A clean pan is a responsive pan, and a responsive pan is the home cook’s most valuable tool for achieving consistent, professional results.
"Your stove is a machine and your pan is the transmission. If you don't know how they shift, you are never going to get the speed or the control you need to reach the finish line of a perfect meal."
Final Thoughts
Mastering the culinary arts is rarely about finding a "magic" recipe that will solve all your problems. Instead, it is about developing an appreciation for the physics happening on your stovetop every single day. By understanding thermal conductivity, heat capacity, and thermal lag, you move from being a passenger in your own kitchen to being the driver. You stop guessing why your steak didn't sear or why your sauce split, and you start seeing the mechanics behind the result.
The next time you find yourself standing over the stove, take a moment to look at your pan—not just as a vessel for food, but as a heat-management system. Listen to the sizzle, feel the weight of the metal, and watch how the ingredients respond to your adjustments. It takes practice, and yes, you will likely make a few mistakes along the way. But when you finally achieve that perfect crust, or that perfectly emulsified sauce, you will know exactly why it happened. You didn't get lucky; you applied the science of precision cooking.
Remember, cooking is an iterative process. Treat every meal as an experiment in heat management. The better you understand your equipment, the more confidence you will have to experiment with new techniques, temperatures, and flavors. Whether you are working with an antique copper pan or a budget-friendly stainless steel skillet, the principles of physics remain the same. Go forth, experiment, and stop blaming the chef—because with these tools in your arsenal, you are the only expert you need in the kitchen. Keep the heat controlled, keep your focus sharp, and let the science do the heavy lifting for you. Happy cooking!

Get the Next Recipe
Weekly recipes, techniques, and gear picks — straight to your inbox.
