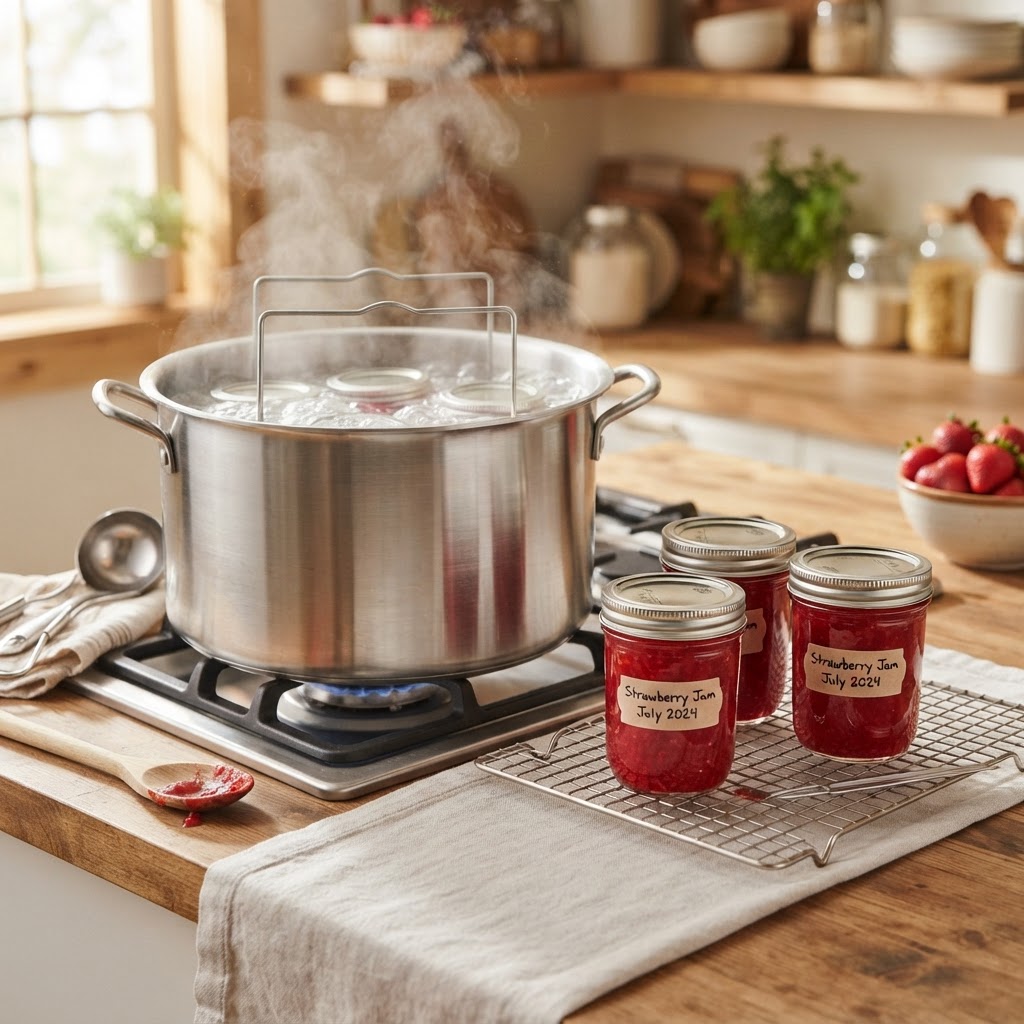
The Home Cook’s Guide to Thermal Processing: Mastering Water Bath Canning Basics for Safe, Shelf-Stable Pantry Preservation
There is a profound, almost primal satisfaction in looking at a shelf lined with jars of summer tomatoes, spiced peaches, or tangy pickles long after the frost has settled on the garden. For the modern home cook, canning is not merely a method of storage; it is an act of defiance against the sterile monotony of industrial grocery aisles. By mastering the art of water bath canning, you reclaim the narrative of your pantry, ensuring that every spoonful of jam or jar of salsa is imbued with the labor of your own hands. It turns your kitchen into a miniature laboratory of flavor, where the science of preservation meets the warmth of hearth and home.
However, many home cooks approach the process of thermal processing with a mix of intimidation and apprehension. The fear of spoilage or the dreaded "botulism" often prevents talented cooks from ever lighting their burners. I am here to tell you that canning is not black magic, nor is it dangerously complex. It is a structured, logical, and deeply rewarding process that relies on a handful of immutable scientific principles. Once you understand the why behind the how, your kitchen will become a bastion of safety and deliciousness that will nourish your family through every season.
In this comprehensive guide, we are going to strip away the myths and focus on the bedrock techniques of safe preservation. We will navigate the essential equipment, the critical role of acidity, and the precise timing required to ensure your preserves remain shelf-stable for years. Whether you are a novice looking to put up your first batch of strawberry jam or a seasoned enthusiast wanting to refine your workflow, this deep dive is designed to instill confidence in every turn of the jar lid. Grab your apron and set aside a Saturday afternoon; it is time to turn your kitchen into the ultimate pantry powerhouse.
The Science of Preservation: Understanding Acidity and Heat
At the heart of water bath canning lies a simple yet non-negotiable chemical threshold. Water bath canning is reserved exclusively for high-acid foods, such as fruits, jams, jellies, pickles, and tomatoes (provided they are acidified). Because these foods possess a pH level of 4.6 or lower, they are naturally inhospitable to Clostridium botulinum, the bacteria responsible for botulism. When we submerge these jars in boiling water, we are not just heating the contents; we are creating a vacuum seal that prevents oxygen from re-entering, while simultaneously destroying yeasts, molds, and enzymes that could lead to spoilage.
Why pH Matters Most
The pH scale is your most important tool in the kitchen. Foods that fall above the 4.6 mark—like green beans, carrots, meats, or corn—require a pressure canner because the water bath method cannot reach the high temperatures necessary to neutralize bacterial spores in low-acid environments. Attempting to water bath these items is a dangerous gamble that no home cook should take. Always stick to tested, research-based recipes that account for the acidity of your ingredients, as even minor tweaks to ratios can inadvertently push a safe recipe into a dangerous territory.
The Role of Temperature
In a standard water bath setup at sea level, your target temperature is 212°F (100°C). This temperature is sufficient to pasteurize high-acid foods, effectively killing off spoilage organisms. However, as altitude increases, the boiling point of water decreases. If you live at an altitude of 1,000 feet or higher, you must adjust your processing times or pressure to compensate for the lower boiling point. Failure to do so will result in under-processing, which leaves your preserves vulnerable to microbial growth over time.
"Preservation is the alchemy of time and temperature; respect the science, and you will be rewarded with a pantry that acts as a library of your kitchen's best memories."
Essential Equipment for the Modern Pantry
You do not need a commercial kitchen to excel at canning, but you do need the right tools for the job. The foundation is a canning pot, which should be large and deep enough to accommodate your jars with at least one to two inches of water covering their tops. A canning rack is an absolute necessity, as it elevates the jars off the direct heat source, preventing glass breakage and ensuring the boiling water can circulate evenly around every surface of the jar.
The Anatomy of a Canning Kit
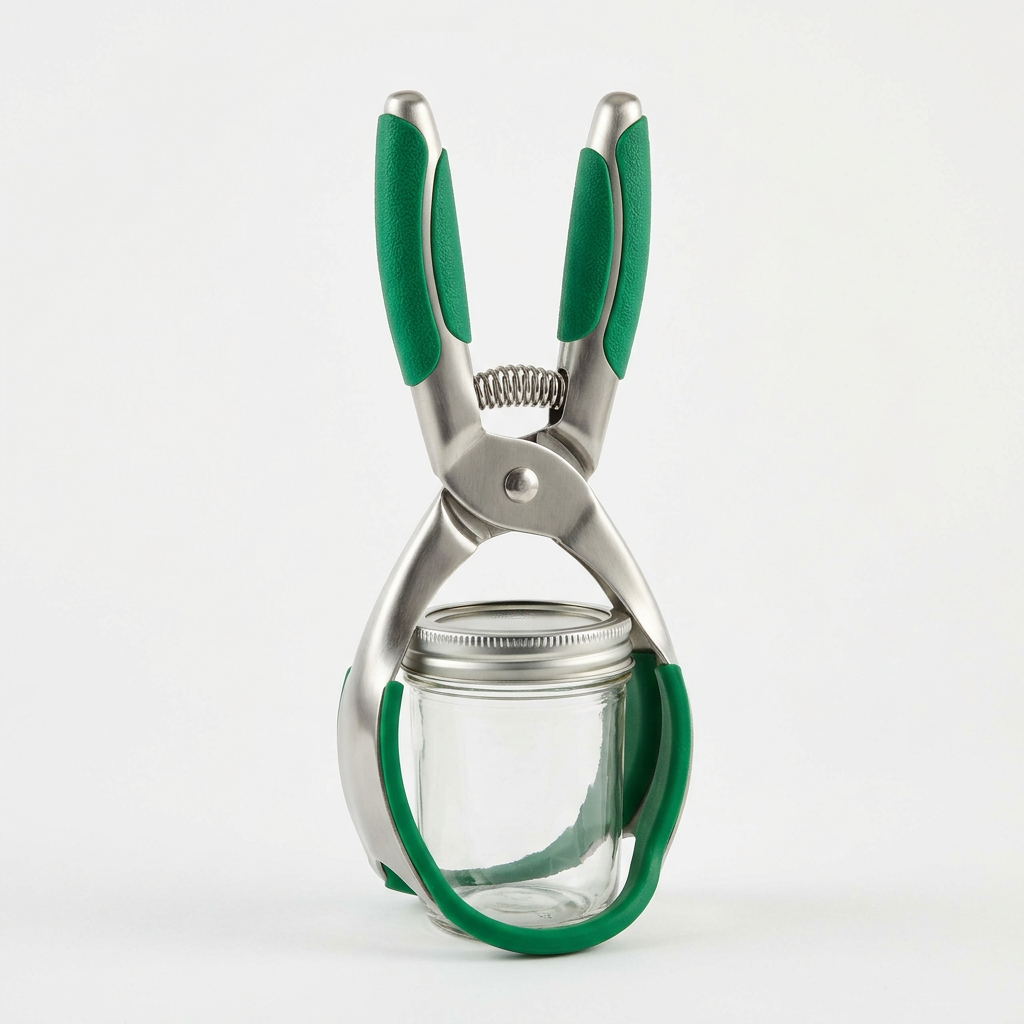
Beyond the pot, a well-stocked kit includes a few specialized items that make the process safer and more efficient. A pair of jar lifters is non-negotiable; they are designed specifically to handle hot glass securely without risking a burn or dropping a jar. A wide-mouth canning funnel is the secret to keeping your jar rims pristine, which is critical for achieving a perfect vacuum seal. You will also need a bubble remover (or a clean, thin plastic spatula) to run around the inside edges of the jar, ensuring no air pockets remain trapped against the glass.
Quality Control: Jars and Lids
Always use Mason-style jars specifically designed for canning. Avoid repurposing commercial sauce or mayonnaise jars, as the glass is often thinner and not tempered to withstand the rigors of prolonged boiling. When it comes to lids, prioritize fresh, new flat lids for every batch. While the rings (bands) can be reused indefinitely as long as they aren't rusted, the sealing compound on the flat lids is a single-use element that degrades once it has been heated and pressurized.
Preparing Your Ingredients and Workflow
Successful canning begins long before you turn on the stove. Organization, or mise en place, is the secret to success. Prepare your workspace by cleaning all surfaces and ensuring you have everything you need within arm's reach. Clean your jars thoroughly in hot, soapy water, even if they appear clean, and keep them warm. Placing your jars in the canning pot filled with warm water is an excellent way to prepare them, as it prevents the glass from shattering when it encounters the hot food.
The Art of the Pack
There are two primary methods of packing jars: raw pack and hot pack. Raw packing involves placing cold ingredients into cold jars and pouring boiling liquid over them. This is often used for certain pickles or fruits that might lose their texture during a heavy cook. Hot packing, however, is the gold standard for most preserves. By heating your fruits, syrups, or vegetables to a simmer before placing them in the jars, you eliminate trapped air and shrink the food volume, which results in a denser, higher-quality jar that is less prone to "floating" or discoloration.
Headspace: The Critical Buffer
Headspace refers to the space between the top of the food and the top of the jar rim. It is arguably the most ignored instruction in home canning, yet it is vital for achieving a vacuum seal. If you leave too little headspace, the food may boil over during processing, which can interfere with the seal or lead to a "siphon" effect. If you leave too much headspace, the air inside the jar may not be properly exhausted, leading to a weak or non-existent seal. Most recipes require between 1/4-inch and 1/2-inch of headspace; always follow the recipe's specific guidance.
Mastering the Processing Stage
Once your jars are filled and the lids are screwed on "finger-tight," it is time for the thermal processing itself. Place the jars into the canning pot using your jar lifter, ensuring they are upright and not touching each other or the sides of the pot. Bring the water to a rolling boil, cover the pot with its lid, and start your timer. It is crucial to remember that the timer only starts once the water returns to a full boil. If the boil stops, you must bring it back to a boil and reset your timer; never guess the time remaining.
The Gentle Transition
After the processing time is complete, turn off the heat and remove the pot lid. Allow the jars to sit undisturbed in the water for at least five minutes. This "resting period" allows the contents to stabilize and reduces the risk of liquid loss or sudden temperature shock. After those five minutes, use your jar lifter to remove the jars, placing them on a thick, folded towel or a wooden cutting board. Avoid placing hot jars directly onto a cold countertop, as the thermal shock can cause the glass to crack instantly.
Cooling and Seal Verification
Leave the jars to cool in a draft-free area for 12 to 24 hours. As the contents cool, the air inside the jar contracts, creating a vacuum that pulls the lid down—this is the "pop" sound we all love to hear. Once completely cool, test the seal by pressing down on the center of the lid. It should be concave and firm; it should not flex or pop back. If a lid does not seal, that jar should be refrigerated and consumed within a few days. Do not try to re-process a jar that has already cooled.
"A kitchen that smells of bubbling vinegar and simmering fruit is a kitchen that is alive. Don’t fear the boiling pot; embrace it as the final step in a cycle that brings your garden directly to your table."
Troubleshooting Common Canning Issues
Even with the best preparation, things can occasionally go wrong. One of the most common issues is liquid loss, or siphoning. This typically happens when the temperature inside the pot fluctuates wildly or when the jars are processed too quickly at a high boil. While the liquid loss doesn't necessarily mean the jar is unsafe, it does mean the food above the waterline might discolor over time. To minimize this, keep your boil steady and gentle—a violent, splashing boil is unnecessary and counterproductive.
Discoloration and Texture Changes
If your peaches turn brown or your pickles look a bit mushy, don't panic. Browning in fruits is often due to oxidation; to prevent this, keep your fruit submerged in an acidic solution (like water with a touch of lemon juice or ascorbic acid) before packing. Texture changes, conversely, are often a result of over-processing. Always adhere strictly to the recommended processing times provided by trusted sources like the National Center for Home Food Preservation or verified university extension services. Never guess, and never use "old family recipes" that haven't been updated for modern safety standards.
Cloudiness in Pickles
Cloudy brine can be discouraging, but it isn't always a sign of spoilage. It can be caused by hard water, table salt containing iodine or anti-caking agents, or even the natural release of starch from the vegetables. To keep your brine crystal clear, use pure canning salt (which lacks additives) and soft water. If you suspect your brine is cloudy due to fermentation or spoilage rather than these harmless factors, check for signs of bubbling, odor, or mold growth—if any of those are present, discard the contents immediately.
Expanding Your Culinary Horizons
Once you have mastered the basics of fruits and pickles, the world of water bath canning opens up significantly. You can experiment with savory chutneys, which combine fruits with onions, ginger, and spices, or spiced tomato conserves that elevate a simple pasta night. The key to successful recipe development is to maintain the acidic integrity of the mix. You can swap herbs and spices with relative freedom, but you should never reduce the amount of acidic ingredients like vinegar or lemon juice, as these are your primary defenses against spoilage.
The Joy of Infusions
Beyond simple jams, consider preserved fruit infusions. Cherries in spiced simple syrup or pears poached in vanilla and star anise are exquisite additions to a winter pantry. These items make incredible gifts, but they also serve as a quick way to "up" your dessert game when guests drop by unexpectedly. The shelf life for these items is typically 12 to 18 months in a cool, dark, and dry cupboard, though they are usually so delicious that they rarely last that long.
Seasonal Planning
To get the most out of your canning, plan your year around the harvest. In the early spring, focus on rhubarb and early berries. Move into the heavy, deep summer months for tomatoes, stone fruits, and cucumbers. As autumn approaches, turn your attention to apples, pears, and hardy vegetables. By aligning your canning schedule with the natural harvest cycle, you ensure that you are working with the highest quality, most nutrient-dense produce available, which translates to a vastly superior finished product on your plate.
Final Thoughts
The path to becoming a proficient home canner is a journey of small, consistent steps. You are learning to read the nuances of a rolling boil, the feel of a perfectly sealed lid, and the rhythm of a kitchen that feeds itself. Do not be discouraged if your first batch of pickles isn't perfectly crisp or if your jam is a little softer than you intended; each jar is a lesson in thermodynamics and culinary technique. The beauty of this craft lies in the iterative process, the way you refine your flavors year after year until you have a shelf of preserves that is uniquely "yours."
When you finally sit down to open a jar of something you processed months ago, you are doing more than just eating; you are reconnecting with the seasons. You are tasting the bright acid of a summer tomato in the middle of a grey January or the sweetness of a peach that was plucked at the peak of ripeness. This is the magic of the pantry—a defiance of time, a celebration of the harvest, and a testament to the skill of the home cook. Take these principles, start with a simple batch of jam, and let the process unfold. Your pantry, and your palate, will thank you for years to come.
Keep your equipment clean, your recipes tested, and your passion for preservation high. There is no mystery to the craft, only the deliberate application of safety and technique. Whether you are dealing with a bumper crop from your backyard garden or a lucky find at the local farmers' market, you now have the tools to ensure that none of that goodness goes to waste. The jars are waiting, the water is ready to boil, and the season is always right to start building your own shelf-stable legacy. Happy canning, and may your seals always pop.

Get the Next Recipe
Weekly recipes, techniques, and gear picks — straight to your inbox.
