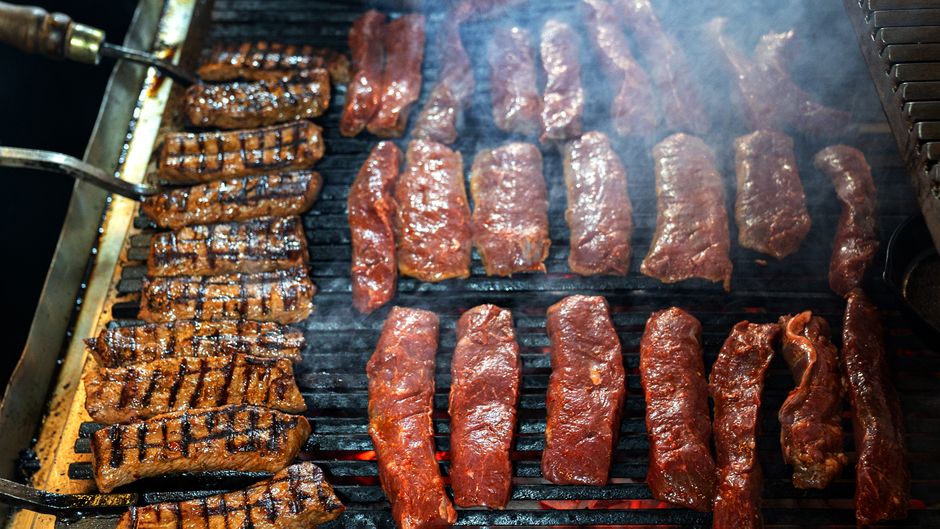
The Home Cook's Guide to Wood-Smoked BBQ: Mastering Low-and-Slow Techniques for Tender, Bark-Crusted Brisket
There is a specific kind of alchemy that occurs when smoke, fire, and time collide with a tough, unforgiving cut of beef. For the home cook, mastering the art of the Texas-style brisket is widely considered the final boss of the backyard barbecue journey. It requires more than just a recipe; it demands a fundamental shift in how you approach heat management, moisture retention, and patience. Many beginners approach this daunting slab of meat with intimidation, but the secret is understanding that the brisket is not an enemy to be conquered, but a partner to be coached into tenderness over the course of an entire day.
When we talk about "low-and-slow" cooking, we are addressing the complex breakdown of collagen into gelatin within the connective tissues of the brisket. This is a scientific process that simply cannot be rushed, regardless of how hungry your guests are or how much fuel you throw onto the fire. If you try to accelerate this journey by turning up the heat, you will inevitably end up with a dry, leathery piece of meat that even the best barbecue sauce in the world cannot salvage. Instead, we embrace the rhythm of the smoker, the shifting colors of the wood embers, and the subtle, tactile changes in the meat itself that signal it is ready for the next phase.
In this guide, we are going to dismantle the mystique surrounding wood-smoked brisket. We will cover the nuances of selecting a high-quality Prime-grade brisket, the precision of trimming away the fat cap to promote consistent heat penetration, and the delicate art of the "stall." By the time you finish this guide, you will be equipped to transform a humble, grocery-store cut into a mahogany-colored masterpiece that boasts a deep, savory bark and an interior so tender it practically melts on the palate. Let’s stop blaming the equipment, stop blaming the wind, and start taking ownership of the fire.
Selecting and Trimming Your Brisket
The foundation of any great brisket is the selection process. You are looking for a Whole Packer Brisket, which includes both the flat and the point muscles. If you buy a flat alone, you will lose the moisture benefits of the point's superior marbling. Look for a brisket with significant intramuscular fat, or marbling; if the fat looks white and hard, that is exactly what you want to see. Aim for a weight between 12 and 16 pounds, as smaller briskets tend to dry out too quickly during the long cook time, while larger briskets can be unruly for a standard backyard offset smoker.
Trimming is where the real artistry begins, and it is a task that should never be rushed. You aren't just cleaning the meat; you are shaping it to optimize airflow and ensure even cooking. Start by removing the hard fat—also known as the deckle fat—which is located between the two muscle groups. This fat will not render down during the cook and will create a rubbery, unpleasant texture if left on. You also want to trim the fat cap down to a consistent thickness, usually around a quarter-inch. If you leave it too thick, the smoke cannot penetrate the meat; too thin, and you risk burning the underside.
"Trimming a brisket is an act of architecture; you are removing the obstacles to perfection to ensure that heat travels across the surface of the meat with absolute uniformity."
The Importance of the Fat Cap
The fat cap acts as a natural basting mechanism. As the brisket reaches the internal temperatures where fat begins to liquefy, it drips down through the meat, adding moisture and richness. However, if the fat cap is uneven, you will find that some parts of your brisket are overcooked while others remain tough. Use a sharp boneless filleting knife and keep it at a shallow angle, gliding it across the surface to peel away the excess. Always err on the side of caution; you can always shave off more, but you cannot put it back on.
Shaping for Airflow
Beyond just the fat, look for thin, jagged edges of meat that dangle off the sides. These are known as "bits" and will likely burn to a crisp well before the rest of the brisket is finished. Trimming these into a smooth, rounded shape helps the smoke pass over the surface of the meat without catching on jagged edges, which prevents acrid, bitter spots from forming on the final bark. A well-trimmed brisket should look aerodynamic, clean, and ready for a heavy, uniform seasoning application.
The Science of Seasoning and the Dry Rub
Once the brisket is trimmed, it is time to season. While the world of barbecue is full of complex, multi-ingredient rubs, we believe that the most iconic brisket relies on the "Dalmatian Rub"—a simple, heavy-handed application of coarse black pepper and Kosher salt. The coarse texture of the pepper is vital because it catches the smoke and creates a protective barrier during the long hours of cooking. Do not use fine-ground table pepper, as it will simply melt into the meat and lose its ability to form a crust.
The 50/50 Rule
For a balanced profile, start with a 50/50 ratio by volume of 16-mesh coarse black pepper and coarse Kosher salt. Some pitmasters prefer a 60/40 ratio of pepper to salt, but 50/50 is the gold standard for beginners. Apply the rub from high above the meat to ensure an even coating across the entire surface. Don't forget the sides and the bottom; the brisket needs to be fully encapsulated in flavor. Once applied, gently pat the rub into the surface of the meat, but do not rub it so hard that you break the texture of the beef.
Letting the Meat "Sweat"
After seasoning, do not throw the brisket on the smoker immediately. Let it sit on the counter or in the refrigerator for at least 45 minutes to an hour. During this time, the salt will begin to draw moisture out of the meat through osmosis, creating a tacky surface known as a pellicle. This sticky surface is crucial because it serves as the glue for your smoke particles. If you put the meat on the smoker while it is dry, the smoke will roll right off; if you wait for the pellicle, the smoke will adhere and begin the process of building that deep, dark mahogany color we call bark.
Managing the Fire and Wood Selection
Your choice of wood is just as important as the quality of the beef. Post Oak is the gold standard for Texas barbecue because it provides a clean, mild smoke that complements the beef rather than overpowering it. Hickory is a popular alternative, but it is much more potent and can turn meat bitter if you are not careful with your fire management. Avoid softwoods like pine or spruce, as the sap in those woods will make your brisket taste like chemicals. If you are using a charcoal smoker, use high-quality lump charcoal for a steady base, and add wood chunks throughout the cook for flavor.
The "Clean Smoke" Principle
The most common mistake amateur pitmasters make is using "dirty smoke." Dirty smoke is thick, white, and billowing; it is the result of incomplete combustion. You want "blue smoke," which is nearly invisible and carries the essence of the wood without the soot. To achieve this, ensure your fire has plenty of oxygen. Keep your vents open and avoid choking your fire to keep the temperature down. If you need to lower the temp, do it by reducing the amount of fuel, not by closing off the air supply.
"A beautiful bark is not just a result of seasoning; it is the physical manifestation of patience, smoke, and the correct atmospheric conditions within your smoker."
Temperature Control
Aim for a consistent pit temperature of 225°F to 250°F. This range is the "sweet spot" for rendering fat and breaking down collagen. If the temperature spikes to 300°F, you will burn the outside of the meat before the interior reaches the necessary tenderness. If it dips below 200°F, you are not generating enough heat to properly render the fat. Use a digital probe thermometer—not the dial thermometer built into the lid of your smoker—to monitor both the pit temperature and the internal temperature of the meat.
The Stall and the Wrap: Navigating the Middle
Around the 150°F to 165°F mark, you will encounter the stall. This is the point where the temperature of your brisket stops rising, sometimes for several hours. It happens because the moisture evaporating from the surface of the meat is cooling the brisket down as fast as the smoker is heating it up. Many beginners panic here and crank up the heat. Do not do this. This is the natural, necessary process of the bark setting.
To Wrap or Not to Wrap?
The decision to wrap the brisket is a point of constant debate among professional pitmasters. Wrapping in pink butcher paper is the best of both worlds; it protects the meat from the harsh heat, helps you power through the stall, but is still breathable enough to maintain that crunchy, smoky bark you worked so hard to develop. Aluminum foil, on the other hand, creates a tight seal that effectively braises the brisket, resulting in a very soft, mushy bark. Unless you are in a massive time crunch, stick to butcher paper.
The Wrapping Technique
When the bark is firm to the touch and the internal temperature hits 165°F, it is time to wrap. Lay out two long sheets of butcher paper, slightly overlapping. Place the brisket in the center and fold the paper tightly around the meat like you are wrapping a gift. Ensure there are no gaps where steam can escape. A tight wrap ensures that the juices stay contained and that the brisket cooks evenly as it climbs toward the target internal temperature of 203°F.
The Crucial Resting Phase
Once your brisket reaches an internal temperature of 203°F, take it off the smoker. Do not carve it yet! The resting phase is arguably the most important part of the entire process. A brisket that has been cooked for 12 hours is under a massive amount of tension; the proteins are tight, and the juices are agitated. If you cut into the meat while it is piping hot, the juices will run out onto your cutting board, leaving you with dry, flavorless beef.
The Long Rest
You should rest the brisket for a minimum of two hours, though three or four is even better. Place the wrapped brisket in an empty, insulated cooler—a technique often called an "oven hold" or a "faux cambro." The cooler acts as a thermal buffer, keeping the brisket at a food-safe temperature while allowing the internal fibers to relax and reabsorb the juices. This process ensures that when you finally slice the meat, every bite remains succulent and tender.
Slicing Against the Grain
How you carve the brisket determines how it feels in the mouth. The flat and the point muscles have grains that run in different directions. You must identify the grain—the direction the muscle fibers are running—and slice perpendicular to it. Slicing with the grain will result in a stringy, chewy bite. Slice the flat into pencils-thick pieces, and as you reach the point, rotate the meat 90 degrees. This ensures that every slice, regardless of the cut, remains easy to chew and melts instantly.
Troubleshooting Common Pitfalls
Even with the best instructions, things can go wrong. If your brisket comes out tough, it is usually because it was undercooked; the collagen never had enough time to render. If it is dry and crumbly, it was likely overcooked or hit with too high a temperature for too long. Take detailed notes during every cook—record the weight, the type of wood, the ambient temperature outside, and the total cook time. This "pit log" is your best tool for improvement.
When the Stall Never Ends
If you have been in the stall for more than four hours and the temperature refuses to climb, check your thermometer. Sometimes the probe is placed too close to a bone or a large pocket of fat, which can skew the reading. Verify the internal temperature by probing in two or three different spots. If it is truly stuck, don't worry about the clock. As long as your fire is clean and your temperature is stable, the meat will eventually reach the finish line.
Preventing a Bitter Bark
A bitter bark is almost always the result of bad smoke management. If your smoke is heavy and yellow, your meat will be bitter. Remember that your goal is a light, invisible, "blue" smoke. If you find your bark is becoming too dark, too early, you may need to reduce the amount of wood you are adding to your charcoal base. The smoke should be a delicate addition, not a heavy blanket that smothers the natural flavor of the prime beef.
"True mastery in the kitchen isn't about recipes; it's about understanding the variables of heat, moisture, and time so intimately that you can correct them on the fly."
Understanding the "Bark" Architecture
The bark is the crown jewel of the Texas brisket. It is a complex layer of caramelized sugars, rendered fat, and polymerized smoke particles. Achieving that deep, near-black color is a testament to your ability to manage moisture on the surface of the meat. If the surface stays too wet, the bark will be soft and mushy; if it dries out too quickly, the bark will turn into charred carbon. Finding the balance requires a steady, low-temperature fire and the correct application of your salt-and-pepper rub.
Variables Affecting Bark Quality
The Role of the Water Pan
While some purists insist against it, a small water pan placed in the smoker can be a game-changer for home cooks using smaller, less insulated units. The water pan serves two purposes: it helps regulate the temperature by adding thermal mass, and it introduces moisture into the air, which helps the bark develop more slowly and evenly. If you struggle with dry briskets, try incorporating a small pan of hot water on the fire side of your smoker.
Advanced Tips for the Seasoned Home Cook
Once you have mastered the basic brisket, you can begin to experiment with more advanced techniques. Beef tallow infusion is one such technique used by competition pitmasters. As you trim your brisket, save the excess fat trimmings. Render them down in a small saucepan until they turn into liquid gold. Before you wrap your brisket, brush a layer of warm beef tallow over the surface. This adds an extra layer of decadence and helps keep the meat moist during the final, critical hours of the cook.
Managing the "Fire-to-Meat" Ratio
In smaller, offset smokers, the proximity of the fire box to the meat can create hot spots. If your smoker is small, you might find that the end of the brisket closest to the fire box cooks much faster than the rest. A professional tip is to periodically rotate the brisket 180 degrees throughout the cook. This ensures that no single portion of the meat is exposed to the direct heat of the fire for too long, maintaining that even cook across the entire flat and point.
The Importance of Fuel Consistency
Consistency is the pitmaster's secret weapon. Using a consistent size and species of wood helps you learn exactly how your smoker behaves. If you are constantly switching between apple, hickory, and oak, you will never truly learn the "language" of your specific pit. Pick a wood, master it, and then branch out once you can consistently produce a perfect brisket every single time.
Final Pro-Tips for Success
Conclusion
Mastering the wood-smoked brisket is a rite of passage for any culinary enthusiast. It is a slow, methodical, and profoundly rewarding process that teaches you more about the physics of heat and the chemistry of food than any other dish. You have learned that the brisket is not something to fear, but something to shepherd through a long, transformative process. From the careful, precise trimming of the fat cap to the patient, hours-long rest in a cooler, every step is an investment in the final product.
Remember that there is no such thing as a "perfect" brisket, as every animal and every fire is slightly different. What you are aiming for is consistency—the ability to reproduce a high-quality, tender, bark-crusted masterpiece regardless of the variables. Don't be discouraged if your first attempt isn't quite as tender as you'd like, or if your bark isn't as dark as a competition-level entry. Every cook is a learning opportunity. Take note of what worked, analyze what didn't, and return to the fire with more knowledge than you had before.
At the end of the day, barbecue is about community. It is about taking a modest cut of meat and turning it into something that brings friends and family to the table. When you serve that first slice of brisket, perfectly rendered, deeply smoky, and tender enough to cut with a fork, you will understand exactly why we go through all the trouble. It is the joy of the craft, the patience of the pit, and the satisfaction of knowing you did it right. Now, go fire up that smoker, clear your schedule, and embrace the slow-and-low journey of the Texas brisket. The fire is yours to manage, and the results will speak for themselves. You aren't just a home cook anymore; you are a pitmaster in the making. Happy smoking, and keep that fire clean.

Get the Next Recipe
Weekly recipes, techniques, and gear picks — straight to your inbox.
