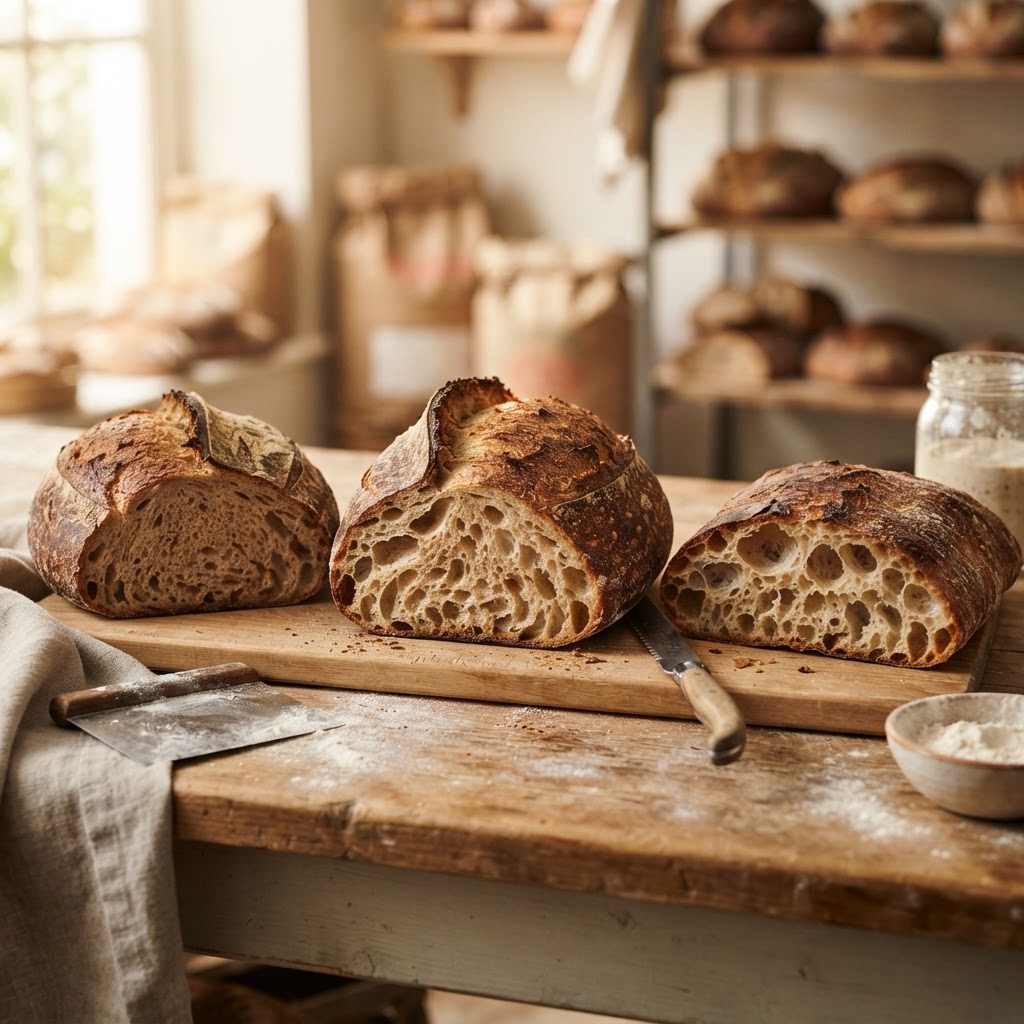
The Hydration Equation: How Water Ratios Determine Your Best Crumb, Crust, and Texture
If you have ever spent hours nursing a sourdough starter, meticulously measuring your flour, and waiting with bated breath for the final pull from the oven, only to find a dense, gummy loaf staring back at you, you are not alone. In the world of professional baking, we often joke that the oven is the great equalizer, but in reality, the destiny of your loaf is sealed long before the dough ever touches the heat. It is written in the invisible language of percentages, a mathematical framework known as baker’s percentages that dictates everything from the extensibility of your gluten network to the caramelization of your crust. Understanding the nuances of hydration is the singular most important leap a home baker can take to transition from merely following recipes to truly mastering the alchemy of bread.
The hydration of a dough—essentially the ratio of water to flour by weight—acts as the primary engine for fermentation and structure. When you increase that ratio, you are inviting a different set of physical properties into your kitchen, turning a tight, manageable ball of dough into a sprawling, slack, and highly active ecosystem of wild yeast and bacteria. Yet, fear not the sticky mess that often accompanies a high-hydration loaf. Once you learn to read the dough, to feel the way it tightens during a fold or relaxes during the bulk fermentation, you will find that these seemingly unruly mixtures are capable of producing the most airy, open-crumb loaves that were once thought exclusive to artisanal bakeries.
This guide is designed to peel back the layers of the hydration equation, demystifying why certain flours behave the way they do and how you can manipulate your hydration levels to achieve your specific dream loaf. Whether you are aiming for the tight, uniform crumb of a classic sandwich bread or the wild, blistering, translucent holes of a rustic country boule, the secret lies in the balance. We will walk through the science of absorption, the mechanics of handling wet dough, and the critical role that hydration plays in the longevity of your bread. Grab your digital scale and your favorite apron, because today, we are stopping the blame game and starting the science of better baking.
The Foundation of Baker’s Percentages
To understand hydration, you must first master the art of the baker’s percentage. In professional kitchens, we do not work in cups or tablespoons; we work in grams, and every ingredient is expressed as a percentage of the total flour weight. By setting the total flour weight to 100%, we ensure that our ratios remain consistent regardless of whether we are baking a single loaf for breakfast or a hundred loaves for a Saturday morning rush. This system allows you to scale recipes up or down with surgical precision while maintaining the exact texture and crumb structure you intended.
When we talk about hydration, we are looking at the weight of the water divided by the weight of the flour, multiplied by 100. For example, if you use 500 grams of flour and 350 grams of water, your hydration is 70%. It is a simple calculation, but it is the bedrock upon which all your bread decisions are made. A 60% hydration dough will be stiff, easy to knead, and excellent for sandwich bread, whereas an 85% hydration dough will be closer to a thick batter, requiring advanced handling techniques like coil folds and laminated folds to develop structure.
Why Weight Beats Volume Every Time
If you are still relying on measuring cups, you are already fighting a losing battle against the hydration equation. Flour settles over time, meaning one cup of all-purpose flour can vary by as much as 20% in mass depending on how it was scooped and packed. When you are aiming for a precise 75% hydration to achieve a specific crumb, that 20% variance is the difference between a loaf that holds its shape and a pancake that spreads across your baking stone. Always use a digital scale to ensure your ratios are accurate, and your consistency will improve overnight.
The hydration level is not just a number on a page; it is the blueprint for the structural integrity of your bread. If you ignore the math, you are leaving the final result to chance, and in baking, chance is rarely a kind partner.
The Flour-Water Interface: Absorption and Development
Not all flours are created equal, and your choice of flour will dictate how much water your dough can handle. High-protein flours, such as bread flour or high-extraction wheat, possess a superior capacity to absorb water because they contain a higher percentage of protein-forming components like glutenin and gliadin. When these proteins are hydrated, they begin to bond and form the gluten network that traps the carbon dioxide gas produced by yeast. If you use a weak flour—like a standard cake flour—with a high-hydration recipe, the flour will be overwhelmed, and your dough will lack the strength to hold any air bubbles, leading to a flat, dense finish.
Furthermore, the ash content and the degree of milling in your flour affect how it interacts with liquid. Stone-ground whole wheat, for instance, contains the bran and the germ, both of which are highly absorbent but also physically sharp. The bran acts like tiny shards of glass that can cut through your gluten strands during the kneading process. This is why bakers often use a process called autolyse—mixing only flour and water and letting it rest for 30 to 60 minutes before adding the leaven or salt. This pause allows the bran to soften and the gluten network to begin forming passively, ensuring that your dough is strong enough to withstand higher hydration.
The Science of Autolyse
The autolyse method is your best friend when working with high-hydration doughs. By allowing the flour to fully saturate with water before any fermentation begins, you are maximizing the extensibility of the dough. You will notice that after an hour of sitting, the dough is significantly smoother and more manageable than it was when you first mixed it. This process reduces the need for aggressive mechanical kneading, which is vital when working with wet, sticky doughs that would otherwise stick to your hands and your countertop, forcing you to add unnecessary dusting flour.
Mastering High-Hydration Handling
Working with a dough that is 80% hydration or higher requires a paradigm shift in how you handle the dough. You cannot use the traditional "heave and knead" technique used for lower-hydration loaves; the dough will simply adhere to your skin and form a mess. Instead, you must rely on low-impact manipulation techniques such as the stretch-and-fold and the coil fold. These methods use the dough's own weight and surface tension to align the gluten proteins without tearing them. By gently stretching the dough and folding it over itself, you are building layers of structural strength while maintaining the pockets of air that result in an open, airy crumb.
Temperature control is also paramount when dealing with high-hydration doughs, as warmer temperatures will accelerate fermentation and make the dough feel even more slack and difficult to manage. Professional bakers often aim for a Dough Temperature (DT) of around 76°F to 78°F. If your kitchen is hot, use cold water; if it is cold, use lukewarm water. Remember that your hands are also a source of heat; when performing your folds, you can lightly dampen your hands with cold water. This not only prevents sticking but also provides a cooling effect to the exterior of the dough, keeping the fermentation steady and controlled.
The Coil Fold Technique
For those working in the 80% plus range, the coil fold is a transformative technique. Unlike the standard stretch-and-fold, which can be harsh, the coil fold is designed to be delicate. To execute this, you simply reach under the middle of the dough with both hands, lift it gently so that it stretches, and then set it back down so that the edges of the dough fold under itself. This builds incredible structure without degassing the loaf, preserving the bubbles that you worked so hard to cultivate during your bulk fermentation.
A sticky dough is not a failed dough; it is a lively, vigorous, and protein-rich masterpiece waiting for the right touch. Embrace the stickiness, avoid the urge to add more flour, and let the gluten do the heavy lifting for you.
The Crust and Crumb Relationship
There is a common misconception that high hydration is solely for the sake of an open crumb. While it is true that more water allows the dough to expand more vigorously in the oven—a phenomenon known as oven spring—the hydration also dictates the quality of your crust. Water in the dough turns to steam in the high heat of the oven, which creates the initial expansion, but it also gelatinizes the starches on the surface of the loaf. This leads to a thin, crispy, and crackly crust that is the hallmark of a world-class hearth bread.
However, too much water without proper structural development will result in a gummy crumb. If the water cannot be effectively held by the gluten network, it remains trapped in the finished loaf, leading to a texture that feels moist and heavy rather than light and airy. This is why your bake time and temperature are just as critical as your hydration ratio. You must bake your loaf long enough to drive out excess moisture and set the interior structure. Don't be afraid to push your loaves to a dark, caramelized color; the maillard reaction occurring on the crust is the final step in ensuring the loaf stays crisp long after it leaves the oven.
Managing Steam in Your Home Oven
To get that professional, crackly crust, you need to replicate the steam-injection systems found in commercial deck ovens. If you are using a Dutch oven, you are already halfway there, as the enclosed space captures the steam released by the loaf itself. If you are baking on a baking stone or steel, you should place a cast-iron skillet on the bottom rack of the oven and pour a cup of boiling water into it the moment you load your bread. This burst of steam prevents the crust from setting too quickly, allowing the loaf to reach its maximum volume before the surface browns.
* Preheat your oven and Dutch oven for at least 45 minutes at 500°F (260°C).
* Load the dough into the Dutch oven and cover immediately.
* Bake covered for 20 minutes to allow the steam to work its magic.
* Remove the lid and lower the temperature to 450°F (230°C) for another 20-25 minutes to develop a deep, mahogany crust.
The Role of Fermentation Time
Hydration and fermentation are inextricably linked. A wetter dough ferments faster than a drier one because the yeast and bacteria are more mobile in a liquid environment. If you decide to increase your hydration to 85%, you must adjust your expectations for the duration of the bulk fermentation. A dough with more water will hit its peak much sooner than a dough with 65% hydration. If you ignore this, you risk over-proofing your dough, leading to a collapse when you try to score or bake it.
Conversely, fermentation is also a tool for building strength. During the bulk fermentation, the production of organic acids (like lactic and acetic acid) strengthens the gluten structure. This is why longer, slower fermentations are often preferred by master bakers. By controlling the temperature of your dough, you can slow down the fermentation process, giving the gluten more time to develop and the flavor more time to deepen. You are looking for a fermentation profile that balances the activity of the yeast with the structural development of the protein network.
Visual Cues for Success
Do not rely solely on the clock. Dough is a biological entity, and it will respond to the specific conditions of your kitchen on any given day. Watch for these visual cues instead of blindly following a timer:
The most important tool in your kitchen is not a fancy stand mixer or a high-end oven; it is your own power of observation. Watch the dough, learn its language, and you will never need a timer again.
Troubleshooting the Hydration Dilemma
Every baker encounters the "pancake" scenario eventually. If your dough is spreading flat instead of rising upward, it is usually a sign that your hydration is higher than your current gluten-building skill set can handle. Do not be discouraged. Instead, scale back your hydration by 5% in your next bake. If you were at 80%, drop to 75%. This small adjustment can make a world of difference in how the dough handles during shaping. The goal is to incrementally increase your hydration as your proficiency with the stretch-and-fold technique improves.
Another common issue is tearing during shaping. This happens when the dough has not been properly developed or when the hydration is so high that the gluten is pushed to its absolute limit. If you notice the surface of your dough is tearing as you try to create tension during the final shaping, stop immediately. Let the dough rest for another 15 minutes. This is called the bench rest or détente. During this rest, the gluten relaxes, allowing you to manipulate the dough further without causing structural damage.
The Importance of Bench Rest
The bench rest is the secret weapon for handling wet doughs. After you have divided your dough into loaves, you must give it a chance to recover from the stress of being cut and handled. A 20-minute rest on the counter, covered with a towel, will make your final shaping significantly easier. The dough will have regained its extensibility, and you will be able to form a nice, tight skin on the boule or batard without fighting the dough’s natural urge to relax.
Flour Choices and Their Impact
Not all wheat is the same, and when you are dealing with hydration, the quality of your flour is paramount. High-quality artisan bread flour usually sits between 12% and 13% protein. If you are using supermarket-brand flour, you might find that it struggles to hold its structure once you cross the 75% hydration threshold. This isn't because you are doing anything wrong; it is simply because the protein quality—the ability of that protein to form a strong, elastic web—is lower.
When experimenting with high-hydration doughs, consider blending your flours. Using 80% bread flour and 20% high-quality whole wheat flour can add depth and strength. The whole wheat flour acts as a structural stabilizer because of its bran content, while the bread flour provides the elasticity needed for that open, airy crumb. This kind of experimentation is how you develop your signature style. Start with a baseline recipe and make small, incremental changes to see how the hydration interacts with your flour of choice.
Understanding Protein Content
| Flour Type | Protein Content | Hydration Sweet Spot |
| :--- | :--- | :--- |
| All-Purpose | 9-11% | 60-65% |
| Bread Flour | 12-13% | 70-80% |
| High-Protein/Strong | 14%+ | 80-90%+ |
| Whole Wheat | Varies | 75-85% (Requires Autolyse) |
Final Thoughts
The hydration equation is not a rigid set of laws, but rather a set of guidelines that empower you to take control of your bread. By understanding the relationship between water weight, flour protein, and the mechanical manipulation of your dough, you transition from a home baker guessing at outcomes to a culinary artisan orchestrating the perfect loaf. Do not fear the sticky dough, do not rush the fermentation, and always respect the power of the bench rest.
The most beautiful loaves are often the ones that challenged us the most during the process. When you pull a loaf from the oven that has achieved that perfect, glassy, singing crust and an interior crumb that looks like a honeycomb, you will know that the time spent learning the math was entirely worth it. Keep your scale calibrated, keep your observations sharp, and above all, keep baking. Every loaf, even the ones that don't quite reach the heights you imagined, is a masterclass in the science of hydration.
You have all the tools you need to succeed. The crumb you desire is within your reach, hidden in the weight of your water and the strength of your flour. Do not blame the chef for a loaf that didn't rise; instead, look to the hydration, learn from the process, and get ready for the next round of baking. The kitchen is your laboratory, and every loaf of bread is an experiment in perfection. Now, go weigh your flour, measure your water, and let the science of the crumb begin. You are on your way to becoming the baker you have always wanted to be.




Get the Next Recipe
Weekly recipes, techniques, and gear picks — straight to your inbox.
