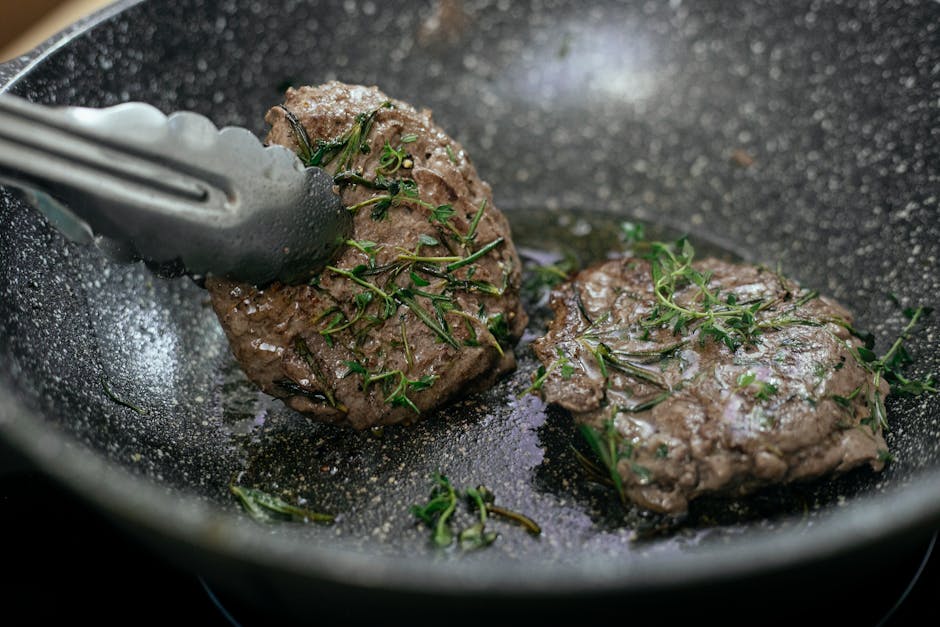
The Maillard Reaction: Mastering the Science of Searing
Cooking is often perceived as an artistic endeavor, a romantic pursuit of flavor that relies on intuition and a well-honed palate. While there is certainly a place for creativity in the kitchen, the true foundation of professional-grade cooking lies in the cold, hard reality of food science. We have all experienced that moment of culinary envy when a chef presents a piece of protein—seared to a deep, mahogany brown, crackling with texture, and yielding to the touch. This isn't just luck; it is a fundamental chemical transformation known as the Maillard reaction. If you have ever blamed yourself for a pale, uninspiring steak or a lack of depth in your pan sauces, it is time to stop blaming your skills and start understanding the chemistry occurring in your skillet.
To understand the Maillard reaction, you must first abandon the antiquated notion that searing "seals in the juices." This myth has haunted home kitchens for decades, leading many to believe that high heat prevents moisture loss through some magical barrier. In reality, searing is entirely about the development of complex, savory flavor profiles that simply cannot exist in boiled or steamed meat. By applying heat to proteins and sugars, we initiate a non-enzymatic browning process that creates hundreds of different flavor compounds. When you master this, you are not just heating food; you are architecting a multidimensional sensory experience that distinguishes a home-cooked meal from a restaurant-quality feast.
In the following exploration, we will dissect the variables that dictate success: moisture management, surface temperature, pH levels, and the precise timing required to trigger this golden-brown transformation. We will move past the frustration of uneven crusts and gray bands of overcooked meat, replacing them with a technical understanding of thermal conductivity. Whether you are working with a cast-iron skillet, a stainless steel pan, or an open flame, the laws of chemistry remain constant. By the end of this guide, you will possess the knowledge to execute the perfect sear every single time, transforming your kitchen into a laboratory of delicious, repeatable results.
The Chemistry Behind the Crust
At its core, the Maillard reaction is a complex chemical dance between amino acids—the building blocks of proteins—and reducing sugars. This reaction begins in earnest when temperatures reach approximately 280 degrees Fahrenheit (140 degrees Celsius). Unlike caramelization, which involves only the pyrolysis of sugars, the Maillard reaction involves the interaction of those sugars with the nitrogen-containing compounds found in muscle fibers. The result is a cascade of new molecules, including pyrazines, pyrroles, and furans, which contribute the nutty, toasted, and savory notes we associate with a perfectly cooked piece of protein.
The Role of Water and Temperature
Water is the greatest enemy of the Maillard reaction. Because water boils at 212 degrees Fahrenheit (100 degrees Celsius), any excess moisture on the surface of your meat will act as a thermal buffer, preventing the pan from reaching the critical threshold required for browning. If your surface is wet, your protein will effectively steam rather than sear. This is why professional kitchens emphasize drying the surface of meat with paper towels before it ever touches a hot pan.
The secret to a perfect crust isn't just the heat of the pan; it is the absolute elimination of surface moisture that allows the chemical reaction to bloom.
To achieve that deep, dark exterior, you need to manage your thermal energy carefully. If your pan temperature drops too low during the initial contact, the moisture within the meat will release, cool the pan, and stall the browning process. This leads to that dreaded "gray meat" syndrome, where the exterior looks unappetizing and the inside overcooks before the crust has a chance to form. Maintaining a high surface temperature is essential for the rapid development of those flavor-packed compounds.
Equipment Selection for Precision Searing
Not all cookware is created equal when it comes to the Maillard reaction. You need materials that provide high thermal mass and the ability to conduct heat evenly across the surface. A thin aluminum pan, for example, will lose its heat the moment you drop a cold steak into it, leading to a localized temperature crash. You want tools that store energy and release it consistently, allowing you to maintain the necessary heat levels even when a cold ingredient is introduced.
Cast Iron and Stainless Steel
Cast iron is the undisputed champion of the home kitchen for searing. Its high thermal mass allows it to hold heat exceptionally well, ensuring that the pan temperature does not plummet upon contact with a protein. Furthermore, cast iron is durable enough to withstand the high temperatures—often upwards of 450 degrees Fahrenheit—that are necessary to drive the Maillard reaction quickly. When seasoned properly, it offers a semi-nonstick surface that promotes an even crust.
Stainless steel is another excellent choice, particularly for pan sauces. Unlike cast iron, stainless steel allows for the formation of fond—those browned, caramelized bits left on the bottom of the pan after searing. These bits are pure, concentrated flavor. By deglazing the pan with wine, stock, or vinegar, you can lift that fond into a sauce, effectively capturing the essence of the Maillard reaction to create a liquid gold finish for your dish.
The Importance of Fat Choice
The fat you use is more than just a lubricant for your protein; it is a heat transfer medium. When you add oil to a hot pan, it fills the microscopic gaps between the protein surface and the metal, ensuring an even distribution of heat. However, you must choose a fat with a high smoke point. Refined oils like grapeseed, canola, or avocado oil are ideal for high-heat searing because they won't break down or impart bitter, burnt flavors into your food during the process.
Mastering the Variables of Success
Successful searing is not just about heat; it is about preparation. The protein should be at room temperature before it hits the pan, or at least pulled from the refrigerator thirty minutes prior to cooking. If the interior is ice-cold, the exterior will spend too much time in the pan to achieve the perfect crust, which almost invariably leads to a gradient of overcooked meat beneath the surface. You want the outside to brown rapidly while the inside reaches your target temperature gently.
Controlling the pH
One of the most overlooked variables in the Maillard reaction is the pH of the protein surface. The reaction occurs significantly faster in an alkaline environment. This is a trick often used in baking—such as when adding baking soda to pretzel dough—but it also applies to savory cooking. A slight increase in the alkalinity of the meat's surface can accelerate the browning process, helping you achieve a deep color without subjecting the meat to excessive, moisture-sapping heat.
The Art of the Flip
There is a common debate regarding how often one should flip their protein. While the old-school approach favored a "flip it once" mentality, modern culinary science suggests that frequent flipping can actually lead to more even results, especially in thicker cuts of meat. By flipping every 30 to 60 seconds, you prevent any single side from absorbing too much direct heat, which helps manage the internal temperature rise and produces a more consistent color across the entire surface.
Frequent flipping doesn't hinder the sear; it controls the gradient, ensuring your crust is uniform and your meat is cooked to an exact, edge-to-edge perfection.
The Science of Fond and Deglazing
If you are searing a protein and do not utilize the fond, you are leaving half the flavor on the table. Fond is the dark, crusty deposit that forms on the bottom of the pan during the searing process. It is the physical manifestation of the Maillard reaction that didn't stick to the meat. To ignore it is a culinary sin. Deglazing is the technique of adding a liquid to the hot pan to loosen these solids and incorporate them into a sauce, effectively turning a byproduct of searing into the highlight of the meal.
Selecting the Right Liquid
The choice of liquid for deglazing should complement the profile of the dish. For a steak, a dry red wine or a splash of balsamic vinegar provides an acidic brightness that cuts through the richness of the fat. For poultry or pork, white wine, chicken stock, or even apple cider can provide a nuanced flavor profile. The key is to add the liquid slowly while the pan is still hot, allowing the steam to release the fond before whisking in cold butter or aromatics to emulsify the sauce into a glossy finish.
Emulsification for Texture
Once you have deglazed your pan, you want to transform that liquid into a sauce with body and sheen. This is achieved through emulsification. By whisking in cold, cubed butter—a technique known as monter au beurre—you change the consistency of the sauce from a thin, watery liquid to a velvety, rich accompaniment. The fat molecules bind with the liquid components of your deglazing agent, creating a stable sauce that coats the back of a spoon and intensifies the savory notes created during the initial sear.
Beyond Meat: Searing Vegetables and Starches
The Maillard reaction is not exclusive to muscle protein. Vegetables, particularly those with high sugar content like carrots, parsnips, and onions, respond magnificently to high-heat searing. When you sear a Brussels sprout or a wedge of cabbage, you are breaking down the complex carbohydrates and initiating a browning process that turns bitter, fibrous stalks into sweet, tender morsels of flavor. The key is to avoid crowding the pan, as vegetables release significant water when heated.
Understanding Starches
Starch-heavy items, like potatoes or gnocchi, also benefit from the Maillard reaction. When you pan-sear a parboiled potato in clarified butter, you are creating a "crust" that is fundamentally different from a baked or boiled skin. It provides a crunch that contrasts with the creamy, soft interior. To achieve this, ensure your starch is completely dry after parboiling; moisture on the surface will result in a gummy, rather than crisp, texture.
The Role of Aromatics
When searing, adding aromatics like garlic, thyme, or rosemary toward the end of the cooking process—a process known as basting—allows the herbs to infuse the fat without burning. Since garlic and herbs burn faster than meat browns, you must time their addition carefully. By tilting the pan and using a spoon to bathe the protein in the aromatic-infused, hot fat, you are effectively "deep frying" the exterior with high-flavor fat, which further accelerates the browning of the crust.
Advanced Troubleshooting and Pro Tips
Even experienced cooks encounter issues where the sear doesn't take hold. One of the most common causes is the "crowded pan" effect. If you put too many items in your skillet at once, the temperature of the pan drops significantly, and the moisture released by the food creates a steam trap. Always sear in batches if necessary, maintaining a respectful distance between pieces of protein. This ensures that the heat remains focused on the surface of the food rather than dissipated throughout the air.
Identifying the Stall
If you find that your food is not browning after several minutes, you have hit a thermal stall. Do not just keep cooking, as this will result in the interior becoming rubbery and overcooked. Instead, remove the food, reheat the pan until the oil is shimmering once more, and then resume the process. It is far better to stop and adjust than to push through with a cold pan. Professional chefs are constantly adjusting the heat under their pans throughout the entire cooking process to ensure the Maillard reaction is consistently supported.
Using a Thermometer
Always rely on an instant-read thermometer rather than time-based estimates. Different proteins have different densities, and your pan's performance can change from day to day. A piece of beef cooked to 130 degrees Fahrenheit is perfectly medium-rare, regardless of how long it took to get there. By removing the guesswork, you allow yourself to focus entirely on the quality of the sear rather than worrying about the internal doneness of the item.
Temperature is the language of the kitchen; learn to speak it fluently, and you will never again serve a piece of meat that is either underdone or dry.
The Psychology of the Chef
Mastering the Maillard reaction is about more than just physics and chemistry; it is about building the confidence to be aggressive with your heat. Many home cooks are timid, fearing that a high flame will result in an acrid, burnt meal. However, the line between "browned" and "burnt" is the primary skill set of a professional. Embracing the sear means accepting that you will occasionally push things too far in your pursuit of perfection—and that is perfectly acceptable.
Continuous Improvement
Every time you sear a protein, pay attention to the sound. A loud, aggressive hiss is exactly what you are looking for. If you hear a soft bubbling, your pan is likely not hot enough, and you are steaming your dinner. Listen to the pan, observe the color, and trust the science. Over time, these variables will become second nature, allowing you to sear intuitively without needing to consult a guide.
The Final Step: The Rest
Once your protein is perfectly seared, do not cut into it immediately. Resting is a critical part of the process that allows the internal juices to redistribute throughout the muscle fibers. If you cut into a seared steak the moment it leaves the pan, you will lose those precious juices to the cutting board. Give it at least five to ten minutes, depending on the thickness of the cut, and you will find that the texture is significantly improved.
Final Thoughts
The Maillard reaction is the bridge between raw ingredients and gourmet food. By shifting your perspective from "cooking by timing" to "cooking by chemical reaction," you gain the ability to manipulate flavor and texture in ways that were previously inaccessible. It requires attention to detail: the drying of the surface, the selection of the fat, the maintenance of the heat, and the intelligent use of the fond. When you internalize these principles, the kitchen ceases to be a place of mystery and becomes a playground of predictable, repeatable, and delicious science.
So, the next time you step up to your stove, remember that you are not just making dinner—you are performing a chemical experiment. Keep your pans hot, your surfaces dry, and your heat under control. When you master these elements, you will find that you don't need fancy equipment or secret ingredients to create restaurant-quality food. You simply need an understanding of the fundamental laws of nature and the courage to apply them with precision. Stop blaming the chef, and start embracing the scientist within. Your future meals will be all the better for it.
As you move forward in your culinary journey, remember that failure is merely data. If your crust is pale, ask yourself why: Was the surface moist? Was the pan crowded? Was the heat too low? By analyzing these moments, you refine your technique. Mastery is a slow process, but it is built on these small, scientific successes. Keep experimenting, keep observing, and above all, keep searing. The world of flavor is wide open to those who understand the chemistry of the flame, and the path to mastery is now laid out before you. There is no limit to what you can achieve when you treat the kitchen with the respect and rigorous curiosity that food science demands. Embrace the sear, savor the result, and enjoy the process of becoming a master in your own kitchen. You have the tools, you have the knowledge, and now you have the authority to create masterpieces every single day.


Get the Next Recipe
Weekly recipes, techniques, and gear picks — straight to your inbox.
