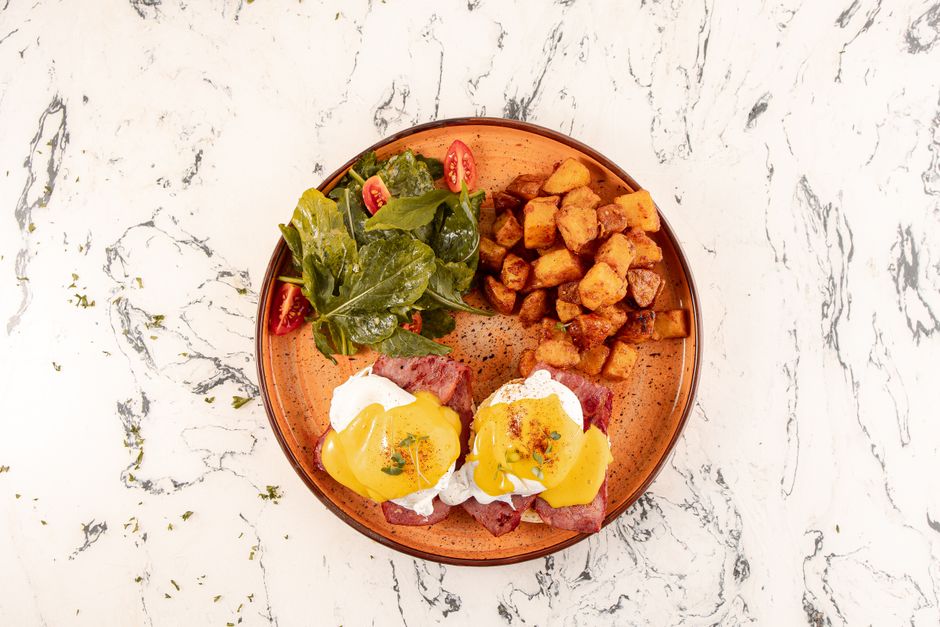
The Perfect Hollandaise: Mastering the Delicate Art of Warm Emulsions
The realm of French mother sauces is often regarded with a mixture of reverence and genuine terror by the home cook, and standing proudly at the center of this culinary pantheon is the elusive Hollandaise. It is a sauce that demands total presence of mind, a gentle touch, and an unwavering commitment to the rhythm of emulsification. Unlike a simple vinaigrette that can be shaken together in a jar, Hollandaise is a warm emulsion that balances the richness of clarified butter with the sharp, acidic tang of lemon juice and the structural integrity of egg yolks. It is the cornerstone of a perfect Eggs Benedict, the crowning glory of tender poached asparagus, and a litmus test for anyone claiming to have mastered the basics of the professional kitchen.
When we talk about the chemistry of Hollandaise, we are talking about the delicate suspension of fat within a liquid medium, held together by the lecithin found naturally in egg yolks. The goal is to achieve a texture that is velvety, thick enough to coat the back of a spoon, and possesses a sunny, pale yellow hue that glows on the plate. Because it contains raw or lightly cooked eggs and a high percentage of butter, it is inherently unstable, prone to breaking if the heat is too high or the butter is added with reckless abandon. Yet, there is a profound satisfaction in watching the mixture transform from a thin, whisked froth into a glossy, decadent ribbon of silk under your very own hands.
In this guide, we are going to peel back the curtain on this temperamental classic, moving beyond the myths that suggest it is impossible to master at home. We will break down the science of temperature control, the mechanics of emulsification, and the emergency protocols for when things inevitably go sideways. By the time you finish this deep dive, you will no longer view the double boiler with apprehension, but with the confidence of a seasoned saucier. Prepare to elevate your brunch game and embrace the glorious, buttery chaos of the one sauce that separates the hobbyist from the true kitchen technician.
The Foundation: Selecting Your Ingredients
Success in the kitchen rarely happens by accident; it is almost always the result of deliberate choices made before the heat is ever turned on. For Hollandaise, your ingredient list is short and brutally honest. Because there are so few components, there is nowhere for low-quality products to hide. You are dealing with eggs, butter, acid, and a pinch of salt. Every single one of these elements contributes to the final structural integrity and flavor profile of the emulsion, meaning that sourcing matters more here than it does in a slow-cooked ragu where spices can mask a lack of depth.
Choosing the Right Butter
When you are making a traditional Hollandaise, the fat source is the protagonist of the show. While standard grocery store butter is perfectly fine, clarified butter or high-quality European-style unsalted butter is the gold standard. Clarified butter—or ghee—has had the milk solids and water removed, which provides a cleaner, more stable emulsion that won't separate as easily under heat. If you choose to use whole butter, remember that the milk solids will thicken the sauce slightly more and change the flavor profile. Always ensure your butter is warm, but never sizzling, as overly hot butter will shock the egg yolks and cause them to scramble instantly.
The Role of Egg Yolks
Your yolks are the emulsifying agent. They contain lecithin, the essential protein that forces the water-based lemon juice and the oil-based butter to coexist in harmony. You want the freshest eggs possible, as the yolk membrane will be stronger and less likely to break during the separation process. When separating, be absolutely certain that not a single trace of egg white remains in the bowl, as the proteins in the white behave differently under heat and can lead to a lumpy or uneven texture.
"A Hollandaise is not merely a sauce; it is a live, breathing entity that responds to the temperature of your room, the quality of your butter, and the rhythm of your whisk. Treat it with the same respect you would a soufflé."
Balancing the Acid
Lemon juice provides the necessary brightness to cut through the heavy, luxurious fat of the butter. Without the acid, the sauce would taste one-dimensional and cloying. Some chefs prefer to use a reduction of white wine, shallots, and cracked peppercorns—known as a gastrique—to add complexity before adding the yolks. For the standard home-kitchen Hollandaise, fresh squeezed lemon juice is perfectly sufficient. Aim for a ratio of approximately one tablespoon of lemon juice per three egg yolks to achieve that bright, clean finish that defines a properly made sauce.
The Science of Emulsification
At the heart of the Hollandaise process is the science of emulsification. An emulsion is essentially a mixture of two liquids that do not naturally want to combine—in this case, fat and water. To force them together, you must disperse the fat into tiny, microscopic droplets that are then coated by the lecithin in the egg yolks. This prevents the fat droplets from coalescing back into a pool of oil. When you whisk, you are manually performing this mechanical work, and the heat from your double boiler is what encourages the egg proteins to thicken and stabilize that structure.
The Double Boiler Technique
The bain-marie, or double boiler, is your best defense against overheating the eggs. You want to create a gentle, indirect heat source that warms the yolks gradually. A common mistake is to have the water in the bottom pot at a rolling boil; this creates too much steam and can quickly turn your delicate base into scrambled eggs. Instead, keep the water at a steady, barely-visible simmer. The bottom of your mixing bowl should not be touching the hot water directly; you want the steam to do the work.
The Whisking Rhythm
Consistency is the name of the game. When you first combine your yolks and acid, you must whisk them vigorously until they turn a pale, creamy yellow and increase in volume. This is called "ribbon stage" in pastry, and it is equally critical here. By whipping air into the yolks, you create a more stable network for the butter to cling to. Once you begin adding the butter, you must maintain a constant, steady speed. If you stop whisking, the butter will pool on top of the eggs, and the emulsion will fracture.
Temperature Management
Temperature is the fine line between perfection and ruin. Your egg base should be warm to the touch—around 140°F to 150°F—but never hot enough to cook the yolks solid. If the sauce becomes too hot while you are adding the butter, simply remove the bowl from the heat for a few seconds and continue whisking. If it feels like it is cooling down too much, return it to the steam. A thermometer is an excellent tool for beginners, but eventually, you will learn to feel the temperature through the metal of the bowl.
Step-by-Step Execution: The Classic Method
Preparation is vital. Before you crack your first egg, ensure all your ingredients are measured and your workspace is clear. The process moves quickly once it starts, and you don't want to be fumbling for a lemon or a stick of butter while your yolks are sitting over the heat. This procedure is designed to be methodical, reducing the room for error while ensuring that the final result is as consistent as the one found in a Michelin-starred kitchen.
Managing the Flow
The speed at which you add the butter is directly proportional to the stability of the sauce. Think of it as a feedback loop. Every few seconds, observe the texture. Is it thickening? Is it shiny? If it starts to look greasy or thin, stop adding butter immediately, take the bowl off the heat, and whisk in a teaspoon of warm water. This provides extra moisture to help the lecithin reorganize the emulsion.
Troubleshooting a Broken Sauce
Do not panic if your sauce "breaks" or separates. It happens to every professional chef at least once in their career. A broken Hollandaise just means the fat has overcome the emulsifier. To fix it, start a new bowl with one fresh egg yolk and a teaspoon of warm water. Whisk it until it is slightly thickened, then very, very slowly whisk your broken, oily sauce into this new yolk base, just as you would add butter. In almost all cases, this will rescue your emulsion and bring it back to a beautiful, glossy state.
"A broken sauce is not a failure of character; it is a lesson in patience. Do not pour it down the drain—simply treat it as the starting point for your next, more successful attempt at the emulsion."
The Variations: Beyond the Standard
While the classic Hollandaise is a masterpiece on its own, it also serves as the mother sauce for several other derivatives. Once you have mastered the technique, you can easily pivot into these secondary sauces. These variations are an excellent way to impress dinner guests and demonstrate a deeper understanding of how flavors interact with fat. Changing the base profile can completely shift the character of a dish, making a simple piece of fish or a grilled vegetable feel like an entirely new culinary experience.
Béarnaise Sauce
Perhaps the most famous derivative of Hollandaise is Béarnaise. Instead of lemon juice, the base is made with a reduction of white wine, white wine vinegar, shallots, peppercorns, and fresh tarragon. The process is identical, but the flavor is significantly more herbaceous and savory, making it the perfect accompaniment for a seared steak or a piece of pan-fried halibut. The tarragon adds a subtle anise note that balances the richness of the butter perfectly.
Mousseline Sauce
For a lighter, more ethereal version of the sauce, you can create a Mousseline. This is done by folding stiffly whipped heavy cream into your finished Hollandaise just before serving. It lightens the texture and adds a velvet-like mouthfeel that pairs beautifully with delicate items like steamed lobster or white fish. Be careful when folding the cream in; do it gently to avoid deflating the airy structure you have spent so much effort building.
Maltaise Sauce
If you are looking for a fruity twist, a Maltaise sauce incorporates the zest and juice of blood oranges instead of standard lemon. The color is absolutely stunning, and the sweet-tart profile of the blood orange complements the earthiness of roasted root vegetables or sautéed bitter greens like kale or radicchio. It is a bold, modern take on a classic that shows off your creative side in the kitchen.
Professional Tips for the Home Chef
The gap between a home kitchen and a professional line is often bridged by small, seemingly insignificant habits. Professional chefs do not have magic powers; they have systems. When you are making a sauce like Hollandaise, your environment needs to be controlled. This means having your mise en place perfectly organized, your whisk ready, and your heat sources calibrated. Efficiency reduces stress, and less stress leads to better decision-making when the sauce starts to thicken.
The Importance of Equipment
Use a round-bottomed stainless steel bowl. The shape is critical because it allows your whisk to reach every corner, preventing any egg from staying stuck to the side and cooking prematurely. A flat-bottomed bowl will leave dead zones where the eggs will scramble. Also, use a balloon whisk with plenty of wires; more wires mean more contact with the liquid, which means a faster and more stable emulsion.
Keeping It Warm
Hollandaise is best served immediately. However, if you are hosting a dinner party and need to keep it warm for 30 minutes, place your bowl over a pot of lukewarm water—not hot. If the water is too hot, the sauce will continue to cook and potentially break. Alternatively, place the sauce in a thermos that has been pre-warmed with hot water. This will hold the sauce at a perfect temperature without the risk of over-coagulation.
Sanitation and Safety
Because Hollandaise uses egg yolks that are barely cooked, it is a high-risk sauce for bacterial growth if left out at room temperature for too long. Always aim to serve it within an hour of making it. Do not reheat Hollandaise that has been sitting at room temperature for more than two hours; it is a recipe for foodborne illness. If you have leftovers, discard them rather than trying to save them for the next day, as the emulsion will not hold up to refrigeration and reheating.
Mastering the Texture
Texture is the ultimate indicator of a successful Hollandaise. You are looking for a consistency that is thick enough to coat a spoon—known in the industry as "nappe"—but light enough to flow gracefully off it. If the sauce is too thick, it will feel like paste; if it is too thin, it is likely that the butter was added too quickly or the heat was insufficient to allow the proteins to set. A perfect Hollandaise should have a sheen that catches the light, reflecting the high fat content and the care you put into the emulsification.
The Mouthfeel Test
When you taste your sauce, pay attention to the "coating" feeling. It should be rich and luxurious, coating the palate without feeling greasy or leaving an oily film. If you taste it and it feels oily, your emulsion is beginning to separate. Immediately whisk in a few drops of hot water or lemon juice to pull the fat back into the structure. This is a common adjustment that even high-end chefs make in the middle of service.
Adjusting the Density
If you find your Hollandaise is too dense, it may be because you used too much butter or the eggs were too large. You can thin the sauce by whisking in a small amount of warm water, white wine, or even a splash of lemon juice. The goal is a delicate balance where the sauce feels substantial enough to be a component of the dish, but light enough to not overpower the delicate flavors of the poached or steamed ingredients it is meant to accompany.
Visual Cues
Watch the sauce as you whisk. You are looking for the appearance of the "trail." When you drag your whisk through the sauce, you should be able to see the bottom of the bowl for a split second before the sauce flows back to cover it. If you can see the bottom for a long time, it is too thick; if it closes up instantly, it is too thin. This visual feedback is your most reliable tool, and with practice, you will be able to read the sauce like a book.
Final Thoughts
Mastering Hollandaise is a rite of passage. It represents the moment you stop following recipes blindly and start understanding the physical properties of your ingredients. There is a distinct sense of accomplishment when you present a perfectly emulsified, golden sauce to your guests—a sauce that you created from scratch using nothing but eggs, butter, and your own steady hand. It is not about perfection; it is about the mastery of a process that requires patience, focus, and a bit of bravery.
Remember that the fear surrounding Hollandaise is largely manufactured. It is not a test of your worth as a cook, but a technique to be learned through repetition. Don't be afraid to fail, and certainly don't be afraid to break a sauce. A broken sauce is simply a prompt to practice your recovery skills, which are just as valuable as the skills required to make the sauce in the first place. Every time you whisk that bowl, you are building muscle memory and deepening your intuition for how ingredients react to heat and motion.
As you continue your journey in the kitchen, carry this lesson forward into everything you cook. Whether you are tempering chocolate, building a pan sauce with butter, or even just poaching an egg to go with your Hollandaise, look for the subtle cues that the ingredients give you. Listen to the sound of the whisk, observe the change in viscosity, and trust your instincts. The "Blame The Chef" philosophy is built on the idea that knowledge is the best ingredient in any kitchen. Now, tie on your apron, grab your whisk, and go conquer the mother of all emulsions. You have everything you need to succeed, and the results will be absolutely golden.
"The secret to the perfect Hollandaise isn't in a gadget or a shortcut—it is in the rhythm of your own hand. Once you find that flow, the sauce will never fail you again."
We hope this guide has given you the confidence to tackle this culinary hurdle with grace. Keep practicing, keep tasting, and never settle for a store-bought packet sauce. Your kitchen is your laboratory, and your dinner table is the best judge you will ever have. Happy cooking, and may your emulsions always be smooth and your butter always be the perfect temperature.


Get the Next Recipe
Weekly recipes, techniques, and gear picks — straight to your inbox.
