The Perfect Pie Crust: Balancing Fat, Flour, and Water for Flaky, Tender Perfection Every Time
There is a profound, almost mystical quality to a truly exceptional pie crust. When you break through that initial, buttery barrier, the sound should be a gentle, rhythmic shatter—a promise of the textural masterpiece that lies beneath. For many home bakers, the journey toward this elusive "perfect" crust is paved with the frustrations of soggy bottoms, tough, cardboard-like edges, and the dreaded shrinkage that leaves your filling exposed and forlorn. We have all stood in our kitchens, dusting flour over a stubbornly sticky mess, wondering if the secret lies in some ancient, guarded technique passed down through generations. The reality, however, is much more accessible: mastering the crust is not about luck or intuition, but about understanding the scientific marriage of fat, flour, and water.
At its core, a pie crust is a feat of engineering, relying on the structural integrity of gluten and the delicate, insulating properties of cold fat. When we talk about "flakiness," we are actually discussing the mechanical separation of flour layers by thin, intact shards of butter that have not yet melted into the dough. If you overwork the mixture, you develop too much gluten, resulting in a chewiness that belongs in a loaf of sourdough, not a delicate berry tart. If your fat is too warm, it incorporates entirely into the flour, yielding a crumbly, sandy texture rather than those beautiful, distinct layers we crave. By respecting the temperature and the handling of these three humble ingredients, you transform from a casual baker into an architect of pastry.
Welcome to "Blame The Chef," where we believe that every culinary failure is simply a lesson disguised as a disaster. Throughout this deep dive, we are going to strip away the myths and focus on the cold, hard facts—literally. Whether you are aiming for a classic lattice-topped apple pie or a savory quiche that holds its shape perfectly, the principles remain identical. We will explore the chemistry of the flour, the thermal profile of your fats, and the precise hydration ratios that determine whether your crust becomes a source of pride or a chore to clean up. Prepare your workspace, sharpen your bench scraper, and let us embark on the path to baking excellence, one flake at a time.
The Chemistry of Flour and the Gluten Trap
When selecting your flour for a crust, you are making a decision about the potential strength and extensibility of your pastry. All-purpose flour is the gold standard for most home bakers, typically containing between 9% and 11% protein content. This range is the sweet spot; it provides enough structure to hold the crust together, but not so much protein that the dough becomes elastic and tough. If you were to reach for bread flour, with its higher protein content, you would be fighting against a rubbery consistency. Conversely, cake flour is far too low in protein, resulting in a crust that might be tender, but will likely disintegrate the moment you try to lift a slice from the tin.
Understanding Protein and Hydration
The secret to a tender crust is the limitation of gluten development. Gluten is formed when the proteins in wheat, specifically glutenin and gliadin, are hydrated and agitated. In the context of bread, we want this; in pie crust, we are the enemy of it. When you mix your flour with your fat, the fat acts as a barrier, coating the flour particles and preventing them from bonding with the water you add later. This is why we use the technique known as cutting in the fat. By keeping the fat in visible, pea-sized chunks, you ensure that even when the water is introduced, large pockets of flour remain dry, creating the foundation for those flaky layers.
The Role of Acid and Additives
Many professional bakers swear by a splash of apple cider vinegar or lemon juice in their ice water. This is not just for flavor; it is a clever trick to tenderize the dough. The acid inhibits the development of gluten strands, effectively "shortening" the chain and making the final product more delicate. Furthermore, keeping your dry ingredients chilled—yes, even putting your flour in the freezer for an hour before mixing—gives you a massive head start on maintaining the temperature of your butter. By controlling the environment, you remove the element of chance from your baking.
"A flaky crust is the result of keeping the fat cold and the handling minimal. If you feel like you are doing too much work, you probably are."
The Fat Factor: Butter, Lard, and the Quest for Flavor
The debate over which fat produces the best pie crust is as old as the rolling pin itself. While butter is widely considered the culinary benchmark due to its superior flavor, it is also the most challenging to work with because of its low melting point. Butter contains a small percentage of water and milk solids, which contribute to the browning and the rich, nutty profile of the crust. However, because butter softens so quickly, it requires a disciplined approach. You must work quickly and keep your hands cool. If your butter starts to feel greasy or looks like a smear, stop immediately and return the bowl to the refrigerator for 20 minutes.
The Case for Lard and Shortening
For those seeking the pinnacle of flakiness, many chefs combine butter with high-quality, rendered leaf lard. Lard has a higher melting point than butter, meaning it holds its shape much better during the initial stages of baking. This allows for even more distinct, structured layers. Vegetable shortening is another option, though it is often criticized for its lack of flavor. It is, however, incredibly stable and easy to handle. Many home bakers find that a 50/50 split between butter and shortening gives them the best of both worlds: the flavor of the butter and the structural reliability of the shortening.
Essential Fat Tips for Success
Always cube your butter into 1/2-inch pieces and chill it until it is rock hard*.
* Do not rely solely on your hands to cut in the fat; use a pastry blender or two knives to keep the heat of your palms away from the dough.
* If you are using salted butter, reduce the amount of added salt in your flour mixture by half to prevent a clash in profiles.
* For a deeper, more professional flavor, try browning a small portion of your butter, cooling it back down, and folding it into the mixture.
Hydration and the Art of the "Shaggy Mass"
The addition of water is the most high-stakes moment in the entire process. Adding too little water results in a crust that is prone to cracking and crumbling, making it impossible to roll out without shattering. Adding too much water, however, leads to a dense, tough, and potentially gummy crust. The goal is to introduce just enough moisture to bring the ingredients together into what we call a shaggy mass. This mixture should look uneven, with bits of dry flour still visible among larger clumps. This is the stage where most novices panic and add more water—resist this urge at all costs.
Measuring Water with Precision
Instead of dumping a pre-measured cup of water into your bowl, use a spray bottle to mist the dough, or add your ice-cold water one tablespoon at a time. The humidity in your kitchen, the age of your flour, and even the type of butter you use can change how much water your dough requires. Always keep your water filled with ice cubes, and discard the cubes before measuring to ensure you aren't adding excess moisture. The temperature of the water should be as close to 32°F (0°C) as possible, as this keeps the butter fat solid throughout the final mixing stage.
The Fold Technique
Once you have your shaggy mass, turn it out onto a lightly floured surface. Using the heel of your hand, give the dough a gentle push to incorporate the dry bits without overworking it. Then, perform a letter fold—folding the dough into thirds like a business letter—before rotating it 90 degrees and folding it again. This technique mimics the lamination process used in puff pastry, creating microscopic layers of butter and flour that will expand and puff in the oven, yielding that textbook flakiness that defines a restaurant-quality pie.
"Your dough should look like a complete disaster before you gather it together. If it looks perfect, you’ve probably overworked it."
Temperature Control: The Baker's Greatest Ally
If there is one thing that defines the difference between a amateur and a master, it is the mastery of thermal management. The entire process of making pie crust is a battle against the melting point of your fat. Once the fat melts into the flour before the dough reaches the oven, you have lost the ability to create flakes. The fat must remain solid until the dough is in the oven. When the crust hits the high heat, the moisture in the butter vaporizes, creating tiny pockets of steam that push the flour layers apart. This process is what creates the physical lift, or the "puff," in your pastry.
Chilling Schedules
Managing the Oven Environment
The heat of your oven is the final component of temperature control. Most pies require a high initial blast of heat—usually around 400°F to 425°F—to "set" the crust and encourage that initial rise. After the first 15 to 20 minutes, you can reduce the temperature to finish cooking the filling. If you notice your edges browning too quickly, use a pie shield or a simple ring of aluminum foil to protect the perimeter while the center continues to bake.
Rolling, Shaping, and the Shrinkage Struggle
Rolling out dough is an art form that requires a light touch and patience. Many home bakers press down way too hard with the rolling pin, effectively crushing the precious layers they just worked so hard to create. Instead, use a steady, consistent motion starting from the center and rolling outward, rotating the dough by 45 degrees after every few strokes. This ensures an even thickness and prevents the dough from sticking to the surface. Use just enough flour on your surface to prevent sticking, but never so much that you incorporate it into the dough, which would dry it out.
Dealing with Shrinkage
There is nothing more discouraging than preparing a beautiful crust, only to watch it shrink down into the bottom of the tin once it hits the heat. Shrinkage happens primarily because the gluten strands are too tight. This is why the resting period is non-negotiable. If you roll out the dough and force it into the pan, you are creating tension. Instead, gently lift the dough and "drape" it into the pan, allowing the excess to hang over the edges. Do not stretch the dough to fit; if it's not big enough, it's not big enough. Trim the excess only after the dough has been chilled again while in the pan.
Blind Baking
For custard pies or pies with unbaked fillings, blind baking is the standard. This involves lining the dough with parchment paper and filling it with pie weights or dried beans to hold the shape while the crust sets. Bake it until the edges are golden and the bottom is matte, not shiny. By removing the weights for the final five minutes of this process, you allow the bottom to crisp up completely, preventing the dreaded "soggy bottom" that occurs when the moisture from the filling seeps into a raw crust.
Troubleshooting Common Crust Catastrophes
Every chef has faced a dough that refused to behave. If your dough is cracking at the edges while you roll it, it is likely too cold or slightly under-hydrated. Let it sit on the counter for a few minutes to soften, or lightly mist the cracks with water and use your fingers to patch them. If your dough is too sticky, it likely contains too much water or the butter has melted. You must refrigerate it until it is firm again. Do not be tempted to add more flour to a sticky dough, as this will lead to a dense, heavy pastry that lacks the desired tenderness.
The Aesthetics of the Edge
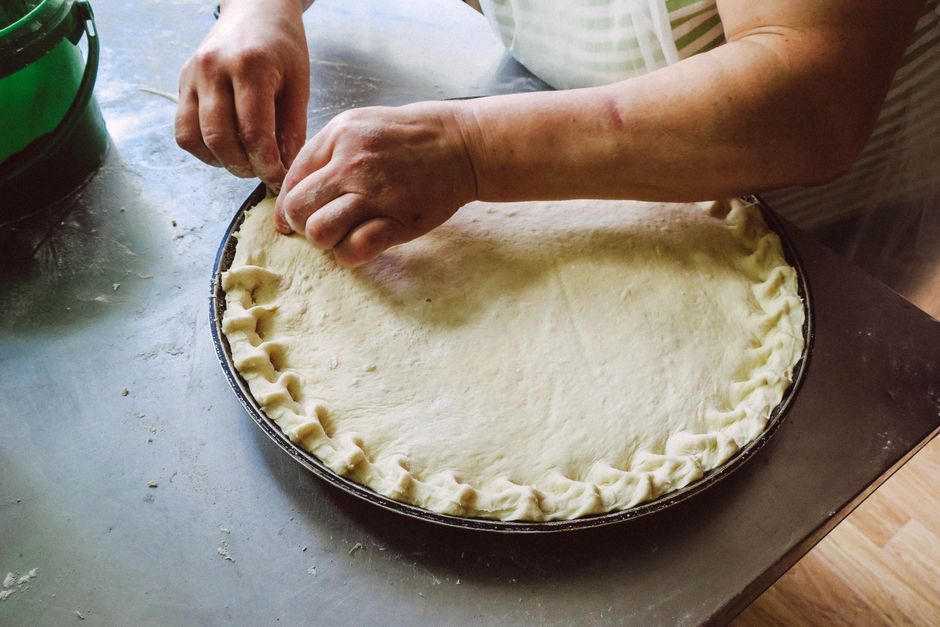
A beautiful crust deserves a professional finish. Whether you choose a classic fluted edge, a simple fork-pressed pattern, or an intricate braid, the technique should be consistent. For a golden, glossy finish, use an egg wash (one egg whisked with a tablespoon of cream or water). The proteins in the egg provide color, while the fat creates a beautiful sheen. For an extra touch of texture and sweetness, sprinkle the edges with coarse sparkling sugar before sliding the pie into the oven. These small, thoughtful details elevate a home-baked pie to the level of a high-end patisserie.
Storage and Re-baking
If you have leftover dough, do not throw it away! It can be wrapped tightly and frozen for up to three months. When you are ready to use it, simply thaw it in the refrigerator overnight. You can also bake off scraps with a little cinnamon and sugar to make "pie cookies," which are a fantastic snack for the baker while the main event is in the oven. This philosophy of using every scrap reflects the professional mindset: zero waste and maximum quality in every bite.
"A crust is not a container; it is an integral part of the flavor profile. Treat it with the same respect you give the filling."
Final Thoughts
Achieving the perfect pie crust is a pursuit that balances chemistry, technique, and a healthy amount of patience. By focusing on keeping your ingredients cold, limiting your gluten development, and respecting the time needed for the dough to rest, you are already miles ahead of the average home baker. Remember that the beauty of baking lies in the process—the tactile satisfaction of feeling the dough come together, the smell of butter browning in the oven, and the immense gratification of slicing into a perfectly crisp, flaky crust.
Do not be discouraged if your first attempt is not "picture perfect." Each time you step into the kitchen, you are building your intuition. You are learning to recognize the signs of a properly hydrated dough, the feel of the butter when it has been cut to the right size, and the visual cues of a perfectly baked, golden-brown edge. At Blame The Chef, we encourage you to keep experimenting, keep chilling, and never stop refining your craft. The perfect pie is not some impossible dream; it is sitting right there in your refrigerator, waiting for the right pair of hands to shape it. Now, go forth and bake—your kitchen, your family, and your taste buds will thank you for the effort you put into every single flake.
When you master the crust, you master the pie. And once you have that confidence, you can begin to experiment with savory fillings, herb-infused doughs, and creative lattice work that will leave your guests wondering if you have secretly been trained in a French culinary school. The foundation you have built here is robust enough to support any vision you have. Stay cold, stay patient, and remember: if the crust is good, the pie is already a triumph. Keep your apron strings tied tight, keep your butter even colder, and enjoy the wonderful, flaky results of your hard work. Happy baking, and we will see you back here next week for more culinary deep dives into the science of flavor.



Get the Next Recipe
Weekly recipes, techniques, and gear picks — straight to your inbox.
