
The Perfect Roast Chicken: Science-Backed Techniques for Crispy Skin and Juicy Meat
There is perhaps no greater litmus test for a home cook than the humble roast chicken. It is a dish that sits at the intersection of simplicity and complexity, often serving as the primary bridge between a casual cook and a seasoned culinary enthusiast. We have all experienced the tragedy of the bird that looked golden and glorious on the outside, only to be sliced into a landscape of dry, chalky breast meat and limp, rubbery skin. Achieving the perfect balance—where the skin shatters like parchment under your knife and the juices run clear and rich—requires more than just luck; it requires a foundational understanding of heat transfer, moisture management, and protein structure.
When we talk about "perfect" roast chicken, we are not simply aiming for sustenance. We are aiming for that transformative sensory experience where the aroma of rendered fat and toasted aromatics fills the kitchen, signaling a meal that feels both ancient and elevated. Many beginners rely on outdated advice, such as stuffing the cavity with bread or trussing the bird until it looks like a trussed prisoner of war, but modern science has dismantled these myths in favor of efficiency and flavor. By focusing on surface dehydration and precise temperature control, we can move away from the unpredictability of the oven and toward a consistent, professional-grade result.
In this guide, we will peel back the layers of culinary lore to reveal the mechanics of roasting. Whether you are prepping for a Sunday family gathering or simply looking to master your weekday repertoire, the techniques discussed here will redefine your relationship with poultry. We will explore the chemistry of the Maillard reaction, the importance of "dry-brining," and why your choice of roasting vessel might be the single biggest factor standing between you and the chicken of your dreams. Prepare to clear your counter, sharpen your chef’s knife, and embrace the process of becoming a master of the roast.
The Foundation of Flavor: Selecting and Preparing Your Bird
The journey to the perfect roast chicken begins long before the oven door is opened; it starts at the butcher counter. While it is tempting to pick up the most affordable bird in the supermarket, the quality of your chicken significantly impacts both the flavor profile and the cooking behavior. Look for a bird that is air-chilled rather than water-chilled. Most mass-produced chickens are cooled in icy water baths, which leads to the meat absorbing excess water—water that you will inevitably have to evaporate in the oven before the skin can begin to crisp. Air-chilled chickens retain their natural juices and have a skin that is far more receptive to the high-heat techniques we will be employing.
Once you have your bird, the preparation phase is where the "science" of the dish truly begins. Most cooks make the mistake of roasting a chicken straight from the refrigerator, but this is a recipe for uneven cooking. A cold bird requires more time in the oven to reach the target temperature, which increases the likelihood of the breast meat overcooking before the legs reach the necessary level of tenderness. Instead, pull your chicken out of the refrigerator at least forty-five minutes before cooking to allow the internal temperature to equalize. This simple step ensures a more uniform roast and a more relaxed muscle fiber during the cooking process.
The Dry Brining Revolution
The most effective way to ensure seasoning penetrates deep into the meat is through dry-brining. Rather than using a liquid bath, which can make the skin soggy, coat your bird liberally with kosher salt and place it uncovered on a wire rack in your refrigerator for 12 to 24 hours. The salt pulls moisture to the surface, dissolves into a brine, and is then reabsorbed into the meat through osmosis. This process does two critical things: it breaks down tough protein structures for a more tender texture, and it dehydrates the outer layer of the skin, which is the prerequisite for achieving that signature glass-like crispiness.
"Dry-brining is the single most transformative technique in the home kitchen; it turns a basic piece of protein into a canvas for deep, savory flavor that exists within the meat, not just on top of it."
* Pat the chicken completely dry with paper towels after taking it out of the fridge.
Use high-quality kosher salt*; avoid table salt, which contains anti-caking agents that can leave a metallic aftertaste.
* Ensure the wings are tucked snugly behind the breast to prevent them from burning during the roasting process.
The Chemistry of Crispy Skin: Managing Moisture and Fat
If you have ever wondered why restaurant chicken skin seems to have a different texture than what you make at home, the answer is moisture control. The skin of a chicken is essentially a layer of fat and protein that, when heated, undergoes the Maillard reaction—a chemical reaction between amino acids and reducing sugars that gives browned food its distinctive flavor. If there is excess surface moisture, that moisture must first turn into steam, which prevents the skin from reaching the temperatures (above 300°F) necessary for browning and crisping. By the time that water has evaporated, your breast meat is often already past the point of being succulent.
To combat this, we must create an environment that encourages rapid moisture loss at the surface while retaining it within the muscle. Aside from dry-brining, you can use a light application of oil or fat to facilitate heat transfer. While butter is traditional and delicious, it contains milk solids and water that can occasionally impede the crisping process. Instead, consider using a high-smoke-point oil like avocado or grapeseed, or clarified butter (ghee). Apply the fat sparingly; you are not looking to coat the bird in a deep-fryer bath, but rather to create a thin, even layer that helps conduct the heat from the oven air directly into the skin.
The Power of Airflow
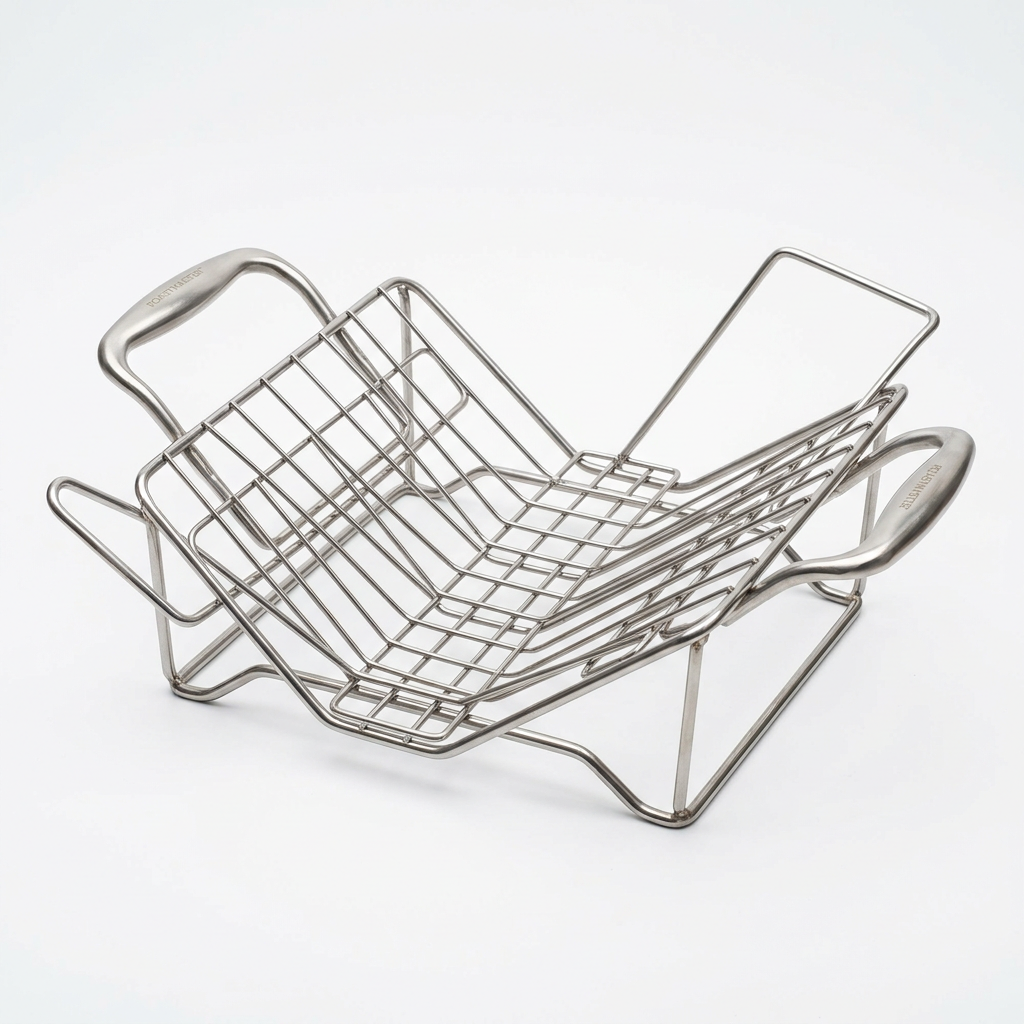
Another overlooked factor is the vessel. Roasting a chicken in a deep-sided casserole dish is a mistake, as the high walls trap steam and cause the bottom of the chicken to stew in its own juices. To achieve a 360-degree crisp, use a flat roasting rack inside a shallow baking sheet or a dedicated roasting pan. This allows the hot air of the convection oven to circulate beneath the bird, rendering the fat in the thighs and back. If you do not have a rack, a bed of thick-cut vegetables—carrots, onions, and celery—can serve as a functional substitute, elevating the bird while infusing the drippings with deep, earthy aromatics.
* Avoid "basting" the bird with its own juices during the roasting process. While it looks cinematic, it essentially pours cold water onto your hot skin, stopping the browning process in its tracks.
* Keep the oven door closed. Every time you open the door, you lose precious heat that is essential for maintaining a consistent crisping environment.
Use an oven thermometer*. Most home ovens are calibrated incorrectly and can be off by as much as 25 to 50 degrees, which is the difference between perfection and disaster.
Precision Temperature: Navigating the Danger Zone
The modern culinary world has largely moved away from the "roast at 350°F for an hour" school of thought. While that method is safe, it rarely results in superior texture. Instead, we utilize high-heat roasting to force the Maillard reaction quickly. Starting the oven at a high temperature, such as 425°F to 450°F, provides a powerful initial blast of heat that sets the skin immediately. After the first 15 to 20 minutes, you can reduce the temperature to 375°F to allow the center of the bird to cook through without scorching the exterior.
The ultimate goal for your chicken is an internal temperature of 160°F in the thickest part of the breast and 175°F in the thigh. Because of carry-over cooking, the temperature will continue to rise by about 5 to 10 degrees after you remove the bird from the oven. If you pull the chicken when the breast hits 160°F, it will eventually climb to 165°F-170°F while resting, ensuring it is perfectly cooked and safe to eat, while staying incredibly juicy. Relying on "feeling" the bird or watching the juices run clear is amateur; rely on a digital instant-read thermometer for guaranteed precision.
The Importance of the Rest
The most under-appreciated step in the entire process is the rest. When you pull your chicken from the oven, the muscle fibers are tight and the juices are agitated and pooled toward the center. If you cut into the chicken immediately, those juices will run out onto your cutting board, leaving the meat dry and fibrous. By letting the chicken rest, uncovered, on a cutting board or carving platter for at least 20 to 30 minutes, you allow the internal temperatures to stabilize and the juices to redistribute throughout the tissue.
"Resting your meat is not a suggestion; it is a fundamental requirement of thermodynamics. If you rush the carving, you are essentially pouring the flavor out of the bird and onto your counter."
Aromatics and Flavor Infusion: Beyond the Basics
While salt and heat manage the mechanics, aromatics define the character of your roast. The cavity of the bird is the perfect place to build a secondary layer of flavor. Instead of bread stuffing—which often dries out and prevents the interior of the bird from cooking efficiently—fill the cavity with halved lemons, whole cloves of garlic, and woody herbs like rosemary and thyme. As the chicken roasts, these aromatics release steam and essential oils into the meat from the inside out, creating an incredibly fragrant profile that balances the richness of the rendered chicken fat.
Many chefs are divided on the issue of trussing. Traditional French technique dictates that the bird should be trussed to ensure compact cooking and a beautiful presentation. While it does result in a more attractive bird, it can also lead to the legs taking much longer to cook than the breast. For the home cook, "partial trussing"—simply tying the ankles together—is enough to keep the legs in place without inhibiting the flow of hot air into the cavity. This allows for a more even cooking time across all parts of the bird, which is the primary goal of the modern roast.
Creating a Pan Sauce
One of the greatest rewards of roasting a whole chicken is the leftover fond—the caramelized bits of protein and fat left on the bottom of the pan. Never wash this away. By placing your roasting pan on the stovetop over medium heat, you can deglaze the pan with a splash of dry white wine, chicken stock, or even vermouth. Use a wooden spoon to scrape up the fond, stir in a knob of cold butter or a spoonful of Dijon mustard, and you have an instantaneous, restaurant-quality jus that elevates the entire dish.
Garlic:* Use a whole head of garlic, sliced in half horizontally; it becomes sweet and spreadable once roasted.
Herbs:* Rosemary and thyme are the gold standard because they hold up well to the high heat, whereas softer herbs like parsley or cilantro should be added only as a garnish at the end.
Citrus:* Lemon halves provide acidity that cuts through the fat of the chicken, brightening the palate after every bite.
Troubleshooting the Common Pitfalls
Even with the best techniques, the home cook will occasionally encounter challenges. One of the most common issues is the "burnt breast, raw leg" problem. This happens when the breast meat, which is leaner, cooks significantly faster than the thigh meat, which contains more connective tissue and requires more time to break down. To solve this, keep an eye on your temperatures. If the breast is reaching 150°F but the thighs are still at 130°F, you can strategically shield the breast with a small piece of foil to slow down its cooking while the rest of the bird continues to heat.
Another issue is the dreaded "soggy bottom." This occurs when the chicken sits in a pool of its own fat and juices during the cooking process. If you notice this happening halfway through, simply remove the chicken from the roasting pan briefly, drain the excess fat, and perhaps toss in a few more dry root vegetables to prop the bird up. The goal is to keep the skin dry, not to stew the chicken. If you are using a non-stick roasting pan, be mindful that these often conduct heat differently than heavy-gauge stainless steel or cast iron; adjust your roasting times accordingly by checking for doneness 10 minutes earlier than the recipe suggests.
The Problem of Uneven Browning
If you find that one side of your chicken is browning faster than the other, your oven likely has a "hot spot." Most home ovens have heating elements in the back or bottom, creating pockets of intense heat. Simply rotate your roasting pan 180 degrees halfway through the cooking process. This simple adjustment accounts for the uneven heat distribution inherent in residential equipment and ensures that the browning is consistent across the entire bird.
Don't over-crowd the pan:* If you are roasting vegetables alongside the chicken, ensure there is plenty of space for air to move. If the pan is packed tight, the vegetables will steam rather than roast.
Check the seasoning:* If the skin looks pale despite high heat, it may be a lack of initial salt or moisture on the surface. Ensure the bird is bone-dry before it goes into the oven.
Listen to your oven:* If you hear a violent sizzling or popping, that is the sound of rendered fat hitting the bottom of the pan. That is flavor, but if it starts to smoke, your oven is set too high or your fat is burning. Lower the heat by 25 degrees.
Advanced Techniques: The Spatchcock Method
If you are looking to shave time off your roasting while maximizing the amount of crispy skin, the spatchcock method (or "butterflying") is the gold standard for professionals. By removing the backbone of the chicken with a pair of poultry shears and flattening the bird out, you eliminate the "tunnel" of the cavity and expose every square inch of the bird to the direct heat of the oven. This creates a uniform surface area that cooks significantly faster, usually in about 45 to 50 minutes, and ensures that the legs and breasts finish at exactly the same time.
Spatchcocking is particularly useful for smaller birds or when you are pressed for time on a weeknight. Because the bird lies flat, the skin on the back, which is usually lost to the roasting pan, becomes a crispy, flavorful part of the meal. It is also much easier to carve a spatchcocked chicken; once the bird is cooked, simply cut through the joint between the leg and thigh, and then slice the breast off the bone. It turns a daunting carving experience into a simple, three-minute task that looks clean and professional.
Why Spatchcocking Works
The science behind this is simple: surface-to-volume ratio. A whole, trussed chicken is essentially a sphere that requires heat to penetrate to the very center. A spatchcocked chicken is a flat plane that allows heat to penetrate the meat evenly from the top and bottom. This technique allows you to roast at a consistently high heat—say, 425°F—without the risk of drying out the breast, because the cooking time is so drastically reduced. It is a win-win for both flavor and efficiency.
"Spatchcocking isn't just about speed; it's about control. When you remove the backbone, you take command of the bird, ensuring that every single slice is uniform, succulent, and perfectly bronzed."
Elevating the Presentation and Serving
A perfectly roasted chicken is a centerpiece, and it deserves to be presented as such. Once the chicken has rested, do not just toss it onto a plate. Arrange it on a wooden carving board or a warm ceramic platter, perhaps surrounding it with the roasted vegetables you cooked in the pan. A dusting of fresh, chopped herbs like parsley or chives adds a pop of color that signals freshness. If you made a pan jus, pour it into a small gravy boat or drizzle it sparingly over the meat just before serving; never drown the bird, as it will ruin the texture of that skin you worked so hard to crisp.
Carving should be done with a sharp, long-bladed slicing knife. Start by removing the legs and thighs as a single unit, then separate them at the joint. Next, cut the breasts away from the carcass in a single, clean sweep by following the keel bone. Slicing the breast against the grain into thick pieces ensures that every bite is tender. If you have done your job correctly, the meat will be shimmering with juices, and the skin will crackle under the blade of your knife—a sound that is, in the culinary world, the ultimate mark of success.
Creating a Legacy
Roast chicken is the dish that you will find yourself making for years to come. It is the meal you cook for a first date, for a lazy Sunday, or for a celebratory dinner with friends. As you repeat these techniques, you will develop an intuitive sense for the process. You will start to hear the "doneness" of the bird, you will learn to adjust your oven based on your specific kitchen equipment, and you will eventually move past the need for a recipe entirely. This is the goal of culinary education: not to memorize a set of instructions, but to understand the fundamental principles of heat, protein, and flavor.
Remember that perfection is a moving target. Some days the skin will be slightly darker, other days the aromatics will be more subtle, and that is perfectly fine. The beauty of the roast chicken lies in its variation. By focusing on the science—the dry-brining, the heat control, the resting period—you are building a foundation of skill that will serve you throughout your entire life in the kitchen. Keep your knives sharp, keep your salt levels balanced, and never be afraid to blame the chef when things don't go perfectly the first time. The next bird is always just a trip to the store away.
Conclusion
Mastering the perfect roast chicken is not about chasing an unattainable ideal; it is about respecting the ingredients and understanding the variables you control. By prioritizing the dryness of the skin through long-term salt application and managing the internal temperature with the precision of a laboratory-grade thermometer, you have elevated your cooking from guesswork to a disciplined craft. We have explored the mechanics of heat, the importance of the rest, and the transformative power of a well-utilized roasting pan. These are the tools that separate the home cook from the true chef.
As you look back on the process, realize that every technical step serves a purpose. The dry-brining provides the seasoning and the texture; the high-heat blast provides the Maillard-induced crunch; the moderate finishing temperature protects the integrity of the breast; and the resting period ensures that the flavor remains trapped within the muscle fibers where it belongs. These are not merely suggestions; they are the laws of the kitchen that, when followed, yield results that are nothing short of spectacular.
So, move forward with confidence. The next time you find yourself standing in the kitchen with a raw bird and a mission, remember the principles we have discussed today. Do not be afraid of the heat, do not be shy with the salt, and never, ever carve your chicken before it has had the time to rest. You are now equipped with the science and the technique to create a meal that will linger in the memories of your guests long after the final plate has been cleared. Enjoy the process, embrace the sizzle, and let the aroma of a job well done fill your home.
Final Thoughts: The Joy of the Roast
Cooking, at its core, is an act of care. There is an inherent comfort in the act of roasting a whole chicken—it is an act that demands patience and rewards attentiveness. Unlike high-pressure techniques like searing or stir-frying, which require constant motion and rapid response, roasting is a slow, methodical observation. It asks you to step back and trust the heat to work its magic. When you master the roast, you master the ability to bring people together around a table for a meal that feels both intimate and grand.
Always remember that every kitchen has its personality. If your oven runs hot, you will need to adjust your times; if your climate is humid, you may need a longer dry-brining period. Use these tips as a framework, but observe your own environment and make the small, necessary adjustments that make the dish uniquely yours. The path to the perfect roast is paved with these minor adaptations, and with every bird you roast, you will become a more confident and intuitive cook.
Finally, do not get caught up in the stress of achieving a "Pinterest-worthy" presentation at the expense of flavor. A slightly uneven crust or a bird that looks a bit rustic is just a sign of a real, home-cooked meal. The goal is to nourish, to delight, and to find joy in the transformation of raw ingredients into something beautiful. Whether you are serving a crowd or just yourself, take the time to appreciate the work you have put in. You have earned this, and you have earned the delicious meal that awaits. Happy roasting, and may your skin always be crispy and your meat always be juicy.

Get the Next Recipe
Weekly recipes, techniques, and gear picks — straight to your inbox.
