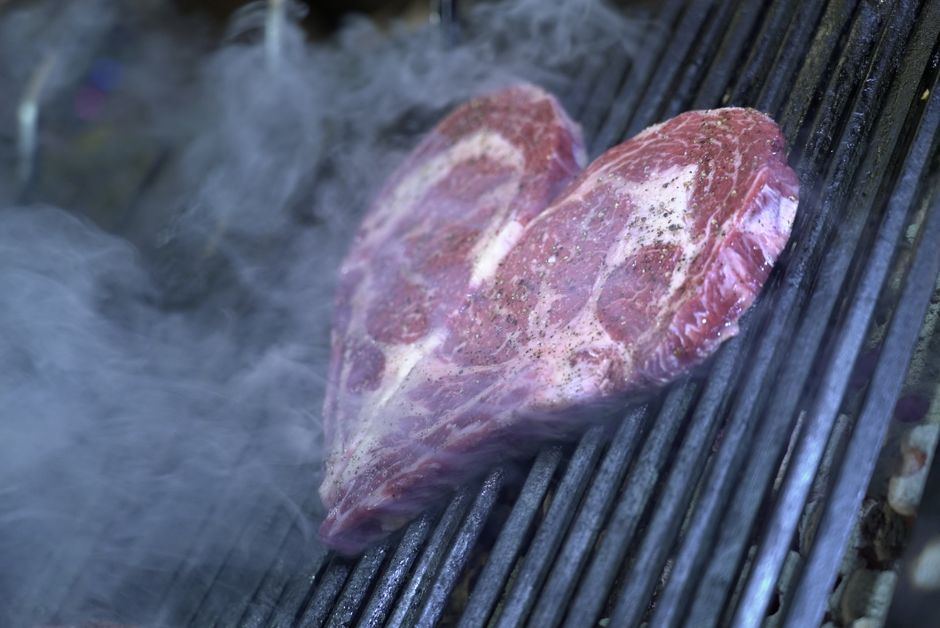
The Perfect Sear: Temperature, Timing, and Technique for Restaurant-Quality Proteins
Achieving the perfect sear on proteins such as steak, fish, or chicken can elevate your cooking to a restaurant-quality experience in your very own kitchen. The art of searing is more than just cooking food at high temperatures; it's about understanding the fundamental techniques that will turn an ordinary piece of meat into something extraordinary. When done correctly, a sear not only creates a beautiful and flavorful crust but also locks in the natural juices of the protein, preserving its moistness and tenderness. As we explore the intricacies of searing, you will learn how to command the heat, time your cooking perfectly, and apply the techniques that make professional chefs excel.
Many home cooks often shy away from attempting the perfect sear, believing it to be a task best left to those with more experience. However, with the right knowledge and a bit of practice, anyone can master this technique. Consider the science behind the Maillard reaction—changing the chemical structure of the proteins and sugars in the meat at high temperatures, producing that enticing flavor and attractive color. Understanding this reaction's dynamics is crucial and can drastically transform the way you approach your cooking.
In this guide, we will delve into various methods to achieve the perfect sear, from selecting the right equipment to understanding the meat's properties, mastering timing, and even learning how to rest your meat afterward for optimal results. Whether you’re aiming to impress your dinner guests or simply wish to enjoy a delicious meal at home, knowing how to sear to perfection can create a delightful culinary adventure that will reveal the seasoned chef within you.
The Science of Searing: Understanding Why It Matters
To truly grasp the importance of searing, we must first embark on an exploration of the science that underpins the cooking process. At the heart of it lies the Maillard reaction, a complex interaction that occurs when proteins and sugars in food are exposed to high heat. This process not only gives food its signature brown color but also creates a depth of flavor that is entirely transformative.
When meat is heated, the proteins begin to denature, causing them to unwind and bond with other molecules, which ultimately forms flavorful compounds. The ideal temperature for this reaction to occur is between 300°F (149°C) and 500°F (260°C). This is where the artistry of cooking starts; knowing when your pan is hot enough to achieve this reaction without burning the exterior or undercooking the interior is critical to perfecting your sear.
Moreover, searing not only improves flavor but also texture. A good sear creates a crust on the surface of the meat, providing a satisfying contrast to the juicy interior. This is particularly important for cuts like steak, where the juxtaposition of textures can profoundly enhance the eating experience. However, timing is everything; an overly long sear can lead to a dry, tough piece of meat while insufficient cooking might yield a raw center.
Key Chemical Reactions in Searing
Incorporating these reactions into your cooking will guide you toward a perfectly balanced flavor profile that has the power to impress your palate. Remember, the goal is not merely to char your protein but to engage in a dance of heat and time that brings out the best characteristics of your food.
Selecting the Right Equipment
Your choice of equipment can dramatically influence your ability to achieve the perfect sear. While many kitchen tools can technically accomplish the task, not all are created equal. Understanding the nuances of pans and heat sources will empower you to take your searing game to new heights.
Choosing the Right Pan
For the best sear, cast iron skillets and stainless steel pans are top contenders.
- Excellent heat retention.
- Develops a natural non-stick surface over time.
- Ideal for high-temperature cooking.
- They can withstand high heat and are perfect for developing fond—the flavorful bits left in the pan after cooking.
- Non-reactive, suitable for deglazing with acidic ingredients.
When selecting a pan, avoid non-stick alternatives for high-temperature cooking as they can release toxins and are not designed to withstand the intense heat required for effective searing.
The Ideal Heat Source
The heat source you choose also affects outcomes. Here are some recommendations based on your setup:
Preheating Your Pan
Regardless of the equipment you use, preheating your pan is crucial. A well-preheated pan will reduce cooking time and establish a thorough sear.
Here’s how to effectively preheat:
By mastering the equipment side of searing, you lay a powerful foundation for achieving culinary excellence.
Picking the Perfect Protein
Choosing the right cut of meat or protein is crucial for a successful sear. Different proteins offer varied amounts of fat, muscle fibers, and moisture, which will significantly impact the final outcome of your dish.
Cuts of Meat for Searing
When selecting your protein, consider not only flavor but also tenderness and cooking times. Cuts with more connective tissue, like chuck roasts or briskets, are better suited for slow-cooking methods rather than traditional searing.
Preparing Your Protein for Searing
Preparation is paramount for a successful sear. Here’s how to get it right:
Understanding Fat Content
Different proteins contain varying amounts of fat, which influences flavor and texture. Higher fat content can aid in achieving the perfect sear while helping to keep the meat moist. Recognizing cuts of meat by their fat content versus weight will give you the best chance of a successful seasoning and searing process.
The Searing Process: Temperature and Timing
With the essentials set, we can move to the heart of the matter—the actual searing process. Precision in timing and temperature is pivotal when attempting to create that coveted crust.
The Ideal Temperature for Searing
As mentioned earlier, the perfect sear is typically achieved between 300°F (149°C) and 500°F (260°C).
The Searing Process
Once your protein is prepared and your pan is hot, follow these steps for successful searing:
The Importance of Resting
After achieving a perfect sear, resting your protein is a vital step often overlooked. Resting allows the meat’s internal juices to redistribute, making every bite tender and flavorful.
Proper timing during this resting phase can hardly be emphasized enough; skipping it could lead to a disappointing dish that loses flavor and moisture.
"The best sear requires patience: don’t rush the process, and respect the resting time."
Advanced Techniques for Searing Perfection
Once you're comfortable with the basic methods, you may want to take your searing skills to the next level. Here, we introduce advanced techniques that chefs around the world use to refine their craft.
Reverse Searing
Reverse searing is a method where you cook the meat at a low temperature first before finishing it with a high-heat sear. This technique is particularly effective for larger cuts of meat, like a whole roast or thick steaks, ensuring even doneness throughout.
How to Reverse Sear:
Searing with Butter and Basting
Incorporating butter and aromatics can take your searing game to the next level. Basting adds flavor and creates a rich, golden crust that leaves a fragrant finish on the meat.
This technique not only enhances flavor but also encourages that mouthwatering golden-brown color that makes food Instagram-worthy!
Experimenting with Different Flavor Profiles
Don’t be afraid to play around with different marinades or rubs to add complexity to your protein. Ingredients such as smoked paprika, cumin, or coriander can impart unique flavors that make a simple piece of meat sing.
Sample Marinade:
Let your protein marinate for at least 30 minutes to 4 hours in the refrigerator. This not only enhances the flavor profile but also helps to tenderize the meat.
Serving and Plating
Presentation is everything when it comes to impressing your guests or enhancing your personal dining experience. How you plate your seared protein can elevate your meal from ordinary to extraordinary.
Simple Yet Elegant Plating Techniques
Pairing with Starches and Veggies
A balanced meal includes proteins, starches, and vegetables. When assembling a plate, consider components that complement and contrast with your seared protein.
- Creamy mashed potatoes
- Garlic risotto
- Quinoa or wild rice
- Sautéed spinach or kale
- Roasted root vegetables
- Grilled asparagus or Brussels sprouts
Choosing side dishes rich in color, texture, and flavor will elevate your overall dining experience.
"Remember, a well-plated dish not only looks elegant but enhances the perception of flavor."
Conclusion
Mastering the art of searing is an invaluable skill that can transform your homemade meals into restaurant-caliber dishes. By understanding the science behind searing, investing in the right equipment, correctly preparing and selecting your proteins, and practicing technique, you will be well on your way to creating exceptional culinary experiences.
As you continue to experiment with different proteins and methods, always keep in mind the fundamental principles of temperature, timing, and technique. With each successful sear, you will not only gain confidence in your cooking but also discover a newfound appreciation for the culinary arts. So go ahead, heat up that pan, and embark on a journey of flavor and finesse that will tantalize your taste buds and thrill your dining companions. The perfect sear awaits you, right in your kitchen!




Get the Next Recipe
Weekly recipes, techniques, and gear picks — straight to your inbox.
