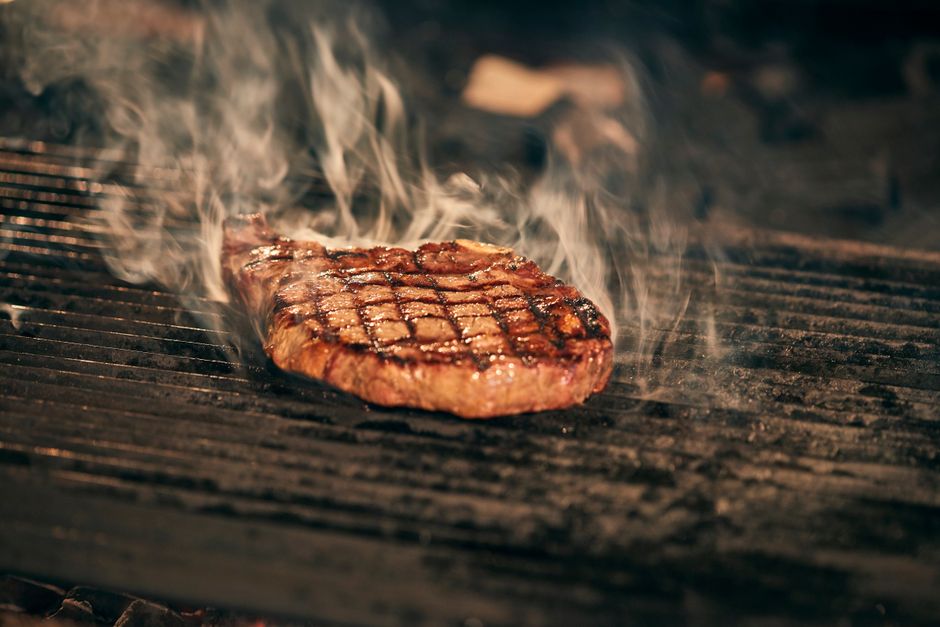
The Perfect Steak: Temperature, Rest, and Sear
There is perhaps no dish more universally revered—and more universally botched—than a perfectly cooked steak. We've all been there: you bring home a beautiful, marbled ribeye, spend a small fortune on it, heat up the pan, and end up with something that's either grey and leathery or cold and raw in the middle. The disappointment is palpable, and the temptation to blame the cut of meat, the pan, or even the cow itself is strong. But here's the truth that every professional chef will tell you: a perfect steak is not about the meat alone. It is about mastering a sequence of deceptively simple techniques that, when executed properly, transform any decent cut into a restaurant-quality masterpiece.
The three pillars of steak perfection are temperature, rest, and sear, and they form an inseparable trinity. Skip or fumble any one of them, and the entire structure collapses. Temperature refers not just to your cooking heat but to the internal temperature of the meat itself—both before it hits the pan and as it finishes. Resting is the patient, often-skipped step that allows juices to redistribute, preventing that tragic moment when you slice into a steak and watch a river of flavor bleed onto the cutting board. And the sear is theMaillard reaction's grand finale, the caramelized crust that delivers the savoury depth we crave.
What follows is a comprehensive guide to these three pillars, drawn from professional kitchens and hard-won home cookery lessons. Whether you're working with a modest sirloin or a decadent dry-aged porterhouse, the principles remain the same. We'll cover everything from selecting and tempering your meat to achieving that elusive crust, with specific temperatures, timings, and chef-tested ratios that take the guesswork out of the equation. By the end, you'll understand not just what to do, but why—and that understanding is what separates a cook from a chef.
Understanding Your Cut: The Foundation of a Perfect Steak
Before we even think about heat, we need to talk about the raw material. Not all steaks are created equal, and the technique you choose should be informed by the cut you're working with. A tenderloin behaves nothing like a skirt steak, and pretending otherwise is the first mistake many home cooks make. Understanding the anatomy of your steak—where it comes from on the animal, how much fat it contains, and how much connective tissue runs through it—will guide every subsequent decision.
The Great Cuts and Their Personalities
For pan-searing and reverse-searing, the premium cuts are your best friends. Ribeye is the undisputed king for many chefs, with its generous marbling that renders into internal basting as it cooks. A good ribeye should have fat woven throughout the muscle, not just a cap on the edge. New York strip offers a tighter texture and a more beef-forward flavour with less fat, making it a favourite for those who prefer chew and intensity. Tenderloin or filet mignon is the most tender cut but also the leanest, which means it needs careful handling to avoid drying out—consider wrapping it in bacon or basting aggressively with butter.
Then there are the working cuts—skirt, flank, hanger, and flat iron. These are leaner, more intensely flavoured, and benefit from marinating and high-heat, quick cooking. They must be sliced against the grain to be tender. Finally, the chuck and short rib cuts are increasingly being sold as steak, and while they're delicious, they often benefit from a slower approach or at least a very forgiving medium doneness to break down connective tissue.
Marbling: The Internal Basting System
Marbling is the term for intramuscular fat, those thin white streaks running through the meat. This fat is flavour and moisture insurance. As the steak cooks, this fat renders, basting the meat from the inside and keeping it juicy. When shopping, look for steaks with even, fine marbling rather than large clumps of fat. The Japanese BMS (Beef Marbling Standard) ranks meat from 1 to 12, with anything above 5 being exceptional. Most supermarket steak in the UK and US sits around 2-4, while premium dry-aged or Wagyu crosses can reach 8 or higher.
A good rule of thumb: for pan-searing, choose steaks at least 2.5 cm (1 inch) thick, preferably 3-4 cm. Thin steaks are nearly impossible to cook to medium-rare without overcooking the exterior, because the heat reaches the centre before you can develop a proper crust. If you can only find thin steaks, consider the butter-baste method with very high heat and a very short cook time, accepting that you'll likely land at medium rather than medium-rare.
Temperature: The Two-Temperature Strategy
The single biggest mistake home cooks make is trying to cook a steak in one stage: searing it in a hot pan and hoping the middle reaches doneness at the same time as the crust forms. This almost never works. Either you get a beautiful crust with a raw centre, or a grey, overcooked edge with a perfectly pink middle. The solution is what chefs call the two-temperature method, and it comes in two main forms: the traditional sear-then-oven approach, and the modern reverse sear.
Tempering: The Pre-Cook Step
Before any cooking begins, temper your steak. Take it out of the fridge 30-60 minutes before cooking and let it sit at room temperature. A cold steak hitting a hot pan will immediately drop the pan's temperature, leading to steaming rather than searing. More importantly, the exterior will overcook before the interior comes up to temperature. For thick steaks (4 cm or more), 60-90 minutes of tempering is ideal.
"A steak cooked from cold is a steak cooked twice—once badly, once well. Temper your meat and you cook it once, properly." — A chef's maxim worth tattooing on your forearm.
Pat the steak bone dry with paper towels before cooking. Moisture is the enemy of the Maillard reaction, which requires temperatures above 150°C (300°F) to occur. Any surface water will first need to evaporate, during which time your pan temperature plummets and the meat begins to boil in its own juices rather than sear. Some chefs even go so far as to leave uncovered steaks on a rack in the fridge overnight to dry out the surface—a technique borrowed from dry-aging that dramatically improves crust formation.
The Traditional Sear-Then-Oven Method
This is the classic steakhouse approach and works beautifully for steaks 2.5-4 cm thick. Here's the method:
The Reverse Sear: The Modern Champion
For steaks 3 cm thick or more, the reverse sear is arguably the superior method. It involves cooking the steak gently first, then finishing with a blazing sear. This gives you a perfectly even doneness from edge to edge with a thin, intense crust. Here's how:
The reverse sear gives you a wider window of error and a more consistent result, which is why it's beloved by chefs and serious home cooks alike.
Target Internal Temperatures
Here are the temperatures to memorize. Use a reliable instant-read thermometer—the Thermapen is the gold standard, but any quick-reading probe will do. Insert it through the side of the steak into the thickest part.
"A thermometer is not a crutch for the inexperienced. It is the tool of the professional who values consistency over ego. Guessing is for gamblers; cooking is for craftsmen."
Resting: The Patience That Pays
Here's a staggering statistic: a steak that is cut immediately after cooking can lose up to 25% of its juices onto the cutting board. A steak that is rested properly loses less than 10%. That difference is the difference between a succulent, flavourful bite and a dry, disappointing one. Resting is not optional. It is not a suggestion. It is the most underrated technique in all of cookery.
The Science of Resting
When meat cooks, the heat causes the muscle fibres to contract, squeezing juices toward the centre of the cut. If you slice immediately, those juices—now concentrated in the middle—gush out because there's no structural integrity left to hold them. Resting allows the fibres to relax and the temperature to equalize, so the juices redistribute evenly throughout the meat. Think of it like a sponge: squeeze it and water flows out; release the pressure and it absorbs again.
How Long to Rest
The general rule is 5 minutes for every inch of thickness, or approximately 5-8 minutes for most steaks and 10-15 minutes for large roasts or tomahawks. Rest the steak on a warm plate or cutting board, loosely tented with aluminium foil. Do not wrap tightly—this creates steam and softens your hard-won crust. Some chefs prefer to rest on a wire rack to prevent the bottom from getting soggy, then transfer to a warm plate before slicing.
For an extra layer of refinement, try the double rest: rest the steak for 5 minutes before cooking (after tempering) and 5-8 minutes after. The pre-cook rest helps the surface dry further, and the post-cook rest redistributes juices. It sounds fussy, but the results are noticeable.
What to Do While the Steak Rests
Resting time is not wasted time. Use it to:
The Sear: Building the Perfect Crust
The sear is the steak's crowning glory—the Maillard reaction, named after the French chemist Louis-Camille Maillard, who described it in 1912. This is the complex browning reaction between amino acids and reducing sugars that creates hundreds of new flavour compounds. It's the same reaction that gives toasted bread, roasted coffee, and caramelized onions their depth. In steak, it's the difference between "cooked beef" and "steakhouse steak."
Choosing the Right Pan
For searing, cast iron or carbon steel is non-negotiable. These materials hold and recover heat far better than stainless steel or, heaven forbid, non-stick. A properly heated cast-iron pan can deliver the sustained high heat needed for a proper crust. If you're using stainless steel, preheat it thoroughly and be patient. Never use non-stick for steak—it cannot reach the temperatures required and you'll damage the coating.
The Fat Question
Use an oil with a high smoke point for the initial sear. Grapeseed oil (216°C/420°F), avocado oil (271°C/520°F), or refined rapeseed oil (204°C/400°F) are all excellent. Olive oil's smoke point varies, but extra virgin is generally too low for a hard sear. Add about 1 tablespoon to a hot pan—you want a thin film, not a pool.
Butter comes later. Add butter in the final minute of cooking, after you've flipped the steak for the last time. The milk solids in butter burn above 175°C (350°F), so if you add it too early, it will turn black and bitter. Instead, let the butter melt and foam, then use a spoon to baste the steak continuously, coating it in nutty, aromatic fat. Add garlic and herbs to the butter—they'll infuse it without burning if you keep the pan moving.
Searing Technique
Here are the critical steps for a perfect sear:
Seasoning: More Than Salt and Pepper
Great steak deserves great seasoning, but the philosophy here is enhance, don't mask. The beef is the star; seasonings are the supporting cast. Let's break down the essentials.
Salt: The Great Enhancer
Salt is the most important seasoning for steak, and most home cooks drastically under-salt. Use kosher salt or flaky sea salt—table salt is too fine and will over-salt quickly because it packs more densely. Aim for 1 teaspoon of kosher salt per pound (450g) of steak, applied evenly to all surfaces.
When to salt is a subject of debate. Salting immediately before cooking draws out some moisture but doesn't have time to penetrate deeply—this is fine for thin steaks. Salting 40-60 minutes before allows the salt to dissolve, draw out juices, and then reabsorb them, seasoning the meat throughout. This is the dry-brine method and is excellent for thicker cuts. Salting overnight (on a rack, uncovered, in the fridge) is even better—it seasons deeply and dries the surface for superior crust formation.
Pepper: A Matter of Timing
Black pepper should be added after the sear, not before. Pre-peppered steaks can develop a bitter, burnt flavour because pepper scorches at high heat. For the same reason, don't include pepper in a dry-brine. Add freshly cracked pepper during the butter-basting stage or after the steak has rested, just before serving.
Beyond the Basics
For those who want to explore, consider:
Common Mistakes and How to Fix Them
Even with the best technique, things go wrong. Here are the most common steak sins and their solutions.
Mistake 1: The Grey Band
Symptom: A thick, overcooked grey layer between the crust and the pink centre. Cause: Cooking over too-high heat for too long, or not tempering the steak. Fix: Use the reverse sear method for steaks over 3 cm thick. The low-temperature first stage ensures even cooking, and the brief sear doesn't have time to overcook the exterior.
Mistake 2: No Crust
Symptom: The steak is cooked but pale and soft on the outside. Cause: Pan not hot enough, steak too wet, or too much oil. Fix: Dry the steak thoroughly, preheat the pan until smoking, use a thin film of oil, and don't crowd the pan—cook one or two steaks at a time max.
Mistake 3: Tough and Chewy
Symptom: The steak is difficult to cut and chew. Cause: Overcooking lean cuts, undercooking working cuts, or slicing with the grain. Fix: Match doneness to the cut (medium-rare for premium cuts, medium for working cuts), and always slice against the grain—perpendicular to the visible muscle fibres. This shortens the fibres and makes each bite tender.
Mistake 4: Burnt Butter
Symptom: Black flecks in your basting butter and a bitter taste. Cause: Butter added too early or pan too hot. Fix: Add butter only in the final minute, reduce heat slightly, and keep the pan moving. If the butter is browning too fast, add a splash of water to cool it down temporarily.
"The difference between a good steak and a great steak is not the price of the meat. It is the attention to detail in the last five minutes of cooking and the first five minutes of resting. That's where restaurants earn their reputation and home cooks earn their pride."
Final Thoughts
A perfect steak is not a mystery or a luxury reserved for steakhouses with $100 price tags. It is a craft, and like any craft, it rewards patience, precision, and practice. The three pillars—temperature, rest, and sear—are your framework. Within that framework, you'll develop intuition: you'll learn to recognize the sound of a proper sear, the feel of a medium-rare steak when pressed, the smell of butter just before it browns. These are the marks of a cook becoming a chef.
Start with a good cut, temper it well, season it generously, cook it with intention, rest it with patience, and slice it with care. Serve it simply—perhaps with a pat of herb butter, a wedge of lemon, and a glass of something red. The steak doesn't need showy accompaniments; it needs respect. And when your guests cut into that perfectly pink, perfectly juicy, perfectly crusted steak and look at you with genuine awe, you'll understand why chefs are so devoted to this primal, elemental dish. It's not just dinner. It's a demonstration of skill, a celebration of fire and fat, and a reminder that the best cooking is often the simplest—done right.
So blame the chef no more. With these techniques in your repertoire, you are the chef. Now go forth, buy a beautiful steak, and cook it like you mean it. Your kitchen—and your dinner guests—are waiting.




Get the Next Recipe
Weekly recipes, techniques, and gear picks — straight to your inbox.
