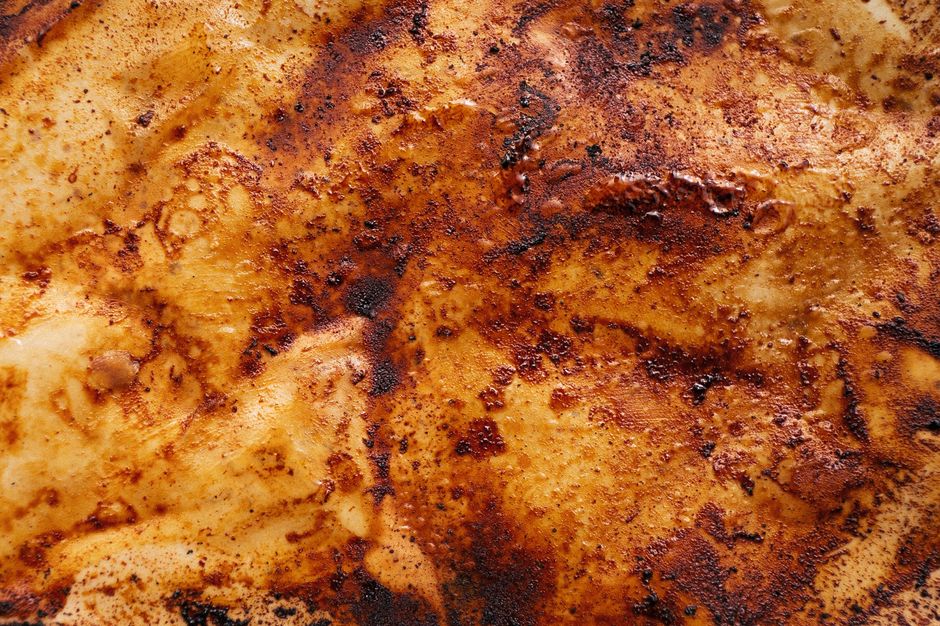
Caramelization is a magical process in cooking that transforms the ordinary into the extraordinary. When you bite into a piece of beautifully caramelized onion or savor the rich flavors of a perfectly seared steak, you are experiencing the complex beauty of this chemical reaction. Yet, for many home cooks, achieving that perfect golden flavor remains elusive. The secret lies not just in using the right ingredients, but also in understanding the science and techniques behind caramelization, effectively elevating your culinary skills.
At its core, caramelization is a form of non-enzymatic browning that occurs when sugar is heated, resulting in a series of complex chemical reactions. This process not only enhances the flavor by creating sweet and nutty notes but also contributes to the color and aroma of your food. Imagine the luscious aroma wafting through your kitchen when sugar transforms into golden-brown syrup. To make your kitchen smell delicious, you’ll want to master the science of caramelization and learn how to achieve those rich, savory notes in your favorite dishes.
Every ingredient responds differently to caramelization, and understanding these nuances can turn a simple dish into a gourmet experience. Perfecting this technique can elevate everything from meats and vegetables to desserts. Whether you’re aiming to master caramelized onions for a French onion soup or searing a steak to create that beautiful crust, understanding the key elements of temperature, timing, and ingredient ratios will lead you to success in your culinary endeavors. Let’s dive deeper into the science and art of creating that golden flavor that enhances your cooking.
The Science of Caramelization
To understand caramelization better, it’s essential to delve into the science behind the process. When sugars are heated to high temperatures, they break down and undergo a series of transformations. This process generally begins at around 320°F (160°C) and can reach up to 350°F (180°C) for maximum caramel flavor development. At these temperatures, the sugar melts and starts to dehydrate, forming new compounds that create that distinctive rich flavor and color we associate with caramel.
The Stages of Caramelization
1.Melting: As sugar is heated, it begins to melt and form a syrup. The first stage of caramelization starts as the sugar crystals dissolve in heat. This process often involves moisture and is crucial in dissolving lumps.
2.Browning: As the temperature increases beyond 320°F (160°C), the sugar begins to brown. This is where the Maillard reaction occurs, allowing sugars to bond with amino acids in proteins. Both of these processes lead to the rich flavors we seek in caramelized foods.
3.Flavor Development: As sugars continue to heat, they develop complex flavors and aromas. This is often where you can distinguish between light and dark caramelization. Light caramel has a sweet buttery flavor, while dark caramel offers deep, toasty, and nutty flavors.
The Importance of Temperature Control
Maintaining the correct temperature is essential in the caramelization process. Too low, and your sugars won't caramelize properly, leading to a watery result. Too high, and you risk burning your sugars, which will impart an acrid flavor no one would enjoy. Here are a few temperature-related tips to consider:
●Use a candy thermometer: This helps in accurately gauging the temperature during the caramelization process. It’s essential for those who want to achieve high precision in their cooking.
●Start with a medium heat: For most caramelized recipes, starting at a medium heat allows you to control the cooking process without risking a burnt end product.
●Monitor closely: Caramelization happens quickly once sugars start to melt, so it’s crucial to stay vigilant and stir when necessary.
Ingredients Matter: Choosing the Right Sugars and Foods
Not all sugars are created equal, and choosing the right one can significantly affect the outcome of your caramelized dish. Each sugar has its own attributes when it comes to flavor and burn temperatures.
Types of Sugars
1.Granulated Sugar: The most common choice for making caramel dishes. It melts evenly and offers a clean, sweet flavor.
2.Brown Sugar: Contains molasses, which adds humidity and moisture. It results in a richer, deeper caramel flavor, making it great for desserts.
3.Honey and Maple Syrup: Natural sweeteners that can also be caramelized, offering unique flavors that are different from granulated sugars.
The Role of Acidity
Adding ingredients with a bit of acidity can enhance caramelization by providing contrasting flavors. For example:
●Lemon Juice: A splash of acidity can cut the sweetness of a caramel, making it more complex.
●Vinegar: Used sparingly, it adds depth to caramelized onions or vegetables.
Selecting Your Ingredients
When considering what you want to caramelize, think beyond just the sugar:
●Vegetables: Onions, carrots, and bell peppers caramelize beautifully due to their natural sugars.
●Proteins: Meats and seafood benefit from caramelization by developing savory crusts that enhance flavor.
●Fruits: Apples, pears, and bananas are delicious when caramelized and can work well in desserts or as side dishes.
Techniques for Mastering Caramelization
Once you’ve grasped the science and selected the right ingredients, it’s time to harness the techniques that will allow you to achieve gloriously caramelized dishes.
The Cooking Method
1.Pan Caramelization: The most common technique, where you heat the ingredient in a skillet until it achieves that golden color.
2.Oven Roasting: For larger portions, roasting vegetables or meats can impart a deep flavor while allowing them to caramelize slowly.
3.“Dry” vs. “Wet” Caramelization: You can caramelize sugars directly over heat without liquid (dry) or add water (wet). The dry method requires close attention, while the wet process is more forgiving and can prevent burning.
Timing Is Crucial
●Patience is a Virtue: Caramelization is a process that rewards patience. Generally speaking, 10-15 minutes over medium heat will yield beautifully caramelized onions. Avoid rushing, as it will create uneven coloring and flavor.
●Evaluate Often: During the cooking process, taste frequently. Early in caramelization, flavors will be mild but enriching; as the sugars darken, they will become richer, so get to know what you enjoy best.
Stirring and Flipping
●Stir occasionally: Depending on the ingredient, a gentle stir can help evenly distribute the heat and sugars. This is particularly important for onions and other dense vegetables.
●Don’t overcrowd the pan: For excellent caramelization, allow space for air and moisture to escape. Too many ingredients in one pan will steam rather than caramelize.
Caramelizing Vegetables: A Flavor Powerhouse
Vegetables are some of the most versatile ingredients for caramelization. They offer a range of flavors, textures, and colors that can complement many dishes. Here’s how to successfully caramelize various types.
Caramelizing Onions
1.Prep: Slice onions into evenly sized pieces – either rings or half-moons work best.
2.Heating the Pan: Place butter or oil in the pan and start at medium heat.
3.Cook Slowly: Allow the onions to cook undisturbed for several minutes. Stir occasionally, scraping the bottom to release fond, that stickiness that adds depth.
4.Finish with Salt: Adding a pinch of salt helps draw out moisture, creating that rich flavor. Expect this to take 30-40 minutes to achieve a dark, rich color.
Caramelizing Carrots
1.Slice Thickly: Cutting them evenly allows for uniform cooking.
2.Use a Hot Pan: Once the oil is hot, add the carrots and allow them to sit for a couple of minutes to form a crispy exterior.
3.Sweetness to Enhance: If desired, a sprinkle of brown sugar helps enhance the sweetness.
4.Steam: Add a bit of water and cover for the last few minutes to assist their final caramelization. Expect this to take about 20 minutes.
Searing Bell Peppers
1.Choose Colors: Red, yellow, and orange bell peppers are generally sweeter than green ones.
2.Heat the Pan: Using a mixture of oil and butter can elevate the flavor significantly but ensure it’s hot before adding the peppers.
3.Cook and Stir: Cook for around 10-15 minutes, stirring occasionally to get an even char.
Meat Caramelization: Searing for Depth
Caramelization of meat is an integral step in developing deep flavors during cooking. This technique, commonly applied through searing or browning, creates a crust that enhances the umami qualities of your dish.
The Searing Process
1.Let it Rest: Before cooking, ensure your meat is at room temperature—letting it sit for about 30 minutes after removal from the fridge will help prevent cold meat from lowering the pan temperature.
2.Preheat Your Pan: Use a heavy-bottomed skillet to retain heat. Cast iron pans work incredibly well for this purpose. Preheat over medium-high heat until it’s scorching hot.
3.Use Minimal Oil: A high smoke point oil like canola or peanut oil can withstand the high heat, while fat from the meat itself will also contribute to the bubbling action that promotes caramelization.
4.Avoid Crowding: Place meat in the pan without overcrowding. Each piece needs enough space to properly sear. Depending on the thickness, this might take 3-5 minutes per side for a perfect crust.
Reflecting on Flavors
After searing, consider deglazing the pan with stock, wine, or vinegar to create a rich sauce from the leftover fond. This process seamlessly melds the flavors together into a gorgeous addition to your dish.
Sweet Treats: Caramelizing for Desserts
When it comes to desserts, caramelization takes on a new role, transforming simple ingredients into sweet temptations. Understanding how to properly caramelize sugars opens new doors in dessert-making.
Caramel Sauce: A Chef’s Sweet Secret
1.Ingredients: Start with granulated sugar and a bit of water in a saucepan.
2.Heat: Over medium-high, allow the sugar to dissolve without stirring initially—only swirl the pan gently to prevent clumping.
3.Observation: Watch the color change from clear to a golden hue, then to a deep amber. This should take approximately 8-12 minutes. As soon as it turns deep amber, remove from heat and add a pinch of salt and cream (heated separately).
4.Storing: Let it cool then store in a glass jar for later use.
Caramelized Fruit for Elevation
1.Choose Your Fruits: Almost any fruit works—you’ll typically want to use those with sugars like bananas, apples, or pineapple.
2.Method: Slice and lay in a hot skillet with butter. Sauté until caramelized, which can take around 5-10 minutes.
3.Use in Dishes: Serve over ice cream, pancakes, or in pastries.
Final Touch: Brûlée Technique
1.Preparation: Prepare a custard base with cream, eggs, and sugar.
2.Bake and Cool: Bake in a water bath until set; cool completely.
3.Candied Top: Sprinkle a thin layer of granulated sugar on the custard, then use a kitchen torch or broiler to melt and caramelize the sugar.
Presentation and Serving: Gorgeous Caramelized Dishes
Once you've perfected the art of caramelization, make sure to showcase your beautiful dishes. Presentation is key to enhancing the eating experience.
Plating Techniques
●Colors: Use contrasting colors on the plate to draw attention. A green herb or fresh vegetable will pop against beautifully caramelized meat or vegetables.
●Height and Layering: Add dimension to your plate by layering elements or stacking components.
●Garnishes: Consider adding a sprinkle of fresh herbs or citrus zest to elevate the look and flavor.
Enhancements
●Drizzles: Adding a sauce or caramel drizzle can help tie the flavors together while adding aesthetic value.
●Textures: Incorporate contrast through texture, like crunchy elements alongside soft or creamy components.
Conclusion
Caramelization is an incredible culinary skill that can transform the simplest ingredients into extraordinary dishes filled with depth and complexity. By understanding the science behind it, selecting the right ingredients, and mastering the techniques involved, you can elevate your cooking to a gourmet level. This essential skill can make a significant difference, giving your food the character and flavor it needs to shine.
Remember, patience and practice are your greatest allies in achieving perfect caramelization. Experiment with different sugars, heat levels, and cooking methods to find what works best for you. With these insights and techniques, you are well on your way to achieving that golden flavor, allowing your dishes to take center stage at any meal. Happy caramelizing!