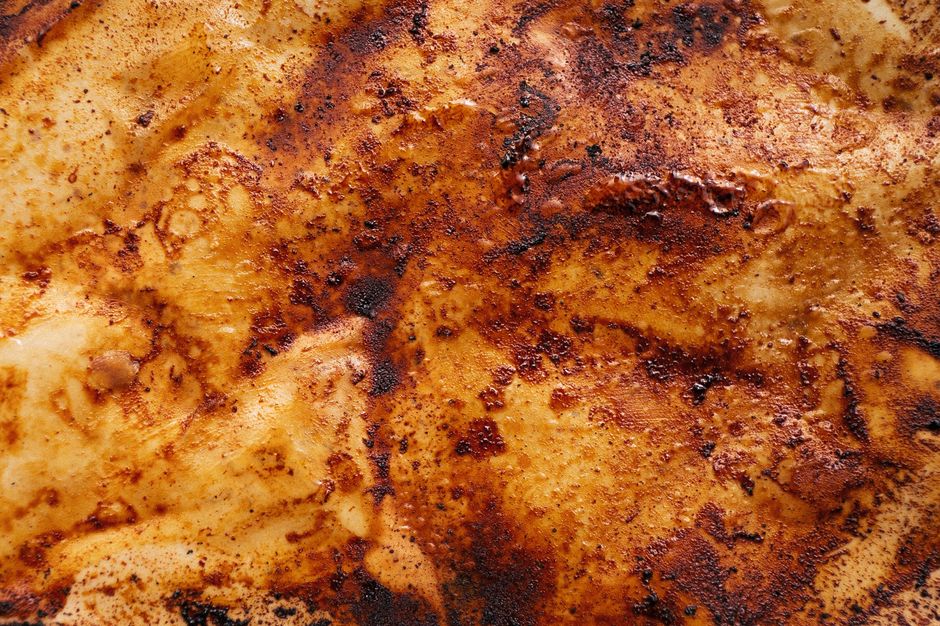
The Science Behind Perfect Caramelization: Unlocking Maillard Reactions
Cooking is, at its heart, a series of transformative chemical reactions that we manipulate with heat, time, and ingredients. While many home cooks view the kitchen as a place of intuition and heart, the most successful chefs treat it as a laboratory where precision unlocks flavor. When you sear a steak or toast a slice of sourdough bread, you are not merely heating up food; you are facilitating a complex cascade of molecular changes known as the Maillard Reaction. This reaction is responsible for the deep, savory, and nutty aromas that make our favorite dishes so irresistibly delicious. Understanding the science behind this process is the singular secret that separates a "home-cooked" meal from a professional, restaurant-quality experience.
Many beginners operate under the assumption that high heat is always the answer to achieving a great crust, but that is a dangerous oversimplification. If the pan is too cold, the meat will steam in its own juices, turning a dull grey color rather than developing the golden-brown exterior we crave. Conversely, if the heat is excessively high, you risk burning the proteins into bitter carbon before the internal fibers have time to relax and render. Mastering the delicate dance between heat intensity and moisture control is the fundamental skill every aspiring chef must acquire. By learning to harness these chemical forces, you take total control over the sensory profile of everything that leaves your kitchen.
This guide will serve as your comprehensive roadmap to achieving the perfect golden-brown finish on everything from root vegetables to delicate proteins. We will dismantle the myths surrounding the "searing" process and provide you with actionable, scientific strategies to ensure consistency every single time you turn on your stove. Whether you are working with stainless steel, cast iron, or non-stick surfaces, the principles of thermal physics remain constant. Prepare to sharpen your culinary intellect and elevate your pantry staples into works of art. Let us dive into the chemistry that makes the culinary world go round.
The Chemistry of Flavor: Decoding the Maillard Reaction
At the microscopic level, the Maillard Reaction is a complex chemical dialogue between amino acids (the building blocks of proteins) and reducing sugars. When these two components are subjected to heat—specifically temperatures between 285°F and 330°F (140°C to 165°C)—they begin to rearrange into a vast array of new molecules. These molecules create the dark, savory, and complex flavor profiles that define cooked foods. It is important to note that this is not the same as caramelization, which involves only the pyrolysis of sugars. The Maillard reaction is essentially the process of turning raw sustenance into something profoundly more flavorful.
Understanding the Thresholds
To trigger this reaction effectively, you must manage moisture. Water boils at 212°F (100°C), which is well below the threshold required for the Maillard reaction to occur in earnest. If the surface of your ingredient is covered in excess moisture, the energy from your pan will be used to evaporate that liquid rather than browning the surface. This is why patting your protein dry with paper towels is arguably the most important step in the pre-cooking process. If you skip this, you are effectively poaching your food rather than searing it.
The Role of pH and Ingredients
The speed and intensity of the reaction are also heavily influenced by the pH balance of your food. Alkaline environments accelerate the reaction, which is why a pinch of baking soda can help brown onions much faster when you are making a French onion soup. Conversely, acidic ingredients—like lemon juice or wine—will inhibit the browning process. If you want to achieve a deep sear, ensure your pan is free of heavy acid glazes until after the crust has been successfully established.
"Cooking is not about following a recipe; it is about understanding the molecular journey of your ingredients from raw to sublime. Once you master the Maillard reaction, you stop guessing and start engineering flavor."
Mastering the Surface: Moisture Control and Thermal Conductivity
The vessel you choose for your cooking is not just a container; it is a heat-transfer mechanism. Stainless steel and cast iron are the gold standards for browning because they provide consistent, high-heat transfer. Non-stick pans, while excellent for eggs, often cannot handle the sustained, high-heat requirements necessary for a heavy-duty sear without degrading the coating or failing to provide the surface temperature needed for significant browning. When selecting your pan, look for high thermal mass, which allows the pan to retain heat even after you add cold ingredients.
The Importance of the Dry Surface
As mentioned previously, moisture is the enemy of the crust. If you are searing a steak or a filet of salmon, take it out of the refrigerator 20 to 30 minutes before cooking. A cold, wet surface will drop the temperature of your pan instantly, resulting in a steam-bath effect. Use high-quality, lint-free paper towels to blot the surfaces until they are bone dry. You will notice that by doing this, the sizzle when the food hits the pan is louder, sharper, and more consistent, signaling the start of the reaction.
Managing Pan Density
Do not overcrowd the pan. When you place too many items in a pan at once, you decrease the ambient temperature of the cooking surface and increase the water vapor density. This effectively lowers the boiling point in the pan, ensuring that your vegetables or proteins remain pale and soft. Give your ingredients "breathing room." If you are cooking a large batch of mushrooms or chicken thighs, work in smaller batches. It takes slightly longer, but the result is a beautiful, mahogany-colored exterior rather than a sodden, grey mess.
Fats and Oils: Choosing the Right Medium for the Job
Not all fats are created equal, and their smoke point is the critical metric for any home cook. The smoke point is the temperature at which an oil begins to break down and emit acrid smoke, signaling that the fat has reached its limit. For high-heat searing, you must use oils with a high smoke point to prevent the food from developing a burnt or chemical aftertaste before the Maillard reaction can fully develop.
Recommended Fats for High Heat
Avocado Oil:* Smoke point of roughly 520°F (270°C). Ideal for searing steaks and intense heat.
Grapeseed Oil:* Smoke point of 420°F (215°C). Neutral flavor and excellent for high-heat sautéing.
Clarified Butter (Ghee):* Smoke point of 485°F (250°C). Provides the deep, nutty flavor of butter without the milk solids burning.
Refined Coconut Oil:* A high-heat stable fat, though it may impart a subtle flavor.
Understanding Fat Dynamics
Avoid using extra virgin olive oil for high-heat searing. While delicious, its lower smoke point means the delicate polyphenols will degrade, and the flavor will turn bitter. Save the expensive finishing oils for post-cooking applications, where their raw, bright notes can shine without being scorched. Always add your oil to a preheated pan; let the oil shimmer, which indicates it has reached the ideal temperature for creating a barrier between the metal and the food.
The Art of Temperature Control: Precision in the Kitchen
The biggest mistake amateur cooks make is setting the heat to "High" and walking away. High heat is a tool, not a constant state. You should use high heat to initially sear the protein, but then you must moderate the temperature to allow the interior of the food to reach the desired doneness without scorching the exterior. This is where heat management becomes a sensory art.
Using the "Sear-and-Slide" Technique
Start your pan on high heat. Add your oil and let it reach the shimmer stage. Add your protein and let it remain undisturbed for 2-3 minutes. If you try to flip it too early, you will tear the fibers, as the food will not have released from the pan surface yet. Once a crust forms, the proteins will naturally "release" from the pan. If the food is sticking, it is simply telling you it isn't ready to turn. Flip once, reduce the heat to medium, and finish to your target internal temperature.
Monitoring Internal Temperatures
Beef (Rare):* 120°F - 125°F
Beef (Medium Rare):* 130°F - 135°F
Chicken:* 165°F (safely reached)
Fish (Salmon):* 125°F - 130°F for flaky, moist results.
"A well-developed crust is the seasoning of the dish. It provides the textural contrast required to make a meal interesting, acting as a structural shell that traps the juices within."
Carbohydrates and the Caramelization Process
While proteins rely on the Maillard reaction, carbohydrates—specifically sugars—rely on caramelization. This is the process of sugar molecules breaking down under heat, leading to the formation of complex, sweet, and nutty compounds. Unlike the Maillard reaction, caramelization does not require nitrogen (amino acids). It is pure, heat-induced sweetness. This is how you transform plain, raw onions into a rich, deep brown marmalade or how you create a dark, glassy finish on roasted root vegetables.
Caramelizing Root Vegetables
Carrots, parsnips, and onions contain high natural sugar content. To achieve the perfect caramelized exterior, toss them in a small amount of oil and spread them in a single layer on a sheet pan. Roast them at 400°F (200°C) with enough space between each piece to allow the moisture to escape. If you crowd the tray, you are steaming them, which keeps the sugars locked within the vegetable instead of allowing them to brown on the surface.
Adding Sugar for Color
In some savory dishes, a small addition of sugar—such as a dash of honey or brown sugar in a marinade—can act as a catalyst for browning. Because the sugar caramelizes at a lower temperature than the protein browns, it can help jump-start the color development on the surface of the meat. Be cautious, however: adding sugar too early can lead to charred, bitter spots if the heat is too aggressive. Use these additions sparingly toward the final stages of cooking.
Essential Tools for the Professional Home Cook
You do not need a commercial kitchen to cook like a pro, but you do need tools that perform consistently. Investing in a few core pieces of equipment will fundamentally change how your food browns and caramelizes. The goal is to provide uniform heat distribution and the ability to maintain temperature throughout the cooking process.
The Gear List
The Science of "Fond"
After you sear a protein, you will notice brown bits stuck to the bottom of your pan. This is called fond, and it is arguably the most flavorful part of the cooking process. Do not wash the pan! Deglaze the pan with wine, stock, or even water. Scrape the fond with a wooden spoon and incorporate it into a sauce. This is how restaurant chefs create flavor density that feels impossible to replicate at home.
Troubleshooting Common Browning Issues
Even with the best intentions, things can go wrong. If you are not seeing the results you want, review your process against these common points of failure. The goal is to isolate the variable that is preventing the reaction from occurring.
Troubleshooting Checklist
Is it Grey?* The pan was not hot enough, or there was too much moisture. Increase the heat next time and ensure you pat the protein dry.
Is it Burnt?* The heat was too high, or you used an oil with too low a smoke point. Lower the heat or switch to a more stable fat.
Is it Soggy?* You crowded the pan. Use a larger pan or cook in multiple batches.
Is the Flavor Bitter?* You scorched the sugars or the fat. Lower the temperature and keep a closer eye on the pan.
The Importance of Resting
Once your food has developed that beautiful, dark brown crust, remove it from the heat. Resting is not just for meat; it is for everything. If you cut into a steak or a roasted piece of chicken immediately, the juices will run out, ruining the work you just did to create a crust. Let your protein rest for at least 5 to 10 minutes. This allows the internal juices to redistribute, ensuring every bite is as juicy as the crust is flavorful.
The Role of Time: Patience as an Ingredient
In the modern world, we often rush our cooking, turning up the heat to get food on the table faster. However, the Maillard reaction is a process of time. If you move the food around too much, you break the contact between the ingredient and the pan, effectively resetting the reaction timer. You must be patient. Put the ingredient in the pan, resist the urge to poke it, and let the science happen.
Practice Makes Perfect
Try this experiment: Take two chicken breasts. Pat one dry and sear it in a hot pan without moving it until a deep golden color forms. Take the other, add it to the pan with a little moisture remaining, and move it around frequently. Compare the two. The difference in flavor will be immediate and profound. You will find that the first breast has a depth of flavor that the second completely lacks.
Finding Your Rhythm
Cooking is a rhythm. It is about understanding when the pan is ready, when the surface is dry, and when the protein is prepared to release. As you practice these techniques, you will find that you no longer need to check a manual. You will hear the sound of a perfect sear, smell the nutty aroma of the Maillard reaction, and know instinctively when it is time to flip. That is the moment you move from being a cook to being a chef.
Advanced Techniques for Flavor Enhancement
Once you have mastered the basics of searing and browning, you can begin to experiment with more advanced flavor-building techniques. These involve using additional ingredients to help accelerate the reaction or to provide a deeper, more savory foundation for your dishes.
The Power of Umami
Many ingredients, such as soy sauce, tomato paste, or Worcestershire sauce, are loaded with glutamates. When you incorporate these into your cooking process, you are adding to the existing amino acids, which effectively provides more fuel for the Maillard reaction. Adding a tablespoon of tomato paste to a base for a braise or a stew and letting it brown (not just cook) on the bottom of the pot creates a massive depth of flavor that a standard tomato sauce simply cannot match.
The "Double Sear"
For thicker proteins like a thick-cut pork chop or a thick piece of steak, you can use a double-sear technique. Sear the first side at high heat until deeply browned. Flip it and sear the second side. If the center is still undercooked, place the entire pan into a preheated 400°F (200°C) oven. This allows the heat to penetrate the center of the meat gently while maintaining the integrity of the crust you have built.
Conclusion
Understanding the science behind the Maillard reaction is the ultimate tool for any home cook. It removes the guesswork and provides a scientific framework for creating food that is inherently better. When you understand that browning is simply the result of heat, moisture control, and the interaction of proteins and sugars, you can approach any ingredient with confidence. You are no longer just heating food; you are using chemistry to build layers of complex, delicious flavor.
As you move forward in your culinary journey, remember that the most important ingredient is your observation. Watch the colors of your food change, listen to the sizzle, and pay attention to the aromas that fill your kitchen. If you maintain a commitment to high-quality ingredients and sound scientific practices, you will find that the "perfect" meal is not a matter of luck, but a matter of technique.
Start small. Focus on one element—the perfect sear on a chicken thigh or the perfect caramelization on a handful of onions. Once you have that down, the rest of the culinary world will begin to fall into place. "Blame the Chef" is about taking responsibility for the food you create, and by mastering the science of the stove, you are taking ownership of your kitchen in the most profound way possible. Happy cooking, and may your crusts always be golden.
Final Thoughts
The path to culinary mastery is long, but it is deeply rewarding. Every meal is an opportunity to experiment, learn, and grow. Do not be discouraged if your first attempts at perfect searing aren't exactly what you hoped for; every professional chef has a history of burnt pans and under-browned proteins. The beauty of science is that it is repeatable. By keeping a consistent approach, you will see your results improve with every single attempt.
Continue to explore the relationship between heat and your ingredients. Look for ways to bring out the natural sweetness in vegetables and the savory, meaty depths of your proteins. Use the tools we have discussed, maintain your temperatures, and above all, take your time. Great flavor cannot be forced—it must be developed. With the knowledge you have gained here, you are now equipped to turn your kitchen into the laboratory where you create your own signature flavors. Continue to challenge yourself, continue to taste everything, and most importantly, keep cooking with purpose. The perfect meal is always within reach if you understand the science of what is happening under the surface. Your journey toward culinary excellence has only just begun. Stay curious, stay precise, and let the science lead you toward your next great dish. Every plate is a new experiment, and every experiment is an opportunity to get closer to perfection. Enjoy the process of becoming the master of your kitchen, one Maillard reaction at a time. The depth of flavor you are searching for is already there, waiting for you to unlock it with the right amount of heat and the right application of technique. Go forth and cook with the confidence of a true culinary scientist.


Get the Next Recipe
Weekly recipes, techniques, and gear picks — straight to your inbox.
