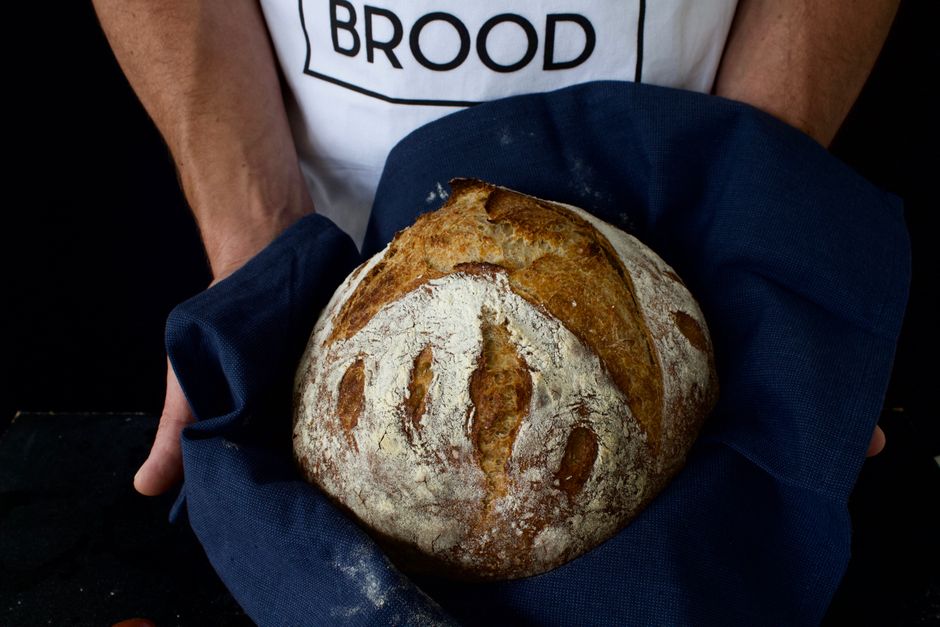
The Science of Baking Perfect Bread
Baking bread is one of the most rewarding endeavors a home cook can undertake. The process transforms humble ingredients—flour, water, yeast, and salt—into a warm, golden loaf that can evoke a sense of comfort and satisfaction unparalleled in the kitchen. This alchemical process is not just an art; it is a fascinating science that requires an understanding of various components, interactions, and conditions. Getting the loaf just right is a blend of precise measurement, correct handling, and environmental factors that can impact the final product. As you delve into the intricacies of bread-making, you’ll discover that even a slight miscalculation can lead to very different results.
The beauty of baking bread lies not only in the end product but also in the transformative journey each loaf undergoes. From the initial mixing of ingredients to the delightful aroma that fills the home as it bakes, each step in the process is crucial. While many aspects of baking depend on personal preference—such as crust thickness or bread density—others are governed by scientific principles that dictate how yeast behaves, how gluten forms, and how moisture is retained. Understanding these principles will allow you to troubleshoot common baking issues and customize recipes to better match your palate.
Moreover, embracing the science behind baking can lead to a more thorough appreciation of the craft. It's easy to follow a recipe diligently only to become frustrated when things don’t go as planned. However, when you arm yourself with knowledge about the roles of each ingredient and their interactions, you can make informed choices, enhancing your breads and avoiding pitfalls. In this comprehensive guide, we will dive deep into the science of bread-making, exploring the components involved, the techniques necessary, and the various methods you can employ to achieve the perfect loaf every time.
The Chemistry of Ingredients
To understand bread-making, it’s essential to start with the ingredients themselves, as each plays a specific role in creating the desired result. The four fundamental ingredients in bread are flour, water, yeast, and salt, but there are many other components—like sugar, fats, and enhancers—that can influence the taste, texture, and appearance of the bread.
Flour: The Foundation
Flour is the backbone of any bread recipe. It contains gluten, a protein that, when hydrated and worked, becomes elastic. The strength and elasticity of gluten is crucial for trapping gases produced by yeast during fermentation, which in turn gives the bread its rise. There are various types of flour:
When selecting flour for your projects, it’s vital to consider the desired texture and structure of the final loaf. For airy, artisanal breads, bread flour is preferred, while all-purpose flour can work well for softer sandwich loaves.
Water: The Vital Element
Water hydrates the flour to initiate the gluten formation process and dissolve yeast and salt. The temperature of the water is also critical. Cooler water (around 70°F) is ideal for longer fermentation times (cold rising), while warm water (between 110°F and 120°F) can reactivate dry yeast more rapidly, suitable for quicker recipes.
Yeast: The Leavening Agent
Yeast is a living microorganism crucial for bread-making. It ferments sugars, producing carbon dioxide and alcohol, which cause the dough to rise. There are primarily two types of yeast used in baking:
When working with yeast, freshness is critical. Always check expiration dates and store yeast in a cool, dry place.
Salting the Dough
Salt not only enhances flavor but also strengthens gluten structures. It regulates yeast activity, slowing down fermentation and allowing for better flavor development during the rising phase. Typically, a salt ratio to flour is about 1.5-2%. Too much salt can inhibit yeast activity, while too little can result in overly airy bread.
The Bread-Making Process
When diving into bread-making, it’s helpful to relate the process to a series of steps that can be mastered with practice and attention to detail. The basic workflow typically follows a formula of mixing, fermenting, shaping, proofing, and baking.
Step 1: Mixing
Mixing is the starting point of any bread-making endeavor. Here, you combine your dry ingredients (like flour, salt, and yeast) and wet ingredients (water, and optional fats).
- Straight Dough Method: All ingredients are combined in one go and kneaded.
- Bulk Fermentation Method: Mix dry ingredients first and add water gradually for better hydration.
Tip: For an elevated flavor, consider autolyse—a technique where flour and water are combined and rested prior to the addition of other ingredients. This helps develop gluten and enhances the flavor of the dough.
Step 2: Kneading
Kneading is the process of working the dough to develop gluten. This can be done by hand or with a stand mixer. If using your hands, employ the “stretch and fold” technique.
1. Flour your work surface to prevent sticking.
2. Push the dough with the palms of your hands.
3. Fold it over and repeat.
1. Use a dough hook attached to your stand mixer.
2. Knead on low speed for 6-8 minutes until the dough is smooth and elastic.
Let the dough rest when it feels resistant—this is crucial for gluten relaxation.
Step 3: Bulk Fermentation
This phase involves letting the dough rise after mixing and kneading. The bulk fermentation can take anywhere from 1-2 hours at room temperature or longer if refrigerated.
- Dough has doubled in size.
- Surface is slightly domed and puffy.
Punching Down: Gently press down on the dough to deflate it and redistribute the yeast for an even fermentation.
Step 4: Shaping and Dividing
Once you’ve completed the bulk fermentation, it’s time to shape the dough.
Shaping is essential for creating surface tension, which will help your bread rise evenly during the final proofing.
Step 5: Proofing
Proofing, or final rise, is important for developing flavor and texture. At this stage, the dough should rise for approximately 30-60 minutes in a warm environment.
Step 6: Baking
Preheat your oven to 450°F, using a baking stone if available to ensure an even heat distribution.
Testing for Doneness: Tap the bottom of the loaf—it should sound hollow if properly baked. Internal temperature should be about 190°F for soft loaves and up to 210°F for crusty artisan bread.
Advanced Techniques
Once you have a grasp on the fundamentals, you may want to explore more advanced techniques to elevate your bread-baking skills. Techniques such as sourdough, poolish, or biga can take your breads to the next level.
Sourdough
Sourdough bread employs a natural starter made from wild yeast and lactic acid bacteria.
1. Combine equal parts of flour and water (about 100g each).
2. Feed this mixture daily with equal flour and water, discarding some of it to maintain balance.
3. After about 5-7 days, you should see bubbles, a pleasant aroma, and it will double in size, indicating it is active.
Poolish and Biga
These are pre-ferments that enhance the flavor and structure of the bread.
- Equal parts flour and water with a small amount of yeast (about 1g per 100g of flour).
- Mix and let it ferment at room temperature for at least 12 hours prior to mixing with the main dough.
- A stiff, Italian-style pre-ferment with less water than poolish.
- Let it ferment for 12-16 hours before incorporating.
Using pre-ferments can dramatically improve the aroma and bread flavor, contributing to a more complex character.
Braiding and Specialty Shapes
Experimenting with shapes can be a delightful expression of creativity.
- Divide your dough into three sections and roll into strands, then braid like hair.
Common Troubleshooting Tips
No one is perfect in the kitchen, and even the most experienced bakers may face challenges. Here are some common problems and their respective solutions.
Dough Too Sticky
If your dough is excessively sticky, it can make shaping nearly impossible.
- Lightly dust your work surface with flour.
- Allow the dough to rest for 10-15 minutes. Sometimes, gluten needs extra time to absorb moisture.
Bread Doesn’t Rise
A loaf that doesn’t rise may indicate problems with yeast or fermentation conditions.
- Check the temperature—ensure it’s warm enough (75-80°F).
- Verify the yeast is active—proof it by dissolving in warm water with sugar; it should bubble.
Bread Crust Too Hard
If your bread has a crust that’s overly hard, it could be an issue of baking time or steam.
- Reduce the baking time slightly.
- Ensure proper steam during the first part of baking to create a more tender crust.
Creative Bread Variations
Once you’re comfortable with basic bread-making skills, consider incorporating additional flavors, fillings, or techniques to personalize your loaves.
Herb and Cheese Bread
Infusing herbs and cheese into the dough can add a delightful twist.
Sweet Breads
Sweet breads commonly include cinnamon rolls or brioche-style loaves.
Seasonal Specialties
Use seasonal ingredients—like pumpkin in the fall or cranberries during the winter—to create unique breads.
Conclusion
Baking bread is a journey of flavor, science, and artistry. By understanding the biology behind your ingredients and the science of the process, you can elevate your baking skills and create perfect loaves. The beauty is that through experimentation and practice, you will find your rhythm—discovering what methods, techniques, and flavors resonate best with your unique palate.
From the satisfying meld of ingredients to the intoxicating aroma filling your home, each loaf tells a story, one that captures both the humble art of bread-making and the joy of sharing it with loved ones. So, gather your flour, warm your water, and prepare to knead, shape, and bake your way to the perfect loaf. Your perfect bread awaits.
(2006 words)




Get the Next Recipe
Weekly recipes, techniques, and gear picks — straight to your inbox.
