
The Science of Brining: How Salt and Sugar Transform Meat Texture
The kitchen is often viewed as a place of intuition, governed by the sights, smells, and sounds of searing pans and simmering pots. Yet, beneath the artistic flair of every great chef lies a rigorous foundation of chemistry and physics that dictates the success of a meal. One of the most transformative techniques in the culinary arsenal—often misunderstood and frequently underutilized by the home cook—is the art of brining. Whether you are prepping a holiday turkey or a simple weeknight pork chop, understanding how water, salt, and sugar manipulate muscle fibers is the difference between a dry, lackluster dish and a succulent, flavorful masterpiece.
At its core, brining is an exercise in osmosis and diffusion, two scientific phenomena that reshape the molecular structure of meat. When you submerge protein in a saline solution, you are essentially forcing the meat to undergo a structural overhaul that allows it to retain moisture even under the intense, dehydrating heat of an oven or grill. Many cooks fear that brining is too time-consuming or overly complicated, but it is actually one of the most forgiving and foolproof methods for ensuring consistent quality. Once you grasp the mechanics of how salt interacts with proteins, you stop relying on luck and start relying on chemistry.
In this deep dive into the science of brining, we will move past simple kitchen myths and explore the technical nuances that elevate home cooking to restaurant quality. We will examine the delicate balance of solute concentration, the role of sugar in the Maillard reaction, and the specific time-to-weight ratios required to achieve perfection. Prepare to rethink how you handle your proteins, because after we deconstruct the science, you will never look at a piece of chicken or a pork loin the same way again. It is time to stop guessing and start engineering your dinner.
The Chemistry of Osmosis and Diffusion
To understand why a brine works, we must first look at the anatomy of muscle tissue. Meat is composed of long, tightly coiled protein filaments held together by connective tissues. When meat is cooked, these proteins denature and tighten, squeezing out their internal moisture like a wrung-out sponge. Brining prevents this tragedy by altering the internal environment of the muscle fibers before heat ever touches them.
Understanding Osmosis
Osmosis is the movement of water across a semi-permeable membrane from an area of low solute concentration to an area of high solute concentration. When you submerge meat in a brine solution, the concentration of salt outside the meat is higher than inside the cells. While we might expect water to exit the meat to balance the salt, the process is more complex. Through the process of diffusion, salt ions penetrate the muscle tissue, which causes the proteins to partially denature and loosen. This physical loosening of the protein strands creates more space within the fiber, allowing the meat to hold onto its inherent moisture even when exposed to high heat.
The Role of Diffusion
While osmosis handles the movement of water, diffusion handles the movement of the salt molecules. These ions migrate into the muscle tissue, which is critical for seasoning the protein from the inside out. Unlike a surface rub, which only flavors the crust, a brine ensures that the flavor profile is integrated into every bite. This internal seasoning also helps to break down some of the tougher muscle proteins, which is why brining is particularly effective for leaner cuts of meat like turkey breast or pork tenderloin.
"The true magic of brining lies not just in moisture retention, but in the structural modification of proteins. By loosening the tight coils of muscle fiber, we create a network that acts as a reservoir for juices during the cooking process."
The Essential Ratios: Getting the Math Right
Many home cooks approach brining with a "measure by feel" mentality, which is a recipe for disaster. If your brine is too weak, you won't see a significant change in texture; if it is too strong, your meat will become mushy or overly salty. The standard, chef-approved brine ratio is typically 5% to 8% salt by weight. However, for most home applications, a simple volume-based ratio is easier to follow without sacrificing precision.
The Standard Brine Formula
A reliable, foolproof starting point for most meats is the "half-cup rule." For every gallon of water, use 1/2 cup of Kosher salt. If you are using table salt, which has a higher density due to its finer grain, you should reduce this amount to 1/3 cup to avoid over-salting.
Gallon of Water:* 16 cups
Kosher Salt:* 1/2 cup (or 150 grams)
Sugar (Optional):* 1/4 to 1/2 cup
Aromatics:* Peppercorns, garlic, fresh herbs
Adjusting for Time and Thickness
The duration of the brine depends entirely on the thickness of the protein. A thin pork chop might only need two hours, while a whole chicken could benefit from twelve to twenty-four hours. Never exceed 24 hours for poultry, as the salt will eventually begin to break down the structure of the meat to the point of a grainy, "mealy" texture. Always keep your brining vessel in the refrigerator at a temperature below 40 degrees Fahrenheit to prevent bacterial growth.
The Role of Sugar and Aromatics
While salt is the engine of the brine, sugar is the secret weapon for appearance and flavor balance. Many home cooks assume sugar is added only for sweetness, but its primary function in a brine is to counteract the harshness of the salt and aid in the development of a beautiful, caramelized crust during cooking.
The Maillard Reaction
When you roast or sear meat that has been brined with sugar, the sugars present on the surface and within the outer layers of the tissue accelerate the Maillard reaction. This is the chemical reaction between amino acids and reducing sugars that gives browned food its distinct flavor and color. By introducing sugar into your brine, you ensure that your meat will achieve a deep, mahogany crust long before the inside dries out.
Selecting Aromatics for Depth
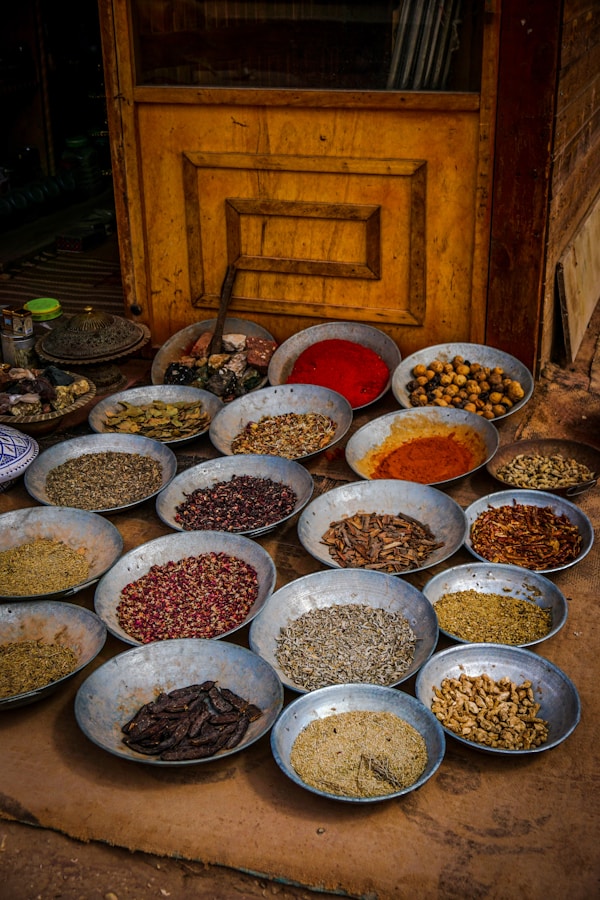
Beyond salt and sugar, your brine is a blank canvas for flavor. Aromatics like whole black peppercorns, smashed garlic cloves, fresh bay leaves, and citrus zest infuse the protein with subtle, background notes that penetrate deep into the tissue.
"A brine without aromatics is merely a saline bath. By introducing botanicals and spices, you are building a layer of flavor that defines the character of the finished dish."
The "Dry Brine" Technique
In recent years, many professional chefs have shifted away from "wet" brines in favor of the dry brine. This method involves applying a concentrated layer of salt directly to the surface of the meat and allowing it to sit uncovered in the refrigerator for several hours or even days. The salt draws moisture out of the meat, dissolves into a concentrated liquid, and is then reabsorbed into the muscle fibers.
Advantages of Dry Brining
The primary advantage of a dry brine is that you are not adding excess water to the protein, which can sometimes result in a "steamed" texture rather than a crisp, roasted one. Furthermore, the dry brine works wonders for crisping skin on poultry. By leaving the meat uncovered in the fridge, the refrigerator's dry, circulating air further dehydrates the skin, ensuring that it crackles perfectly when roasted.
When to Use Dry vs. Wet
Use a Wet Brine for:* Lean, quick-cooking proteins like pork chops, chicken breasts, or whole turkeys that have very little internal fat.
Use a Dry Brine for:* Larger, more robust cuts like beef roasts, duck, or thick steaks where you want to prioritize a superior, crispy crust and concentrated flavor.
Essential Equipment and Safety Precautions
When you are dealing with large volumes of saltwater and raw meat, sanitation is non-negotiable. You are creating a perfect environment for microorganisms, so you must treat your brining setup with the same care as you would a delicate sauce.
The Vessel Choice
Always use non-reactive containers for your brining. Stainless steel, glass, or food-grade plastic buckets are ideal. Avoid reactive metals like aluminum or cast iron, as the acidic elements in your aromatics or the high salt concentration can cause the metal to leach into your food, leaving an unpleasant metallic off-taste.
The Temperature Trap
The most dangerous mistake a home cook can make is brining at room temperature. Even if your kitchen feels cool, your meat will quickly enter the "danger zone"—between 40 and 140 degrees Fahrenheit—where bacteria multiply rapidly. Always, without exception, keep your brining container in the coldest part of your refrigerator. If your vessel is too large for your fridge, you can use a large, clean cooler filled with ice, but you must monitor the temperature with a probe thermometer to ensure it stays below 40 degrees at all times.
Troubleshooting Common Brining Mistakes
Even with the best intentions, things can go wrong. Perhaps the meat tastes like a salt lick, or perhaps the texture feels soft and unnatural. Understanding these failures is part of the growth process for any serious cook.
Salt Overload
If you find your meat is consistently too salty, you are likely brining for too long. Remember that salt does not stop moving once it enters the meat; it continues to permeate until an equilibrium is reached. If you are worried about timing, always err on the side of "less is more." You can always add a pan sauce or a seasoned glaze later, but you cannot "un-salt" a piece of meat once it has reached equilibrium.
Texture Issues
If your meat feels "mushy" or "spongy," you have likely exceeded the denaturation threshold. This happens when the salt has broken down the muscle structure too extensively. This is particularly common with delicate proteins like fish or thin cuts of chicken. Keep a strict timer for your brines. For chicken breasts, four hours is usually plenty; for a whole chicken, overnight is the maximum limit.
Rinsing and Drying
Never skip the final step of the brining process: the rinse and pat-down. Before cooking, remove the meat from the brine and rinse it thoroughly under cold, running water to remove the excess surface salt. Then, use paper towels to pat the meat bone-dry. Surface moisture is the enemy of browning. If the meat is wet, it will steam instead of sear, and you will lose the beautiful color you spent hours preparing for.
Advanced Brining: Beyond the Basics
Once you have mastered the standard salt-and-sugar brine, you can begin experimenting with more complex solutions. Professional kitchens often use "composite brines" that incorporate various liquids to add depth and complexity.
Substituting Liquids
Instead of using water, try using apple cider, beer, or tea as the base for your brine. These liquids provide natural sugars, tannins, and acidity that further influence the texture and flavor of the protein.
Apple Cider:* Adds a subtle fruitiness and extra sugar for caramelization.
Beer:* Provides malty, earthy notes and mild acidity to tenderize.
Tea:* The tannins in black tea help to firm up the exterior of the meat, providing a wonderful textural contrast.
Adding Acid
While you should avoid strong acids like vinegar in a brine (as they will "cook" the outside of the meat prematurely), you can use mild acids like citrus slices or fruit juices. These help to brighten the flavor profile and assist in the breakdown of connective tissues. Just remember to limit the exposure time, as acid-heavy brines act much faster than standard saline solutions.
"Brining is not just a method; it is a philosophy of patience. By respecting the time required for osmotic equilibrium, you transform humble ingredients into a culinary experience that justifies the effort."
Conclusion
The science of brining is a testament to the fact that great cooking is a partnership between the chef and the chemistry of the food. It is a technique that demands preparation and forethought, but it rewards the home cook with a level of consistency that is otherwise difficult to achieve. By controlling the salt, managing the time, and respecting the temperature, you remove the guesswork from your kitchen and move closer to the precision found in the world’s best professional kitchens.
As you integrate these practices into your repertoire, remember that every piece of meat is unique. Some will be leaner, some will be tougher, and some will respond more aggressively to the brine. Start with the baseline ratios provided here, observe the results, and adjust your timing accordingly. Do not be afraid to experiment with new aromatics or different brine bases. Once you stop fearing the science and start embracing the process, you will find that "Blame The Chef" is a phrase you will no longer hear at your dinner table—unless, of course, they are complimenting you on how perfectly tender your roast turned out.
Keep your brine cold, your measurements precise, and your heat high during the finishing sear. Happy cooking, and may your meats always be juicy.
Final Thoughts
The journey to becoming a better cook is paved with small, iterative improvements. Brining is one of the most impactful "small" changes you can make. It transforms the structural integrity of your protein, ensuring that even a novice cook can produce results that rival the most seasoned professionals. We have covered the chemistry of osmosis, the importance of the Maillard reaction, and the tactical differences between wet and dry brining.
However, the final ingredient, as always, is your own palate. Use these guidelines as a framework, not a rigid set of laws. Taste your brine (before adding raw meat, of course), smell your aromatics, and adjust your process to suit your specific equipment and taste preferences. The science provides the roadmap, but you are the driver. With a bit of salt, a touch of sugar, and the patience to let the chemistry do its work, you have all the tools necessary to elevate your culinary game to the next level. Now, clear some space in your refrigerator, grab your salt, and get to work—your next perfectly brined meal is only a few hours away.
Get the Next Recipe
Weekly recipes, techniques, and gear picks — straight to your inbox.
