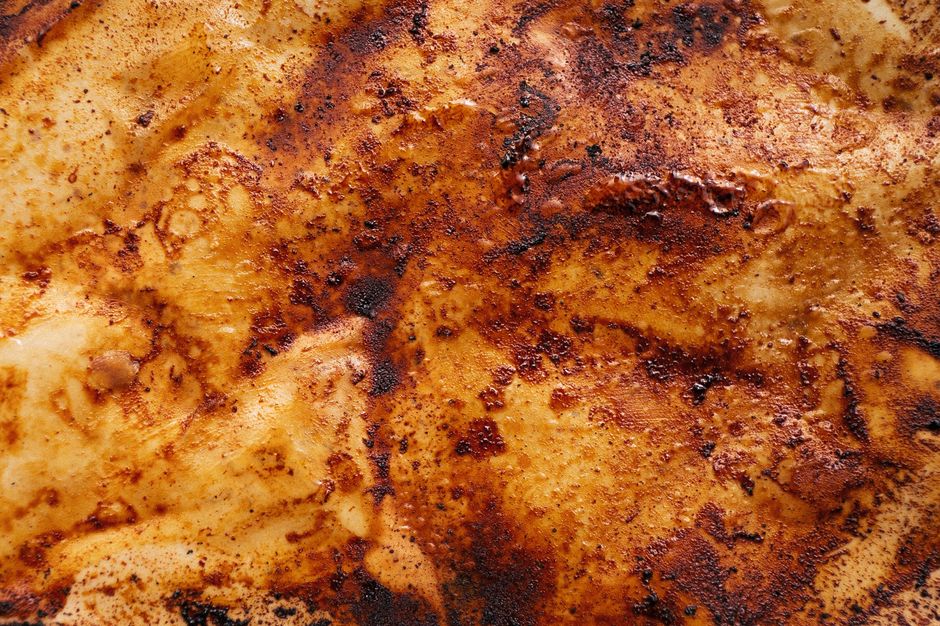
The Science of Caramelization: How Sugar Transforms Into Golden, Complex Flavor
Every home cook knows that moment of hesitation when a sugar syrup begins to darken in the pan. It is a threshold where the clear, sweet liquid transitions into something far more sophisticated, shifting from simple sugar to an amber-hued masterpiece of culinary chemistry. This is the art of caramelization, a fundamental process that separates the novice from the practiced chef, turning mundane ingredients into complex flavor profiles. Understanding what happens on a molecular level during this transformation does not just help you avoid burnt sugar; it empowers you to harness heat as a primary ingredient in your kitchen.
When we talk about the chemistry of the kitchen, we are often discussing heat-induced changes, but few are as profound or as sensory as caramelization. It is not merely a color change, but a series of non-enzymatic browning reactions that break down carbohydrates into hundreds of distinct flavor compounds. By manipulating time and temperature, you gain control over the depth of sweetness, the bitterness of the roast, and the overall aroma of your desserts, sauces, and roasted vegetables. This guide serves as your roadmap to mastering this delicate balance, ensuring that you can replicate that professional-grade depth in your own home with confidence.
Before diving into the technical specifications, it is important to discard the fear often associated with sugar work. Many cooks view the stove as an adversary, worried that a few seconds too long will result in an acrid, inedible mess. However, once you learn to recognize the visual cues, the scent profiles, and the tactile responses of the sugar, the process becomes an intuitive dance. We will explore the breakdown of sucrose, the role of moisture, and the precise techniques that professional chefs utilize to ensure consistency. Prepare to transform your culinary repertoire through the lens of science and precision.
The Chemistry Behind the Sweet Transformation
At its most basic level, caramelization is the oxidation of sugar. Unlike the Maillard reaction, which requires proteins (amino acids) and sugar, caramelization occurs when sugar is heated until it decomposes. As temperatures climb, the sucrose molecules undergo thermal decomposition, breaking apart into smaller glucose and fructose units. These units then reorganize, recombine, and dehydrate, creating entirely new chemical structures responsible for that iconic golden-brown color and the nutty, butterscotch-like flavor we crave.
The Phases of Heat
The process begins in earnest when temperatures reach approximately 320 degrees Fahrenheit (160 degrees Celsius). At this point, the water content has largely evaporated, and the sugar enters a molten state. As you continue to apply heat, the temperature of the sugar will rise above the boiling point of water, signaling that the structural integrity of the sucrose is failing. This is a critical stage because the energy from the stove is no longer being used to evaporate moisture but is instead fueling the chemical rearrangement of the sugar itself.
Caramelization is the alchemy of the kitchen; it is the moment where heat forces sugar to abandon its simple sweetness and embrace a complex, nuanced identity defined by bitterness and depth.
As the sugar continues to darken, the flavors evolve through a spectrum. In the early stages, the flavor is predominantly sweet and buttery. As the color deepens to a rich amber, you begin to detect notes of toasted nuts, toasted coconut, and eventually, a sharp, sophisticated bitterness that acts as a counterbalance to the inherent sugar content. Mastering this spectrum is how a chef controls the final profile of a sauce, a custard, or a brittle.
Essential Equipment and Safety Precautions
Working with hot sugar requires respect and the right tools. Because melted sugar acts much like napalm—clinging to surfaces and transferring extreme heat—safety is paramount. Never rush the process, and always have a bowl of ice-water nearby. While a heavy-bottomed stainless steel pan is ideal for its even heat distribution, it is also vital that the pan is clean. Any impurities, such as dust or remnants of soap, can cause the sugar to crystallize prematurely, creating a grainy texture rather than a smooth, silky liquid.
The Role of Temperature Control
Precision is your best friend. A digital infrared thermometer or a candy thermometer is not just a luxury; it is a necessity for the aspiring pastry chef. While you can often judge doneness by color, the temperature of the sugar determines its physical state once it cools. A light amber syrup will remain soft or chewy, while a dark, high-temperature cook will result in a hard, glass-like finish.
Stainless Steel Pan:* Choose one with a heavy base to prevent hot spots.
Silicone Spatula:* High-heat resistant and essential for folding the sugar as it melts.
Pastry Brush:* Used to wash down the sides of the pan with water to prevent crystallization.
Cold Water Bath:* Always keep a basin of ice water on standby to stop the cooking process immediately if the sugar reaches your desired color.
Always remember that the sugar will continue to cook from the residual heat of the pan even after you remove it from the burner. To stop the reaction, it is common practice to plunge the bottom of the pan into your cold water bath for just a second, or to immediately pour the sugar onto a silicone baking mat or into a prepared mold.
The Technique: Wet vs. Dry Caramelization
There are two primary methods for achieving caramelization, each serving a different purpose depending on the outcome you desire. Wet caramelization involves adding water to your sugar to help it dissolve evenly before the heat begins to break it down. This method is generally considered more beginner-friendly because it ensures that the sugar melts at a uniform rate, preventing localized burning while other sections of the sugar are still granular.
The Dry Method
Dry caramelization is the method preferred by many professional chefs for its intensity and control over flavor. In this approach, you add only sugar to the pan. You must be incredibly patient, sprinkling thin layers of sugar and letting them melt before adding more. This method requires constant vigilance and a gentle, swirling motion of the pan rather than heavy stirring, which can cause the sugar to clump up or "seize."
Step-by-Step for Dry Caramelization
The danger in the dry method is that the sugar at the bottom can darken significantly faster than the sugar on top. If you aren't attentive, you might find yourself with a mixture of burnt, carbonized bits and raw, un-melted sugar. Practice makes perfect here; start with small batches and observe how the heat conducts through the metal.
Managing Crystallization: The Pastry Chef's Secret
One of the most frustrating obstacles in sugar work is crystallization. This occurs when sucrose molecules in a concentrated syrup begin to bond together, forming small, gritty crystals rather than a smooth, molten liquid. It is a chain reaction: one stray crystal attaches to the side of the pan, and suddenly the entire batch turns into a sandy, cloudy mess. This is why you should never stir the sugar too aggressively once it has started to liquefy during a wet caramelization process.
Prevention Techniques
To prevent this, chefs often use invert sugars or acids to interfere with the crystallization process. Adding a small amount of lemon juice or cream of tartar introduces acidity, which helps break down the sucrose into glucose and fructose, effectively inhibiting the reformation of crystals. Furthermore, keeping the sides of the pan clean is vital.
The secret to a perfect caramel is not found in the stirring, but in the restraint. Once the sugar begins to dissolve, let the heat do the work and resist the urge to intervene.
If you are using the wet method, keep a pastry brush dipped in water by your side. As the water evaporates, sugar crystals will often form on the sides of the pan above the liquid line. Simply brush these crystals back into the molten sugar. This ensures that the only thing remaining in your pot is the smooth, liquid gold you are aiming for.
Beyond Sugar: Caramelization in Vegetables and Proteins
While we often associate caramelization with dessert, the process is a fundamental tool for savory cooking as well. Think of the deep, sweet, and complex flavors of caramelized onions. In this context, we aren't just melting sucrose; we are breaking down the complex carbohydrates and starches present in the vegetable. It is a slower process, often taking upwards of 45 minutes of gentle, low-heat cooking, but the result is a massive increase in flavor density.
The Science of Roasted Flavor
When you roast vegetables like carrots, parsnips, or beets, the high heat of the oven triggers a mix of caramelization and the Maillard reaction. This creates that characteristic dark, caramelized exterior that is significantly more flavorful than the steamed or boiled equivalent. The keys to success in savory caramelization are:
Surface Area:* Ensure vegetables are cut into uniform pieces so they cook evenly.
Fat Distribution:* Use a high-quality oil or fat, like butter or olive oil, to conduct heat evenly across the vegetable's surface.
Patience:* Don't crowd the pan. If vegetables are too close together, they will steam in their own moisture rather than browning.
When cooking proteins, the browning on the exterior of a steak or a pan-seared scallop is largely a product of the Maillard reaction, but the sugars naturally present in the protein (and often in a glaze or marinade) will caramelize as well. This creates a crust that is not only visually appealing but provides a foundational layer of flavor that carries the entire dish.
Mastering Complex Caramel-Based Sauces
Once you have mastered the base caramel, the world of sauce-making opens up. A caramel sauce is essentially a caramel that has been stabilized with a liquid, typically heavy cream or butter. The trick to adding liquid to molten sugar is understanding that the temperature difference is immense. When you pour cold cream into 350-degree sugar, the resulting steam can cause severe burns and, if done too quickly, can cause the sugar to harden into a solid lump.
The Emulsification Process
To create a smooth, luxurious sauce, add your liquid slowly in a thin, steady stream while whisking constantly. This emulsification is vital. By incorporating the liquid bit by bit, you prevent the sugar from seizing. Once the liquid is fully incorporated, return the sauce to a low heat to ensure that any remaining lumps are fully melted and integrated into a glossy, uniform sauce.
Salted Caramel:* Add high-quality sea salt at the end to balance the intense sweetness.
Compound Caramels:* Consider adding aromatics like vanilla bean, star anise, or even a hint of bourbon to deepen the profile.
Shelf Life:* Properly made caramel sauces can last for weeks in the refrigerator, making them an excellent component to keep on hand for elevating everything from morning coffee to late-night desserts.
Experimenting with different liquids—such as apple cider, orange juice, or even balsamic vinegar—allows you to create unique, chef-driven glazes for meats or desserts. The chemistry remains the same, but the resulting flavor profiles are limited only by your imagination and your willingness to experiment with balance.
Troubleshooting and Pro-Tips for Success
Every chef encounters a "seized" batch of sugar at some point. Perhaps the heat was too high, or a bit of stray crystal found its way into the pot. The most important tip is to know when to start over and when to save the batch. If the sugar has turned a dark, bitter brown and is smelling acrid, it has crossed into carbonization. There is no saving this; it is burnt, and the bitter flavor will ruin whatever you add it to.
Salvageable Errors
However, if the sugar has simply seized or become gritty, you can often save it. Add a small amount of water back into the pan and return it to very low heat. Stir gently as the water dissolves the clumps. While it might take a few extra minutes, you can often return the sugar to a smooth state without compromising the flavor. Just remember that adding water effectively resets the cooking process, so you will need to pay close attention to the color again.
Mastery is not the absence of mistakes, but the ability to recognize when the chemistry of your pan is trending away from your goal and having the technique to correct it before the product is lost.
Lastly, consider the color of your sugar as your primary indicator of ripeness. A pale, golden straw color is light and sweet; a deep, rich amber is complex and robust; and a dark, mahogany shade is bold, bitter, and intense. Professional chefs will often use a "swatch" technique, placing a small dot of the cooling caramel on a white plate to accurately gauge the color before the entire batch gets too dark. Never rely on the pan alone, as the color can be deceptive depending on the depth of the metal and the ambient lighting in your kitchen.
Conclusion
The science of caramelization is a testament to the idea that cooking is as much about physics and chemistry as it is about taste. By understanding the thresholds at which sucrose breaks down and reforms, you move from following a recipe to commanding a process. Whether you are creating a simple glaze for roasted carrots, a decadent topping for a flan, or a sophisticated base for a pastry cream, the principles remain the same: patience, heat management, and the careful observation of change.
As you continue to refine your skills, remember that this process is one of the most rewarding in the culinary arts. It forces you to be present, to engage with your ingredients, and to trust your senses. Do not be intimidated by the heat or the speed at which sugar can transform. Embrace the amber hue, the toasted aroma, and the depth of flavor that can only be achieved through controlled, precise caramelization. The "Blame The Chef" philosophy has always been about taking ownership of your kitchen, and by mastering this science, you are doing exactly that.
Your journey into the complexities of sugar work will undoubtedly lead to moments of failure, but these are essential lessons in the physics of the kitchen. Keep your pan clean, keep your thermometer handy, and never stop pushing the boundaries of what your ingredients can become. With each batch, you will notice subtle differences in color and flavor, teaching you the nuance that differentiates a home cook from a true culinary artist. Go forth, turn up the heat, and watch as simple, crystalline sugar transforms into the complex, golden essence of gourmet cooking. Happy cooking, and may your caramel always be perfectly golden.


Get the Next Recipe
Weekly recipes, techniques, and gear picks — straight to your inbox.
