The Science of Gluten Development: How Protein Networks Create Bread Structure and Pasta Texture
For as long as humans have been baking, bread has been a source of both sustenance and mystery. We often speak of the "magic" of a sourdough starter or the "alchemy" of turning flour and water into a crusty, airy loaf, but in reality, there is very little magic involved. At its core, bread-making is a rigorous exercise in food chemistry, specifically the manipulation of protein networks. To understand why a baguette has a shattering crust and an airy crumb while a bowl of tagliatelle offers a firm, satisfying "al dente" bite, one must look deep into the microscopic structures formed when wheat flour meets moisture. As home cooks, we often follow recipes blindly, but by grasping the fundamental science of how these proteins behave, you gain the freedom to troubleshoot any dough that crosses your counter.
When we talk about the structure of your favorite bakes, we are talking about gluten. Contrary to common belief, gluten does not exist as a pre-formed substance inside a bag of flour. Instead, it is an emergent property—a complex, elastic web created only when two specific proteins, gliadin and glutenin, are hydrated and physically agitated. Gliadin provides the extensibility, that characteristic "stretch" that allows a dough to expand under the pressure of fermenting gases. Glutenin, on the other hand, provides the elasticity and strength, acting like microscopic rubber bands that snap the dough back into shape. Mastering this balance is the difference between a loaf that holds its structure and a sad, dense disc of under-leavened sadness.
In this deep dive, we are going to peel back the curtain on the kneading process, the autolyse technique, and the critical role of hydration levels. We will explore how temperature influences the rate of enzymatic activity and why your choice of flour—whether it’s a high-protein bread flour or a low-protein cake flour—radically alters the potential for structure. By the end of this post, you will no longer be blaming the chef, the humidity, or the phase of the moon for your flat loaves. You will have the technical knowledge to diagnose your dough’s behavior in real-time, allowing you to adjust your technique for the perfect result every single time you fire up the oven.
The Foundations of Flour: Protein Content and Quality
The journey toward a perfect crumb begins long before the first fold. Not all flour is created equal, and the protein content of your wheat is the primary indicator of its potential for structure. In the world of professional baking, we look for two specific proteins: gliadin and glutenin. When you add water to flour, these proteins absorb the moisture and begin to uncoil from their dormant state. Once they are sufficiently hydrated, they begin to bond with one another, forming the complex molecular matrix we call gluten.
If you are aiming for a high-tension bread like a sourdough boule or a chewy ciabatta, you need a flour with a protein content between 12% and 14%. Lower-protein flours, like cake or pastry flour, have a protein count of 7% to 9%, which is ideal for biscuits or pie crusts where we actually want to limit gluten development to keep the texture tender. For pasta, however, we often seek a hybrid approach, using "00" flour, which is milled very finely to ensure that the protein creates a smooth, workable sheet that holds its shape during the boiling process without turning to mush.
Understanding the Wheat Kernel
To better manage your results, visualize the wheat kernel. The endosperm is the starchy heart of the kernel and is where your gluten-forming proteins live. When the miller grinds the grain, the efficiency of that process impacts how well those proteins perform. Hard red spring wheat is the gold standard for bread because it contains a higher percentage of these robust proteins. When purchasing your supplies, check the nutritional label—aiming for 12g of protein per 100g of flour is a great rule of thumb for almost all professional-grade loaves.
"Gluten is not a physical ingredient you add to a bowl; it is a structural miracle that occurs when chemistry meets movement. If you respect the proteins, the dough will respect your ambitions."
The Autolyse Technique: Giving Your Dough a Head Start
One of the most transformative techniques you can adopt in your kitchen is the autolyse. This simple step involves mixing only your flour and water together, then letting the mixture sit for 30 to 60 minutes before adding salt or yeast. By delaying the addition of salt, which acts as a gluten tightener, you allow the flour to fully hydrate and the proteins to begin their natural reorganization process without resistance.
During this rest period, an enzyme called protease begins to break down some of the glutenin bonds, making the dough more extensible and easier to work with. It essentially does the "heavy lifting" for you, reducing the amount of manual kneading required later. You will notice that after an autolyse, the dough feels significantly more supple and less prone to tearing. It is the secret weapon of professional bakers who need to maintain a consistent output without overworking their arms.
Timing and Temperature for Optimal Hydration
For a proper autolyse, water temperature is critical. If your kitchen is cold, use slightly warmer water (around 75°F or 24°C) to encourage enzyme activity. If the room is warm, use cool water to prevent the yeast—which you’ll add later—from waking up too quickly. Do not rush this step. The autolyse is a passive, patient process. It creates a baseline of strength that makes the subsequent mixing and folding phases much more effective and, frankly, much less frustrating.
The Physics of Kneading: Building the Network
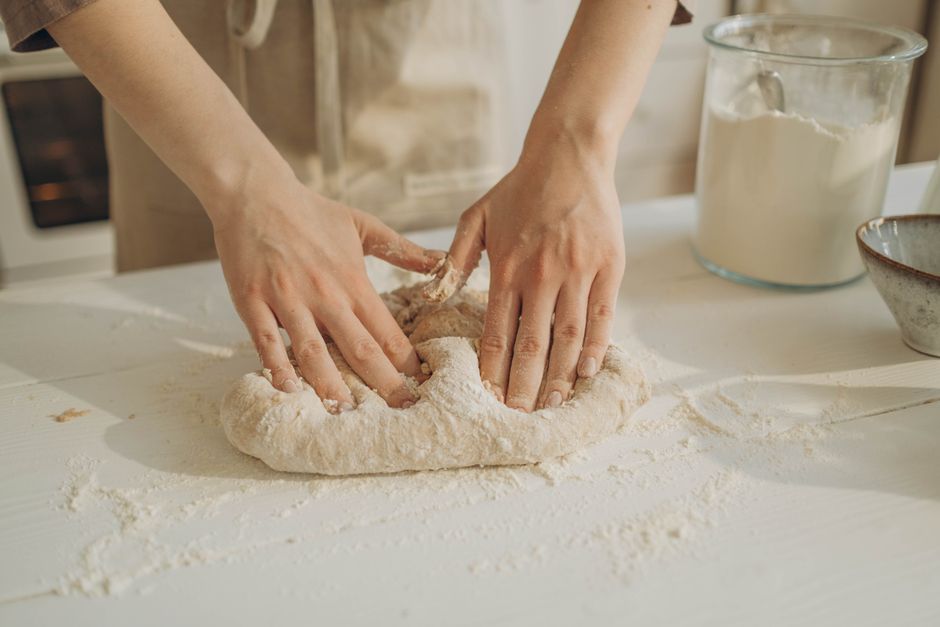
Kneading is the mechanical process of stretching and folding the dough to align the gluten proteins. While machines make this easy, manual kneading provides a tactile feedback loop that is essential for learning. When you push the heel of your hand into the dough and fold it back, you are physically forcing those protein strands to align and cross-link. This is how you transition from a shaggy, disorganized mass to a smooth, cohesive ball of dough that exhibits elasticity.
There is a point of diminishing returns, however. It is possible to over-knead dough, causing the gluten structure to lose its integrity and become brittle. A properly kneaded dough should be smooth to the touch, slightly tacky but not sticking to your hands, and able to pass the windowpane test. To perform this test, take a small marble-sized piece of dough and gently stretch it between your fingers. If you can stretch it until it is thin enough to let light through without it snapping, you have achieved a fully developed gluten network.
Mixing Techniques for Success
Hydration Ratios: How Water Controls Texture
The baker's percentage is the language of the professional bakery, and hydration is its most important variable. Hydration is simply the ratio of water to flour by weight. A 70% hydration dough—meaning for every 1,000 grams of flour, you use 700 grams of water—will behave very differently than a 60% hydration dough. Higher hydration yields a more open, airy crumb because the extra water turns to steam, creating larger pockets during the baking process.
However, high hydration also makes the dough much stickier and harder to handle. This is where your technique must evolve. Instead of traditional aggressive kneading, high-hydration doughs respond better to stretch-and-fold cycles. By gently stretching the dough and folding it over itself at 30-minute intervals, you build the network incrementally without needing to handle the sticky mass on a floured surface.
Adapting to Humidity and Environment
Always remember that your environment changes the outcome. In high-humidity climates, your flour will already contain some moisture from the air, meaning your dough might feel "wetter" than the recipe suggests. Always hold back about 5% of your water when starting a new recipe. You can always add more water, but you can never take it back out. Monitoring your dough's feel as you mix is the mark of a chef who understands the science, rather than one who blindly follows a list.
"Water is the lubricant of the gluten network. Without enough, the strands are too stiff to move; with too much, they lose their grip. Finding the sweet spot in your specific kitchen is the true craft of the baker."
Salt, Yeast, and the Chemistry of Control
While gluten is the structure, salt and yeast are the governors. Salt does more than just enhance flavor; it is a critical chemical agent that tightens the gluten structure and regulates fermentation. Without salt, dough becomes sticky, unmanageable, and over-proofs in a chaotic, rapid burst. It acts as a shield, preventing the yeast from consuming the sugars too quickly and ensuring a steady, reliable rise.
Yeast, whether it is a commercial instant variety or a wild sourdough culture, is responsible for the gas production that pushes against the gluten network. As the yeast consumes sugars, it releases carbon dioxide. The gluten network traps these bubbles, inflating like millions of tiny balloons. If your gluten network is weak, those balloons will pop, resulting in a flat loaf. If it is too strong, it will resist expansion, resulting in a dense, tight crumb.
The Balancing Act
Temperature Control:* Yeast thrives between 75°F and 85°F. Keep your dough in this range to ensure a consistent, predictable rise.
Fermentation Times:* A longer, slower fermentation (often called cold proofing in the refrigerator) allows for more flavor development through enzymatic breakdown and makes the gluten more extensible.
Salt Management:* Always add salt after the initial autolyse to prevent it from interfering with the early development of the gluten matrix.
Troubleshooting Your Dough: Diagnosing the Crumb
When your loaf comes out of the oven, it provides you with a post-mortem report on your technique. A "gummy" interior, where the crumb feels wet and dense, is often a sign of under-baking or cutting into the bread while it is still hot. You must allow the bread to cool completely—ideally for at least two hours—to allow the internal starches to set and the moisture to redistribute.
If the holes in your bread are uneven, with large caverns at the top and density at the bottom, your bulk fermentation might have been insufficient, or your dough was handled too roughly during the final shaping. Shaping is the final stage of building structure. By creating tension on the outer skin of your dough, you guide the gases to expand upward rather than outward. Think of it as wrapping a present; you want the surface to be taut and smooth.
Common Issues and Solutions
The Dough Won't Stretch:* This is "gluten lock." You over-kneaded or the dough is too cold. Let it rest in a warm spot for 30 minutes to relax.
The Dough Feels Like Soup:* Your hydration might be too high for the protein content of your flour. Add 1-2 tablespoons of flour at a time until you reach a workable consistency.
The Bread is Flat:* Either the gluten structure was never developed, or the bread was over-proofed and the yeast ran out of "gas" before it hit the oven.
Advanced Pasta Science: The Texture of Al Dente
Everything we have discussed regarding gluten applies to pasta, but with one key difference: we want a "tougher" gluten network to ensure the pasta holds up against boiling water. Pasta dough is typically much lower in hydration (around 40% to 50%) than bread dough. This results in a much stiffer, more concentrated protein network. When you roll pasta thin, you are physically stretching those gluten bonds into long, linear strands.
This is why resting pasta dough is non-negotiable. After mixing and kneading, the gluten is incredibly tense and will snap back if you try to roll it immediately. By letting the dough rest, wrapped in plastic, for at least 30 minutes, you allow the gluten to relax. This makes it possible to roll the pasta paper-thin without it fighting back or tearing. The result, when boiled, is a perfect, resilient bite that captures sauces beautifully.
The Role of Eggs
In many pasta traditions, particularly in Northern Italy, eggs are used as the primary liquid. The fats in the yolks coat the flour proteins, which provides a more tender texture and a richer flavor, while the proteins in the egg whites provide additional structure. It is the ultimate marriage of flavor and structural engineering. Whether you are making pappardelle or tortellini, remember that the egg-to-flour ratio is the blueprint for your finished dish.
Final Thoughts
The mastery of bread and pasta is not found in a secret family recipe or a specific brand of flour, but in the persistent application of these scientific principles. When you understand that kneading is alignment, that autolyse is enzyme management, and that hydration is the primary driver of structure, you cease to be a passive follower of instructions. You become an architect of dough. You begin to look at a bag of flour not just as a pantry staple, but as a potential matrix of protein just waiting for the right conditions to form something extraordinary.
As you move forward, I encourage you to experiment. Keep a journal of your bakes. Note the temperature of your water, the length of your autolyse, and the humidity of the room. When a loaf fails, don't blame the oven or the flour; look at your network. Was the gluten properly developed? Did the yeast have the time it needed? Was the dough handled with the tension required to hold its shape? By asking these questions, you transition from a home cook to a true artisan.
Remember that failure is merely data. Every flat loaf, every gummy batch of pasta, and every over-proofed dough is a lesson in how these proteins react to their environment. Do not be discouraged by the variables—embrace them. The science of gluten development is a lifelong study, and there is always another crust to perfect, another crumb to open, and another texture to refine. Take your time, trust the process, and above all, keep your hands in the dough. That is where the magic—the real, verifiable, scientific magic—truly lives. You are the architect of your kitchen, and with this knowledge, you are ready to build a foundation that will support the most incredible bakes of your life. The next time you find yourself staring at a bowl of shaggy, unformed dough, remember the chemistry at work. Harness the proteins, respect the balance, and watch as your simple ingredients transform into the structure you desire. This is the chef’s way, and now, it is yours.
***
Quick Reference Guide for the Home Baker:
By adhering to these principles, you strip away the anxiety that comes with baking. You replace "hoping it works" with "knowing why it works." Whether it is a dense, earthy rye or a delicate, golden sheet of lasagna, your grasp of the gluten network will ensure that your results are always consistent, delicious, and structurally sound. Go forth, keep baking, and may your crusts always crackle and your pasta always bite back. Your journey into the science of dough is just beginning, and there is no limit to what you can achieve once you understand the building blocks of the culinary world.
One final piece of advice: invest in a digital scale. Precision is the best friend of a scientist, and since baking is chemistry, measuring your ingredients by weight rather than volume is the single most important habit you can cultivate. Grams are universal, reliable, and entirely unforgiving of guesswork. When you stop measuring by the cup and start measuring by the gram, you remove the largest variable in your kitchen, allowing the science of protein networks to operate exactly as it should. Your bakes will immediately improve, and you will find that the consistency you have been craving was only a few grams away all along. Enjoy the process, and may your kitchen always smell of freshly baked bread.
In closing, the science of gluten is a beautiful intersection of biological necessity and human ingenuity. It is an ancient technology that we are still refining in our modern kitchens every single day. By understanding the interplay of gliadin and glutenin, the mechanical forces of kneading, and the environmental impacts of humidity and temperature, you are participating in a tradition that spans thousands of years. You have the tools, you have the knowledge, and now you have the authority to create masterpieces. Go create them. The science is on your side, and the results are on your table. Everything else is just a matter of practice, patience, and a little bit of flour on your apron. Happy baking, and don't blame the chef—blame the chemistry.
Get the Next Recipe
Weekly recipes, techniques, and gear picks — straight to your inbox.
