The Science of Gluten: How Protein Networks Give Bread Its Structure
Baking is often described as a form of chemistry, yet for the home cook, it frequently feels more like an act of faith. You mix flour, water, salt, and yeast, hoping that the alchemy of the oven will transform these humble ingredients into a crusty, airy loaf of artisan bread. The secret to this transformation isn't just luck; it is a sophisticated, invisible architecture constructed at the molecular level. When you understand how the proteins in wheat interact, you move from merely following a recipe to mastering the physical properties of your dough. Every fold, knead, and proofing stage is an intentional move to manipulate these biological building blocks.
At the heart of every successful loaf lies the protein network known as gluten. Many people treat gluten as a mystical substance, but it is actually a complex web formed by two specific proteins: gliadin and glutenin. When flour is hydrated, these two proteins begin to bond, creating an elastic matrix capable of trapping the carbon dioxide produced by yeast. Without this structure, the gas would simply escape, leaving you with a dense, flat cracker instead of a lofty crumb. By learning how to control this network, you gain the ability to dictate the texture, crumb structure, and overall quality of your bread.
This post is designed for those who have moved past the initial intimidation of bread baking and are ready to peel back the curtain on the science behind the crust. We will explore the mechanics of protein development, the impact of hydration levels, and how temperature fluctuations dictate the pace of fermentation. We will look at how your mixing technique—whether you prefer the traditional bulk fermentation approach or the increasingly popular no-knead methods—influences the final outcome. Grab your apron and your digital scale; it is time to stop blaming the chef and start understanding the dough.
The Molecular Building Blocks of Bread
To truly grasp how bread gains its structure, we must look at the flour under a metaphorical microscope. Wheat flour is not just starch; it is a carefully calibrated balance of proteins that serve as the foundation of your dough. When dry flour meets water, the gliadin and glutenin proteins begin their dance. Gliadin provides the extensibility—the ability of the dough to stretch without snapping back—while glutenin provides the elasticity, the characteristic "bounce" that pulls the dough back into shape.
The Importance of Protein Content
Professional bakers often look for specific protein percentages in their flour, usually ranging between 11% and 13% for standard loaves. A high-protein flour, often labeled as bread flour, is ideal for loaves that require a strong, supportive structure, such as bagels or rustic sourdoughs. Conversely, lower-protein pastry flours produce a delicate, crumbly texture because they lack the capacity to form an extensive, high-tension network.
The Role of Hydration
Hydration is the ratio of water to flour, calculated by weight, which is the only accurate way to measure ingredients in a professional kitchen. A baker’s percentage of 70% hydration, for example, means using 700 grams of water for every 1000 grams of flour. Higher hydration doughs have more "mobility," meaning the proteins can align more easily, but they require more skill to handle. Lower hydration doughs are stiff, creating a tighter crumb that is easier for beginners to shape and score.
The secret of a great baker is not in the strength of their hands, but in their ability to let time do the work of the protein network development.
The Mechanics of Mixing and Development
The physical act of mixing is the catalyst that kicks off the development of the gluten matrix. When you knead, you are essentially aligning the glutenin strands into long, organized chains. This is a delicate balance; over-kneading can actually begin to degrade the structure, while under-kneading leaves the dough unable to hold its shape. Modern bakers often favor the autolyse technique—a method where you mix only the flour and water and let it rest for 20 to 60 minutes before adding salt or leavening.
The Autolyse Technique
By allowing the flour and water to sit, the enzymes naturally present in the flour begin to break down the starches into sugars, and the proteins begin to hydrate fully. This process makes the dough more extensible, meaning it will expand much more easily during the final bake. It reduces the amount of physical labor required because the gluten structure begins to form organically, without constant friction.
Kneading vs. Folding
While traditional kneading involves high-energy pushing and folding, many artisan bakers now utilize a series of stretch and folds. By performing these at 30-minute intervals during the first two hours of bulk fermentation, you strengthen the gluten network gently. This method preserves the delicate gas bubbles produced by the yeast, resulting in a more open, airy crumb—the hallmark of a high-quality loaf.
* Step 1: Hydrate the flour for 30 minutes (autolyse).
* Step 2: Incorporate the salt and starter, mixing thoroughly.
* Step 3: Perform 4 sets of stretch and folds spaced 30 minutes apart.
* Step 4: Allow the dough to rest undisturbed for the remainder of bulk fermentation.
Fermentation: The Invisible Architect
Fermentation is the process of yeast consuming sugars and releasing carbon dioxide and alcohol. However, it is also a period of intense structural development. As the gas bubbles grow, they press against the gluten walls, stretching the protein chains like a balloon. If the network is strong enough, it will hold this pressure. If the gluten is weak, the dough will collapse, a failure often mistakenly blamed on the temperature of the oven or the brand of flour.
Temperature and Time
Yeast activity is highly dependent on ambient temperature. In a warm kitchen, your dough might complete its bulk fermentation in three hours. In a cool environment, it might take six. The goal is to reach the right "volume," not just the right time. Most artisan loaves benefit from a cold proof—a long, slow fermentation in the refrigerator—which enhances the flavor profile through the production of organic acids while strengthening the gluten network.
Monitoring Development
How do you know when your dough is properly fermented? It should increase in volume by approximately 50% to 75% for most sourdough recipes. It should also pass the poke test: if you gently press your finger into the dough, the indentation should slowly spring back but leave a small, soft dimple. If it springs back instantly, it needs more time. If it collapses, it has been over-proofed and the gluten network has been compromised by the weight of the gas.
"A loaf of bread is simply a memory of the fermentation process, trapped in a delicate shell of baked protein and starch."
Shaping and Tension: The Final Structure
Once fermentation is complete, you are left with a bubbly, fragile mass. The goal of shaping is to create surface tension, a tight "skin" around the dough that will encourage the loaf to rise upward in the oven rather than spreading outward. This is where many home cooks fail. If the surface isn't taut, the loaf will sag, even if the interior gluten network is perfect.
The Pre-shape
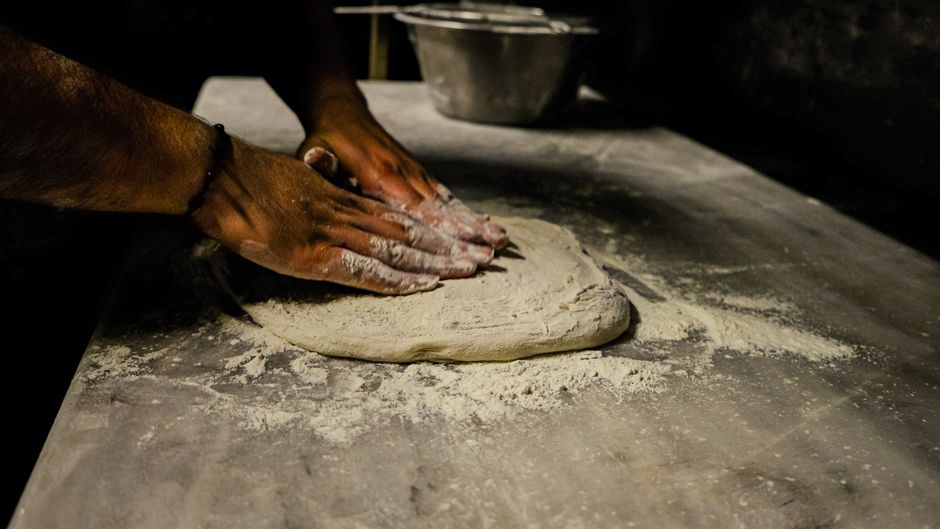
Before the final shaping, perform a pre-shape. Gently turn the dough out onto a lightly floured surface and fold it into a loose round. Let it rest for 20 minutes under a cloth. This relaxes the gluten, making the final shaping much easier. It allows the dough to retain its structure without feeling like it is "fighting back" against your hands.
Creating the Final Skin
For a boule or batard, use your bench scraper to gently pull the dough across the counter, creating friction. This motion tightens the outer layer of the dough. The goal is to maximize the tension of the outer membrane. A well-shaped loaf will feel firm and springy, holding its rounded shape perfectly on the work surface. Do not over-handle at this stage; you want to keep as many of those internal gas bubbles as possible.
The Physics of the Oven Spring
The moment the dough hits the hot stone, the final phase of structure building begins: the oven spring. As the dough temperature rises, the yeast experiences a final, frantic burst of activity before the heat kills it. Simultaneously, the carbon dioxide bubbles trapped in the gluten network expand rapidly. This happens within the first 10 to 15 minutes of the bake.
The Importance of Steam
Steam is arguably the most important element of the early bake. By introducing steam—either through a Dutch oven, a commercial steam-injected oven, or a simple pan of boiling water—you keep the crust soft for those first few minutes. If the crust dries out too quickly, it becomes rigid and prevents the loaf from expanding, leading to a restricted, stunted rise.
Scoring for Direction
Scoring, or slashing the dough, is not just for aesthetics. It provides a deliberate point of weakness in the crust, allowing the dough to expand in a controlled manner. A deep, angled score encourages the dough to "bloom" or "ear," showing that the internal pressure has been expertly directed. Without a score, the loaf will tear at its weakest point, often resulting in a messy, unpredictable finish.
* Preheat your oven to 475°F (245°C) for at least one hour.
* Place your dutch oven inside to get it blazing hot.
* Score the dough at a 45-degree angle.
* Bake covered for 20 minutes to trap steam.
* Remove the lid and bake for 20-25 minutes to develop a dark, flavorful crust.
Managing Common Failure Points
Even with the best science, mistakes happen. Understanding why they happen is the mark of a pro. A common issue is a "gummy" interior, which usually occurs when the bread is cut too soon. The structure of bread is still "setting" as it cools, and cutting into a hot loaf releases the moisture that is meant to stabilize the crumb. Always wait at least one hour before slicing.
Understanding Over-Fermentation
If your dough feels like a slack, soupy mess, you have likely over-fermented. When the yeast consumes all the available sugars, the acid levels rise to a point where they begin to degrade the gluten structure. This results in a pancake-like loaf that is difficult to score and lacks any significant rise. If you catch this early, you can try to salvage it by shaping it into a smaller, tighter boule, but sometimes it is best to treat it as focaccia dough and bake it in a pan.
The Problem of Under-Fermentation
Under-fermentation, conversely, results in large, cavernous bubbles near the top of the loaf with a dense, heavy layer at the bottom. This is often called "tunneling." It happens when the yeast hasn't had enough time to produce enough carbon dioxide to aerate the entire dough mass. Ensure you are tracking your dough's temperature—an ambient temperature of 75°F (24°C) is ideal for most sourdough.
Bread structure is a dialogue between the yeast, the proteins, and the baker; if you stop listening to the dough, you lose the conversation.
Advanced Flour Additions and Effects
While we have focused on standard wheat bread, it is worth discussing how "impurities" affect your gluten network. Ingredients like fats, sugars, and whole grains all interact with the proteins in unique ways. Fat, such as butter or oil, coats the protein strands, effectively "shortening" the gluten network. This is why brioche is tender and soft rather than chewy and crusty.
Working with Whole Grains
Whole wheat flour contains the bran and germ of the wheat kernel. These components are sharp and abrasive; they essentially "cut" through the gluten strands as the dough expands. If you are baking a 100% whole wheat loaf, you must be much gentler with your handling. Many bakers find success by soaking their whole wheat flour (the "soaker" method) before mixing, which softens the bran and allows for better structural integrity.
The Role of Enzymes
Sometimes, your flour might need a boost. Commercial bakers often use malted barley flour, which contains amylase enzymes that help break down complex starches into simpler sugars for the yeast. If your bread seems to lack "energy" or volume despite good fermentation, a tiny pinch of diastatic malt powder can dramatically improve the enzyme activity in your dough.
The Art of the Crumb Structure
The "open crumb"—that beautiful, lace-like interior with large, irregular holes—is the holy grail for many home bakers. Achieving this requires a precise balance of high hydration (usually 75% or higher), gentle handling to preserve the gas, and a strong flour that can support the large bubbles. It is an exercise in restraint; the more you touch the dough, the more you collapse the very structure you are trying to build.
Preserving Gas Bubbles
When turning your dough out for final shaping, treat it as if it were made of glass. Use a light touch. If you feel a large gas bubble, try to guide it into the center of the loaf rather than popping it. These large bubbles (the alveoli) are the pockets where the structure is most stretched, and they are what provide that delightful, light texture that distinguishes artisan bread from supermarket loaves.
The Cooling Phase
After the oven, the loaf must cool on a rack with airflow on all sides. As the loaf cools, the moisture inside redistributes. The crust softens slightly, and the crumb sets into its final texture. Never leave a cooling loaf on a flat surface, as the steam will become trapped underneath, leading to a soggy, ruined bottom crust.
Final Thoughts
Mastering the science of gluten is a journey that lasts a lifetime. You will encounter days where the dough behaves perfectly and days where it seems to have a mind of its own. By focusing on the fundamentals—the hydration ratios, the temperature of your fermentation, the tension of your shaping, and the intensity of your steam—you will find that you are no longer just a home cook following a recipe. You are an engineer of biological networks, a creator of crust and crumb.
The "Blame the Chef" mentality is a tool to encourage accountability, but the real magic happens when you stop blaming and start observing. Every loaf is a data point. When a loaf comes out dense, don't just eat it and move on; analyze the crumb. Was the fermentation too short? Was the hydration too low? Did the dough have enough tension? When a loaf comes out perfect, analyze that too. What changed in your environment or your technique that led to that success?
Bread is one of the oldest human technologies, and it remains one of the most rewarding. It connects us to the earth through the grain, to history through the yeast, and to our own senses through the smell and taste of a freshly baked loaf. As you continue to practice, remember that the gluten network is a living, breathing thing. It responds to your touch, your patience, and your knowledge. Keep your kitchen warm, keep your scale accurate, and most importantly, keep your hands in the dough. You are building more than just a loaf of bread; you are building a craft that will serve you for years to come. Happy baking.




Get the Next Recipe
Weekly recipes, techniques, and gear picks — straight to your inbox.
