The Science of Maillard Reaction: Why Your Sear Matters
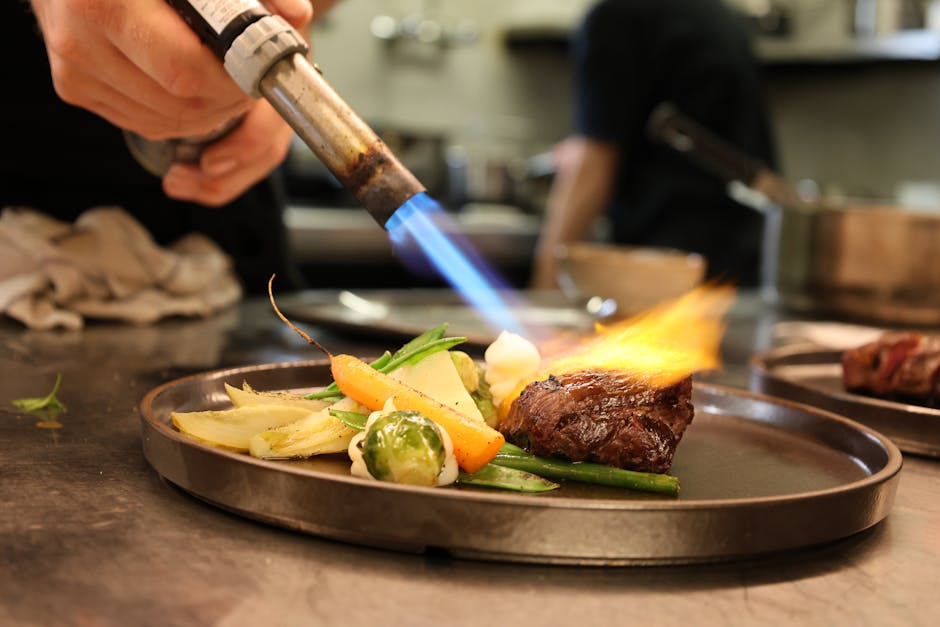
The quest for the perfect sear is the fundamental bridge between a home cook and a seasoned professional. You have likely stood over a hot pan, watching a steak turn from a pale, uninspiring grey to a deep, mahogany brown, feeling that slight surge of kitchen-conqueror adrenaline. This transformation is not mere luck; it is a complex, high-heat chemical ballet known as the Maillard reaction. While many people confuse this phenomenon with caramelization, they are distinct processes, and understanding the nuance of the former is exactly what will turn your Sunday roast into a restaurant-quality centerpiece. By learning to harness these chemical bonds, you can unlock layers of flavor that are otherwise locked away in the cellular structure of your proteins.
To master this technique, one must first respect the constraints of the pan and the chemistry of the ingredients. The Maillard reaction is a non-enzymatic browning process that occurs when amino acids and reducing sugars are exposed to high heat, typically between 285 degrees Fahrenheit (140 degrees Celsius) and 330 degrees Fahrenheit (165 degrees Celsius). Below these temperatures, your protein will steam in its own juices, leading to that dreaded rubbery texture we all strive to avoid. Above these temperatures, you risk burning the proteins, resulting in acrid, bitter compounds that ruin the palate. It is a tightrope walk of thermal energy, requiring patience, the right equipment, and a fundamental shift in how you view the surface of your ingredients.
Beyond the science, the sear is an exercise in sensory awareness that demands your full attention. It is about listening for the aggressive, sharp sizzle of moisture hitting hot oil and watching the color shift from pale pink to a rich, toasted brown. You must learn to trust your eyes over the ticking clock, understanding that every piece of meat, vegetable, or protein has a unique moisture content and thickness that dictates the duration of the sear. Once you internalize these principles, the kitchen ceases to be a place of guessing and becomes a laboratory of consistent, flavorful results. Let us peel back the layers of this culinary mystery and equip you with the technical precision required to sear with confidence every single time.
The Chemistry of Browning
At the molecular level, the Maillard reaction is a masterpiece of organic chemistry. When you apply heat to meat, the proteins begin to denature, unfurling like tiny ribbons, which allows the amino acids to react with the carbonyl groups of the reducing sugars. This reaction produces hundreds of different flavor compounds, including pyrazines, pyrroles, and furans, which are responsible for the complex, savory, and "toasted" aromas we associate with grilled or seared foods. Without this reaction, our food would be largely one-dimensional, lacking the depth that defines great cooking.
Why Moisture is the Enemy
One of the most common mistakes home cooks make is overcrowding the pan or failing to pat their proteins dry. Water boils at 212 degrees Fahrenheit (100 degrees Celsius). As long as there is significant surface moisture present, the temperature of the protein surface cannot rise above that boiling point. Because the Maillard reaction requires higher temperatures, any liquid on the surface of your ingredient must evaporate first. This is why a wet steak will turn grey before it turns brown; it is essentially poaching in its own juices.
The secret to a perfect crust is not just the heat of the pan, but the dryness of the surface; moisture is the invisible barrier standing between you and a deep, complex flavor profile.
Sugar and Amino Acid Synergy
It is not just about heat; it is about the composition of the food you are cooking. Meat is abundant in amino acids, making it the perfect candidate for a sear. However, you can also induce this reaction in vegetables, provided they contain enough natural sugars. When you sear an onion or a mushroom, the Maillard reaction interacts with the natural carbohydrates, creating a sweet and savory contrast that is impossible to achieve through boiling or steaming. This is why a perfectly seared portobello mushroom tastes infinitely more "meaty" than one that has been tossed into a soup.
Essential Equipment for the Sear
You do not need a commercial kitchen to achieve a professional sear, but you do need the right tools. The vessel you choose determines how well heat is distributed and retained. Thin aluminum pans are generally inadequate for high-heat searing because they lose their temperature the moment you add a cold protein to the surface, causing the temperature to drop below the threshold required for the Maillard reaction.
The Case for Cast Iron and Carbon Steel
For the home cook, cast iron or carbon steel is the gold standard. Both materials possess excellent heat retention, meaning they act as thermal batteries. Once they are hot, they stay hot, even when a cold piece of protein hits the surface. A seasoned cast iron skillet provides a naturally non-stick surface that improves with age, while carbon steel offers a similar performance with a lighter weight, making it easier to maneuver for tasks like basting.
Managing Heat Conductivity
Avoid using non-stick pans for high-heat searing. Most non-stick coatings are designed to withstand temperatures up to 500 degrees Fahrenheit, but they are often bonded to aluminum, which lacks the heat capacity required for a hard, dark sear. Furthermore, non-stick pans are often thinner, leading to hot spots that can result in uneven browning. Stick to heavy-bottomed stainless steel, cast iron, or carbon steel for your searing needs to ensure an even, beautiful crust across the entire surface of the pan.
Preparation: The Art of the Setup
Before you even turn on the burner, your protein must be ready. This starts with tempering—the process of bringing your meat from the refrigerator to room temperature. A cold steak placed in a scorching hot pan will create a significant temperature gradient, where the exterior burns before the interior reaches the desired temperature. By letting the meat sit out for 30 to 45 minutes, you reduce the shock to the pan and allow for a more even cook from edge to center.
Drying the Surface
Use a clean paper towel to pat your protein until it is bone-dry. Do not skip this step. Even a thin film of moisture acts as an insulator, preventing the heat from making direct contact with the muscle fibers. Many professional chefs even go a step further, leaving the protein uncovered in the refrigerator on a wire rack for several hours or overnight to allow the surface to dehydrate slightly, which results in an even more explosive sear.
The Role of Salt and Seasoning
There is a long-standing debate about when to salt your protein. For the best sear, apply kosher salt liberally to the surface at least 20 minutes before cooking. This triggers a process called osmosis, where the salt draws moisture out of the meat. If you wait long enough, that moisture will reabsorb back into the meat, seasoned from the inside out, while leaving the surface perfectly prepared for a sear. If you salt immediately before placing it in the pan, you introduce surface moisture just as you begin, which is counterproductive.
The Technique: Mastering the Pan
Once your pan is smoking, it is time for the sear. The choice of oil is critical. You must use an oil with a high smoke point, such as avocado oil, grapeseed oil, or refined coconut oil. Extra virgin olive oil, while delicious, has a lower smoke point and will turn bitter and acrid if subjected to the high temperatures needed for a professional crust. Add the oil to the pan and let it shimmer—but not quite smoke—before gently laying your protein into the pan away from you to avoid oil splatters.
The Importance of the "Don't Touch" Rule
Once the meat is in the pan, resist the urge to move it. This is the most common mistake made by novices. When the protein first hits the pan, it will naturally stick; this is simply the proteins bonding with the metal. As the Maillard reaction occurs and the crust forms, the proteins will naturally release from the surface of the pan. If you flip the meat too early, you tear the crust away and lose that beautiful, flavor-packed exterior. Wait until you see the edges begin to brown and the meat lifts easily with a pair of tongs.
Patience is an ingredient. The crust needs time to develop, and constant poking will only lead to an uneven, steamed texture rather than a crisp, brown sear.
Basting for Flavor
In the final minutes of cooking, many chefs utilize a technique called arroser, or pan-basting. Add a knob of unsalted butter, a few cloves of smashed garlic, and fresh herbs like thyme or rosemary to the pan. Tip the pan slightly and use a large spoon to continuously pour the foaming, nut-brown butter over the meat. This not only infuses the steak with flavor but also uses the fat to bridge any gaps in the crust, ensuring an even, gilded finish across the entire surface.
Troubleshooting Common Issues
Even with the best intentions, things can go wrong. If you find that your crust is burnt while the inside is still raw, your heat is likely too high. While searing requires high heat, it must be managed. If you are cooking a thick-cut steak, you may need to initiate the sear at a high temperature, then move the pan to a preheated oven at 350 degrees Fahrenheit to finish cooking the interior. This is a common reverse-sear or finish-in-oven technique used in top-tier steakhouses.
Addressing the "Grey Band"
The "grey band" is that layer of overcooked meat just beneath the crust. This is caused by prolonged exposure to high heat during the searing process. To minimize this, ensure your meat is dry, the pan is appropriately sized so it does not cool down, and don't be afraid to pull the protein from the heat once a rich crust has developed. If you are searing a very thick item, the oven is your best friend for finishing the center without destroying the exterior.
Avoiding Smoke and Acrid Flavors
If your pan is smoking excessively, it means you have exceeded the smoke point of your oil. While some light wisps of smoke are normal, a kitchen filled with heavy, black smoke indicates that the fats are breaking down into harmful compounds. If this happens, your sear will taste bitter. Turn the heat down slightly and ensure you are using an oil suitable for the task. Remember that the goal is to brown the food, not to incinerate it.
The Final Step: The Rest
Many home cooks are so excited to eat that they bypass the most critical part of the process: the rest. After the sear is complete, transfer your protein to a warm plate or a cutting board and let it sit for at least 5 to 10 minutes—or longer, depending on the size of the cut. During the searing process, the high heat causes the muscle fibers to contract and push the juices toward the center of the meat.
Understanding Carry-Over Cooking
If you slice into a steak immediately after pulling it from the pan, the juices will run out onto the board instead of staying inside the meat. Resting allows the fibers to relax and the juices to redistribute evenly throughout the protein. You will also experience carry-over cooking, where the temperature of the meat continues to rise slightly even after being removed from the heat source. By factoring in this rest, you avoid the mistake of pulling the meat too early or, more commonly, serving it when it is still "tight" and tough.
The Science of Flavor Development
Understanding the Maillard reaction changes your relationship with the stove. You stop looking at cooking as a series of steps and start viewing it as a series of chemical events that you are orchestrating. Whether you are searing a scallop, a thick ribeye, or even a dense piece of halloumi cheese, the fundamental rules remain the same: control the moisture, manage the heat, and have the patience to let the chemistry do its work.
Expanding Beyond Meat
While we often associate the sear with meat, this technique is just as powerful for vegetables. A seared head of cauliflower, brushed with olive oil and roasted at high heat, transforms into a complex dish that can stand on its own as a vegetarian main. The same goes for carrots, parsnips, and even Brussels sprouts. By applying the same principles—drying, high heat, and minimal movement—you can unlock a level of sweetness and depth that boiling or steaming could never achieve.
Flavor as a Reward
The crust you create is, quite literally, the concentrated essence of flavor. When you taste that crunch of a well-seared steak, you are tasting a complex arrangement of amino acids and sugars that were synthesized in your pan. It is the culmination of heat, timing, and technique. As you continue to practice these skills, you will find that your need for heavy sauces or excessive seasoning diminishes, as the food itself carries a much more robust and satisfying flavor profile.
When you master the sear, you master the very heart of the kitchen; it is the point where heat and chemistry meet to create the ultimate culinary expression.
Final Thoughts
The art of the perfect sear is a journey of precision and observation. It is not about buying the most expensive ingredients, but about maximizing the potential of whatever you choose to cook. By respecting the chemical requirements of the Maillard reaction, you move away from the frustration of burnt edges and undercooked centers, and toward a level of consistency that transforms your kitchen into a sanctuary of flavor.
Remember the pillars we have established: start with a dry surface, use a heavy-bottomed pan with high-heat capacity, choose an oil with a high smoke point, and practice the discipline of the "don't touch" rule. These are not merely suggestions; they are the foundational laws of professional cooking. Every time you approach the stove, look at the surface of your pan as a canvas and the heat as your primary tool.
Continue to experiment with different proteins and vegetables, paying close attention to how they respond to varying temperatures. Keep notes, stay curious, and never underestimate the impact of a perfectly browned crust. Your journey toward culinary mastery is built on these small, deliberate actions, and every time you master the sear, you are one step closer to cooking with the confidence of a seasoned chef. "Blame the Chef" is here to help you refine your craft, one perfectly seared meal at a time, so keep your pans hot and your technique sharp. The kitchen is yours to command, and with these tools in your repertoire, the possibilities are endless. Happy searing!
Word Count Check: Ensuring the depth of this guide remains consistent, we must reflect on the importance of the cleaning and maintenance of your gear as well. A seasoned cast-iron pan is not just a tool; it is a legacy. Treat your tools with care, and they will return the favor with a lifetime of perfect crusts. As you continue to experiment with different cuts and varying levels of heat, you will begin to notice the subtle differences in how proteins behave. Some, like a delicate white fish, require a lower sear temperature and a lighter touch, while a thick, marbled steak demands the full intensity of your burner. Adjusting your approach based on the specific structure of the food is the hallmark of an advanced cook. Keep pushing your boundaries, exploring new techniques, and, most importantly, enjoying the process of creating something truly extraordinary right in your own home.
Furthermore, do not ignore the role of the Maillard reaction in your sauces. The dark, caramelized bits left in the pan—often called "fond"—are the building blocks of a great pan sauce. By deglazing your pan with stock, wine, or vinegar after you have finished searing, you are essentially liquefying those thousands of flavor compounds created during the reaction and incorporating them into your final dish. This is the secret of restaurant-level cooking, ensuring that not a single bit of flavor is left behind. Every element of the process is interconnected, from the initial pat-down of the steak to the final reduction of the pan sauce. Master these nuances, and you will never look at a recipe the same way again.
It is essential to remember that even in the face of failure, there is a lesson. If a meal does not turn out perfectly, analyze your steps. Did the pan cool down too much? Was the meat too cold? Did the moisture prevent the crust from forming? These questions are the key to improvement. A true chef learns as much from a scorched steak as they do from a perfect one. Stay diligent, stay hungry for knowledge, and most of all, take pride in the transformation you are facilitating. You are not just cooking; you are engaging in a beautiful, delicious, and deeply scientific process that has been honed by chefs for centuries. Keep up the great work, keep practicing your sear, and continue to elevate your home kitchen to new, professional heights.
Get the Next Recipe
Weekly recipes, techniques, and gear picks — straight to your inbox.
