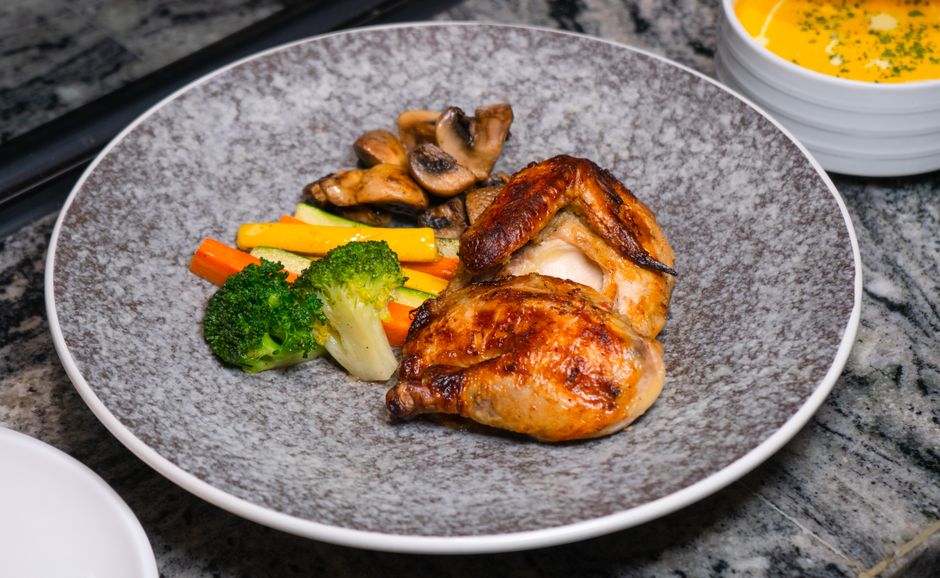
The Science of Perfect Roast Chicken: Temperature, Timing, and Rest
There is something fundamentally iconic about a perfectly roasted chicken, a dish that separates the casual weekend cook from the true student of the kitchen. While it seems deceptively simple, the journey from a raw, pale bird to a mahogany-skinned masterpiece involves a complex interplay of chemistry, physics, and patience. Many home cooks approach this task with a sense of trepidation, fearing the dreaded dry breast or, worse, the undercooked joint hidden deep within the thigh. At Blame The Chef, we believe that understanding the "why" behind the process is the key to shedding that anxiety and mastering a technique that will serve you for a lifetime.
To achieve excellence, one must look past the outdated advice of "roast until the juices run clear." That age-old adage is imprecise and leads to inconsistent results that often sacrifice the succulence of the meat for the sake of safety. We are going to explore the precise mechanics of heat transfer, the role of moisture retention, and the vital importance of the resting period, which is perhaps the most misunderstood element in the roasting cycle. When you treat the chicken as an assembly of distinct biological tissues, you stop guessing and start engineering a result that is both scientifically sound and culinarily breathtaking.
Preparation is not merely about seasoning; it is an act of structural optimization that begins long before the oven door closes. By controlling surface moisture, managing the fat content, and respecting the different density profiles of white and dark meat, you can bypass the traditional pitfalls that plague most home kitchens. We are going to break down the cold, hard facts of roasting, providing you with the technical framework to ensure your bird arrives at the table with skin that shatters like glass and meat that remains impossibly succulent. It is time to elevate your Sunday roast from a chore into a triumph of culinary science.
The Architecture of the Bird: Understanding Tissues
The fundamental challenge in roasting a whole chicken is that it is not a monolithic object. The breast meat, which is composed of lean muscle fibers, behaves entirely differently under heat than the thigh and leg meat, which is rich in connective tissue and intramuscular fat. Because the breast is thinner and lacks the structural fat of the leg, it reaches the target temperature of 150°F to 155°F (65°C to 68°C) much faster than the darker meat. If you roast the bird until the thighs are at their optimal tenderness—often requiring 175°F (80°C)—the breast will have long since crossed the line into dryness.
The Role of Connective Tissue
Dark meat contains significant amounts of collagen, a protein that requires time and heat to break down into gelatin. While high heat is necessary to crisp the skin, the connective tissue inside the legs needs a slightly longer stay in the heat zone to become supple and flavorful. This is why professional chefs often employ techniques that protect the breast while exposing the legs to a more aggressive thermal environment.
Surface Moisture and the Maillard Reaction
The Maillard reaction—the chemical reaction between amino acids and reducing sugars that gives browned food its distinctive flavor—is inhibited by water. If the surface of your chicken is damp, the energy of the oven is wasted evaporating that water before browning can begin. By prioritizing a dry surface, you create the conditions for rapid, consistent browning, which adds depth and complexity to the finished product.
"To achieve the perfect roast, you must treat the breast and the thighs as two separate culinary challenges housed within a single, elegant structure."
Preparation: The Foundation of Flavor
Before your chicken even enters the oven, you must address the primary enemies of texture: excessive surface moisture and internal temperature imbalances. A cold bird straight from the refrigerator will take longer to cook and will likely end up with overcooked exterior layers before the center reaches a safe temperature. Bringing the bird to room temperature for 30 to 45 minutes can make a world of difference in the final outcome.
The Power of Dry Brining
We cannot overstate the importance of dry brining. By salting your chicken at least four hours—or preferably 24 hours—before roasting, you allow the salt to permeate the meat through osmotic pressure. This does more than season; it denatures the proteins slightly, allowing them to hold onto their juices more effectively during the high-heat cooking process.
Strategic Seasoning
When seasoning, don't just focus on the exterior skin. Gently loosen the skin over the breast and slide in a mixture of herb-infused compound butter or a simple drizzle of olive oil and salt. This creates an internal barrier that helps protect the delicate breast meat while injecting moisture and flavor directly into the fibers that need it most.
Thermal Management: Oven Dynamics
When it comes to the oven, consistency is your greatest ally. Many home cooks fluctuate temperatures based on fear of burning the skin, but this usually results in a bird that is pale and steamed rather than roasted. A high-temperature start followed by a moderate finish is the industry standard for a reason. Starting at 425°F (220°C) allows the skin to begin the Maillard process immediately, while dropping the temperature to 350°F (175°C) after 20 minutes ensures the internal tissues cook evenly without the outer layers turning to leather.
The Science of Airflow
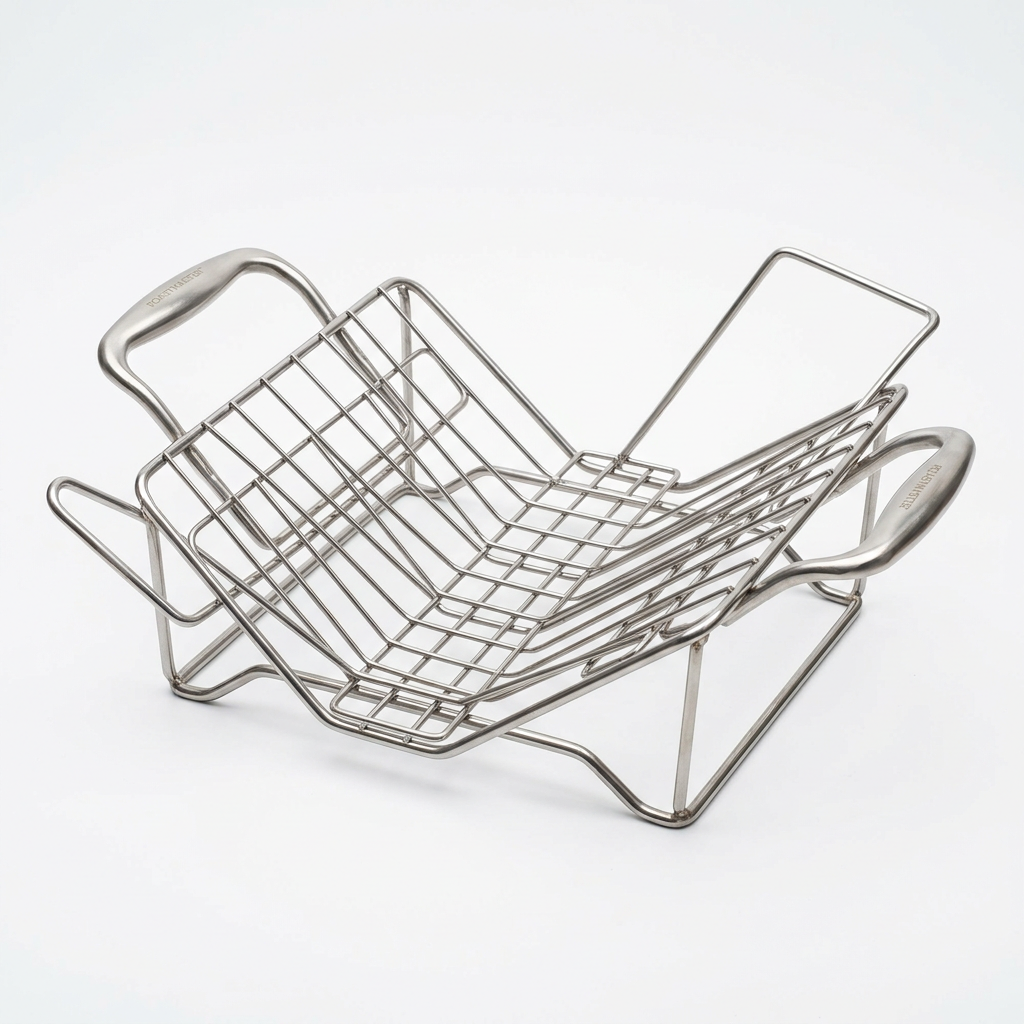
Airflow within the oven is essential for even browning. Utilizing a roasting rack allows hot air to circulate underneath the bird, preventing the bottom of the chicken from sitting in its own juices and getting soggy. If you do not have a rack, a bed of hearty root vegetables like carrots, potatoes, and onions can act as a natural trivet, absorbing the rendered fat and aromatics.
Managing Internal Temperature
You should never rely on time alone to dictate when a chicken is finished. A reliable instant-read thermometer is the only tool that guarantees safety and quality. Probe the deepest part of the thigh, taking care not to hit the bone, which will provide a false high reading. Once the thigh registers 165°F (74°C), the chicken is technically safe to eat, though many prefer the texture of the dark meat closer to 175°F (80°C).
"A thermometer is not an admission of culinary weakness; it is the ultimate tool of the precision-oriented chef who refuses to leave the quality of their meal to chance."
The Science of Resting: A Culinary Necessity
The most critical—and most ignored—step in the roasting process is the resting period. When the chicken is in the oven, the muscle fibers are contracted and the juices are pushed toward the center of the bird or into the pockets of the connective tissue. If you carve into the bird the moment it leaves the oven, these juices will immediately bleed out onto the cutting board, leaving you with dry, flavorless meat.
The Redistribution Process
As the bird rests, the temperature gradient begins to equalize. The exterior cools slightly, while the residual heat from the outer layers continues to travel toward the cooler center. During this time, the muscle fibers relax, allowing the juices that were forced into the center to redistribute back throughout the meat. This is why resting creates a succulent, juicy result that you simply cannot achieve otherwise.
Optimal Resting Durations
* For a standard 3.5 to 4-pound bird, allow at least 20 to 30 minutes of rest.
* Keep the bird tented loosely with aluminum foil to trap heat without steaming the skin.
* Do not keep it wrapped too tightly, or the trapped steam will destroy the crispness you worked so hard to achieve.
Fats and Moisture Retention
Fat is the conductor of heat and the carrier of flavor. As the fat in the skin and the subcutaneous layers renders, it baste the meat, adding a richness that is unattainable through lean roasting alone. While some chefs swear by constant basting, we generally advise against it. Opening the oven door repeatedly causes significant heat loss, disrupting the internal climate and preventing the skin from reaching the crisp, golden state required for the perfect roast.
The Compound Butter Secret
A compound butter—made with softened butter, minced garlic, fresh herbs, and a touch of lemon zest—is a cheat code for the home cook. By inserting this under the breast skin, you provide a constant source of fat that works from the inside out. As the butter melts, it bastes the breast meat during the cooking process, effectively shielding it from the drying effects of the hot oven air.
Choosing the Right Bird
The quality of the chicken matters immensely. A pasture-raised or air-chilled chicken has a different moisture content and fat profile than a mass-market, water-chilled bird. Water-chilled chickens often retain a significant amount of excess water in the cavity and skin, which can make it harder to achieve a crisp texture. If you must use a water-chilled bird, extra time for air-drying in the refrigerator is non-negotiable.
Equipment: Why Tools Matter
You do not need a commercial-grade kitchen to produce a professional-quality bird, but you do need the right basics. A heavy-gauge roasting pan is superior to a flimsy aluminum one because it holds heat more effectively and prevents the bottom of the pan from warping or scorching. Furthermore, a digital thermometer with a probe that stays in the meat while it cooks—allowing you to monitor the internal temperature without opening the door—is a game-changer for those still learning to judge doneness.
The Importance of the Rack
Using a rack is about elevating the product to ensure that the heat hitting the chicken is uniform. If the chicken is touching the bottom of the pan, the meat on the bottom will stew in rendered fat. While this can lead to delicious, schmaltz-soaked vegetables, it is detrimental to the skin on the bird.
Mastering the Carve
Once you have mastered the temperature, timing, and rest, the final frontier is the presentation. A sloppy carving job can diminish the beauty of a perfectly roasted bird. Use a sharp, thin-bladed knife and work with the anatomy of the chicken. Start by removing the legs and thighs, then separate the breast meat by running your knife along the keel bone. When you slice the breast, do so against the grain to ensure every bite is as tender as possible.
Maintaining Texture
Remember, your goal is to present the meat with the skin intact on the slices where possible. This provides the crucial contrast of textures—the shattering crispness of the skin against the tender, moist interior. If you have rested the bird properly, you should see very little juice on the board, which is the ultimate sign of a successful roast.
Serving Suggestions
A perfect roast chicken is the ultimate blank canvas. Pair it with the juices from the pan (deglazed with a splash of white wine or stock) and serve it alongside simple, well-seasoned vegetables. The simplicity of the presentation will allow the quality of your technique to shine through, providing a dining experience that feels both rustic and refined.
"The carving board is where your patience is rewarded. A clean, precise cut reveals the glistening, succulent interior that signifies a roast performed to the highest standard."
Advanced Troubleshooting: Common Pitfalls
Even with the best planning, things can occasionally go sideways. Understanding how to react when something goes wrong is the mark of an experienced cook. If the skin is browning too quickly, a simple shield of aluminum foil can prevent it from burning while the interior continues to reach the target temperature. If the bird seems to be cooking unevenly, rotating the pan 180 degrees halfway through the roasting process can compensate for hot spots in your oven.
Identifying Doneness Without the Guesswork
If your thermometer stops working mid-cook, use the "leg wiggle" test: grasp the drumstick and gently wiggle it. If the joint moves easily and the meat at the base of the leg begins to pull back from the bone, the bird is likely finished. However, never rely on this as your primary method; it is a secondary, tactile check for those who have developed a "feel" for the process.
The Problem of the Tough Skin
If you find the skin is chewy rather than crisp, it usually points to an issue with moisture. Did you pat the bird dry enough? Did you keep the oven door closed? Were you using a rack? Ensure that the next time you roast, you increase the initial high-heat blast by a few minutes or move the chicken to a higher rack position to encourage better browning.
Expanding the Flavor Profile
While a classic salt-and-pepper roast is a masterpiece of minimalism, there is no reason not to experiment once you have the fundamentals down. Infusing the cavity with aromatics like lemon, garlic, ginger, or even star anise can add subtle layers of flavor that permeate the meat from the inside. Creating an herb-based crust or using a dry rub with spices like paprika, cumin, or sumac can transform the profile of the bird entirely.
The Infusion Technique
To add deeper flavor, slide sprigs of rosemary, thyme, or sage under the skin along with your compound butter. As the chicken roasts, these oils are released directly into the muscle tissue, providing an aromatic intensity that an external rub simply cannot match. You can also place thick slices of citrus or aromatics in the bottom of the roasting pan, allowing the chicken to steam in those fragrant vapors as it cooks.
Pan Sauces: The Final Touch
The bits of browned meat and fat at the bottom of the pan—known as fond—are pure culinary gold. Once the chicken is resting, place the roasting pan on the stovetop over medium-high heat. Deglaze with a splash of dry vermouth or chicken stock, scraping up those flavorful bits. Whisk in a small knob of cold butter at the end to create a glossy, emulsified sauce that ties the entire dish together.
The Evolution of Your Roasting Practice
Roasting a chicken is a process that rewards repetition. Each time you enter the kitchen to roast a bird, you learn a little more about your specific oven's temperament and how different sizes of poultry affect the roasting time. Perhaps you will find that you prefer a slightly higher heat to achieve a more aggressive char on the skin, or perhaps you discover that a longer rest leads to an even more succulent breast.
Documenting Your Results
We strongly encourage you to keep a small kitchen journal. Note the weight of the bird, the temperatures used, the duration of the roast, and—most importantly—the end result. Did the breast dry out? Was the skin perfectly crisp? By tracking these variables, you can refine your technique until the process becomes second nature.
Building Confidence
The confidence to host a dinner, to prepare a Sunday meal, or to simply enjoy a quiet evening with a perfectly cooked bird is a skill that translates into all areas of your cooking. When you master the science of the roast, you stop looking at recipes as rigid sets of instructions and start seeing them as fluid concepts you can manipulate and improve. The bird is just the beginning.
Final Thoughts
The art of the perfect roast chicken is not found in a single, secret ingredient or a mysterious piece of equipment. It is found in the deliberate application of thermal control, the strategic management of moisture, and the patient respect for the physics of muscle proteins. You have learned that the breast and the thigh are different worlds requiring different approaches, that the resting period is not optional, and that your own careful observation is the most powerful tool in your culinary arsenal.
Take these principles and apply them with conviction. The next time you walk into the grocery store and pick up a whole chicken, you will not see a generic piece of meat; you will see a canvas for your improved skills. You will know exactly how to prep, how to heat, and how to wait for that perfect, transformative moment when the bird is ready to be carved. You will no longer be guessing, and you will no longer have to blame anyone else if the results are less than stellar—because with this scientific foundation, you have everything you need to be the master of your own oven.
Finally, remember that the goal of all this technical rigor is simple: pleasure. The joy of a perfectly roasted bird, shared at a table with friends or family, is one of the most rewarding experiences in the human culinary tradition. When the skin shatters, the meat pulls away from the bone with ease, and the juices remain exactly where they belong, you will know that the time you spent understanding the science was worth every second. Go forth, preheat that oven, and roast with the confidence of a chef who truly understands the process. Your perfect bird awaits, and the journey toward culinary mastery is well underway. Consistency is the goal, and mastery is the result of applying these rules every single time you cook. Happy roasting.



Get the Next Recipe
Weekly recipes, techniques, and gear picks — straight to your inbox.
