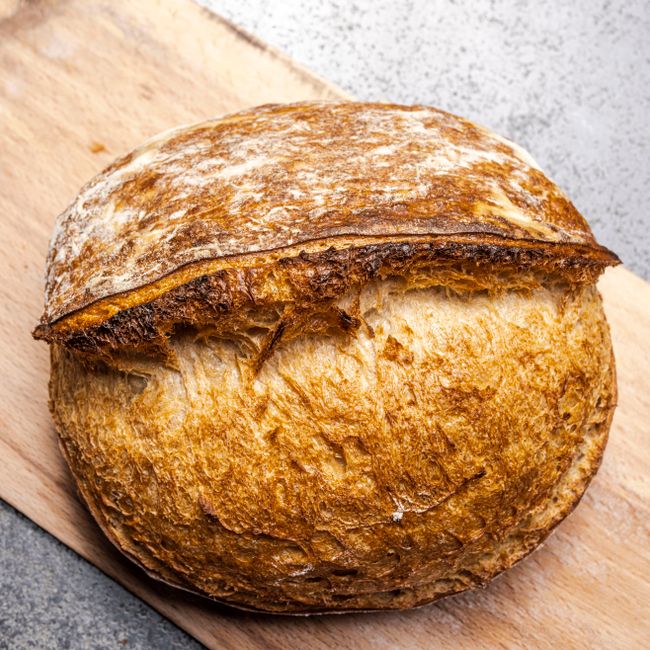
The Science of Sourdough: Mastering Fermentation
Sourdough bread is more than just food—it's an art form that embodies the dance of chemistry and craftsmanship. At its heart lies the intricate science of fermentation, a process that transforms simple ingredients into complex flavors and textures that are hard to resist. Home bakers, intrigued by the prospect of creating their own sourdough loaves, often wonder what makes this bread so unique. Understanding the biological processes behind fermentation not only results in a tastier loaf but also empowers you as a cook, enabling you to troubleshoot and perfect your baking routine.
In this comprehensive guide, we'll explore the nuances of sourdough fermentation, equipping you with the knowledge and skills necessary to master this ancient method. From the initial stages of creating a starter to the final bake, every step is crucial and merits attention. We will dissect the microbial wonders at play, demystify the sourdough process, and provide you with foolproof techniques to elevate your sourdough game. This is not just about following a recipe; it’s about understanding the “why” and “how” behind every action you take in the kitchen.
As you embark on this culinary journey, remember that patience is just as key as technique. Fermentation requires time, but the results—an aromatic, crusty loaf with a tender crumb—are well worth the wait. Grab your flour, water, and salt, and prepare to delve into the fascinating science of sourdough bread.
The Fundamentals of Sourdough
To fully appreciate sourdough, it's essential first to grasp the fundamentals that separate it from commercial yeast-leavened bread. At the core of sourdough baking is the sourdough starter, a culture of flour and water inhabited by wild yeast and lactic acid bacteria. Unlike commercial yeasts, which provide a fast fermentation process, the wild yeasts in sourdough starters thrive at a slower pace, allowing for deeper flavors to develop.
Sourdough’s flavor profile and leavening power stem from a delicate balance of sugars, acids, and gas production. The natural fermentation process results in distinct variants of sour flavor, which can be influenced by the type of flour used, fermentation times, and environmental conditions. This all adds layers of complexity to the flavor profile of your bread, setting it apart from the mass-produced alternatives.
The key components of sourdough bread-making are remarkably simple: flour, water, salt, and a healthy starter. Yet, the magic happens in the interactions between these ingredients, facilitated by the wild yeast and bacteria. Understanding these ingredients and their roles is crucial for any home baker who seeks to harness the full potential of sourdough fermentation.
Understanding Your Starter
What is a Sourdough Starter?
A sourdough starter is essentially a mixture of flour and water that ferments over time, cultivating microorganisms that will help leaven your bread. This magical concoction captures the local yeasts and bacteria present in your environment, making every starter unique. Most starters can sustain themselves indefinitely if properly maintained, and they are a cornerstone of sourdough baking.
Creating Your Starter
Creating a starter from scratch is one of the most rewarding experiences for a baker. Here’s a simple method to create a robust starter:
After 24 hours, you may not see much action, but that's okay. The next day, feed your starter by discarding half of it (approximately 100 grams) and adding another 100 grams of flour and 100 grams of water. Repeat this feeding process daily.
Maintenance of Your Starter
Once your starter is bubbly and active (typically 5-7 days of feeding), it's crucial to maintain it properly to keep its fermentation power high:
Troubleshooting Your Starter
Sometimes, despite our best efforts, a starter may not behave as expected. Here are a few common issues and solutions:
- Solution: Ensure your environment is warm enough (70-75°F); consider using a warm spot in your kitchen or a proofer.
- Solution: This is a sign that your starter is hungry. Stir it back in and give it a feeding.
- Solution: It could be a sign of contamination. Check your starter's color and smell; if it appears pink or has a foul smell, it’s best to discard and start anew.
The Role of Fermentation
The Science of Fermentation Process
Fermentation is an incredible biochemical process driven by microorganisms that convert starches and sugars into alcohol, carbon dioxide, and organic acids. In sourdough, both wild yeast and lactic acid bacteria play distinct roles. The yeast primarily produces carbon dioxide, which gives the bread its lift, while lactic acid bacteria contribute to the tangy flavor.
The initial phase of fermentation, called multiplication, involves the wild yeast and bacteria reproducing in response to the nutrients released during the mixing of flour and water. Your starter will only be powerful if it contains a robust population of these microorganisms.
Autolyse: The Key to Flavor Development
Before diving into proofs and shaping, one essential step in sourdough baking is the autolyse. This technique involves mixing the flour and water and allowing them to rest for 30 minutes to an hour before adding salt and starter.
Benefits of autolyse include:
The Fermentation Stages
Once you combine your starter with other ingredients, the dough undergoes several phases of fermentation, each crucial for developing flavor and texture. Here are the key stages:
The Temperature Influence
Ideal Fermentation Temperatures
The temperature of your environment plays a critical role in the fermentation process. Optimal temperatures for sourdough fermentation generally hover between 75°F and 80°F (24°C to 27°C). Higher temperatures can speed up fermentation, resulting in a tangier bread, whereas cooler temperatures slow down the yeast activity and produce a milder flavor.
Here are some temperature ranges to consider:
Increasing Flavor Complexity
When adjusting fermentation times based on temperature, it’s essential to understand that longer fermentation at cooler temperatures generally leads to more complex flavors. In contrast, faster fermentations enrich the sourness.
Consider incorporating cold fermentation for additional flavor depth. Place your shaped dough into the refrigerator overnight (12-14 hours). This will slow yeast activity, allowing the bacteria to thrive, producing lactic acid that intensifies the sour flavor while also improving the dough structure.
Using Temperature to Troubleshoot
Monitoring dough temperature can help troubleshoot common issues. If your bread lacks rise or flavor, consider the following strategies:
Understanding the science of temperature in sourdough baking can undoubtedly dictate the success of your baking endeavors.
The Anatomy of Sourdough Bread
The Crust and Crumb
The crust and crumb of sourdough bread are critical elements that contribute to its overall appeal. The crust is often thick and crunchy, a result of Maillard reaction and caramelization—two chemical reactions that occur during baking. The Maillard reaction gives bread its unique brown color and complex flavor, while caramelization adds depth.
Crumb, the interior structure of the bread, should be airy yet cohesive. A well-developed crumb structure indicates the gluten network has been formed correctly, while larger holes signify adequate fermentation and gas production. Achieving a consistently airy crumb takes practice and often relies on proper folding techniques and fermentation times.
Flavor Profiles of Sourdough
Sourdough's unique flavor profile is influenced by many factors, including the type of flour used, hydration levels, temperature, and fermentation time. Different grains introduce varying flavors and textures. Bread made with whole grains has a nuttier, heartier flavor, while white flour bread tends to be milder.
Besides the basic tanginess resulting from lactic acid bacteria, let’s break down flavor notes commonly found in sourdough:
Experimenting with different flour blends, hydration rates, and fermentation times can yield exciting results and flavors, showcasing creativity in your loaf.
Advanced Techniques for the Sourdough Baker
Hydration Levels
The hydration level in sourdough significantly impacts the texture, crumb, and baking process. A standard sourdough bread typically rests at about 70% hydration, but adjusting to 60-80% can result in varied outcomes. Higher hydration usually leads to a more open crumb structure and a tender crust.
#### Tips for Working with High-Hydration Doughs:
Alternative Ingredients and Flours
Flavor Enhancements
Baking Your Sourdough
Prepping to Bake
Before you even think of placing your loaf in the oven, preparation is key. Ensure you have all your tools and utensils ready:
The Baking Process
Troubleshooting Your Bake
Understanding these aspects of baking can help you master the final and most crucial step in producing exceptional sourdough.
Conclusion
Mastering sourdough bread is both an art and a science that marries patience with precision. The exploration of fermentation and its nuanced reactions sets this ancient culinary tradition apart, allowing each loaf to tell a unique story. Whether you’re crafting your own starter, adjusting hydration levels for the perfect crumb, or experimenting with different flours and add-ins, each step empowers you as an artisan baker.
As you continue your sourdough journey, remember the importance of patience and practice. Embrace imperfections and learn from each bake. With time, you’ll discover that sourdough is not just about following a recipe; it’s about cultivating a skill and experience that continuously evolves. Carry your knowledge forward and bring your own flair into every loaf you create.
Baking sourdough is a rewarding endeavor, and as your skills develop, so will your appreciation for the magnificent process that transforms simple ingredients into a loaf worth sharing. Gather your friends and family to enjoy the fruits of your labor, and let the aroma of fresh bread waft through your home, a testament to your dedication to mastering the science of sourdough.
Word Count: 2,090




Get the Next Recipe
Weekly recipes, techniques, and gear picks — straight to your inbox.
