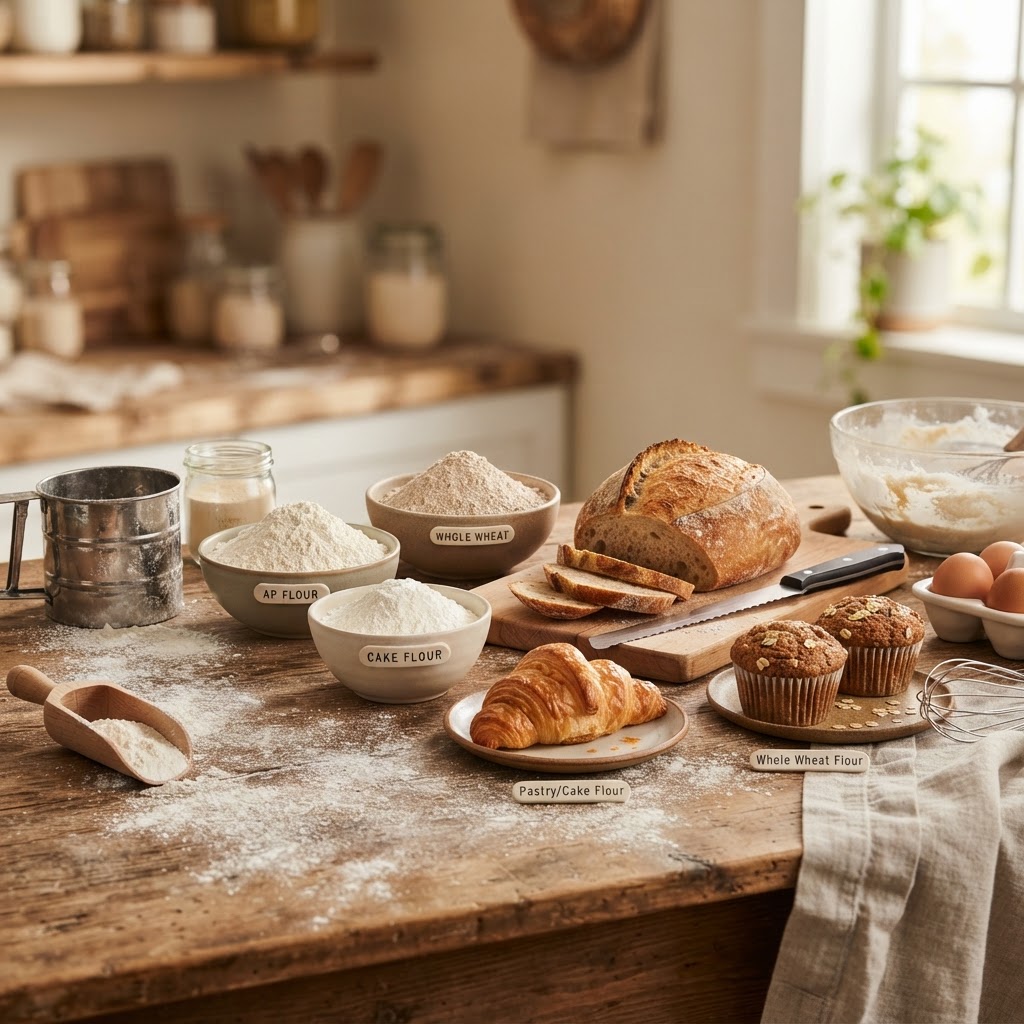
The Science of Starch: How to Choose the Right Flour for Every Type of Bake
Baking is often described as a form of chemistry that happens to result in something delicious, and nowhere is this more evident than in the humble bag of flour. For the novice home baker, flour can seem like a monolith—a singular, white dust that serves as the foundation for everything from a crusty sourdough loaf to a delicate sponge cake. However, those who have spent time in a professional kitchen understand that the protein content, milling process, and grain type of your flour act as the architectural blueprints for your finished product. Understanding these nuances is the single greatest leap you can take toward moving from a baker who follows recipes to one who truly understands the mechanics of their craft.
When you dip your measuring cup into a container of flour, you are interacting with complex biological polymers that have been tempered by heat and pressure. Starch granules and protein structures like glutenin and gliadin are the quiet workers inside your mixing bowl. When water is introduced and agitation—or kneading—begins, these elements transform into a cohesive matrix capable of trapping gases. If you choose a high-protein bread flour for a tender scone, you will inevitably end up with a tough, chewy brick. Conversely, using cake flour for a rustic artisan loaf will result in a flat, structural failure that cannot hold its own weight during the rise.
My goal in this guide is to demystify the grain aisle and provide you with a roadmap for selecting the perfect flour every time you step into the kitchen. We will explore the breakdown of wheat, the role of extraction rates, and how moisture percentages dictate the final crumb. By the time you finish reading, you will possess the vocabulary and the technical understanding required to manipulate your doughs and batters with the confidence of a seasoned pastry chef. Whether you are aiming for the ultimate crunch in a cookie or the pillowy crumb of a brioche, the journey begins with identifying the right starch for the job.
The Foundation of Flour: Proteins and Starches
At the molecular level, flour is primarily composed of two things: starch and protein. While the starch granules provide the bulk and the eventual setting of the bake, the protein content is responsible for the texture. When flour is moistened, the two main proteins, glutenin and gliadin, bond to form gluten. This elastic network is what gives bread its chew and structure. The amount of protein in your flour determines how much of this network can be formed. A typical all-purpose flour sits in the middle range, usually between 9% and 11% protein, making it a versatile choice for a wide variety of recipes.
Understanding Protein Percentages
In professional baking, we look specifically at the percentage of protein by weight. If you look closely at the nutritional label on a high-quality bag of flour, you can calculate this by taking the grams of protein per serving and dividing it by the total weight of the serving size. A Bread Flour will typically clock in between 12% and 14%, providing the tensile strength needed for yeast-based doughs. If you are baking a pizza dough that requires a long fermentation and significant stretching, you want a higher protein count to prevent the dough from tearing.
The Role of Starch Granules
Starch represents about 70-80% of the weight of the flour. During the baking process, these granules undergo a process called gelatinization. As the oven temperature rises, the starch granules absorb water, swell, and eventually burst, creating a gel that sets the structure of your bake. This is why temperature is so critical; if your oven is not hot enough to trigger this gelatinization before the structure collapses, you will end up with a "gummy" interior. Professional chefs often use the "spring-back" test to see if a loaf has reached the internal temperature (usually 190°F to 210°F) necessary for the starches to fully stabilize.
"The difference between a mediocre baker and a great one isn't just the recipe; it is the fundamental understanding of how the flour behaves under heat and pressure."
All-Purpose Flour: The Workhorse of the Kitchen
All-purpose flour is the standard in most American pantries for a reason. It is a blended flour, usually a mix of hard and soft wheat, designed to strike a balance between structural integrity and tenderness. Because it sits in the middle of the protein spectrum, it is safe to use for cookies, muffins, pancakes, and even quick breads. However, its "purpose" is not truly "all." If you find that your cakes are slightly too firm or your bread lacks the airy, open crumb of a bakery-style loaf, it is time to branch out.
When to Use All-Purpose
I recommend keeping a high-quality, unbleached all-purpose flour for everyday tasks. Unbleached is generally preferred because the natural aging process allows the flour to develop better gluten-forming capabilities compared to chemically bleached flour. When you are making a standard batch of chocolate chip cookies, the 10-11% protein content provides enough structure to hold the fat and sugar without becoming overly bready.
Adapting Your Ratios
If you find yourself in a situation where you only have all-purpose flour but need the properties of a different type, you can use additives to mimic them. To simulate cake flour, remove two tablespoons of all-purpose flour from a cup and replace it with two tablespoons of cornstarch. The cornstarch dilutes the protein, resulting in a more tender crumb. Conversely, for a chewier bread, you can add a teaspoon of vital wheat gluten to your flour mix to boost the protein content without needing a second bag of flour in your pantry.
High-Protein Flour: For the Love of Bread
When we talk about bread, we are talking about the gluten matrix. Without a high-protein flour, you simply cannot achieve that characteristic "chew" and the large, irregular bubbles (known as an open crumb) that define a successful artisan loaf. Bread flour is milled from hard red spring wheat, which is naturally higher in protein. In a professional bakery, I always advise keeping a dedicated high-protein flour specifically for yeast-raised doughs.
Managing Dough Strength
When working with high-protein flour, the technique of autolyse is essential. This involves mixing only the flour and water at the start of your process and letting it rest for 30 to 60 minutes before adding salt or yeast. This allows the flour to fully hydrate and the gluten bonds to begin forming on their own, making the dough much more extensible and easier to handle. It is a professional secret that significantly improves the texture of the final crust.
The Impact of Fermentation
High-protein flours handle long fermentation times much better than lower-protein varieties. During a long, cold-proof (often 12 to 24 hours in the refrigerator), the yeast breaks down the starches into sugars, and the enzymes soften the gluten slightly. If you use a lower-protein flour for this process, the structure may disintegrate under the enzymatic activity, leading to a flat, dense loaf. Always match your flour protein to the length of your fermentation.
Cake and Pastry Flours: The Art of Tenderness
In the world of pastry, cake flour and pastry flour are your best friends. These flours are milled from soft wheat, which has significantly lower protein content—typically 7% to 9%. The goal here is to minimize the formation of gluten. In a cake, you want a crumb that is velvet-like and tender, not chewy. If you were to use a bread flour for a Victoria sponge, the resulting cake would have a tough, rubbery texture that would be entirely unappealing.
The Milling Process
These flours are often finely milled and sometimes chlorinated. Chlorination is a process that slightly changes the acidity of the flour, which helps the starches absorb more liquid and fat. This allows for a higher sugar-to-flour ratio, which is why professional-grade cakes are so moist and rich compared to some homemade versions. If you are baking for a high-stakes event, sourcing a professional-grade cake flour can make a world of difference.
Proper Mixing Techniques
Because pastry flours are so delicate, the way you mix them is vital. Over-mixing is the primary culprit in cake failure. Once you add your wet ingredients to the dry, you should only mix until the batter is just combined. Every additional rotation of your whisk or mixer develops more gluten, turning your light sponge into a dense, chewy block. When folding in delicate ingredients like whipped egg whites, use a wide rubber spatula and a gentle, circular motion to preserve the aeration.
"A pastry chef understands that flour is not just a filler; it is the structural support system for the delicate balance of fats and sugars."
Specialized Flours: Rye, Whole Wheat, and Ancient Grains
While refined white flour is the standard, whole wheat flour and rye flour introduce complexity, depth, and a nutritional profile that white flour simply cannot match. Whole wheat flour includes the bran and the germ, which act as little "knives" that cut through the gluten strands as they form. This is why a 100% whole wheat loaf is often heavier and denser than a white loaf. If you want a 100% whole wheat bread with a great rise, you must account for this by increasing hydration and using a longer, gentler kneading process.
Working with Whole Wheat
The bran in whole wheat flour is abrasive and absorbs more water than the endosperm found in white flour. When substituting whole wheat into a recipe, you should aim to add an additional 5-10% hydration (more water) to compensate for this absorption. Furthermore, because whole wheat contains the germ—which is full of fats—it can turn rancid if left at room temperature for too long. Always store your whole wheat and ancient grain flours in the freezer to keep them fresh and free from off-flavors.
The Charm of Ancient Grains
Flours like spelt, emmer, and einkorn are gaining popularity for their unique flavor profiles and digestibility. Spelt, in particular, is a favorite of mine. It is related to wheat but has a much more complex, nutty flavor. However, be warned: spelt flour has a very fragile gluten structure. If you work it too much, the gluten will snap and break down entirely, resulting in a loaf that won't rise. When baking with ancient grains, treat the dough with a light touch and avoid aggressive mechanical mixing.
Rye:* Low gluten, high hydration needs. Adds a deep, earthy flavor.
Spelt:* Fragile, nutty, and easy to over-knead.
Whole Wheat:* High fiber, requires extra water and patience.
Mastering Moisture: The Baker’s Percentage
If there is one thing that separates the home cook from the professional, it is the use of Baker's Percentages. Instead of measuring in cups—which are notoriously inaccurate because flour settles differently in the cup—professionals measure everything by weight, using grams. The flour is always defined as 100%, and all other ingredients are calculated as a percentage of that total weight. This system allows you to easily scale recipes up or down and, more importantly, allows you to adjust the hydration levels to suit the type of flour you are using.
Calculating Hydration
To calculate the hydration of your dough, divide the weight of the water by the weight of the flour. For a typical artisan loaf, you might look for 70% hydration (70g water for every 100g of flour). If you are using a very absorbent whole wheat flour, you might need to push that to 75% or 80%. Knowing these numbers allows you to look at a dough and know immediately if it is too dry or too wet, long before it hits the oven.
The Importance of Scales
I cannot stress this enough: get a digital kitchen scale. Measuring flour by volume is the single most common reason for failed bakes. A cup of flour can weigh anywhere from 120 grams to 160 grams depending on how packed it is. In a recipe that calls for four cups of flour, that is a variance of 160 grams—more than an entire cup! Precision in your starting weight ensures that your hydration, protein-to-starch ratio, and salt balance remain consistent every single time you bake.
Troubleshooting Common Flour Issues
Even with the best information, things can go wrong. Perhaps your dough didn't rise, or your cookies spread across the pan like a puddle. Usually, the issue lies in the relationship between the flour you chose and the technique you employed. A "soupy" batter often means the protein content was too low for the liquid, or the gluten wasn't properly developed. A "bready" muffin often means the flour was over-mixed or had too high a protein count for a quick-bread application.
Why Did My Bread Not Rise?
If your bread failed to rise, first check your yeast. However, if the yeast is active, the culprit is often the flour. Did you use a low-protein cake flour? It simply cannot support the gas production of the yeast. Did you use an old bag of flour that had been sitting in the pantry for a year? Flours do degrade over time; as the proteins oxidize, their ability to form strong gluten bonds diminishes. Freshness matters as much as the variety of the grain.
Managing Spreading and Texture
If your cookies spread too much, you may have used a low-protein flour that couldn't support the weight of the butter and sugar, or your oven temperature was too low, preventing the flour's starch from setting quickly enough. Try chilling your dough for at least 30 minutes before baking. This hydrates the flour, allows the fats to solidify, and results in a much better structure once the heat hits the tray.
"A kitchen scale is not just a tool; it is a declaration of intent. It tells the ingredients that you are serious about the outcome of your labor."
Final Thoughts
The science of flour is a vast, beautiful, and deeply rewarding subject. By moving away from the idea of "all-purpose" as a catch-all and embracing the specific properties of different flours, you open the door to a higher tier of baking. You will begin to notice the difference in the way the dough feels in your hands, the way it behaves under the tension of a fold, and the way it transforms when it finally hits the heat of the oven.
Remember that flour is a living, changing ingredient. It responds to the humidity in your kitchen, the temperature of your water, and the speed of your mixer. Don't be afraid to experiment, keep a baking journal, and note how different flours respond to your specific environment. When you "blame the chef," make sure you are doing so because you are challenging yourself to learn the underlying mechanics, not because you are afraid to get your hands dirty.
Ultimately, baking is a craft of patience and precision. Whether you are baking a simple rustic loaf for a Tuesday night dinner or an elaborate cake for a celebration, the flour is your canvas. Treat it with respect, choose your variety based on the outcome you desire, and always, always measure by weight. With these fundamental principles in your toolkit, there is no limit to what you can achieve in your kitchen. Happy baking, and may your crusts always be golden and your crumbs always be perfect.
As we conclude this exploration, I hope you feel empowered to go into your pantry and look at your bags of flour not as identical white powders, but as distinct tools in your repertoire. Start with the basics: bake the same loaf of bread using all-purpose flour, then again with bread flour, and observe the difference in the rise and the crumb. This kind of experiential learning is exactly how professionals develop their intuition. Your kitchen is your laboratory, and every bake is an experiment in flavor and texture. Embrace the process, embrace the science, and never stop questioning why things work the way they do. The perfect bake is waiting for you.




Get the Next Recipe
Weekly recipes, techniques, and gear picks — straight to your inbox.
