The Science of Sugar Crystallization: Mastering Smooth Caramels, Fudge, and Syrups Without Seizing
Cooking is often described as an art, but when it comes to the temperamental world of sugar work, it is undeniably a rigorous science. Many home cooks approach the stove with a sense of trepidation when a recipe calls for caramel or fudge, fearing that singular moment when a smooth, golden mixture suddenly turns into a grainy, crystallized disaster. This phenomenon, known as seizing, is the bane of the amateur confectioner, yet it is entirely preventable once you understand the molecular dance occurring inside your saucepan. Sugar, or sucrose, is a highly structured crystalline molecule that, when heated, undergoes a series of complex transformations that dictate everything from texture to flavor profile. By mastering these variables—temperature, concentration, and agitation—you move from being a victim of your ingredients to a master of your culinary outcomes.
The journey into confectionery begins with the basic understanding of supersaturation, a state where a solution holds more dissolved solute than it theoretically should at a given temperature. When you dissolve sugar into water and apply heat, you are breaking the bonds that hold the crystalline structure together, allowing the sucrose molecules to move freely in a liquid medium. As the water evaporates, the concentration of sugar increases, and the liquid becomes increasingly viscous, eventually reaching stages that range from thread to hard crack. If the conditions are not carefully managed, those sucrose molecules will find each other again and revert to their solid, crystalline state, ruining your smooth sauce or candy. Learning to manipulate these states is the difference between a professional-grade ganache and a gritty, broken mess that belongs in the trash.
In this deep dive, we will explore the thermodynamics of sugar work, the essential tools of the trade, and the precise techniques required to achieve perfection every time. We will look past the simple instructions of "boil until golden" to understand why we use acid, how the brush of a damp pastry brush can save a batch, and why the ambient humidity in your kitchen actually matters. Whether you are aiming to create the perfect salted caramel sauce for a dinner party or a batch of traditional fudge that melts on the tongue, the knowledge shared here will serve as your blueprint. Put down the wooden spoon, grab your thermometer, and prepare to elevate your sugar work from guesswork to an exact science.
The Chemistry of Sucrose and Nucleation
At the heart of all candy making is the battle against nucleation, the process by which sugar molecules begin to gather around a focal point to reform their solid structure. In a perfect syrup, we want the sucrose to remain in an amorphous state, meaning it is solid but lacks a repeating crystalline structure. When sugar crystals form prematurely, they act as "seeds," prompting a chain reaction where the entire mixture rapidly turns into a sandy, grainy substance. This is why you will often see chefs warning against stirring a boiling sugar syrup; agitation is a powerful catalyst for nucleation, providing the mechanical energy for molecules to bump into one another and stick.
Why Impurities are the Enemy
The presence of dust, leftover sugar granules on the side of the pot, or even an unwashed whisk can trigger unwanted crystallization. These microscopic particles act as the surface upon which sugar crystals start their growth. Professional kitchens treat the side of the saucepan with religious fervor, using a damp pastry brush to wash down any stray granules that have splashed onto the sides above the liquid line. If these dry granules fall back into the boiling syrup, they act as the "nuclei" that lead to a seized mass, effectively ruined beyond repair.
Managing the Environment
The environment in which you cook plays a subtle but critical role. Sugar is hygroscopic, meaning it eagerly absorbs moisture from the air. If you are working on a particularly humid day, your sugar will take longer to reach the desired temperature because it is constantly fighting the atmospheric water vapor. Furthermore, the rate at which your syrup cools will determine the size of the crystals that form. A slow, controlled cooling period often allows for larger crystal growth, which is exactly what we want to avoid when seeking a silky, smooth texture in our finished confections.
"The difference between a amateur and a master is not the recipe, but the understanding of the environment. Every molecule of sugar is seeking a partner; your job is to keep them dancing independently until the very last moment."
The Essential Tools for Precise Confectionery
You cannot achieve professional results without the correct equipment, and in the world of sugar, the candy thermometer is your non-negotiable partner. While experienced chefs can judge sugar stages by dropping a sample into a bowl of ice water—the "cold water test"—a digital thermometer provides the exact data needed to hit those narrow windows of success. The transition between firm ball and hard ball can happen in a matter of seconds, and even a three-degree variance can result in a fudge that is too soft to slice or a caramel that is too hard to bite.
Choosing the Right Pot
The material of your saucepan is just as important as the thermometer. You should always reach for a heavy-bottomed saucepan, preferably one made of stainless steel or copper. Copper is prized for its superior thermal conductivity, which ensures that heat is distributed evenly across the base of the pot, preventing "hot spots." Hot spots lead to uneven cooking and caramelization, where one side of your syrup begins to burn while the other is barely reaching the soft ball stage. A thick-walled pot also provides the thermal mass necessary to maintain a steady temperature once you remove the pan from the heat.
The Role of Acid and Inversion
To prevent crystallization, we often introduce an interfering agent into our syrup. These are typically acids like lemon juice, cream of tartar, or even a small amount of corn syrup. These ingredients work by encouraging inversion, a chemical process where sucrose is broken down into its two component sugars: glucose and fructose. These simpler sugars are far more resistant to crystallization than sucrose alone, making them the invisible insurance policy for your caramel and fudge recipes. By adding just a quarter-teaspoon of cream of tartar, you significantly increase the stability of your syrup during the cooling phase.
Mastering the Caramelization Process
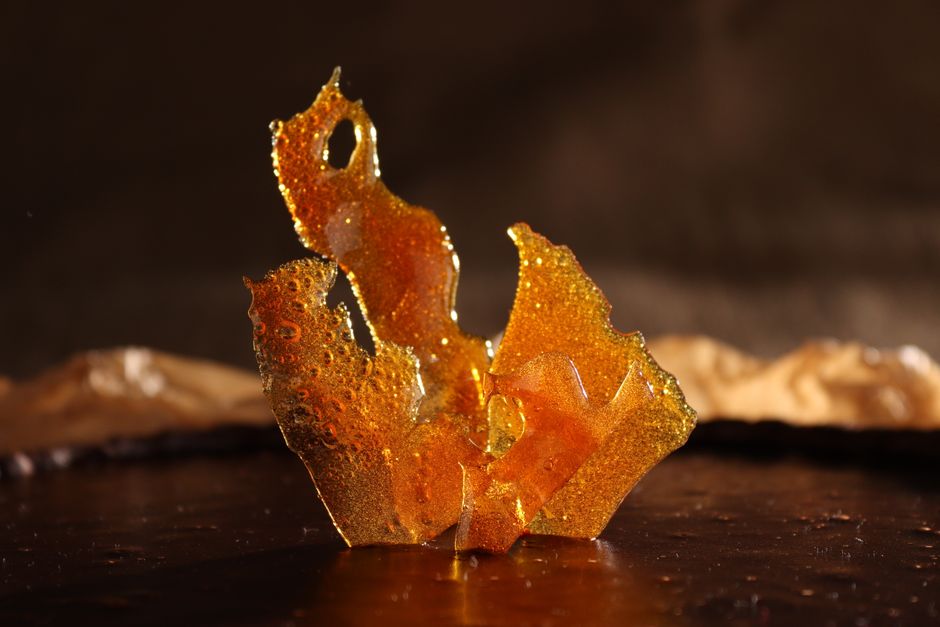
Caramelization is a pyrolytic process, which means it occurs through the application of high heat, causing the complex sugar molecules to break down and reform into hundreds of different aromatic compounds. Unlike crystallization, which is a physical change, caramelization is a chemical reaction that transforms clear, sweet sugar into the rich, nutty, and bitter profile we associate with classic caramel. The color change—from clear to pale straw to deep amber—is the primary indicator of the depth of flavor you are achieving.
Dry vs. Wet Caramel
There are two primary methods for making caramel: the dry method and the wet method. The wet method involves dissolving the sugar in water before heating, which makes the cooking process slower and more manageable, though it increases the risk of crystallization. The dry method involves placing sugar directly into the pan and heating it until it melts. This is faster and produces a more intense flavor but requires constant attention and careful movement of the pan to ensure that the sugar melts evenly without scorching.
Stopping the Process
The most dangerous moment in caramel making is the carry-over heat. Even when you pull your pot off the stove, the residual heat in the heavy-bottomed base will continue to cook the sugar. If you are aiming for a medium-amber caramel, you must pull the pot the moment it hits the desired color, or better yet, have an ice bath ready to set the base of the pot in. This immediate reduction in temperature halts the caramelization process instantly, ensuring you don’t cross the line from perfectly toasted to burnt and bitter.
"When the sugar hits that deep, mahogany hue, you are seconds away from perfection or disaster. Trust your eyes as much as your thermometer; if it smells like it might burn, it already has."
The Science of Creamy Fudge
Fudge is perhaps the most misunderstood of all sugar-based confections because it requires a deliberate, controlled crystallization process to achieve its signature texture. Unlike a smooth, clear caramel, which relies on the total absence of crystals, fudge relies on the formation of microscopic sugar crystals. These crystals must be so small that they are undetectable to the human tongue, creating a texture that is velvety and smooth rather than gritty.
The Cooling and Beating Technique
The secret to fine-grained fudge is temperature control during the cooling process. After boiling your sugar, milk, and butter mixture to the soft ball stage (approximately 238°F to 240°F), you must allow the mixture to cool undisturbed until it reaches roughly 110°F. If you start beating the mixture while it is too hot, the crystals will grow too large, resulting in a grainy, sandy texture. Only when the mixture has reached that "cool" threshold should you begin the beating process, which forces the sugar to crystallize in a controlled, uniform manner throughout the fat phase of the candy.
The Importance of Fat
In addition to sugar, fudge relies heavily on fats like butter, cream, or condensed milk. These fats serve two purposes: they add a rich flavor, and they act as a physical barrier that coats the individual sugar crystals. This coating prevents the crystals from clumping together, which is the primary reason why high-fat-content fudges are consistently smoother than lower-fat versions. When you are developing a recipe, don’t skimp on the high-quality dairy; it is the structural support system for your finished product.
Common Failures and How to Fix Them
Every chef, no matter how skilled, has faced a batch of seized sugar. The most common error is the "crystal chain reaction," where one stray grain ruins the entire batch. If your syrup becomes cloudy or you see grit forming on the sides of the pan, you have effectively "seeded" the solution. While you can sometimes save a slightly seized syrup by adding a small amount of hot water and reheating it, usually the best course of action is to start over. The integrity of the chemical structure has been compromised, and further manipulation will only lead to a harder, grainier result.
Troubleshooting Texture Issues
If your caramel turns out too thin, you haven’t reached a high enough temperature. If it is too hard, you’ve gone too far. Temperature is the universal language of candy, but you must calibrate your thermometer before use. To do this, bring a pot of water to a rolling boil and measure the temperature; at sea level, it should read exactly 212°F. If your thermometer reads 210°F, you know you need to adjust your target temperatures for your candy recipes by plus two degrees.
Humidity and Storage
Once your candy is finished, the work isn't over. Because sugar is hygroscopic, storage is vital. Always store your caramels and fudge in an airtight container in a cool, dry place. If the environment is too humid, your perfectly set candies will become sticky and lose their shape. If you live in a very humid climate, consider wrapping each piece individually in wax paper or cellophane. This adds a layer of protection against the atmospheric moisture that threatens the structural stability of your hard-earned confections.
Advanced Tips for the Home Chef
To truly master the craft, you must move beyond basic recipes and begin experimenting with flavor infusion and texture modification. Infusing your sugar syrup with herbs like rosemary, lavender, or Earl Grey tea adds a sophisticated layer to classic caramels. The trick is to infuse the dairy component (the heavy cream) rather than the boiling sugar itself. By heating the cream with your aromatics and then straining it before adding it to the sugar, you ensure a clean, smooth finish without any unwanted bits of plant matter that could act as nucleation points.
The Power of Salt
Salt is the single greatest enhancer in sugar work. It acts as a counterpoint to the extreme sweetness, activating the taste buds and creating a lingering, complex finish. For the best results, use a flaky sea salt like Maldon, and sprinkle it over the top of the caramel or fudge just before it sets. Don’t stir the salt into the mixture while it is cooking, as it will dissolve and lose its textural crunch. You want the contrast of the smooth, sweet candy against the sharp, salty crystals of the finishing salt.
Scaling Up and Down
Be wary of changing the quantity of a recipe. Confectionery relies on ratios, and the surface-area-to-volume ratio of your saucepan affects the rate of evaporation. If you double a recipe, you may find that the cooking time increases significantly, which changes the flavor profile of the sugar. Always work within the capacity of your pan; if your pot is too full, you will have trouble managing the boil-over, and if it is too empty, the thermometer may not be fully submerged in the liquid.
"A chef’s intuition is just years of mistakes refined into habit. Do not fear the seizing, for it is merely a lesson in the physics of sweetness."
The Final Polish: Presentation and Temperature
The visual appeal of your candy is the final step in the process. For caramels, a clean, sharp edge is the hallmark of professional work. Use a warm knife to cut your caramels, dipping the blade in hot water and wiping it clean between every single cut. This prevents the caramel from dragging and tearing as you slice. For fudge, a quick, firm cut at room temperature is usually sufficient, but if the fudge is particularly dense, a light score mark across the surface before the final cut can help guide your knife.
Tempering and Patience
Patience is the secret ingredient in all sugar work. Whether you are letting your fudge cool to the perfect 110°F or waiting for your caramel to set before cutting, rushing the process is a guarantee of failure. Sugar requires time to reach its stable states. If you find yourself frustrated or in a hurry, it is better to walk away and return to the stove when you can give the process your full, undivided attention.
Building Your Culinary Library
Keep a confectioner’s log. Note the date, the humidity level in your kitchen, the specific temperature you reached, and the final outcome of the batch. This allows you to replicate your successes and understand your failures. Over time, you will develop a "feel" for the stages of sugar, recognizing the way the bubbles change size and the way the viscosity shifts as the sugar concentration climbs. This sensory knowledge is what separates the home cook who follows a recipe from the chef who understands the science.
Conclusion
Mastering the science of sugar crystallization is a transformative experience for any home cook. It changes how you view the ingredients in your pantry, turning a simple bag of granulated sugar into a versatile medium for culinary expression. By understanding the roles of nucleation, inversion, and temperature control, you have the power to create confections that are not only delicious but also technically perfect. Whether you are whipping up a batch of classic, buttery salted caramels or a decadent, melt-in-your-mouth fudge, remember that the "seizing" you once feared is just a signal to pay closer attention to the variables at play.
The beauty of this craft lies in its precision. Every degree on the thermometer, every splash of cream, and every gentle motion of your pastry brush contributes to the final result. As you continue to practice, you will find that the fear of failure dissipates, replaced by the confidence that comes from deep, scientific understanding. Do not be afraid to experiment with new flavors, textures, and techniques, but always respect the underlying physics of the sugar. With the right tools, a bit of patience, and the knowledge of how these molecules interact, there is no limit to what you can create in your own kitchen.
As you move forward in your culinary journey, remember to share your creations. Sugar is meant to be enjoyed, and there is no greater satisfaction than presenting a box of homemade, perfectly crystallized candies to friends and family. They will see the art, but you will know the science that made it possible. Keep your thermometers calibrated, keep your pans clean, and keep the heat steady. The world of confectionery is vast and rewarding, and you now have the tools to conquer it, one degree at a time. Happy cooking, and may your caramels always be smooth and your fudge always melt just right.

Get the Next Recipe
Weekly recipes, techniques, and gear picks — straight to your inbox.
