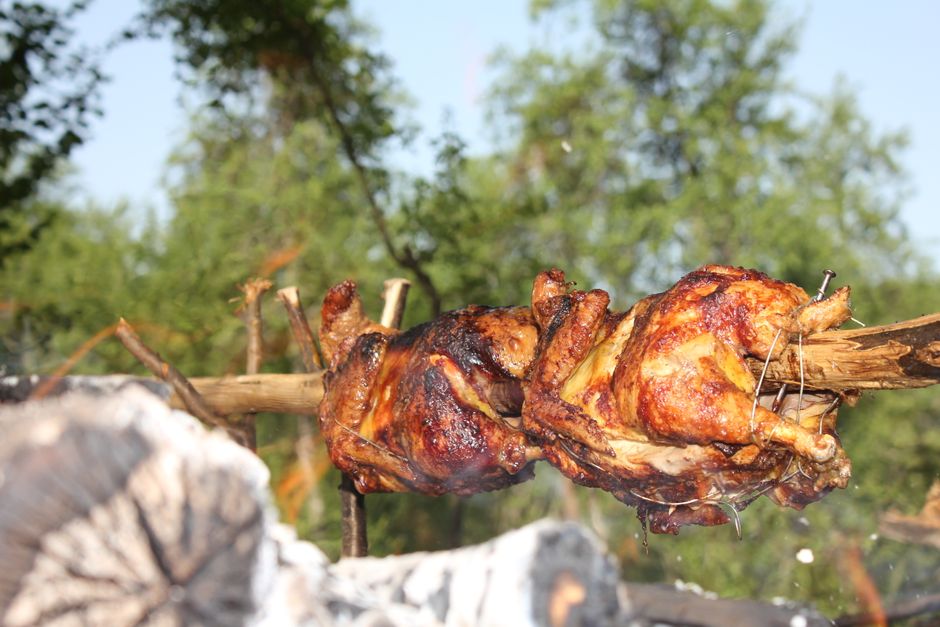
The Science of the Perfect Roast Chicken
The quest for the perfect roast chicken is the true rite of passage for any home cook, serving as the ultimate test of patience, technique, and intuition. While it may seem deceptively simple, achieving that elusive combination of blisteringly crisp, golden-brown skin and succulent, flavorful meat requires a fundamental understanding of how heat, moisture, and proteins interact within the oven. Many home cooks approach this dish with unnecessary trepidation, fearing a dry breast or rubbery skin, but by stripping away the guesswork and applying culinary science, you can transform this humble bird into a masterpiece. This post is dedicated to deconstructing the roast chicken, moving beyond rote recipes to help you understand the physics behind every sizzle and sear.
At the heart of the process is the Maillard reaction, that complex chemical dance between amino acids and reducing sugars that occurs when food is subjected to high heat. To achieve that signature mahogany finish, we must manage surface moisture with scientific precision, ensuring that the skin dries out before the meat overcooks. It is a balancing act of evaporation versus conduction, where the goal is to drive the internal temperature of the bird to exactly the right point while simultaneously creating a shatteringly crisp exterior. If you have ever wondered why your chicken tastes bland or why the breast turns to sawdust while the legs remain raw, you are likely missing the essential variables of thermal conductivity and protein denaturation.
Welcome to "Blame The Chef," where we believe that a deep understanding of technique is the most valuable tool in your kitchen arsenal. Throughout this deep dive, we will explore everything from the importance of dry brining and trussing to the physics of carry-over cooking and resting periods. We will challenge the conventional wisdom that suggests chicken needs to be roasted at low temperatures for hours, instead advocating for a high-heat approach that yields superior results. Prepare to shift your culinary perspective, because after mastering these principles, you will never look at a supermarket rotisserie bird the same way again.
The Foundation: Selecting and Preparing Your Bird
Choosing the Right Specimen
The journey begins at the butcher counter, where the quality of your ingredient dictates the ceiling of your results. When choosing a chicken, prioritize air-chilled birds over those that have been water-chilled. During the standard water-chilling process, chickens absorb a significant amount of water, which essentially boils the bird from the inside out and prevents the skin from achieving a truly crispy texture. An air-chilled bird has a lower water content, meaning the skin is primed to dehydrate efficiently in the heat of your oven. Furthermore, look for birds that are free-range or pasture-raised, as these chickens develop more intramuscular fat and connective tissue, which translates to a richer, more complex flavor profile that factory-farmed birds simply cannot replicate.
The Science of Dry Brining
Once your bird is home, the most critical preparation step is dry brining. By seasoning your chicken with kosher salt at least 24 hours in advance—or ideally up to 48 hours—you allow the salt to penetrate deep into the muscle fibers. Through the process of osmosis, the salt draws moisture out of the meat initially, creating a concentrated brine on the surface, which is then reabsorbed into the bird. This internal seasoning ensures that the flavor isn't just sitting on the surface, but is inherent to the meat itself. Additionally, leaving the bird uncovered in the refrigerator during this process serves to dehydrate the skin, which is the primary prerequisite for achieving that glass-like crispness we all crave.
Managing Temperature for Success
Never bring your chicken directly from the refrigerator to the oven. Removing the bird from the cold and allowing it to sit at room temperature for roughly 45 to 60 minutes before cooking reduces the temperature gradient between the exterior and the interior. If you put a stone-cold bird into a 450-degree oven, the exterior will reach its searing point long before the deep tissue begins to warm, leading to uneven cooking. By bringing the bird closer to ambient temperature, you promote more uniform thermal transfer, ensuring that the dark meat—which needs to reach a higher temperature to break down connective tissue—finishes at roughly the same time as the leaner breast meat.
"The difference between a mediocre roast and a transcendental one is rarely the recipe; it is the management of moisture and the patience to allow the bird to reach the oven on its own terms."
Thermal Physics and the Art of the Sear
Why High Heat Wins
Traditional roasting methods often lean toward lower temperatures, around 325 degrees Fahrenheit, in the hopes that the bird will remain moist. However, this is a flawed approach because the prolonged exposure to moderate heat allows the breast meat to lose too much moisture through evaporation before the skin can undergo the Maillard reaction. By utilizing a high-heat method—starting at 450 or even 475 degrees Fahrenheit—you trigger the Maillard reaction almost immediately. This rapid searing seals the surface and provides a significant boost to the flavor profile, creating a complex, caramelized crust that protects the interior from drying out during the cooking process.
Understanding Heat Transfer
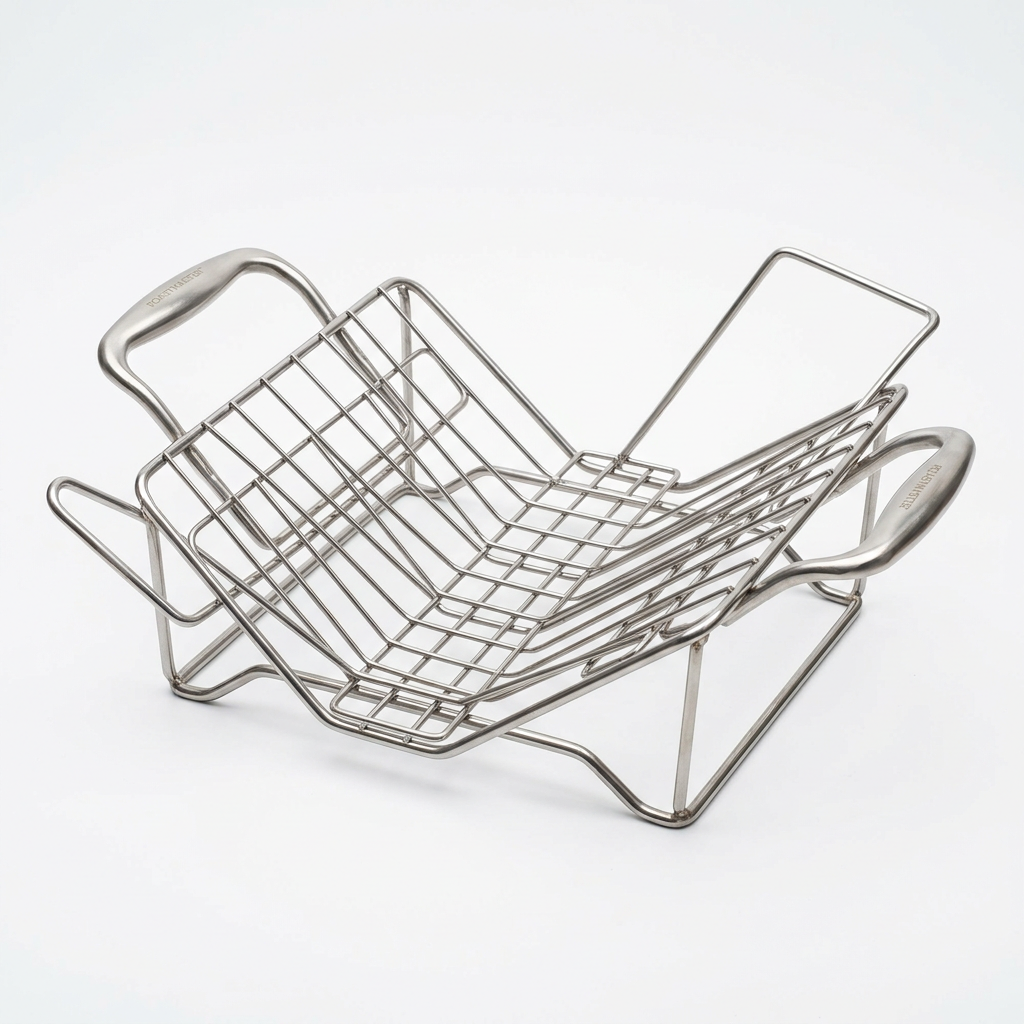
Roasting is a combination of convection—the movement of hot air around the bird—and conduction—the transfer of heat from the pan or rack to the skin. To maximize convection, you should place your bird on a wire rack set over a rimmed baking sheet. This allows hot air to circulate underneath the chicken, ensuring that the bottom side browns as effectively as the breast side. If the chicken sits directly on a baking sheet, the bottom skin will end up soggy, sitting in its own rendered juices rather than crisping. This simple architectural change in your roasting setup is one of the most effective ways to elevate your home-cooked results.
The Role of Rendered Fat
As the skin begins to heat up, the subcutaneous fat starts to render. This liquid gold is essential for self-basting. Some chefs suggest using butter, but the natural fat of the chicken is cleaner and offers a more focused flavor. When you dry brine your bird, the skin's surface texture changes, becoming slightly porous. As the fat renders, it essentially deep-fries the skin from the outside in. This interaction between the high heat of the oven and the fat dripping from the bird creates the specific texture of a professional-grade roast. Do not be afraid of the smoke that may arise during the first ten minutes; it is merely the process of your bird becoming a culinary masterpiece.
Trussing: A Question of Geometry
The Aerodynamics of Cooking
There is a common debate in the culinary world regarding whether to truss a bird. From a scientific perspective, trussing serves a specific mechanical purpose: it creates a compact, uniform shape that promotes even cooking. When you tie the legs together and tuck the wings under the breast, you are effectively controlling the surface area-to-volume ratio. By pulling the wings tight against the body, you prevent the thin, delicate tips from burning before the rest of the bird is cooked. Furthermore, by pulling the legs close to the carcass, you insulate the breast slightly, preventing it from overcooking while the dark meat in the legs—which needs more heat to tenderize—reaches its target temperature.
How to Truss Like a Professional
To truss effectively, use a long piece of kitchen twine. Place the bird breast-side up, slide the twine under the tail, and cross it over the drumsticks. Pull the twine tight to bring the legs together, then bring the ends of the twine up around the breasts and tie them securely near the neck cavity. This creates a rounded shape that allows the air to flow around the bird with minimal obstruction. It also helps the chicken retain its juices, as the tucked-in limbs act as a seal against the interior cavity, trapping moisture within the bird during the roasting cycle.
The Alternative: Spatchcocking
If you are less concerned with aesthetics and more concerned with sheer efficiency, consider spatchcocking (or butterflying) the bird. By removing the backbone with poultry shears and flattening the chicken, you create a perfectly level plane. This technique reduces the roasting time significantly and ensures that every part of the bird is exposed to the oven's heat simultaneously. While a traditional trussed bird is the classic centerpiece, a spatchcocked bird is the superior choice for home cooks who want to guarantee a perfectly cooked breast and thigh every single time. It is a pragmatic, science-forward approach to poultry preparation.
"If you want to control the temperature of your bird with absolute certainty, look to the physics of the shape. A trussed bird cooks for presentation and tradition; a spatchcocked bird cooks for total environmental consistency."
The Final Countdown: Internal Temperature and Resting
The Danger of the "Timer"
The most common mistake home cooks make is relying on a clock. Every oven has its own unique hot spots, and every bird varies slightly in weight and fat content. You must use a digital instant-read thermometer to determine when your chicken is done. The USDA recommends 165 degrees Fahrenheit for poultry, but as a chef, I suggest pulling the bird from the oven when the breast hits 155 degrees. Because of carry-over cooking, the internal temperature will continue to rise as the chicken rests on the counter. If you pull it at 165, by the time it reaches the table, it may have climbed to 175 or higher, resulting in dry, stringy meat.
The Physics of the Rest
Resting your chicken is not a suggestion; it is a chemical necessity. When meat is hot, the muscle fibers are contracted and the internal juices are in a state of high agitation, effectively distributed throughout the protein. If you carve the bird immediately, those juices will run out onto the cutting board, leaving the meat dry. By allowing the bird to rest for at least 20 to 30 minutes, you allow the proteins to relax and the juices to redistribute and thicken slightly. This resting period is when the final texture of the meat is cemented. Resist the urge to cut into it prematurely—the wait is what separates the amateur from the pro.
Managing Carry-Over Heat
During the rest, the outer layer of the chicken is still significantly hotter than the center. This heat continues to travel inward, which is precisely why we aim for that lower target temperature of 155 degrees for the breast and 175 degrees for the thigh. The thigh meat contains more connective tissue, such as collagen, which needs to reach that higher temperature to undergo hydrolysis—the process that turns tough, chewy collagen into silky, decadent gelatin. By allowing the bird to rest, you are letting the laws of thermodynamics do the work for you, ensuring the breast remains tender while the dark meat becomes succulent.
Flavor Profiles: Enhancing the Natural Essence
The Aromatics Strategy
While the chicken itself is the star, the aromatics you place inside the cavity serve as a subtle internal steamer. Stuffing the cavity with halved lemons, whole garlic heads, and fresh woody herbs like rosemary and thyme infuses the bird from the inside with volatile oils. Do not overstuff the cavity, as doing so blocks the circulation of heat and increases the cooking time, which contradicts our goal of uniform heat distribution. A few strategically placed aromatics provide enough fragrance to elevate the final dish without compromising the efficiency of the roasting process.
The Fat-to-Acid Balance
A perfect roast chicken needs a bright, acidic counterpoint to cut through the richness of the rendered fat. Many chefs make the mistake of using heavy sauces, but a well-roasted chicken often needs nothing more than the pan drippings themselves. After removing the bird, deglaze the pan with a splash of dry white wine, chicken stock, or even a squeeze of fresh lemon juice. Whisking these into the rendered fat creates a pan sauce that is essentially concentrated flavor. This is the ultimate "chef’s secret"—using the science of the roasting pan to create an instantaneous jus that complements the natural, salty, and savory notes of the crisped skin.
Seasoning Beyond the Salt
While dry brining with salt is foundational, the addition of aromatics like smoked paprika, cracked black pepper, or high-quality dried herbs to the skin surface can provide a depth of color and flavor. Be cautious with fresh herbs on the skin, as they can burn under high heat; instead, consider tucking them under the breast skin or adding them during the final ten minutes of roasting. The key is to keep the skin as dry as possible until the very end. If you want a more complex profile, a light brushing of softened butter mixed with lemon zest right after the bird comes out of the oven can add a luxurious mouthfeel and a beautiful sheen that enhances the visual appeal.
Troubleshooting Common Culinary Failures
The Soggy Skin Syndrome
If your skin is not crisp, it is almost certainly a moisture management issue. Perhaps you didn't leave the bird uncovered in the fridge for long enough, or you crowded the pan with vegetables, which released moisture and essentially steamed the bird. Vegetables like carrots, onions, and potatoes are excellent, but they should be placed on a separate roasting tray or arranged in a way that allows air to move freely around the chicken. If you must roast vegetables under the bird, toss them in a small amount of oil and ensure they are spread in a single layer to minimize the steam output.
The Uneven Cook
An unevenly cooked chicken is usually the result of an oven that hasn't been properly preheated. Always preheat your oven for at least 30 minutes before inserting the bird, even if the light indicates it has reached the target temperature. Ovens take time to saturate the internal walls with heat; a full heat-soak ensures that the temperature remains stable once you open the door to place the bird inside. Furthermore, rotate the pan 180 degrees halfway through the roasting process to account for any localized temperature variances in your oven, ensuring that both sides of the bird are exposed to the same thermal environment.
The "Dry Breast" Dilemma
This is the most common grievance of the home cook. If the breast is consistently dry, check your thermometer’s placement. You should insert the probe into the thickest part of the breast, ensuring it does not touch the bone, as the bone conducts heat differently and will give you a false, higher reading. Additionally, consider the bird's size. A massive four-pound bird will inevitably have a dry breast by the time the legs are done unless you take measures to protect it, such as shielding the breast with a layer of foil for the first half of the cooking time or using a "butterflying" technique to ensure the entire chicken is a consistent thickness.
"Cooking is not a static endeavor; it is a dynamic conversation between the cook, the ingredient, and the heat. When you listen to the science, the bird tells you exactly when it is ready."
Refining the Technique for the Home Kitchen
Step-by-Step Execution
To summarize the scientific approach to the perfect roast, follow this refined sequence:
Equipment Essentials
You do not need a professional kitchen, but you do need reliable tools. A heavy-duty rimmed baking sheet is vital for heat retention, and a wire rack is non-negotiable for airflow. Beyond that, a digital instant-read thermometer is the single most important investment you can make. The days of guessing by color or "poking" the meat are behind us; precision is the hallmark of the modern home cook. By standardizing your equipment, you remove variables and make your success repeatable, which is the definition of mastering a technique.
The Importance of Confidence
The most essential ingredient, often overlooked in scientific culinary analysis, is the confidence of the cook. When you understand the "why" behind the "how," you stop fearing the oven and start leading it. A perfect roast chicken is not about luck; it is about the mastery of heat, the management of moisture, and the respect for the biological structure of the bird. Approach your next chicken with the mindset of a scientist—observe the reactions, respect the temperatures, and trust the process. You are the architect of your own culinary success, and with these principles in hand, you are ready to deliver a meal that would make any chef proud.
Conclusion
The pursuit of the perfect roast chicken is, in many ways, the pursuit of culinary mastery itself. By focusing on the Maillard reaction, thermal conductivity, protein denaturation, and the crucial importance of the resting period, we turn a basic roast into a scientific marvel. You have learned that the skin requires dryness, the muscle requires heat management, and the flavor requires time and salt. Every detail we have discussed—from the air-chilling of the bird to the precision of the thermometer—serves a specific purpose in the greater architecture of the dish.
As you move forward, do not be afraid to experiment with these variables. Perhaps you will find that a slightly higher heat works better in your particular oven, or that you prefer the texture of a spatchcocked bird over a trussed one for weeknight dinners. That is the beauty of this craft; once you understand the science, you are no longer limited by recipes. You are free to iterate, to refine, and to create something that is uniquely yours.
"Blame The Chef" is built on the belief that everyone has the capacity to be an exceptional cook if they are willing to peel back the layers of tradition and look at the chemistry involved. When you roast your next chicken, remember that you are not just making dinner; you are engaging in a process that has been honed by generations of cooks and backed by the undeniable laws of physics. Take your time, focus on the details, and above all, enjoy the process. The reward is a masterpiece of golden skin and succulent, perfectly cooked meat that serves as the centerpiece of your kitchen repertoire. Happy roasting, and remember—if the result is perfect, you get all the credit; if it needs work, you can always blame the chef.

Get the Next Recipe
Weekly recipes, techniques, and gear picks — straight to your inbox.
