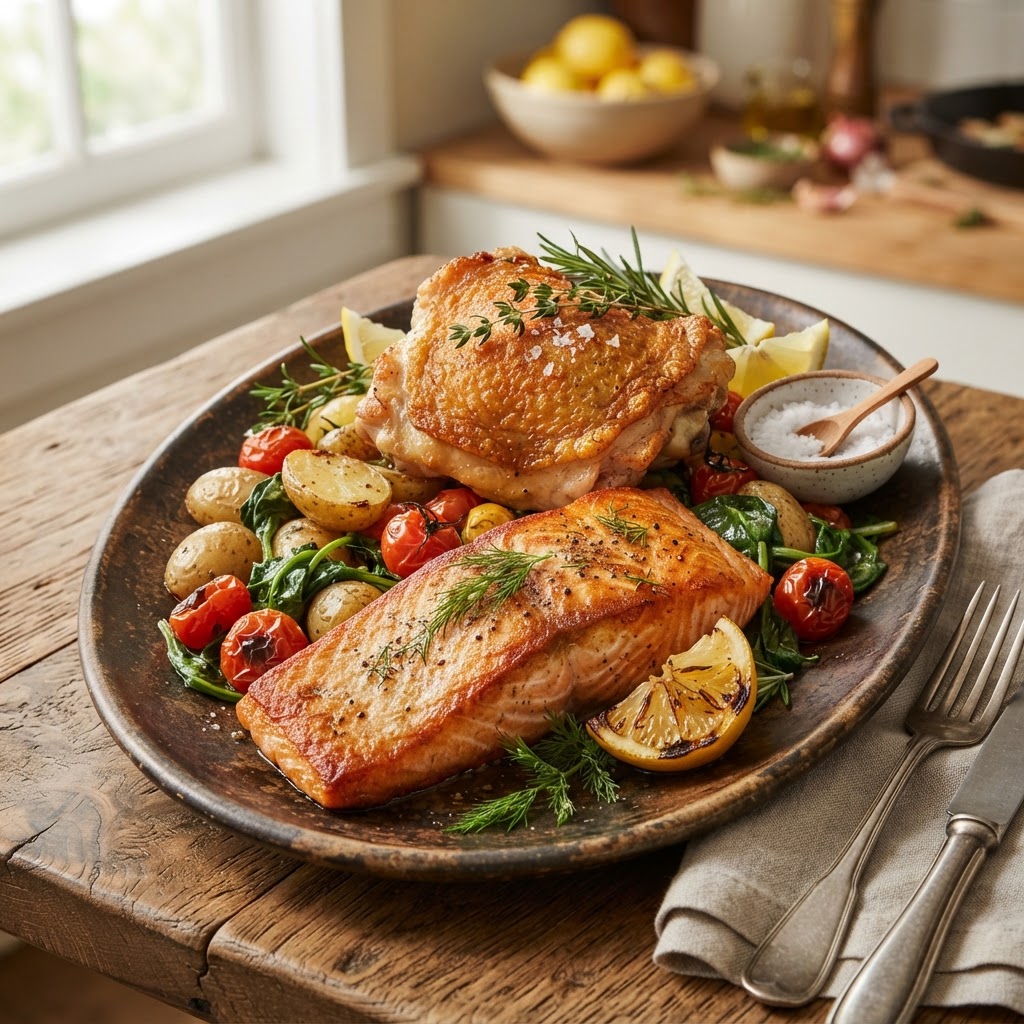
The Secret to Perfectly Crispy Skin: A Home Cook’s Guide to Mastering Poultry and Fish
The quest for the perfect, glass-like crunch on a piece of poultry or fish is perhaps the single most daunting challenge for the home cook. We have all experienced the tragedy of a beautiful salmon fillet or a pristine chicken breast that loses its luster the moment it touches the pan, resulting in a soggy, pale, and unappealing mess. Achieving that signature Maillard reaction—the chemical process that creates the complex, browned flavor profile we crave—requires more than just high heat and a good pan. It demands a fundamental understanding of moisture, fat content, and the physics of heat transfer that governs your kitchen. Mastering this technique transforms your home cooking from merely functional to restaurant-quality, providing that coveted sensory experience of a crackling exterior giving way to succulent, tender meat.
At "Blame The Chef," we believe that your equipment is only as good as your preparation, and in the case of crispy skin, preparation is quite literally everything. Most home cooks rush the process, throwing a cold protein directly into a pan, which guarantees uneven cooking and a lackluster crust. By focusing on the structural integrity of the skin and managing the thermal environment of your cooking surface, you can replicate the results of a professional kitchen without needing a commercial-grade flat-top grill. This guide is designed to dismantle the intimidation factor surrounding crust development, providing you with a systematic approach that works every single time, regardless of your skill level or the specific protein you have chosen to serve.
We will journey through the science of proteins, the importance of lipid management, and the crucial cooling phases that ensure your hard work doesn't vanish on the plate. Crispy skin is not just a texture; it is a declaration of culinary intent, signaling to your guests that you possess the patience and technical knowledge to treat ingredients with the respect they deserve. Whether you are searing a delicate piece of sea bass or roasting a whole bird for a Sunday supper, the principles remain consistent. Prepare yourself to look at your pantry, your cast iron, and your technique with new eyes, because once you master the art of the crust, you will never look back at a limp piece of chicken skin again.
The Science of the Sear: Why Moisture Is Your Enemy
The pursuit of the perfect crust is, at its core, a battle against moisture. When protein meets heat, the moisture on the surface of the skin must evaporate before the temperature can rise enough to trigger the Maillard reaction. If your protein is damp, the energy from your pan or oven is consumed entirely by turning that surface water into steam, which effectively poaches your skin instead of searing it. To achieve a golden-brown finish, you must ensure the surface is bone-dry, a step that many home cooks overlook in their haste to get dinner on the table.
Surface Dehydration Techniques
To ensure optimal crispiness, you must remove as much surface moisture as possible. The most reliable method is to pat the protein dry with high-quality paper towels immediately before it hits the fat. For an even more professional touch, consider the refrigeration method: place your skin-on poultry or fish on a wire rack in the refrigerator for several hours, or even overnight, uncovered. This promotes surface dehydration through circulating cold air, effectively "curing" the skin so that it is primed for intense, immediate browning the moment it hits the heat.
The Role of Salt in Moisture Control
Salt is a powerful tool, but it must be used with precision. While salting draws out moisture through osmosis, it can also lead to a watery pan if the salt is applied too far in advance without a proper resting period. We recommend salting your poultry at least 45 minutes before cooking, which allows the salt to dissolve into the juices and be reabsorbed into the meat, effectively seasoning the entire piece rather than just the exterior. For delicate fish, however, season immediately before cooking to prevent the salt from breaking down the fragile proteins and drawing out too much structural moisture.
"A dry surface is the golden ticket to a golden crust; if your protein feels damp to the touch, you are already behind in the race for texture."
Managing the Heat: Choosing Your Vessel and Fuel
The choice of pan is just as critical as the choice of protein. For poultry, a cast iron skillet or a heavy-duty stainless steel pan is mandatory. These materials offer superior heat retention, meaning they won't suffer a drastic temperature drop when the cooler protein is added to the surface. Avoid non-stick pans for high-heat searing; while they are excellent for eggs, they rarely sustain the consistent, high-temperature environment required to develop a deep, mahogany crust on chicken or fish without burning the butter or oil.
The Thermal Conductivity of Your Pan
Heavy-gauge metal is essential for maintaining a stable cooking environment. When you place a chicken thigh into a thin, cheap pan, the temperature at the point of contact plummets, causing the proteins to stick and preventing the rapid browning necessary for a crispy finish. By using a heavy pan, you ensure that the thermal energy is consistent throughout the process. Always preheat your pan to a medium-high setting until a drop of water dances on the surface—a classic test for the Leidenfrost effect—before adding your fat and protein.
Selecting the Right Fat for the Job
The fat you use is the medium that facilitates the transfer of heat from the metal to the protein. You need a fat with a high smoke point, such as avocado oil, grapeseed oil, or clarified butter (ghee). Avoid extra-virgin olive oil for high-heat searing, as its impurities will burn and turn bitter long before you achieve the desired crust. Use just enough fat to thinly coat the bottom of the pan—excess fat can actually insulate the skin and prevent it from crisping properly, leading to a greasy result rather than a crispy one.
The Art of the Poultry Sear: From Thighs to Whole Birds
Poultry skin contains a significant amount of fat, which, when rendered correctly, becomes the primary vehicle for its own crispiness. When cooking chicken thighs, start in a cold pan. By placing the chicken skin-side down in a cold or room-temperature skillet and gradually increasing the heat, you allow the subcutaneous fat to melt away slowly, effectively "frying" the skin in its own liquid gold. This technique produces a thin, paper-like crust that is remarkably light and satisfying.
Strategic Rendering for Superior Texture
As the fat renders, you might notice the edges of the skin curling up. To prevent this, use a pan press or even a secondary, slightly smaller heavy pan placed on top of the chicken to ensure maximum contact with the cooking surface. This consistent pressure is the secret weapon of professional chefs. It keeps the skin flat and ensures that every square millimeter is in direct contact with the heated metal, resulting in an even, uniform golden color across the entire surface of the skin.
Mastering the Flip and Finish
Once the skin is deep golden brown and has released naturally from the pan—never force a piece of protein to release; if it's sticking, it isn't ready—you can gently flip it to finish cooking. Remember that the skin is now fully developed, so you want to avoid flipping it back and forth. Finish the cooking process by basting with butter, garlic, and fresh thyme, allowing the aromatic fats to penetrate the meat. This dual-temperature approach—high heat for the skin, lower, gentle heat for the interior—is the hallmark of a master home cook.
"The sound of searing fat is the music of the kitchen; let the pan do the work, and resist the urge to move the protein until it tells you it is ready to be flipped."
Crisping Delicate Fish: Precision and Patience
Fish skin, particularly on varieties like striped bass, snapper, or trout, is much more fragile than poultry skin. The strategy here is to use high heat for a short duration to snap the skin into a crisp state without overcooking the delicate flesh beneath. Because fish proteins denature very quickly, you don't have the luxury of a long rendering process. You must go in with confidence and execute a quick, high-intensity sear that prioritizes the skin over the flesh.
The "Score and Press" Technique
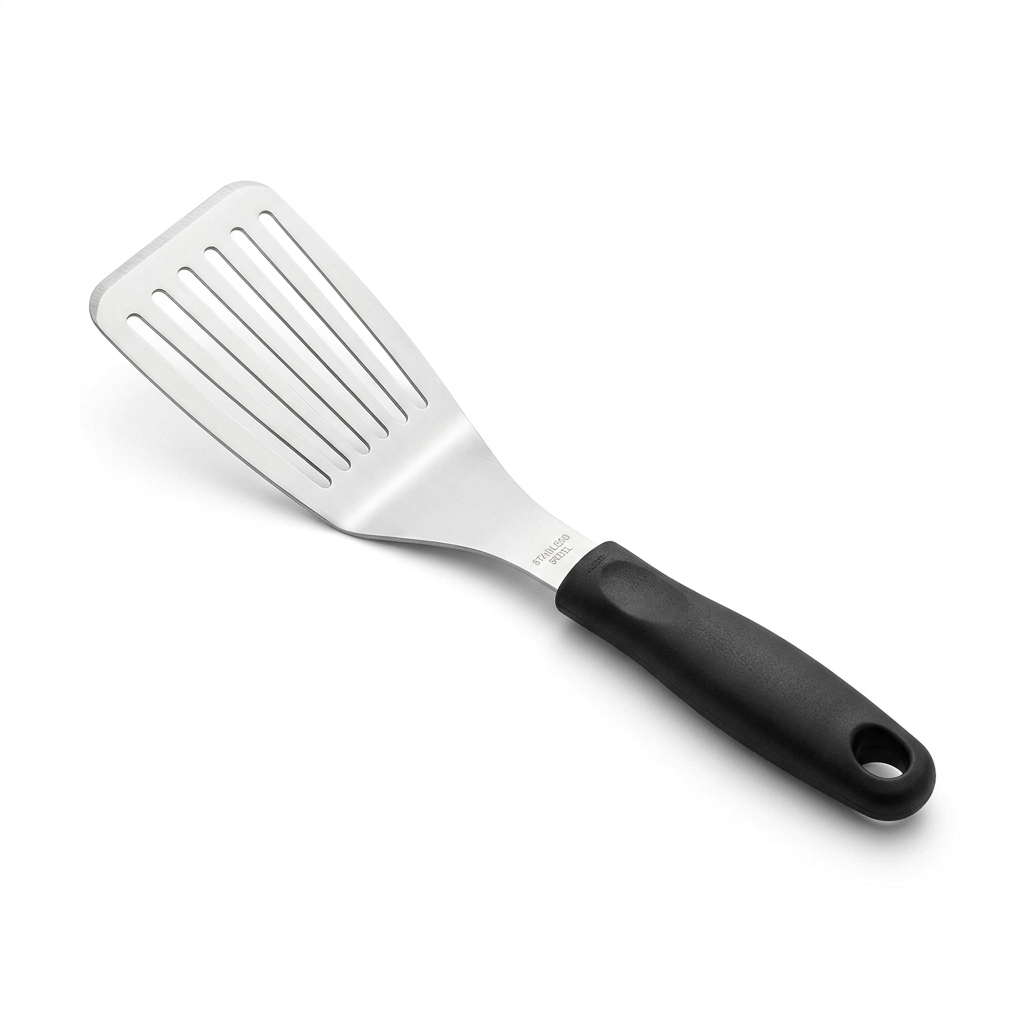
For fish with thicker skin, such as salmon or sea bass, scoring the skin lightly with a sharp knife can prevent the fillet from curling during the cooking process. A few shallow, diagonal cuts across the skin allow for the expansion of the muscle fibers, keeping the fillet flat against the pan. Once the fish is in the pan, use a fish spatula to press the center of the fillet firmly down for the first 30 seconds of cooking. This ensures that the center of the skin, which naturally wants to pull away from the pan, stays in contact with the hot surface.
Avoiding the Overcook
When cooking fish, the vast majority of the time should be spent on the skin side. Aim for 80% to 90% of the total cooking time on the skin side. By the time you flip the fish, the skin should be shatteringly crisp and the flesh should be mostly translucent. A quick flip for a 30-second "kiss" on the flesh side is often all that is required. This method keeps the flesh moist, opaque, and perfectly tender, while the skin provides the necessary textural contrast that defines a premium seafood dish.
Troubleshooting Common Crisping Errors
Even with the best intentions, things can go wrong. If you find your skin is burning before the meat is cooked through, your heat is too high. If the skin is sticking, your pan was not hot enough or you didn't use enough fat. The most common error is impatience; home cooks are often afraid of the smoke that high-heat searing produces. While you should certainly use your ventilation hood, a certain amount of smoke is a normal byproduct of high-temperature cooking.
The Stickage Problem
If your chicken or fish is sticking to the pan, do not panic. It is not necessarily a failure of your technique; it is a signal that the protein needs more time. The Maillard reaction creates a natural release mechanism. As the proteins reorganize into a crust, the bond between the food and the pan weakens. If you tug and the skin tears, you have lost the battle. Simply turn the heat down slightly, add a tiny bit more fat if necessary, and wait. The food will release when it is ready.
Managing Residual Heat
Remember that even after you remove the protein from the heat, it continues to cook. This is known as carryover cooking. If you have developed a perfect crust, you must transfer your protein to a wire rack rather than a plate. Placing a crispy skin item directly onto a plate allows steam to get trapped underneath, which will soften that gorgeous crust within seconds. A wire rack allows air to circulate underneath the food, preserving the crunch until you are ready to serve.
Preheat your pan:* Never drop food into a cold pan unless using the cold-render method.
Dry the skin:* Use paper towels religiously.
Don't crowd the pan:* Give every piece of meat its own space to breathe and sear.
Use the right fat:* Stick to high smoke-point oils.
Respect the resting phase:* Always rest your meat on a rack, never a flat surface.
Essential Tools for the Home Chef
To consistently achieve professional results, you need the right arsenal of tools. A cast iron skillet is non-negotiable for its thermal mass and durability. A flexible, stainless steel fish spatula is another must-have, as its thin edge allows you to slide perfectly underneath the fillet without damaging the skin. These tools are not just accessories; they are an extension of your culinary technique, allowing you to manipulate the food with the precision of a professional.
Maintaining Your Equipment
Proper care of your pans is part of the recipe. If you are using cast iron, ensure it is well-seasoned, as this provides a natural, non-stick surface that improves over time. If you use stainless steel, learn the "Leidenfrost" test to ensure you are adding your oil at the correct moment. By maintaining your tools, you ensure that they perform consistently, removing one variable from the complex equation of home cooking.
The Importance of the Wire Rack
If you take away only one lesson from this guide, let it be the necessity of the wire rack. It is the single most effective tool for preventing the dreaded "soggy bottom." By elevating your protein, you stop the accumulation of steam. This is the difference between an amateur-looking meal and a professional dish that maintains its integrity from the moment it leaves the stove until the first bite is taken.
"Cooking is a practice, not a destination; each time you pick up the spatula, you are refining your understanding of heat, fat, and time."
Final Thoughts
Mastering the art of crispy skin is a transformative experience for any home cook. It changes the way you approach your grocery shopping, your pan selection, and your timing in the kitchen. When you finally achieve that perfect, crackling crust, you aren't just serving a meal; you are serving a sensory masterpiece that balances texture and flavor in a way that is profoundly satisfying. It takes patience, a bit of bravery when the pan starts to smoke, and a firm commitment to the fundamentals of moisture control and heat management.
Do not be discouraged by initial failures. Even the most accomplished chefs have had to scrape a few torn fillets off the bottom of a pan in their early careers. Every time you cook, you are learning to read the language of the pan, the way the fat sizzles, and the way the skin browns. Keep these principles close—the dry surface, the heavy pan, the patience to wait for the natural release, and the wire rack to finish. You have all the tools necessary to turn your kitchen into the best restaurant in town.
As you continue to explore these techniques, remember that your personal touch is what truly makes the dish. Whether you choose to season your poultry with smoked paprika or finish your fish with a squeeze of charred lemon, the foundation of a perfectly crispy skin remains the same. Enjoy the process, embrace the sizzle, and take pride in the crunch. You have the knowledge; now, go forth and turn up the heat. Your perfect, golden-brown creation awaits, and from this point forward, you’ll never have to blame the chef again—because the chef is you.

Get the Next Recipe
Weekly recipes, techniques, and gear picks — straight to your inbox.
