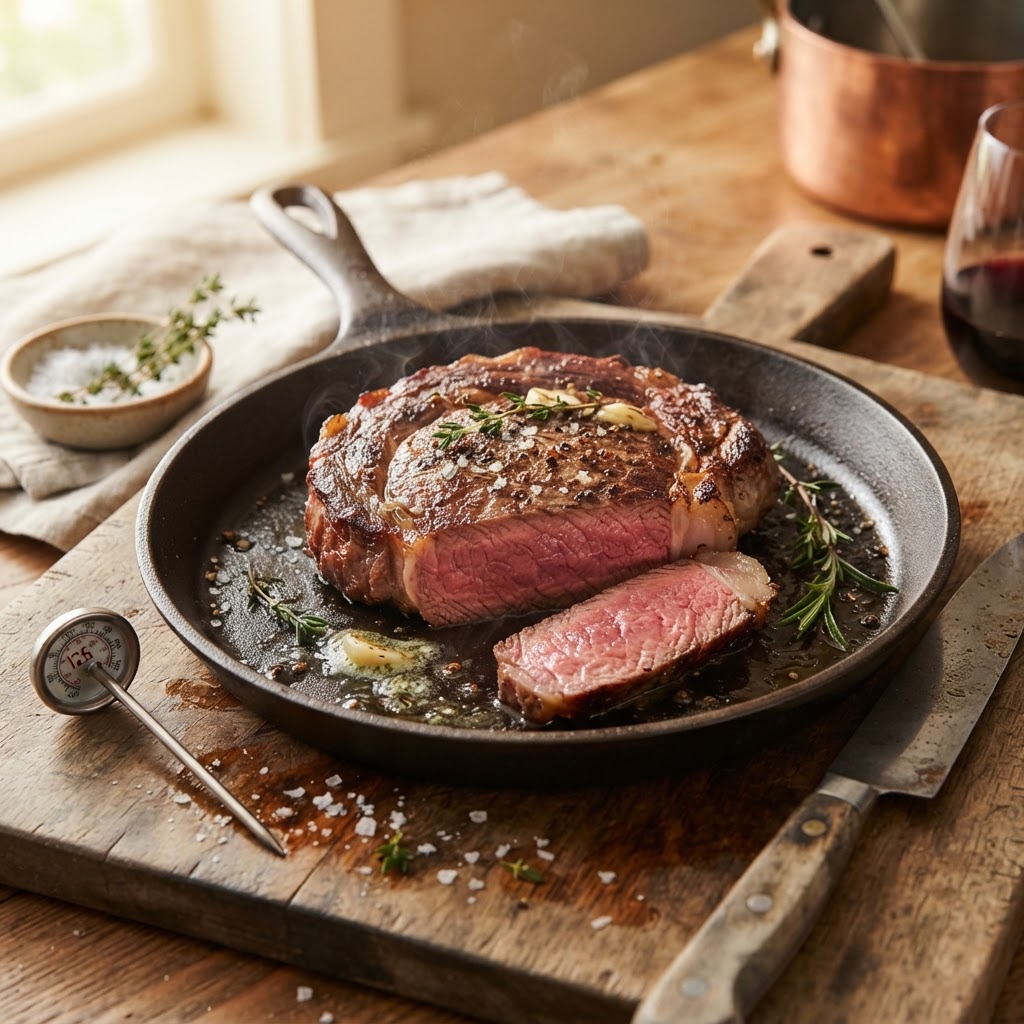
The Thermal Threshold: Mastering Carryover Cooking to Perfect Your Proteins
The journey toward culinary mastery is paved with burnt crusts, overcooked centers, and the inevitable frustration that comes when a beautiful cut of meat turns into a fibrous, dry disappointment. We have all stood at the edge of the stovetop, thermometer in hand, praying that our timing aligns with the elusive moment of perfection. Many home cooks view temperature as a binary state: it is either raw or cooked, and the gap between those states is often where our greatest kitchen disasters occur. However, the secret to restaurant-quality protein isn’t just about how you apply heat; it is about how you manage the heat that remains long after the flame has been extinguished. Understanding the science of thermal energy is the true mark of an accomplished home chef.
Carryover cooking is not merely a suggestion or a fancy term used by culinary school graduates; it is the most critical variable in the equation of meat preparation. When you pull a steak off the grill or remove a roasted chicken from the oven, the story of its doneness is far from finished. The exterior of the protein, which has been subjected to intense, direct heat, acts as a reservoir of thermal energy that continues to travel inward toward the center of the cut. If you ignore this physical phenomenon, you are essentially guaranteeing that your protein will reach a state of overdoneness within minutes of hitting your cutting board. Mastering this requires a shift in perspective, moving away from "cooking until done" and toward "cooking until the target, then allowing the physics to finish the job."
This post is designed to pull back the curtain on the Thermal Threshold, providing you with the technical framework and the intuitive confidence needed to stop blaming yourself for dry proteins. We will dismantle the myths surrounding resting times, explore the impact of protein density on temperature gradients, and provide you with actionable data to ensure your next dinner party is flawless. By the end of this guide, you will understand exactly why your meat behaves the way it does after it leaves the heat source. You will stop guessing and start calculating, turning every session in the kitchen into a predictable success. Let us delve into the science of heat and learn how to master the resting phase once and for all.
The Physics of Heat Transfer
Understanding Thermal Momentum
When you sear a piece of protein, you are creating a significant temperature gradient. The surface, having been exposed to temperatures exceeding 400°F (204°C) during the Maillard reaction, is significantly hotter than the core. Physics dictates that heat must move from areas of high concentration to areas of low concentration. Therefore, the heat trapped in the crust will inevitably migrate toward the cooler center. This is the definition of thermal momentum. If you pull a piece of meat at exactly your target temperature, the heat stored in the crust will push that internal temperature up by 5°F to 15°F (3°C to 8°C) as it rests.
The rate of this migration depends entirely on the size, shape, and density of the protein. A large, thick beef tenderloin roast has a massive amount of thermal energy stored in its outer layers compared to a thin strip steak. If you fail to account for the size of the protein, you will inevitably end up with a center that is gray and overcooked despite your best efforts to monitor the heat. Learning to estimate this "thermal lag" is the first step toward achieving a consistent medium-rare or medium-well profile every single time.
The Role of Resting
Resting is not just about keeping juices in the meat; it is the active period where the equilibrium of temperature is reached. During this phase, the surface temperature drops as it releases energy into the environment, while the core temperature rises as it absorbs energy from the surrounding layers. This is the thermal equilibrium phase. If you cut into your protein immediately after pulling it from the heat, you interrupt this process, leading to a uneven texture and a loss of moisture.
"Carryover cooking is not a matter of luck; it is a calculated surrender of heat that allows the protein to finish its journey in the gentle embrace of residual warmth."
Always remember that resting is a dynamic process. The protein is essentially cooking itself without the aid of an external heat source. For larger cuts like a whole ribeye roast or a thick pork loin, this resting period can last up to 20 or 30 minutes. Do not rush this process. The patience you exhibit during these minutes is what separates the dry, tough, and tragic from the succulent, tender, and triumphant.
Calibrating Your Pull Temperatures
The Law of the 5-Degree Rule
A universal guideline for most home cooks is the 5-Degree Rule, though it is more of a starting point than a hard-and-fast law. For most individual cuts like steaks or chops that are roughly 1 to 1.5 inches thick, you should pull the protein off the heat when your thermometer reads 5°F below your desired final serving temperature. If you want a steak to reach a perfect medium-rare of 130°F (54°C), you pull it from the heat at 125°F (52°C).
However, this rule is highly dependent on the cooking method. If you are reverse-searing, which utilizes a low and slow environment, the internal temperature rise is significantly lower because the temperature differential between the exterior and interior is minimal. In such cases, you might only need to account for a 2-degree rise. Conversely, if you are deep-frying a protein, the heat intensity is extreme, and you must account for a much larger jump in temperature—often as high as 10 to 15 degrees.
Adjusting for Cut Size
The mass of the protein dictates how much energy it holds. Consider these general rules for internal temperature pull-points for medium-rare (final target 130°F/54°C):
By segmenting your approach based on the geometry of the meat, you eliminate the guesswork. When you are dealing with a thick roast, the heat has a much longer distance to travel to reach the center, and the sheer volume of hot, outer meat will provide a massive "thermal payload" that will continue to drive the internal temperature upward long after you have moved the meat to a cutting board.
The Equipment of Accuracy
The Digital Advantage
If you are still using the analog dial-face thermometer that came with your oven, you are operating with a significant disadvantage. These tools are often calibrated poorly and respond to temperature changes with the speed of a sloth. To master carryover cooking, you need a high-speed, digital instant-read thermometer. These devices provide a reading in under three seconds, which is crucial because every second your oven door is open or your meat is exposed to air, you are losing valuable heat and potentially affecting the accuracy of your reading.
Precision is the bedrock of consistency. A quality thermometer should be checked for accuracy by placing it in an ice water bath—it should read 32°F (0°C). If it does not, you are working with skewed data, and your carryover cooking calculations will be inherently flawed. Do not skimp on this tool; it is the single most important instrument in your kitchen arsenal.
Positioning the Probe
Where you stick that thermometer matters just as much as when you stick it. You must ensure the tip of the probe is in the geometric center of the thickest part of the protein. If you are checking a roast, aim for the deep center, ensuring you haven't accidentally pierced all the way through to the other side or touched a bone. Bones act as heat conductors and will give you a false, inflated reading, leading you to believe the meat is done before it actually is.
Always take multiple readings if you are working with an irregularly shaped piece of meat. Proteins are rarely uniform in density or thickness. By taking readings in several spots, you can identify the "cold zone," which is the truest indicator of where the meat stands. Once you find the coolest point, that is the number you use to make your decision to remove the heat.
Techniques for Thermal Control
Using Aluminum Foil: To Tent or Not to Tent?
The act of tenting your meat with aluminum foil is a common practice, but it serves a specific purpose in the carryover cooking process. When you tent, you create a micro-environment that traps heat and moisture. This prevents the surface temperature from dropping too quickly, which effectively extends the carryover cooking phase. If you have pulled your meat at the correct time, this is generally a good thing, as it ensures an even temperature distribution throughout the muscle fibers.
However, if you are concerned about the crust, tenting can be a detriment. The steam generated by the resting meat can soften the crispy exterior you worked so hard to create. If texture is your priority, place the meat on a wire rack over a sheet pan to allow air circulation, which helps keep the crust dry while the heat migrates to the center. Use the foil tent only if you are worried about the meat cooling down too quickly before serving.
"A beautiful sear is a trophy of heat application, but the internal temperature is the testament to your mastery of time and stillness."
The Reverse Sear Method
The reverse sear is perhaps the most forgiving method for perfecting carryover cooking. By bringing the meat to a low, stable temperature in the oven or smoker first, you create a uniform internal gradient. Because the temperature of the oven is so close to your target internal temperature, the jump in temperature during the resting phase is incredibly predictable and minimal. This technique allows you to achieve the perfect medium-rare from edge to edge, with a beautiful crust that isn't dependent on a massive, uncontrolled carryover spike.
The Anatomy of the Resting Phase
The Muscle Fiber Response
Understanding what happens to protein on a cellular level explains why resting is non-negotiable. When meat is cold, the muscle fibers are contracted and firm. As heat is applied, these fibers relax, but the moisture contained within them is pushed toward the center of the cut by the pressure of the cooking heat. If you slice the meat while it is still under the stress of high-intensity cooking, those juices will simply run out onto the cutting board.
During the rest, the thermal equilibrium allows the muscle fibers to loosen and reabsorb some of that moisture. This is why meat is more succulent after a 10-minute rest than it is immediately off the grill. Furthermore, the enzymatic activity within the meat actually continues for a short period after the fire is gone, contributing to tenderness. You are not just waiting; you are allowing the meat to undergo a final, crucial stage of its transformation into a gourmet meal.
Managing Temperature Drift
Drift is the variation in the amount of heat added during carryover. A piece of lean tenderloin will behave differently than a fatty brisket or a delicate piece of fish. Leaner proteins have less fat to insulate the heat, meaning they may experience a faster, sharper temperature rise, while fatty cuts act as an insulator and might hold their heat for a longer period.
If you are cooking for a large group and need to keep several proteins at the correct temperature, consider a hold-warmer or a low-temperature oven set to 130°F. This allows you to effectively pause the carryover process once it reaches the ideal internal temperature, keeping the protein in that perfect state for an extended window. This is a pro-level technique that allows you to manage the timing of a multi-course dinner without the anxiety of the meat drifting past your desired doneness.
Common Pitfalls and Troubleshooting
The Case of the "Surprise Gray Ring"
The dreaded gray ring around the edge of a steak is usually the result of using a heat source that is too aggressive for too long, or failing to pull the meat early enough. When the temperature gradient is too steep, the outer layers reach the "overcooked" threshold while you are still waiting for the center to reach "medium-rare." This is why high-heat searing should be brief, and the bulk of the cooking should happen through indirect heat.
If you consistently find a thick gray ring, stop blaming the cut and start adjusting your timing. Try pulling the steak at a lower internal temperature and using a longer, gentler rest to finish the cook. You might be surprised at how vibrant and consistent the color of the cross-section becomes when you master the balance between the initial sear and the final thermal settling.
Overcoming Temperature Fear
Many home cooks fear the thermometer reading. They see "120°F" and panic because it looks too low. You must trust the data, not your intuition. The science of thermal conductivity is reliable, whereas our instincts are often clouded by the sight of raw-looking meat. If you have done the math and allowed for the carryover, the meat will hit that perfect 130°F mark every single time. It is a psychological hurdle that every great chef has had to clear.
When you start trusting your digital thermometer, you stop hovering over the oven. You gain the ability to step away, prepare a side dish, or pour a glass of wine, knowing with mathematical certainty that your steak is currently in the perfect stage of its development. Accuracy breeds calm, and a calm chef is a better chef.
Final Thoughts
Mastering the Thermal Threshold is the bridge between cooking as a chore and cooking as an art form. It requires the discipline to stop the fire early, the patience to let the meat rest, and the technical understanding of how heat migrates through protein. By internalizing these concepts—the 5-degree rule, the importance of thermal equilibrium, and the necessity of high-precision tools—you strip away the mystery of the process and replace it with repeatable, professional-grade results.
You are no longer a victim of the flame; you are the manager of the heat. When you pull that beautiful roast from the oven, you are not ending the cooking process; you are initiating a final, delicate transition. As you let the meat rest, remember that the science is working in your favor. The fibers are relaxing, the juices are settling, and the internal temperature is finding its way to that sweet spot of perfection.
Do not let the fear of an undercooked center push you into the tragedy of a dry one. Embrace the grace period provided by carryover cooking. The next time you find yourself standing over the stove, thermometer in hand, remember that you are not just waiting for the temperature to rise; you are orchestrating a perfect culinary outcome. When you finally slice into that protein and reveal the perfect edge-to-edge color, you will know that it wasn't luck that got you there—it was your mastery of the thermal threshold. Enjoy the process, trust your measurements, and above all, never blame the chef when you have the science to back up your success.
As you continue your culinary journey, remember that even the most seasoned professionals are constantly refining their understanding of heat. Every protein is unique, and every oven has its own personality, but the laws of thermodynamics remain constant. Apply these techniques with consistency, record your successes, and don't be afraid to experiment with different resting times to find what works best for your specific gear. With enough practice, the "perfect protein" will cease to be a rare event and will instead become the standard expectation for every meal you create in your kitchen. Happy cooking, and may your resting boards always remain moist and your centers always remain succulent.


Get the Next Recipe
Weekly recipes, techniques, and gear picks — straight to your inbox.
