Transform Your Cooking: Master the Essential Technique of Blanching Vegetables for Optimal Flavor and Color
Blanching is a culinary technique that serves as a bridge between the freshness of raw ingredients and the intricate flavors of cooked dishes. It's a simple yet effective method that involves briefly boiling vegetables before plunging them into cold water, resulting in vibrant colors, enhanced textures, and improved flavors. Mastering the art of blanching is an essential skill in any home cook's repertoire. It not only preserves the nutrients and taste of vegetables but also sets the stage for a myriad of cooking techniques that elevate your dishes beyond the ordinary.
The beauty of blanching lies in its versatility. Whether you're preparing vegetables for a stir-fry, salad, or freezing, this technique is invaluable. Picture yourself tossing bright green asparagus into a hot pot of water, watching as they transform from a dull hue to a radiant shade of emerald within moments. This dramatic change not only captivates the eyes but also sets the tone for delightful textures, ensuring that every bite is both satisfying and flavorful.
Moreover, blanching is an indispensable step in meal prep, helping you save time during busy evenings while supporting the notion of health-conscious living by keeping your veggies crisp and full of nutritional integrity. For those who may dread the repetitive “Do I really need to do this?” thought process that often accompanies preparing vegetables, fear not — this guide will comprehensively break down how and why blanching should take center stage in your kitchen. Get ready to transform your cooking with this indispensable technique.
What is Blanching?
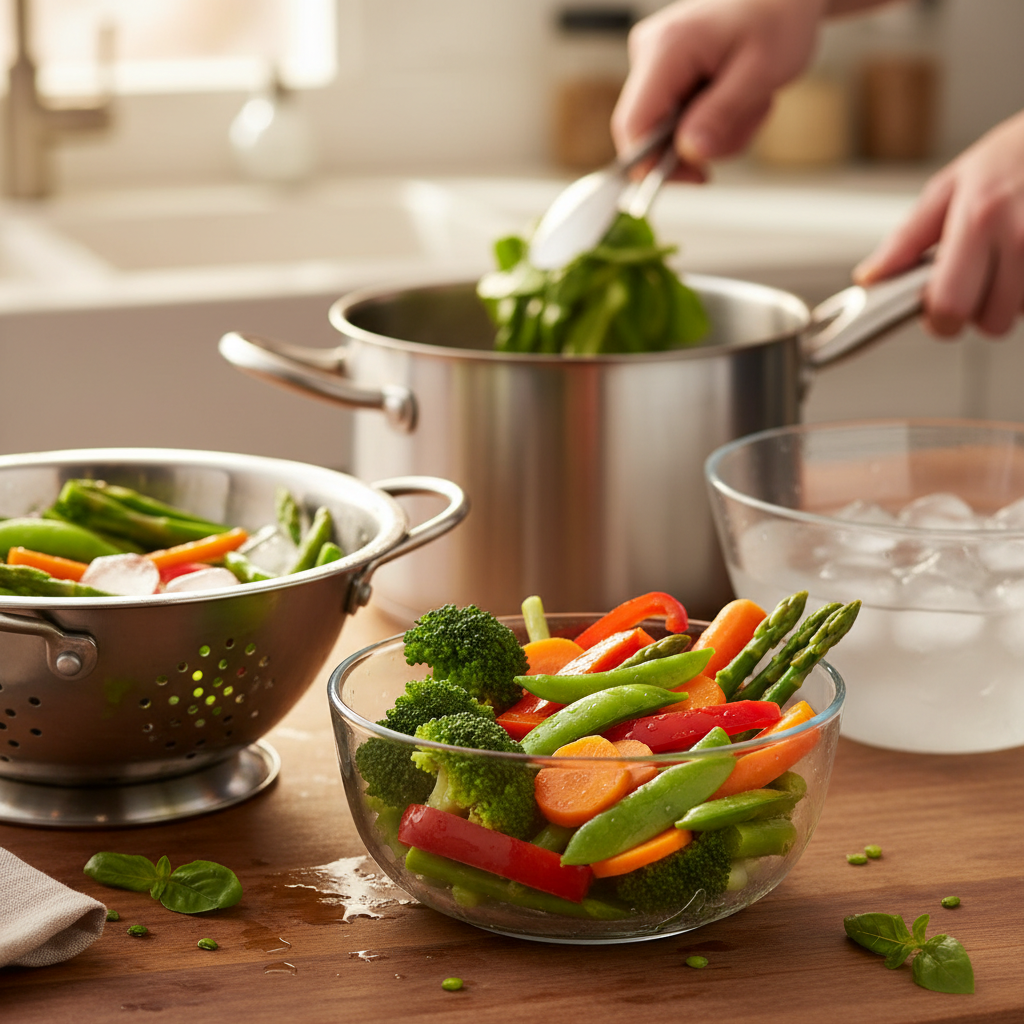
Blanching is a cooking method that involves briefly cooking vegetables in boiling water, followed by immediately cooling them in ice water. This rapid cooking and cooling method serves several purposes. Primarily, it helps to preserve the vegetables' vibrant color, enhance their flavor, and maintain a crisp texture. It also reduces bitterness in certain vegetables and deactivates enzymes that can cause nutrient loss and off-flavors during storage.
The Science Behind Blanching
When you blanch vegetables, you've essentially given them a quick heat treatment. Heat denatures proteins, which helps retain the crispness of the vegetable's cell structure. The hot water ruptures some of the plant's cell walls, making nutrients more bioavailable while releasing some of the less desirable flavors and textures. Additionally, the rapid cooling in ice water halts the cooking process, effectively locking in the vibrant color and crisp texture.
Common Vegetables to Blanch
While you can blanch nearly any vegetable, some of the most popular choices include:
Why Blanching is Important
Blanching is crucial for several reasons:
The Blanching Process Step-by-Step
Understanding the blanching process is fundamental to executing this technique flawlessly. Here’s a step-by-step guide to help you through the process seamlessly.
Step 1: Gather Your Supplies
Before initiating the blanching process, it’s vital to gather all your supplies to ensure a smooth workflow. You will need:
Step 2: Prepare the Vegetables
Preparation is key for successful blanching. Here’s what you need to do:
Step 3: Bring Water to a Boil
In a large pot, bring water to a vigorous boil. The volume of water is essential — the general rule of thumb is to use about one gallon of water per pound of vegetables. This ensures that the temperature doesn’t drop drastically when the vegetables are added.
Step 4: Blanch the Vegetables
Once the water has reached a rolling boil, carefully add the prepared vegetables. Here’s where you'll need to pay close attention to cooking times. Overcooking will result in a mushy texture, while undercooking might not achieve the desired effects.
| Vegetable | Time (Seconds) |
|--------------|----------------|
| Green Beans | 2-4 |
| Broccoli | 3-5 |
| Asparagus | 2-4 |
| Carrots | 4-6 |
| Peas | 1-2 |
Step 5: Ice Bath
Immediately after the allotted time, remove the vegetables using a slotted spoon and plunge them into the prepared ice bath. This step is crucial as it stops the cooking process and locks the color and texture. Leave the vegetables in the ice bath for about the same amount of time they spent in the boiling water.
Step 6: Drain and Dry
Finally, remove the vegetables from the ice bath and drain them in a colander. You can also pat them dry with a clean kitchen towel or paper towels to remove excess moisture, especially if you plan to sauté or roast them afterward.
Enhancing Blanched Vegetables: Flavorful Additions
While blanching enhances the natural qualities of vegetables, you can further elevate their flavors with simple additions. Here are some tips for enhancing your blanched vegetables:
Seasoning the Water
"The boiling water is not just a cooking medium; it's the first step toward amazing flavor."
Adding ingredients to your boiling water can infuse flavor directly into the vegetables. Consider the following:
Tossing in Dressings
After blanching, consider tossing your vegetables in a light dressing. For instance:
Creative Serving Ideas
Blanched vegetables can be enjoyed in myriad ways. Here are a few ideas to inspire your cooking:
Storing Blanched Vegetables: Freezing Tips
If you’ve prepared more blanched vegetables than you can consume immediately, storing them is a great option. Freezing maintains the quality of vegetables for several months, allowing you to enjoy them long after their peak season.
Preparing Vegetables for Freezing
Once your vegetables are blanched and cooled, follow these steps for successful freezing:
Thawing Instructions
When you’re ready to use your frozen vegetables, it’s essential to thaw them properly:
Troubleshooting Common Blanching Issues
Like many cooking techniques, blanching can come with its share of challenges. Here are some common issues with advice on how to navigate them.
Overcooking
One of the most frequent mistakes is overcooking the vegetables. Signs of overcooking include:
Solution: Utilize a timer and have your ice bath ready to plunge vegetables immediately after removing them from boiling water.
Insufficient Color and Flavor
If your blanched vegetables appear lackluster or bland, it could be due to a lack of seasoning in the boiling water.
Solution: Ensure you are seasoning your water sufficiently with salt and other flavor enhancers before adding vegetables.
Uneven Cooking
Sometimes, blanched vegetables might cook unevenly, leading to some pieces being perfectly cooked while others are underdone.
Solution: Cut vegetables into uniform sizes and avoid overcrowding the pot. If you’re blanching different kinds of vegetables together, ensure they have similar blanching times.
The Culinary Versatility of Blanched Vegetables
Once you’ve perfected the technique of blanching, its culinary capabilities are truly endless. Let's explore how to utilize blanched vegetables in various dishes.
Side Dishes
Blanched vegetables can serve as excellent side dishes when seasoned simply or combined with ingredients. For instance:
Main Course Components
Incorporating blanched vegetables can add freshness and color to mains. Think about these options:
Cold Dishes
Blanched vegetables can also shine in cold dishes. You might prepare:
Conclusion
Mastering the technique of blanching vegetables can significantly elevate your culinary skills, transforming ordinary produce into vibrant, flavor-rich components that enhance any meal. With its combination of simplicity and effectiveness, blanching allows you to preserve the integrity of your vegetables while enhancing their color, flavor, and nutritional value. As you practice blanching and begin to incorporate this technique into your cooking routine, you'll find that the limit of your creativity is bound only by your own imagination.
By using this technique, you not only refine your cooking prowess but also provide your loved ones with beautifully presented and delicious meals that celebrate the best of nature. So, as you stand over that pot of boiling water, remember that you’re not just cooking; you’re creating magic — vibrant colors, fresh flavors, and textures that will bring joy to every dining experience.
Incorporate blanching into your cooking strategy today, and watch as your dishes transform into something extraordinary. Whether you’re prepping for a busy week ahead or planning a dinner party, remember that with each vibrant, blanched vegetable, you’re not just serving food — you’re serving art on a plate. Happy cooking!


Get the Next Recipe
Weekly recipes, techniques, and gear picks — straight to your inbox.
