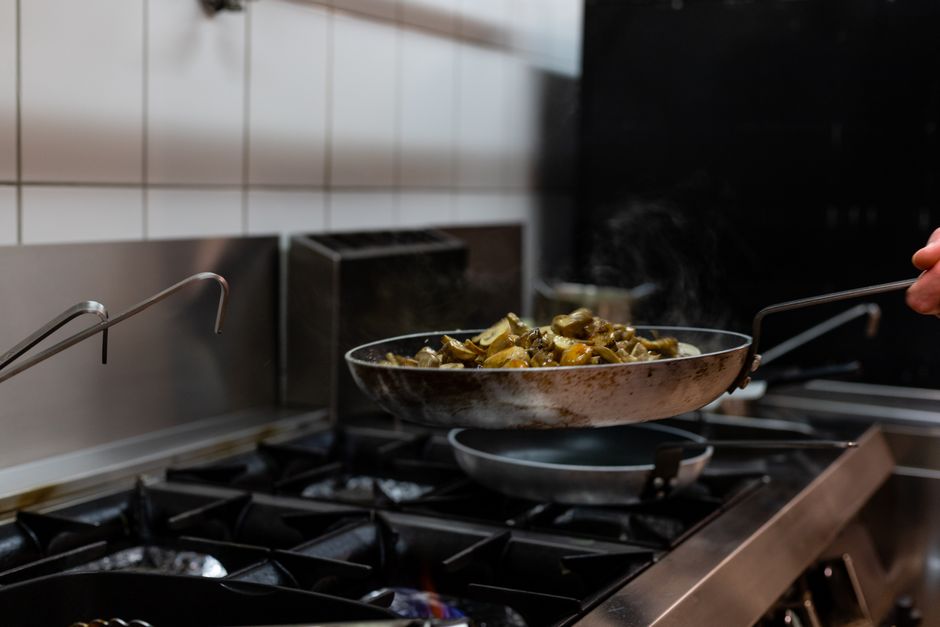
Why Is My Carbon Steel Pan Sticky After Seasoning?
Stepping into the world of carbon steel cookware can feel like joining an exclusive club where the secrets to the perfect sear and the most responsive heat control are hidden behind the veil of the "seasoning process." Many home cooks transition from the convenience of non-stick pans to the rugged reliability of carbon steel, only to be met with a frustrating, tacky, and gummy surface after their first few attempts at seasoning. This phenomenon is incredibly common, and it usually stems from a misunderstanding of what seasoning actually is on a molecular level. It is not simply about coating a pan in oil; it is about the controlled thermal breakdown of fats to create a polymerized layer that bonds to the metal surface. When you see that sticky, brown residue, you haven't failed as a cook; you have simply applied too much of a good thing, creating a layer that hasn't fully cured into a hard, slick finish.
Understanding the "why" behind the stickiness is the first step toward mastering your carbon steel. Most beginners treat the pan like they are greasing a cake tin, pouring in a generous amount of oil and hoping for the best. In reality, carbon steel requires a microscopic application of high-smoke-point oil, wiped so thinly that it looks like you have removed it all before it ever touches the heat. If you leave a thick layer of oil, the heat will cause the molecules to tangle and gel rather than oxidize and polymerize into the smooth, hard-wearing surface we crave. Mastering this transition from "tacky mess" to "glass-like finish" is a rite of passage, and once you understand the mechanics of oil breakdown, you will never struggle with a sticky pan again.
In this guide, we are going to dive deep into the chemistry, the technique, and the maintenance of your carbon steel pans. We will troubleshoot the sticky spots, discuss the best oils for the job, and walk through the exact steps to strip, re-season, and maintain your cookware for a lifetime of service. Whether you are searing a perfectly golden-brown duck breast or simply frying a morning egg that slides effortlessly across the surface, your carbon steel pan should be your most trusted partner in the kitchen. Let’s move past the frustration of the sticky residue and get your pan back to a high-performance state, ready for your next culinary adventure.
The Chemistry of Polymerization
Why Excess Oil Is the Enemy
The primary culprit behind a sticky, gummy, or tacky carbon steel pan is almost always an excess of oil. When you season a pan, you are trying to induce polymerization, a chemical process where long-chain fatty acids are broken down by heat and rearranged into a hard, plastic-like film that bonds directly to the metallic pores of the steel. This layer provides both a physical barrier against rust and a non-stick surface. If the layer of oil applied to the pan is too thick, the heat is unable to evenly reach the bottom of the layer. Instead of forming a solid, thin polymer, the oil turns into a viscous sludge that never fully cures.
"A well-seasoned carbon steel pan should feel like smooth, cool glass, not like a piece of tape that has lost its stickiness. If your finger drags across the surface, you have applied way too much fat."
Think of the oil as a thin varnish. If you paint a piece of wood with a single, microscopic layer of varnish, it dries into a hard shell. If you pour an entire bucket of varnish onto that same wood, it remains wet and tacky for days, or it dries into a soft, uneven mess. The same principle applies to your pan. The goal is to reach the smoke point of the oil, where the fat begins to break down. If the layer is too thick, the top of the layer reaches the smoke point and turns dark, while the bottom of the layer remains under-cured, resulting in that dreaded sticky sensation that traps food and ruins your efforts.
Achieving the Microscopic Layer
To achieve the perfect season, you must apply the oil and then immediately attempt to wipe it all away. This seems counterintuitive to the home cook who believes more oil equals better seasoning. However, you will find that even after wiping the pan with a clean paper towel until it appears completely dry, there is still enough oil remaining on a molecular level to create a perfect, thin coat. This is the secret that professional chefs use to maintain their line pans.
The Best Oils for Carbon Steel
High Smoke Point vs. Polymerization
Not all oils are created equal when it comes to seasoning. You want an oil with a high smoke point, typically above 400°F (204°C), but it also needs to be a drying oil or a semi-drying oil. Drying oils are fats that are more prone to polymerization because of their chemical composition, specifically their degree of saturation. Fats that are liquid at room temperature and have a higher concentration of polyunsaturated fats generally create the best, most durable seasoning layers.
Popular choices among chefs include:
Grapeseed Oil:* Known for its high smoke point and neutral flavor, it is widely considered the gold standard for creating a hard, slick finish.
Canola Oil:* Readily available and effective, it creates a very stable layer, though it can sometimes leave a slightly more amber-colored finish than grapeseed.
Sunflower Oil:* Similar to grapeseed, it is an excellent drying oil that provides a hard, non-stick surface.
Avocado Oil:* While it has a very high smoke point, it can sometimes be a bit more difficult to manage because of its density; use it sparingly.
Avoid These "Seasoning" Oils
While it is tempting to use what you have on hand, avoid using extra virgin olive oil or butter for your initial seasoning sessions. Extra virgin olive oil has a low smoke point and contains organic compounds that can burn and become bitter, rather than turning into a smooth polymer. Butter contains milk solids which will burn, turn black, and cause your pan to become uneven and pitted before it ever has the chance to form a proper bond with the metal. Stick to refined, neutral oils that won't distract from the performance of the pan or add unwanted flavors to your future meals.
Troubleshooting the Sticky Pan
Assessing the Damage
If your pan is currently sticky, you need to determine the severity. Is it just a small patch in the center, or is the entire surface a gummy nightmare? If it is a small patch, you might be able to fix it by simply heating the pan and wiping it out while it is warm. However, if the entire pan is tacky, you have a layer of "gunk" that needs to be removed. Do not worry; carbon steel is incredibly durable, and you can practically never "ruin" a pan by needing to re-season it.
To test the severity, use your fingernail to scrape a small section of the surface. If a brown, sticky residue comes up, you have failed to polymerize the oil. If the surface is hard and black but feels rough, you may have accumulated carbon buildup from burnt food rather than sticky oil. For the sticky oil problem, the solution is always heat or, in extreme cases, a light scrub with a stainless steel scouring pad.
The "Heat and Wipe" Fix
If the sticky layer isn't too thick, you can often fix it without starting over. Place the pan on the burner and turn the heat to medium-low. Let it heat up until it is warm to the touch. Once it is warm, take a clean paper towel folded over several times (to protect your fingers) and vigorously wipe the interior of the pan. The heat will loosen the semi-polymerized oil, and the paper towel will soak up the excess. You may see a brown or yellowish tint on the paper towel—this is the sticky residue being removed. Repeat this process until the paper towel comes away clean and the pan feels smooth to the touch.
"A clean, dry pan is the canvas upon which great meals are painted. Never let a moment of impatience with the seasoning process turn you away from the incredible searing power of carbon steel."
Step-by-Step Recovery: Stripping and Re-seasoning
When to Start Over
There are times when the sticky layer is simply too uneven or too thick to salvage. If you have significant ridges or gummy buildup that makes the pan uneven, you should perform a reset. To do this, you need to remove the current seasoning layer. Some people use oven cleaners for this, but I recommend a more manual approach to ensure the pan stays in good condition. Scrub the pan under hot, soapy water with a steel wool pad until the grey color of the steel is visible again.
Once the pan is clean and bare, dry it thoroughly on the stovetop. It is vital to ensure all moisture is evaporated, as water is the enemy of raw carbon steel and will cause immediate flash rust. Once the pan is dry and has a light grey, matte appearance, you are ready to begin the seasoning process from scratch. Remember the mantra: thin is in.
The Multi-Layer Method
Maintenance and Daily Use
The Importance of the "Post-Cook" Rinse
The best way to keep your pan from becoming sticky in the future is how you treat it after each use. When you are done cooking, don't leave the pan soaking in the sink. Carbon steel should never be soaked, as the water will break down your hard-earned seasoning and lead to rust. Instead, rinse the pan with hot water while it is still warm. If there is stuck-on food, use a chainmail scrubber or a soft brush. If you must use a tiny bit of mild dish soap, that is perfectly fine—modern dish soap is not harsh enough to strip a well-cured polymer layer.
After washing, always dry the pan immediately. Place it on the burner for a minute to ensure all moisture is gone, then wipe a tiny drop of oil over the surface before storing it. This "maintenance coat" keeps the steel hydrated and prevents the seasoning from becoming brittle.
Dealing with Acidic Foods
One of the most important rules of carbon steel is to be cautious with acidic ingredients like tomatoes, wine, vinegar, or citrus. Acid is the natural enemy of seasoning. If you cook a tomato-based sauce in a new carbon steel pan, it will likely strip your seasoning and leave your food with a metallic taste. Until your pan has developed a very deep, mature, and thick seasoning—which can take months or even years of consistent use—reserve your acidic cooking for your stainless steel or enameled cast iron pans.
If you do accidentally strip a spot with acid, do not panic. The pan isn't ruined. Simply clean the area, give it a quick round of stove-top seasoning, and keep cooking. The beauty of carbon steel is its forgiveness; it is designed to be a living, breathing part of your kitchen that evolves alongside your skill set.
Developing the "Patina"
The Difference Between Seasoning and Patina
New users often confuse seasoning with patina. Seasoning is the manufactured layer of oil you create through high-heat polymerization. Patina, on the other hand, is the organic, non-uniform darkening of the metal that occurs over years of use. A mature carbon steel pan should look mottled, dark, and perhaps a bit "ugly" to the untrained eye. That dark, splotchy surface is the result of thousands of meals—a map of all the steaks you’ve seared, the onions you’ve sautéed, and the crepes you’ve flipped.
You shouldn't strive for a perfectly uniform, jet-black pan right out of the gate. That takes time. A sticky pan is often one that someone has tried to force into a "perfect" look too quickly by layering too much oil. Allow your pan to develop its own unique history. If a spot peels or looks lighter than the rest, it is not a sign of failure; it is just a sign that you have been cooking. Keep using the pan, keep seasoning it with the fat from the food you cook, and the patina will naturally fill in those gaps over time.
Cooking Techniques to Build Strength
The fastest way to build a robust patina and an iron-clad seasoning is by cooking fat-rich foods. In the early stages of a pan's life, prioritize searing fatty proteins like bacon, sausages, or skin-on chicken thighs. The rendered fat from these ingredients is ideal for fortifying your seasoning layer. As you sauté these items, the fat gets pushed into the pores of the metal, automatically performing a "mini-seasoning" every time you cook.
Avoid using the pan for boiling water or steaming vegetables in the first few weeks. These techniques provide no fat and introduce significant moisture, which can weaken a fresh, thin seasoning layer. If you want to use the pan for something delicate, like an egg, make sure you use a small amount of butter or oil and keep the pan well-preheated. A pan that is properly preheated will naturally release food much better than a cold one, preventing the need for the excessive force that might scrape off your seasoning.
Advanced Tips for the Home Chef
Managing Heat Density
One of the biggest reasons home cooks fail with carbon steel is poor heat management. Carbon steel is relatively thin compared to cast iron, meaning it reacts very quickly to temperature changes. It doesn't hold heat as well as a massive, heavy iron skillet, but it responds to the flame almost instantly. If you have a sticky spot, it might be because you were cooking on a burner that was too small, creating a hot spot in the center while the edges remained cool. This uneven heat leads to uneven polymerization.
Always try to match the size of your pan to the size of the burner. If you are using a large 12-inch carbon steel skillet on a tiny burner, the center will get screaming hot while the edges will stay cool, leading to a pan that is perfectly seasoned in the middle but raw or sticky on the sides. Preheat the pan slowly, rotating it if necessary to ensure the entire surface reaches the same temperature.
The Paper Towel Test
If you are ever in doubt about whether your pan is ready for cooking, perform the paper towel test. Take a clean paper towel and drag it firmly across the surface of the pan. If you see brown or black streaks, your pan is not clean or is shedding loose seasoning. If the paper towel comes away completely clean, your pan is properly polymerized and ready for the egg slide test. This test should become part of your routine—it only takes a second, but it saves you the headache of having your food stick and burn mid-cook.
Final Thoughts on Perfection
It is important to remember that perfection is not the goal in the culinary arts; the goal is consistent, delicious results. Your carbon steel pan does not need to look like it came out of a magazine to perform like a professional tool. A pan that is slightly splotchy, slightly discolored, and clearly "used" is usually the one that produces the best-tasting food. Don't fall into the trap of obsessing over the aesthetics. If the food doesn't stick and the pan doesn't rust, you have succeeded.
Conclusion
The journey to mastering carbon steel is one of patience, observation, and a little bit of chemistry. If you take away only one thing from this guide, let it be the importance of the thin application. A sticky pan is simply a sign that the oil was applied too generously, and it is a problem that can always be rectified with a bit of heat, a bit of scrubbing, and a fresh start. Do not be discouraged by the learning curve; the reward—a responsive, non-stick, and near-indestructible cooking surface—is well worth the effort.
As you continue to cook with your carbon steel, you will find that the pan becomes more like an old friend. You will learn its quirks, its hot spots, and its limits. You will stop worrying about the seasoning and start focusing on the sear, the fond, and the flavors you are creating. Treat the pan with respect, keep it dry, and prioritize high-quality fats during your cooking sessions, and you will find that it becomes the most reliable tool in your arsenal. The "sticky" phase is just a fleeting moment in the long life of your cookware.
Continue to experiment with different temperatures, different oils, and different techniques. Every meal you cook adds another layer of seasoning and another chapter to the story of your pan. Whether you are a professional chef working the line or a home cook looking to improve your Sunday breakfast, carbon steel offers a tactile and rewarding connection to the food you prepare. Embrace the process, keep your oil applications whisper-thin, and happy cooking. You are now well on your way to becoming the master of your own kitchen, and your carbon steel pan will be right there with you, one perfectly seared dish at a time. Do not blame the chef for the learning curve—blame the chemistry, then use that chemistry to your advantage and master the pan once and for all.

Get the Next Recipe
Weekly recipes, techniques, and gear picks — straight to your inbox.